ignition RENAULT TALISMAN 2016 1.G Service Manual
[x] Cancel search | Manufacturer: RENAULT, Model Year: 2016, Model line: TALISMAN, Model: RENAULT TALISMAN 2016 1.GPages: 328, PDF Size: 3.39 MB
Page 133 of 328
2.25
TYRE PRESSURE MONITORING SYSTEM (1/3)
If the vehicle is equipped with the func-
tion, this system monitors the tyre pres-
sure.
Operating principle
Each wheel (except for the emergency
spare wheel) has a sensor in the infla-
tion valve which periodically measures
the tyre pressure.
The system displays the current pres-
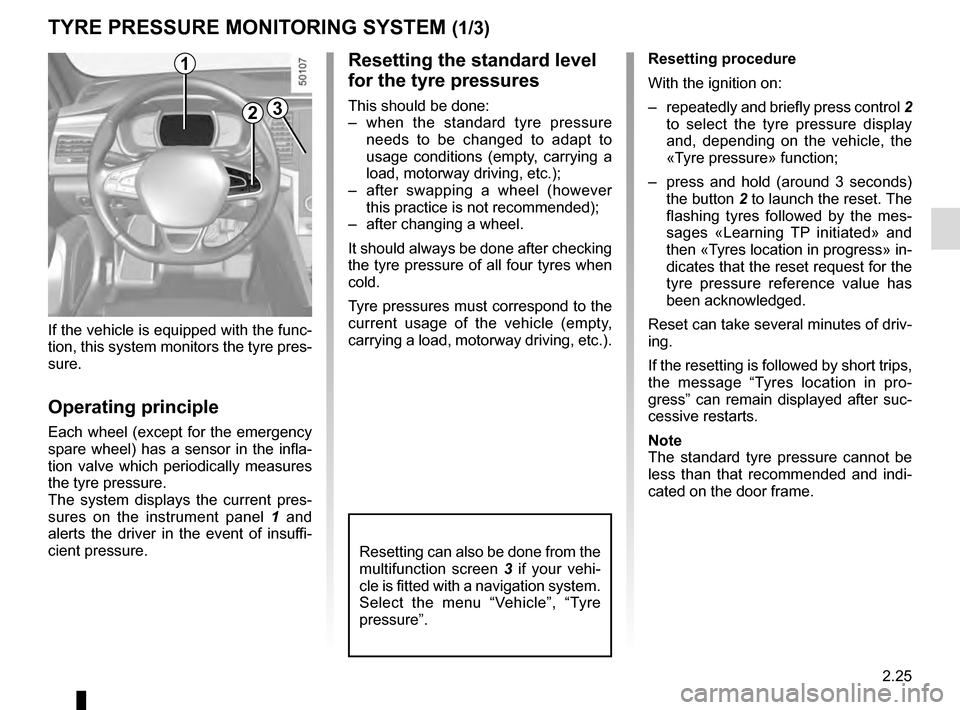
sures on the instrument panel 1 and
alerts the driver in the event of insuffi-
cient pressure.
2
1Resetting procedure
With the ignition on:
– repeatedly and briefly press control 2
to select the tyre pressure display
and, depending on the vehicle, the
«Tyre pressure» function;
– press and hold (around 3 seconds) the button 2 to launch the reset. The
flashing tyres followed by the mes-
sages «Learning TP initiated» and
then «Tyres location in progress» in-
dicates that the reset request for the
tyre pressure reference value has
been acknowledged.
Reset can take several minutes of driv-
ing.
If the resetting is followed by short trips,
the message “Tyres location in pro-
gress” can remain displayed after suc-
cessive restarts.
Note
The standard tyre pressure cannot be
less than that recommended and indi-
cated on the door frame.
3
Resetting the standard level
for the tyre pressures
This should be done:
– when the standard tyre pressure needs to be changed to adapt to
usage conditions (empty, carrying a
load, motorway driving, etc.);
– after swapping a wheel (however this practice is not recommended);
– after changing a wheel.
It should always be done after checking
the tyre pressure of all four tyres when
cold.
Tyre pressures must correspond to the
current usage of the vehicle (empty,
carrying a load, motorway driving, etc.).
Resetting can also be done from the
multifunction screen 3 if your vehi-
cle is fitted with a navigation system.
Select the menu “Vehicle”, “Tyre
pressure”.
Page 139 of 328
2.31
DRIVER CORRECTION DEVICES AND AIDS (4/12)
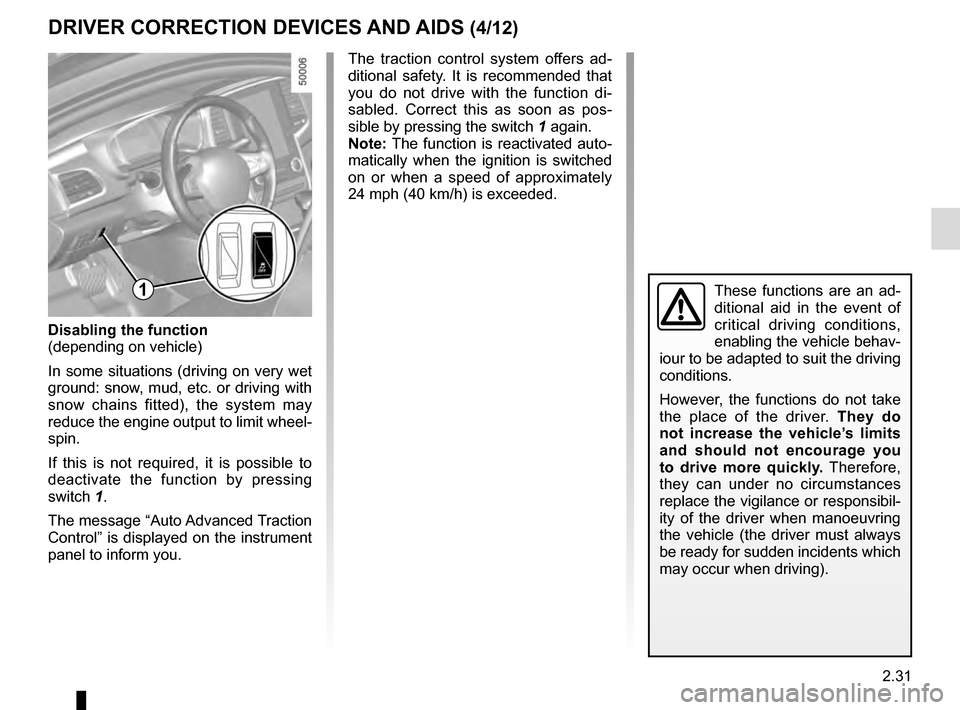
Disabling the function
(depending on vehicle)
In some situations (driving on very wet
ground: snow, mud, etc. or driving with
snow chains fitted), the system may
reduce the engine output to limit wheel-
spin.
If this is not required, it is possible to
deactivate the function by pressing
switch 1.
The message “Auto Advanced Traction
Control” is displayed on the instrument
panel to inform you.
1
The traction control system offers ad-
ditional safety. It is recommended that
you do not drive with the function di-
sabled. Correct this as soon as pos-
sible by pressing the switch 1 again.
Note: The function is reactivated auto-
matically when the ignition is switched
on or when a speed of approximately
24 mph (40 km/h) is exceeded.
These functions are an ad-
ditional aid in the event of
critical driving conditions,
enabling the vehicle behav-
iour to be adapted to suit the driving
conditions.
However, the functions do not take
the place of the driver. They do
not increase the vehicle’s limits
and should not encourage you
to drive more quickly. Therefore,
they can under no circumstances
replace the vigilance or responsibil-
ity of the driver when manoeuvring
the vehicle (the driver must always
be ready for sudden incidents which
may occur when driving).
Page 142 of 328
2.34
For vehicles not fitted with a naviga-
tion system
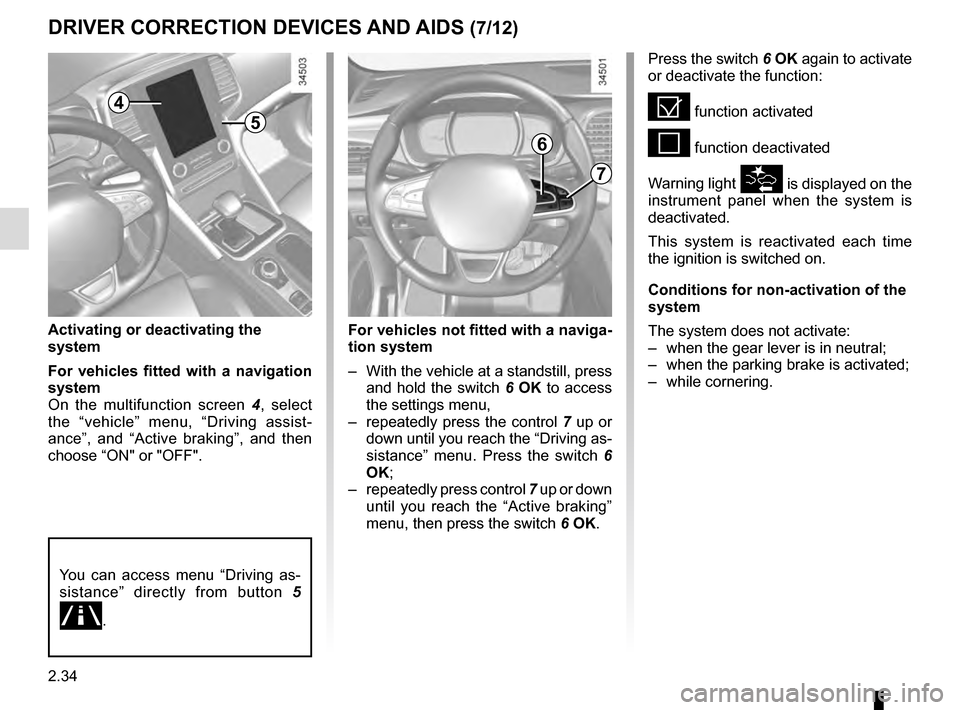
– With the vehicle at a standstill, press and hold the switch 6 OK to access
the settings menu,
– repeatedly press the control 7 up or
down until you reach the “Driving as-
sistance” menu. Press the switch 6
OK;
– repeatedly press control 7 up or down
until you reach the “Active braking”
menu, then press the switch 6 OK.
Activating or deactivating the
system
For vehicles fitted with a navigation
system
On the multifunction screen
4, select
the “vehicle” menu, “Driving assist-
ance”, and “Active braking”, and then
choose “ON" or "OFF".
DRIVER CORRECTION DEVICES AND AIDS (7/12)
You can access menu “Driving as-
sistance” directly from button 5
.
Press the switch 6 OK again to activate
or deactivate the function:
= function activated
< function deactivated
Warning light
\b is displayed on the
instrument panel when the system is
deactivated.
This system is reactivated each time
the ignition is switched on.
Conditions for non-activation of the
system
The system does not activate:
– when the gear lever is in neutral;
– when the parking brake is activated;
– while cornering.
4
5
6
7
Page 152 of 328
2.44
BLIND SPOT WARNING (2/4)
2
3
Activation/deactivation
Vehicles fitted with a navigation
system
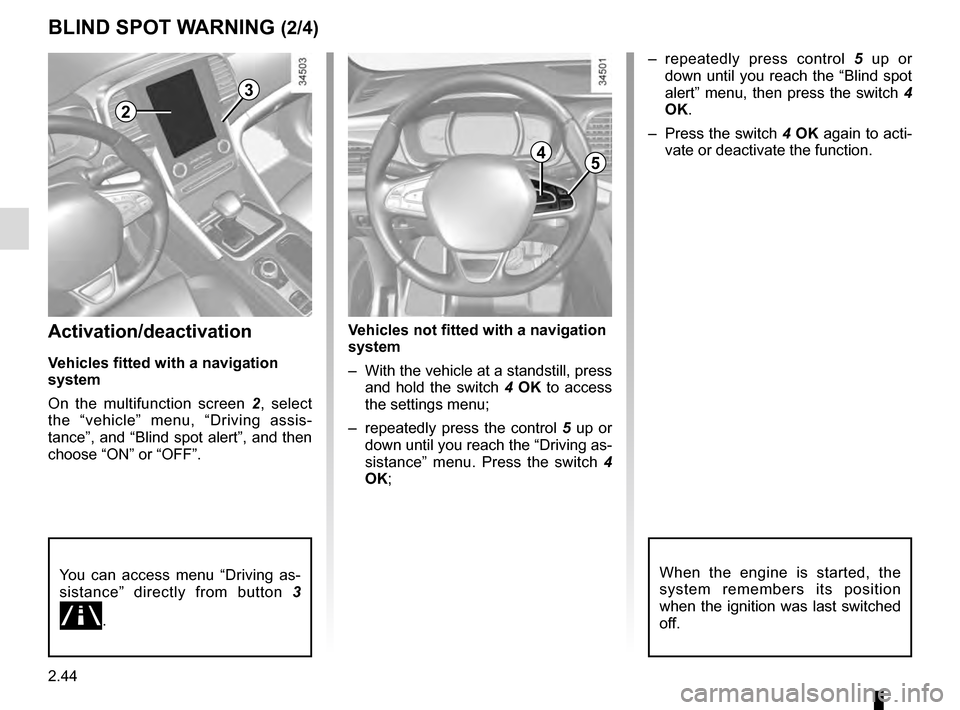
On the multifunction screen 2, select
the “vehicle” menu, “Driving assis-
tance”, and “Blind spot alert”, and then
choose “ON” or “OFF”.
You can access menu “Driving as-
sistance” directly from button 3
.
Vehicles not fitted with a navigation
system
– With the vehicle at a standstill, press
and hold the switch 4 OK to access
the settings menu;
– repeatedly press the control 5 up or
down until you reach the “Driving as-
sistance” menu. Press the switch 4
OK; – repeatedly press control
5 up or
down until you reach the “Blind spot
alert” menu, then press the switch 4
OK.
– Press the switch 4 OK again to acti-
vate or deactivate the function.
When the engine is started, the
system remembers its position
when the ignition was last switched
off.
45
Page 187 of 328
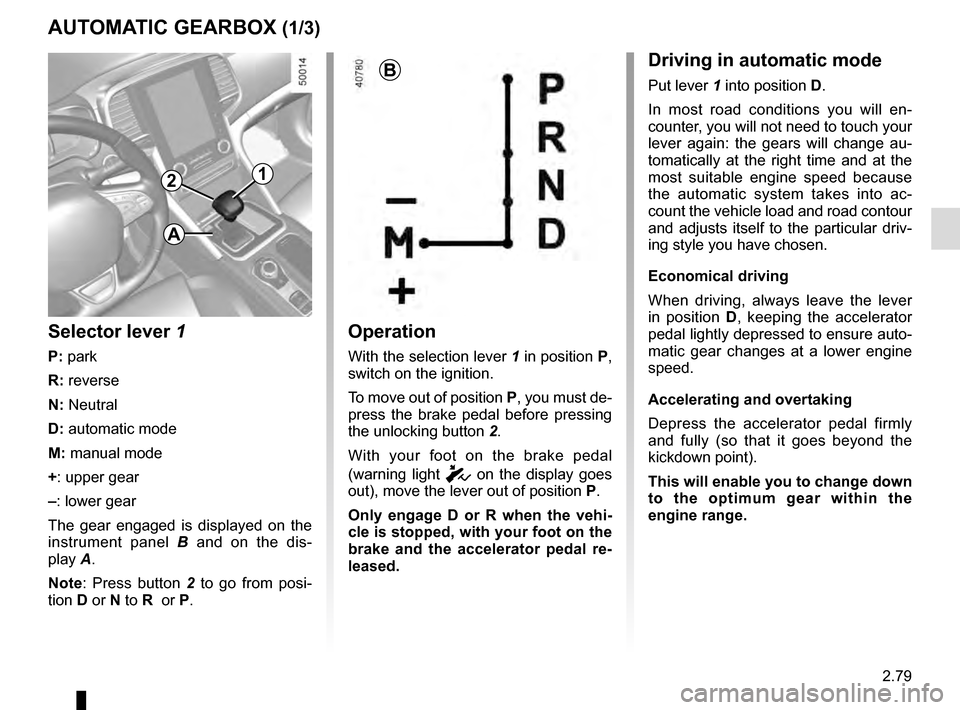
2.79
AUTOMATIC GEARBOX (1/3)
2
Operation
With the selection lever 1 in position P,
switch on the ignition.
To move out of position P, you must de-
press the brake pedal before pressing
the unlocking button 2.
With your foot on the brake pedal
(warning light
c on the display goes
out), move the lever out of position P.
Only engage D or R when the vehi-
cle is stopped, with your foot on the
brake and the accelerator pedal re-
leased.
1
B
Selector lever 1
P: park
R: reverse
N: Neutral
D: automatic mode
M: manual mode
+: upper gear
–: lower gear
The gear engaged is displayed on the
instrument panel B and on the dis-
play A.
Note: Press button 2 to go from posi-
tion D or N to R or P.
Driving in automatic mode
Put lever 1 into position D.
In most road conditions you will en-
counter, you will not need to touch your
lever again: the gears will change au-
tomatically at the right time and at the
most suitable engine speed because
the automatic system takes into ac-
count the vehicle load and road contour
and adjusts itself to the particular driv-
ing style you have chosen.
Economical driving
When driving, always leave the lever
in position D, keeping the accelerator
pedal lightly depressed to ensure auto-
matic gear changes at a lower engine
speed.
Accelerating and overtaking
Depress the accelerator pedal firmly
and fully (so that it goes beyond the
kickdown point).
This will enable you to change down
to the optimum gear within the
engine range.
A
Page 189 of 328
2.81
AUTOMATIC GEARBOX (3/3)Operating faults
– when driving , if the message
"CHECK AUTO GEARBOX" ap-
pears on the instrument panel, it in-
dicates a failure.
Contact your approved Dealer as
soon as possible;
– when driving, if the message
"Gearbox overheating" appears on
the instrument panel, stop as soon
as possible to let the gearbox cool
down and wait for the message to
disappear;
– If a vehicle with an automatic
gearbox breaks down, refer to the
information on “Towing” in Section 5.
For safety reasons, do not
switch off the ignition before
the vehicle has come to a
complete standstill.
Parking the vehicle
When the vehicle is stopped, move the
lever to position P while keeping your
foot on the brake pedal: the gearbox is
in neutral and the drive wheels are me-
chanically locked by the driveshaft.
Ensure that the electronic parking
brake is engaged.
An impact to the under-
side of the vehicle while
manoeuvring (e.g.: strik-
ing a post, raised kerb or
other street furniture) may result in
damage to the vehicle (e.g.: defor-
mation of an axle).
To avoid any risk of accident, have
your vehicle checked by an ap-
proved Dealer.
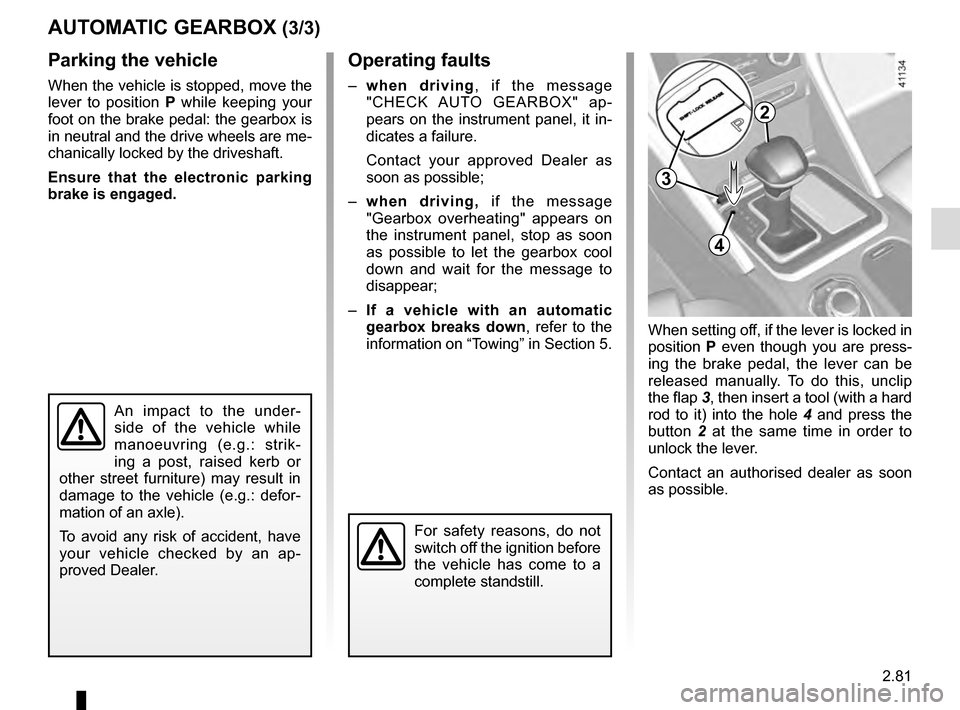
2
When setting off, if the lever is locked in
position P even though you are press-
ing the brake pedal, the lever can be
released manually. To do this, unclip
the flap 3, then insert a tool (with a hard
rod to it) into the hole 4 and press the
button 2 at the same time in order to
unlock the lever.
Contact an authorised dealer as soon
as possible.
3
4
Page 207 of 328
3.17
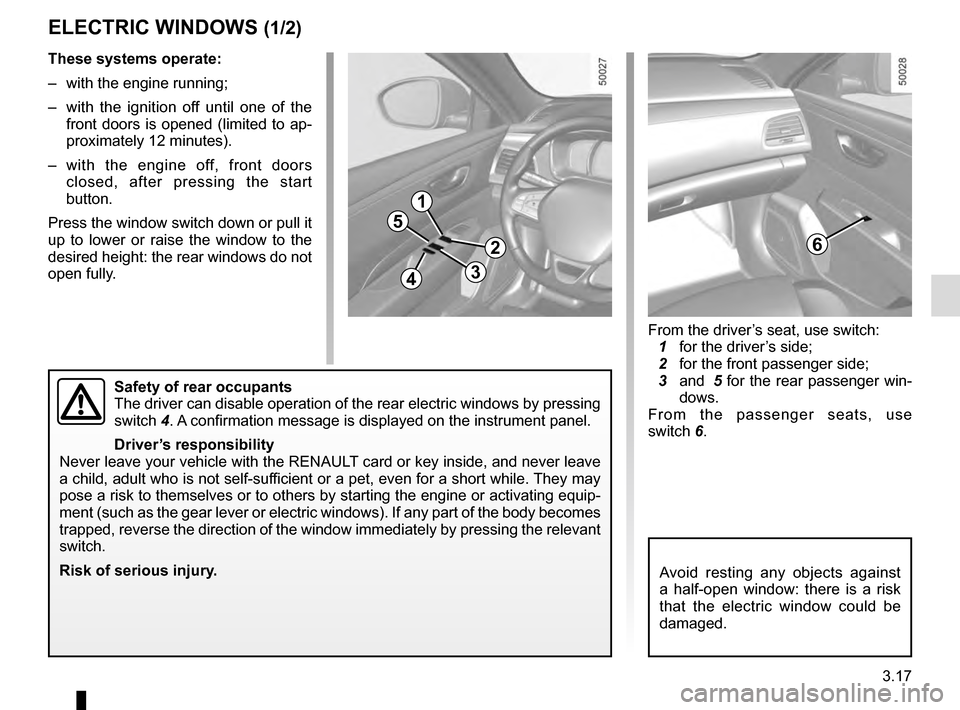
From the driver’s seat, use switch:
1 for the driver’s side;
2 for the front passenger side;
3 and 5 for the rear passenger win-
dows.
From the passenger seats, use
switch 6.
ELECTRIC WINDOWS (1/2)
1
2
34
5
6
These systems operate:
– with the engine running;
– with the ignition off until one of the front doors is opened (limited to ap-
proximately 12 minutes).
– with the engine off, front doors closed, after pressing the start
button.
Press the window switch down or pull it
up to lower or raise the window to the
desired height: the rear windows do not
open fully.
Safety of rear occupants
The driver can disable operation of the rear electric windows by pressin\
g
switch 4. A confirmation message is displayed on the instrument panel.
Driver’s responsibility
Never leave your vehicle with the RENAULT card or key inside, and never leave
a child, adult who is not self-sufficient or a pet, even for a short while. They may
pose a risk to themselves or to others by starting the engine or activat\
ing equip-
ment (such as the gear lever or electric windows). If any part of the \
body becomes
trapped, reverse the direction of the window immediately by pressing the\
relevant
switch.
Risk of serious injury.
Avoid resting any objects against
a half-open window: there is a risk
that the electric window could be
damaged.
Page 209 of 328
3.19
ELECTRIC SUNROOF (1/3)
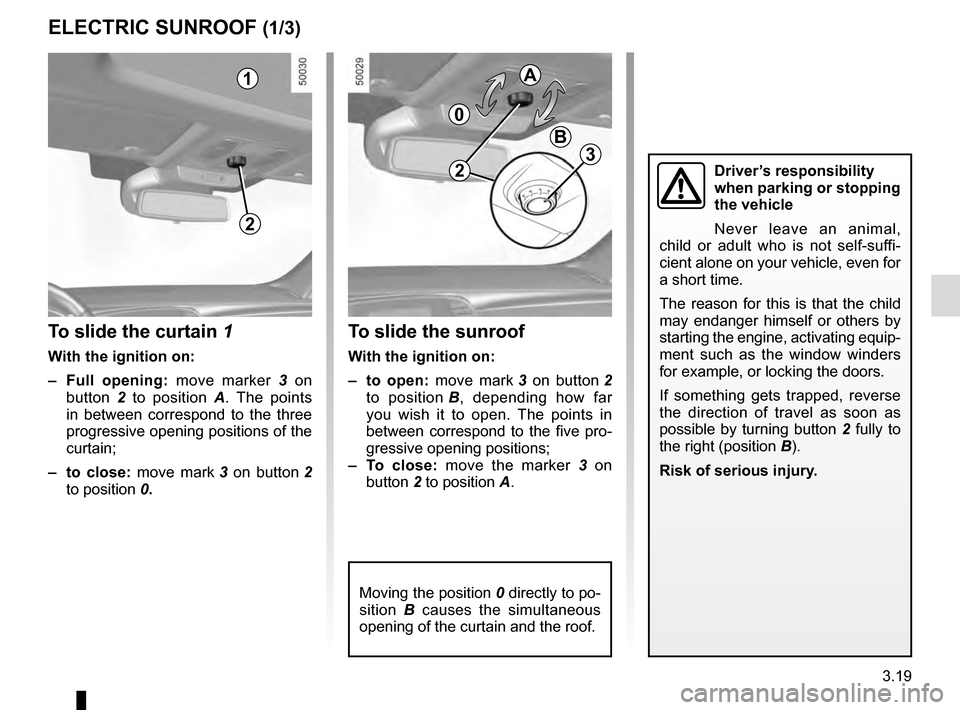
To slide the curtain 1
With the ignition on:
– Full opening: move marker 3 on
button 2 to position A . The points
in between correspond to the three
progressive opening positions of the
curtain;
– to close: move mark 3 on button 2
to position 0.
To slide the sunroof
With the ignition on:
– to open: move mark 3 on button 2
to position B, depending how far
you wish it to open. The points in
between correspond to the five pro-
gressive opening positions;
– To close: move the marker 3 on
button 2 to position A.
1
2
0
A
B
Moving the position 0 directly to po-
sition B causes the simultaneous
opening of the curtain and the roof.
Driver’s responsibility
when parking or stopping
the vehicle
Never leave an animal,
child or adult who is not self-suffi-
cient alone on your vehicle, even for
a short time.
The reason for this is that the child
may endanger himself or others by
starting the engine, activating equip-
ment such as the window winders
for example, or locking the doors.
If something gets trapped, reverse
the direction of travel as soon as
possible by turning button 2 fully to
the right (position B).
Risk of serious injury.23
Page 218 of 328
3.28
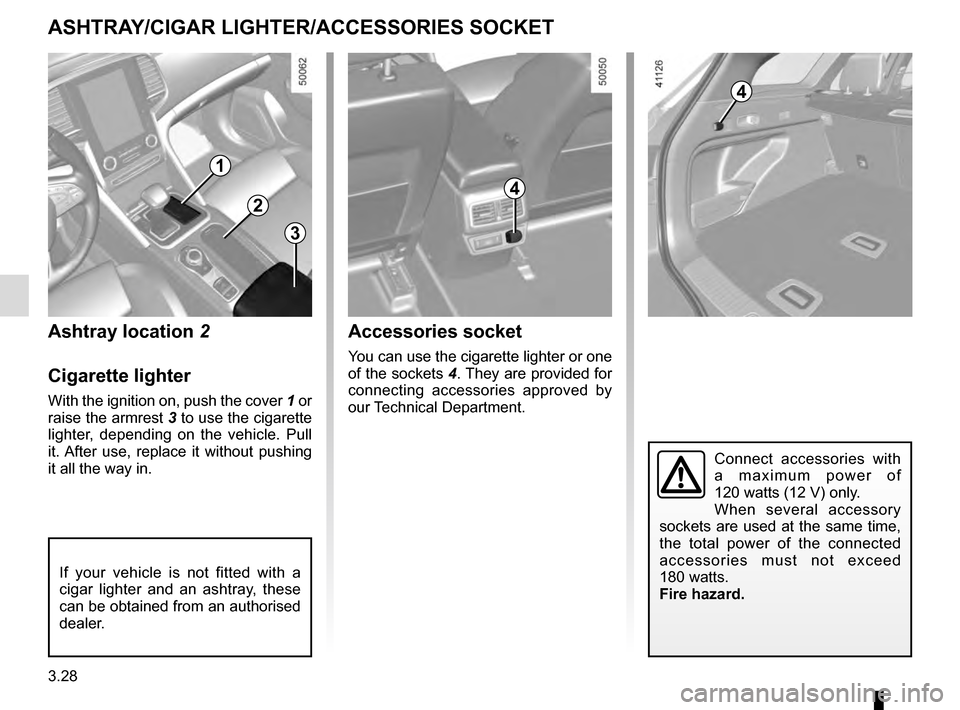
ASHTRAY/CIGAR LIGHTER/ACCESSORIES SOCKET
1
Ashtray location 2
Cigarette lighter
With the ignition on, push the cover 1 or
raise the armrest 3 to use the cigarette
lighter, depending on the vehicle. Pull
it. After use, replace it without pushing
it all the way in.
Accessories socket
You can use the cigarette lighter or one
of the sockets 4. They are provided for
connecting accessories approved by
our Technical Department.
Connect accessories with
a maximum power of
120 watts (12 V) only.
When several accessory
sockets are used at the same time,
the total power of the connected
accessories must not exceed
180 watts.
Fire hazard.
4
2
If your vehicle is not fitted with a
cigar lighter and an ashtray, these
can be obtained from an authorised
dealer.
3
4
Page 223 of 328
3.33
LUGGAGE COMPARTMENT: 4 door versions (2/3)
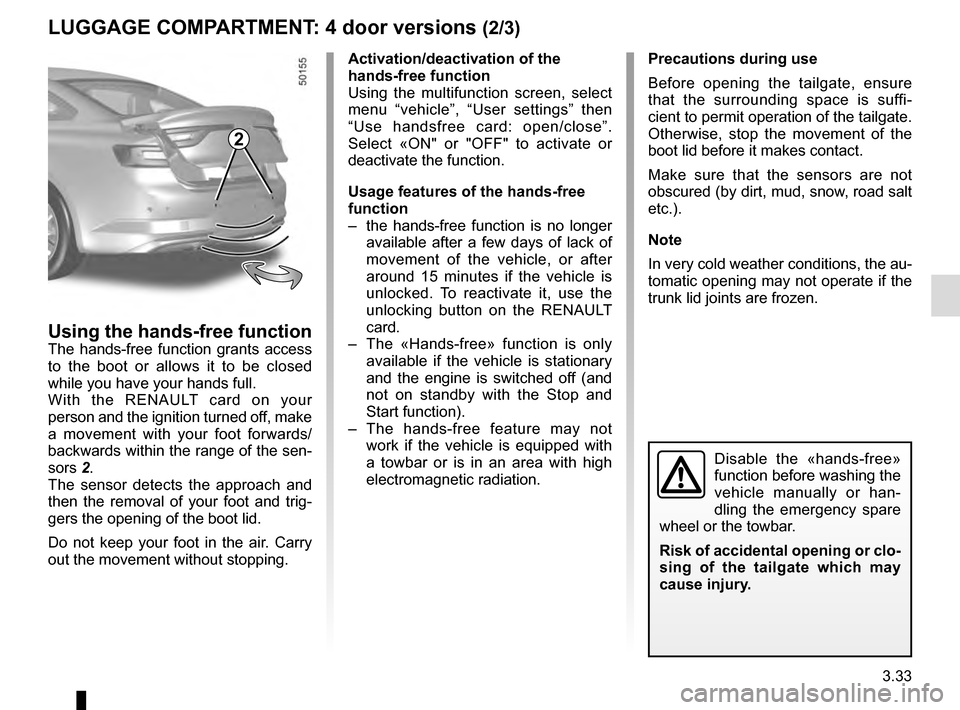
Using the hands-free functionThe hands-free function grants access
to the boot or allows it to be closed
while you have your hands full.
With the RENAULT card on your
person and the ignition turned off, make
a movement with your foot forwards/
backwards within the range of the sen-
sors 2.
The sensor detects the approach and
then the removal of your foot and trig-
gers the opening of the boot lid.
Do not keep your foot in the air. Carry
out the movement without stopping.
2
Activation/deactivation of the
hands-free function
Using the multifunction screen, select
menu “vehicle”, “User settings” then
“Use handsfree card: open/close”.
Select «ON" or "OFF" to activate or
deactivate the function.
Usage features of the hands-free
function
– the hands-free function is no longer available after a few days of lack of
movement of the vehicle, or after
around 15 minutes if the vehicle is
unlocked. To reactivate it, use the
unlocking button on the RENAULT
card.
– The «Hands-free» function is only available if the vehicle is stationary
and the engine is switched off (and
not on standby with the Stop and
Start function).
– The hands-free feature may not work if the vehicle is equipped with
a towbar or is in an area with high
electromagnetic radiation. Precautions during use
Before opening the tailgate, ensure
that the surrounding space is suffi-
cient to permit operation of the tailgate.
Otherwise, stop the movement of the
boot lid before it makes contact.
Make sure that the sensors are not
obscured (by dirt, mud, snow, road salt
etc.).
Note
In very cold weather conditions, the au-
tomatic opening may not operate if the
trunk lid joints are frozen.
Disable the «hands-free»
function before washing the
vehicle manually or han-
dling the emergency spare
wheel or the towbar.
Risk of accidental opening or clo-
sing of the tailgate which may
cause injury.