warning light RENAULT TWINGO 2009 2.G Air Conditioning User Guide
[x] Cancel search | Manufacturer: RENAULT, Model Year: 2009, Model line: TWINGO, Model: RENAULT TWINGO 2009 2.GPages: 122
Page 68 of 122

61A-65
HEATING
Control panel: Removal - Refitting
61A
REMOVAL
I - REMOVAL PREPARATION OPERATION
aLock the airbag computer using the Diagnostic tool
(see Fault finding - Replacement of components)
(MR 413, 88C, Airbags and seat belt pretensioners).
aDisconnect the battery (see ) (MR 411, 80A, Bat-
tery).
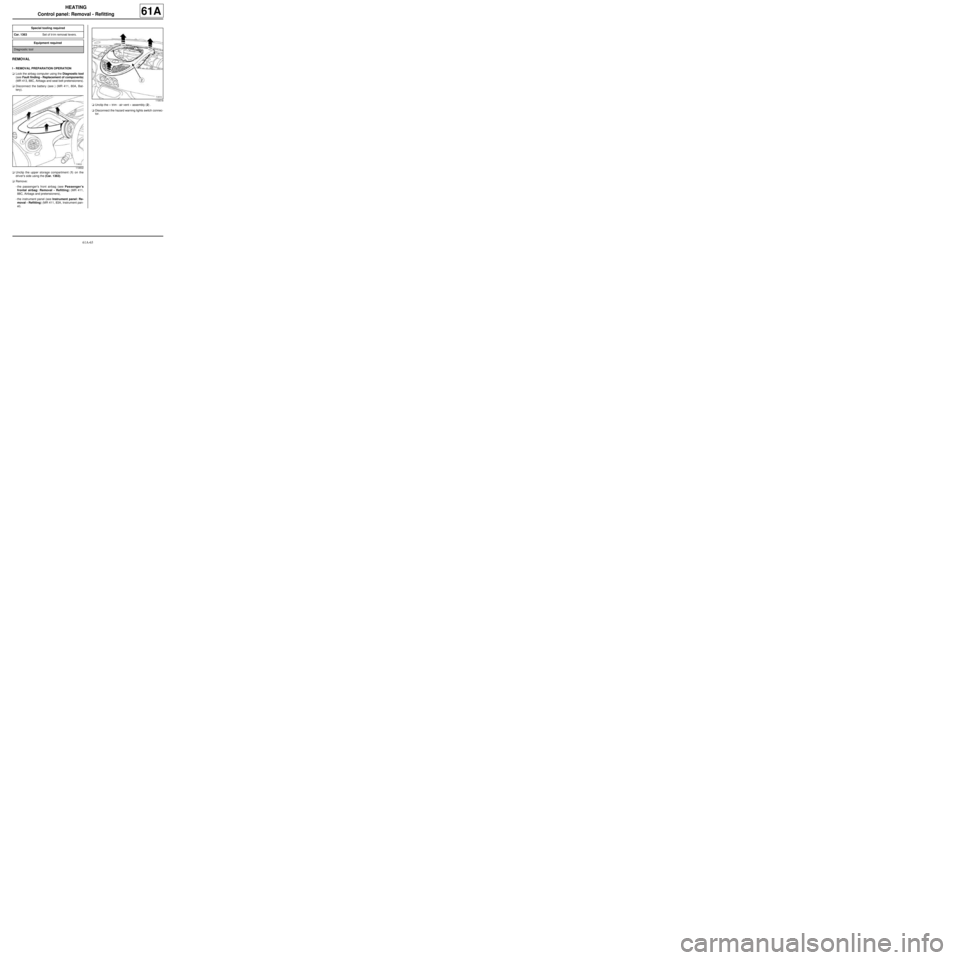
aUnclip the upper storage compartment (1) on the
driver's side using the (Car. 1363).
aRemove:
-the passenger's front airbag (see Passenger's
frontal airbag: Removal - Refitting) (MR 411,
88C, Airbags and pretensioners),
-the instrument panel (see Instrument panel: Re-
moval - Refitting) (MR 411, 83A, Instrument pan-
el).aUnclip the « trim - air vent » assembly (2) .
aDisconnect the hazard warning lights switch connec-
tor. Special tooling required
Car. 1363Set of tr im removal levers.
Equipment required
Diagnostic tool
119502
119518
Page 70 of 122

61A-67
HEATING
Control panel: Removal - Refitting
61A
aConnect the control panel connectors.
aPress on the tab.
aFit the control panel ball joint.
aClip on the air distribution control cable.
aPress on the tab.
aFit the control panel ball joint.
aClip on the air mixing control cable.
aFit the control panel ball joint.
aClip on the recirculation control cable.
aConnect the control panel connector.
II - FINAL OPERATION.
aConnect the hazard warning lights switch connector.
aClip on the « trim - air vent » assembly.
aRefit:
-the instrument panel (see Instrument panel: Re-
moval - Refitting) (MR 411, 83A, Instrument pan-
el),
-the passenger's front airbag (see Passenger's
frontal airbag: Removal - Refitting) (MR 411,
88C, Airbags and pretensioners).
aClip on the upper storage compartment on the driv-
er's side.
aConnect the battery (see ) (MR 411, 80A, Battery).
aUnlock the airbag computer using the Diagnostic
tool (see Fault finding - Replacement of compo-
nents) (MR 413, 88C, Airbags and seat belt preten-
sioners). CLIMATE CONTROL
AIR CONDITIONING or STANDARD HEATING
Page 88 of 122

62A-7
AIR CONDITIONING
Refrigerant circuit: Check
AIR CONDITIONING or CLIMATE CONTROL
62A
There are several types of detector:
-electronic detectors,
-trace detectors.
Check that the air conditioning system is operating cor-
rectly (see 62A, Air conditioning, Air conditioning:
Check, page 62A-4) .
REFRIGERANT CIRCUIT SEALING CHECKING
OPERATION
1 - Electronic detectors:
a
aSwitch on the electronic detector.
aStart the engine.
aLet the air conditioning system run for 15 minutes.
aSwitch off the engine.aCheck the sealing of the refrigerant circuit using the
electronic trace detector (follow the trace of the cir-
cuit as closely as possible, to limit variations due to
other gases).
2 - Trace detectors
a
aCheck for dye on the cold loop components with the
ultraviolet light.
aInject the dye.
aStart the engine.
aLet the air conditioning system run for 15 minutes.
aSwitch off the engine.
aCheck the refrigerant circuit sealing by scanning the
circuit with the ultraviolet light.
aAffix a label (supplied with the dye capsule), to indi-
cate that dye has been used (as close as possible to
the filler valves). Equipment required
Diagnostic tool
IMPORTANT
Consult the safety and cleanliness advice and oper-
ation recommendations before carrying out any
repair (see 62A, Air conditioning, Air condition-
ing: Precautions for the repair, page 62A-1) .
Note:
After any work on air conditioning circuit leaks on
the Laguna II, Vel Satis and Espace IV, check that
filling fault DF033 Refrigerant is not present, using
the Diagnostic tool. If it is present, clear it. The
compressor cannot operate until the fault is cleared.
Note:
To carry out an after repair check, use the proce-
dure for the electronic detector (1). To carry out a
more thorough check for leaks, use a trace detector
(2).
WARNING
Consult the device's operating manual to avoid
incorrect use.
Note:
If replacing a defective part (see 62A, Air condi-
tioning).
WARNING
Consult the device's operating manual to avoid
incorrect use.
WARNING
To avoid damaging the cold loop components
(corrosions , etc.), do not use dye if the traces
reveal that some product has already been
injected.
Note:
If replacing a defective part (see 62A, Air condi-
tioning).