window RENAULT TWINGO 2017 3.G Owners Manual
[x] Cancel search | Manufacturer: RENAULT, Model Year: 2017, Model line: TWINGO, Model: RENAULT TWINGO 2017 3.GPages: 228, PDF Size: 6.76 MB
Page 9 of 228
1.3
KEY, RADIO FREQUENCY REMOTE CONTROL: general information (2/2)
Radio frequency remote
control operating range
This varies according to the surroun-
dings: take care not to lock or unlock
the doors by inadvertently pressing the
buttons on the remote control.
Note: If a door or the luggage compart-
ment lid is open or not closed properly,
the doors and luggage compartment lid
lock/unlock quickly.
Interference
Interference by factors in the imme-
diate vicinity (external installations or
the use of equipment operating on the
same frequency as the remote control)
may affect the operation of the remote
control.
Replacement and additional keys
or remote controls.
You must only contact an approved
dealer:
– If you need to replace a key it will be necessary to take the vehicle
and all of its keys to an approved
Dealer in order to initialise the
system.
– Depending on the vehicle, you have the option of using up to
four remote controls.
Remote control unit failure
Make sure that the correct battery
type is being used, and that the bat-
tery is in good condition and inser-
ted correctly. These batteries have
a service life of approximately two
years.
Refer to Section 5: “Radio fre-
quency remote control: batteries”
for the battery changing procedure.
The key must not be used for any
function other than those described
in the handbook (removing the cap
from a bottle, etc.).
Driver’s responsibility
when parking or stopping
the vehicle
Never leave an animal,
child or adult who is not self-suffi-
cient alone on your vehicle, even for
a short time.
They may pose a risk to themselves
or to others by starting the engine,
activating equipment such as the
electric windows or locking the
doors.
Also, in hot and/or sunny weather,
please remember that the tempera-
ture inside the passenger compart-
ment increases very quickly.
RISK OF DEATH OR SERIOUS
INJURY.
Page 10 of 228
1.4
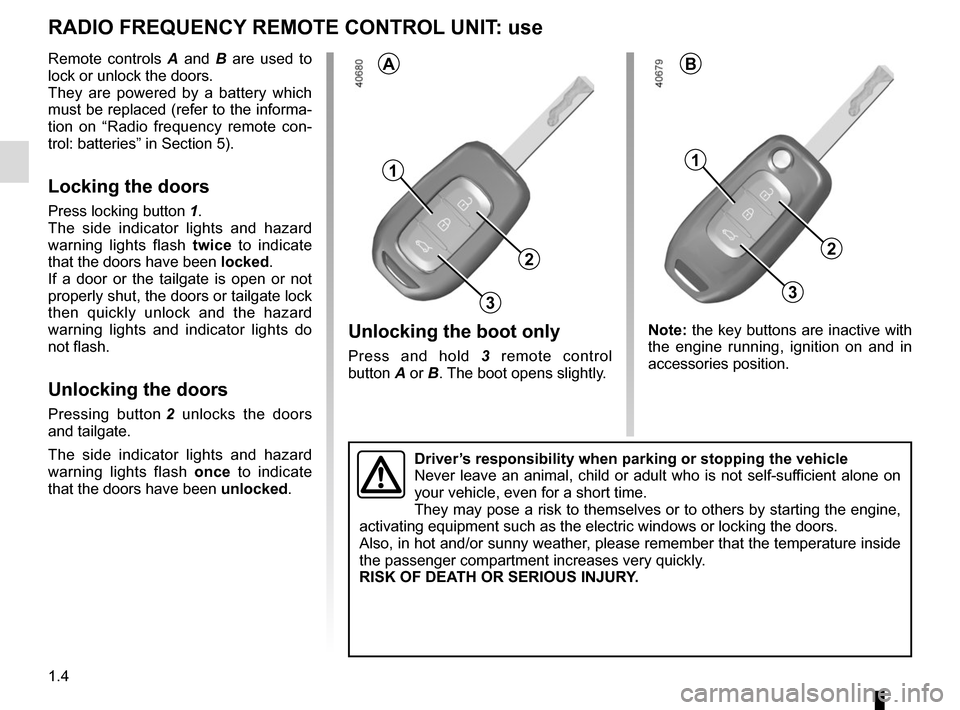
1
2
Unlocking the boot only
Press and hold 3 remote control
button A or B. The boot opens slightly.
RADIO FREQUENCY REMOTE CONTROL UNIT: use
Remote controls A and B are used to
lock or unlock the doors.
They are powered by a battery which
must be replaced (refer to the informa-
tion on “Radio frequency remote con-
trol: batteries” in Section 5).
Locking the doors
Press locking button 1.
The side indicator lights and hazard
warning lights flash twice to indicate
that the doors have been locked.
If a door or the tailgate is open or not
properly shut, the doors or tailgate lock
then quickly unlock and the hazard
warning lights and indicator lights do
not flash.
Unlocking the doors
Pressing button 2 unlocks the doors
and tailgate.
The side indicator lights and hazard
warning lights flash once to indicate
that the doors have been unlocked.
BA
Note: the key buttons are inactive with
the engine running, ignition on and in
accessories position.
3
1
2
3
Driver’s responsibility when parking or stopping the vehicle
Never leave an animal, child or adult who is not self-sufficient alone on
your vehicle, even for a short time.
They may pose a risk to themselves or to others by starting the engine, \
activating equipment such as the electric windows or locking the doors.
Also, in hot and/or sunny weather, please remember that the temperature inside
the passenger compartment increases very quickly.
RISK OF DEATH OR SERIOUS INJURY.
Page 11 of 228
1.5
DEADLOCKING
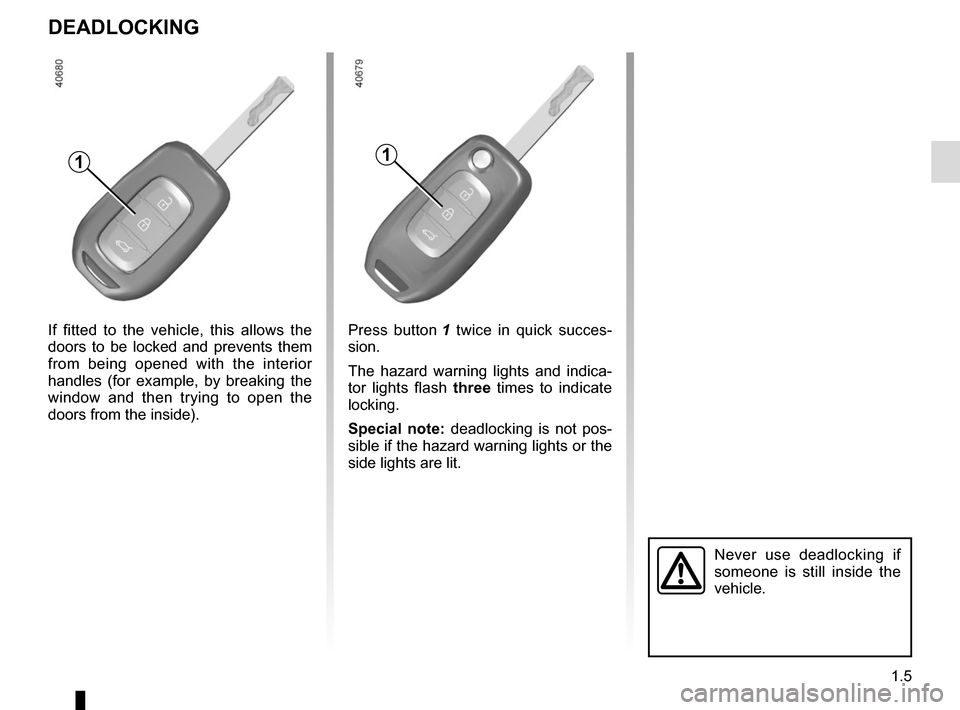
1
Never use deadlocking if
someone is still inside the
vehicle.
If fitted to the vehicle, this allows the
doors to be locked and prevents them
from being opened with the interior
handles (for example, by breaking the
window and then trying to open the
doors from the inside).Press button 1 twice in quick succes-
sion.
The hazard warning lights and indica-
tor lights flash three times to indicate
locking.
Special note: deadlocking is not pos-
sible if the hazard warning lights or the
side lights are lit.
1
Page 13 of 228
1.7
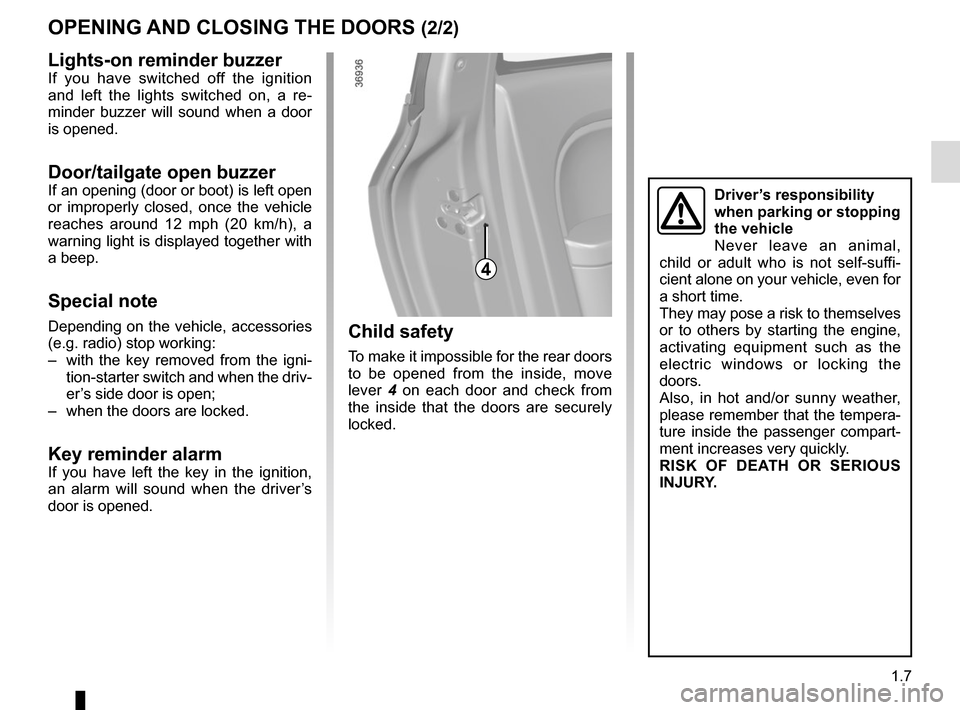
Child safety
To make it impossible for the rear doors
to be opened from the inside, move
lever 4 on each door and check from
the inside that the doors are securely
locked.
OPENING AND CLOSING THE DOORS (2/2)
Driver’s responsibility
when parking or stopping
the vehicle
Never leave an animal,
child or adult who is not self-suffi-
cient alone on your vehicle, even for
a short time.
They may pose a risk to themselves
or to others by starting the engine,
activating equipment such as the
electric windows or locking the
doors.
Also, in hot and/or sunny weather,
please remember that the tempera-
ture inside the passenger compart-
ment increases very quickly.
RISK OF DEATH OR SERIOUS
INJURY.
4
Lights-on reminder buzzerIf you have switched off the ignition
and left the lights switched on, a re-
minder buzzer will sound when a door
is opened.
Door/tailgate open buzzerIf an opening (door or boot) is left open
or improperly closed, once the vehicle
reaches around 12 mph (20 km/h), a
warning light is displayed together with
a beep.
Special note
Depending on the vehicle, accessories
(e.g. radio) stop working:
– with the key removed from the igni- tion-starter switch and when the driv-
er’s side door is open;
– when the doors are locked.
Key reminder alarmIf you have left the key in the ignition,
an alarm will sound when the driver’s
door is opened.
Page 29 of 228
1.23
CHILD SAFETY: General information (1/2)
Carrying children
Children, and adults, must be correctly
seated and strapped in for all journeys.
The children being carried in your vehi-
cle are your responsibility.
A child is not a miniature adult. Children
are at risk of specific injuries as their
muscles and bones have not yet fin-
ished growing. The seat belt alone
would not provide suitable protection.
Use an approved child seat and ensure
you use it correctly.
A collision at 30 mph
(50 km/h) is the same as fall-
ing a distance of 10 metres.
Transporting a child without
a restraint is the equivalent of allow-
ing him or her to play on a fourth-
floor balcony without railings.
Never travel with a child held in your
arms. In the event of an accident,
you will not be able to keep hold of
the child, even if you yourself are
wearing a seat belt.
If your vehicle has been involved in
a road accident, replace the child
seat and have the seat belts and
ISOFIX anchorage points checked.
To prevent the doors being
opened, use the “Child
safety” device (refer to the
information on “Opening
and closing the doors” in Section 1).
Driver’s responsibility
when parking or stopping
the vehicle
Never leave an animal,
child or adult who is not self-suffi-
cient alone on your vehicle, even for
a short time.
They may pose a risk to themselves
or to others by starting the engine,
activating equipment such as the
electric windows or by locking the
doors.
Also, in hot and/or sunny weather,
please remember that the tempera-
ture inside the passenger compart-
ment increases very quickly.
RISK OF DEATH OR SERIOUS
INJURY.
Page 30 of 228

1.24
CHILD SAFETY: General information (2/2)
Using a child seat
The level of protection offered by the
child seat depends on its ability to re-
strain your child and on its installation.
Incorrect installation compromises the
protection it offers the child in the event
of harsh braking or an impact.
Before purchasing a child seat, check
that it complies with the regulations for
the country you are in and that it can
be fitted in your vehicle. Consult an ap-
proved dealer to find out which seats
are recommended for your vehicle.
Before fitting a child seat, read the
manual and respect its instructions. If
you experience any difficulties during
installation, contact the manufacturer
of the equipment. Keep the instructions
with the seat.Set a good example by always fas-
tening your seat belt and teaching
your child:
– to strap themselves in correctly;
– to always get in and out of the car at the kerb, away from busy traf-
fic.
Do not use a second-hand child
seat or one without an instruction
manual.
Check that there are no objects in
the vicinity of the child seat which
could impede its operation.
Never leave a child unat-
tended in the vehicle.
Check that your child is
always strapped in and that
the belt or safety harness used is
correctly set and adjusted. Avoid
wearing bulky clothing which could
cause the belts to slacken.
Never let your child put their head or
arms out of the window.
Check that the child is in the correct
position for the entire journey, espe-
cially if asleep.
Page 32 of 228
1.26
CHILD SAFETY: choosing a child seat mounting (1/3)
There are two ways of attaching child
seats: via the seat belt or using the
ISOFIX system.
Attachment via the seat belt
The seat belt must be adjusted to
ensure that it is effective in the event of
harsh braking or an impact.
Ensure that the strap paths indicated
by the child seat manufacturer are re-
spected.
Always check that the seat belt is cor-
rectly fastened by pulling it up, then
pulling it out fully whilst pressing on the
child seat.
Check that the seat is correctly held by
moving it from side to side and back
to front: the seat should remain firmly
fixed.
Check that the child seat has not been
installed at an angle and that it is not
resting against a window.
Do not use the child seat
if it may unfasten the seat
belt restraining it: the base
of the seat must not rest on
the buckle and/or catch of the seat
belt.
The seat belt must never
be twisted or the tension
relieved. Never pass the
shoulder strap under the
arm or behind the back.
Check that the seat belt has not
been damaged by sharp edges.
If the seat belt does not operate nor-
mally, it will not protect the child.
Consult an approved dealer. Do not
use this seat until the seat belt has
been repaired.
No modifications may be
made to the component
parts of the restraint system
(seat belts, ISOFIX and
seats and their mountings) originally
fitted.
Attachment using the ISOFIX
system
Authorised ISOFIX child seats are ap-
proved in accordance with regulation
ECE-R44 in one of the three following
cases:
– ISOFIXuniversal 3-point forward-fac- ing seat;
– ISOFIXsemi-universal 2-point seat;
– specific.
For the latter two, check that your child
seat can be installed by consulting the
list of compatible vehicles.
Attach the child seat with the ISOFIX
locks, if these are provided. The ISOFIX
system allows quick, easy, safe fitting.
The ISOFIX system consists of 2 rings
and, in some cases, a third ring.Before using an ISOFIX
child seat that you pur-
chased for another vehicle,
check that its installation is
authorised. Consult the list of ve-
hicles which can be fitted with the
seat from the equipment manufac-
turer.
Page 47 of 228
1.41
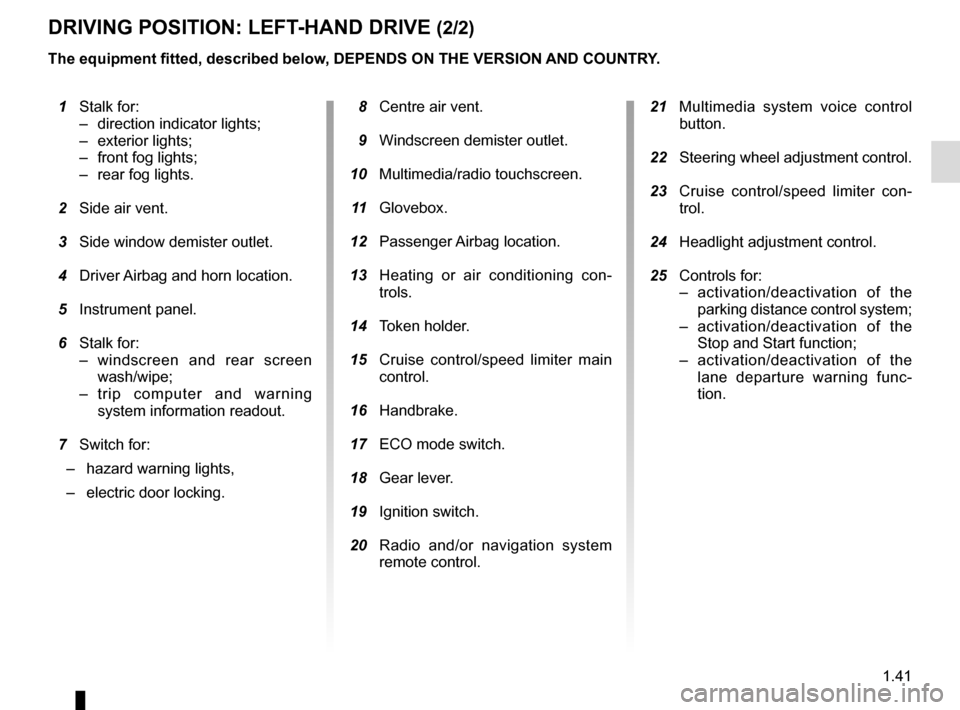
DRIVING POSITION: LEFT-HAND DRIVE (2/2)
1 Stalk for:
– direction indicator lights;
– exterior lights;
– front fog lights;
– rear fog lights.
2 Side air vent.
3 Side window demister outlet.
4 Driver Airbag and horn location.
5 Instrument panel.
6 Stalk for:
– windscreen and rear screen wash/wipe;
– trip computer and warning system information readout.
7 Switch for:
– hazard warning lights,
– electric door locking.
The equipment fitted, described below, DEPENDS ON THE VERSION AND COUNTRY.
8 Centre air vent.
9 Windscreen demister outlet.
10 Multimedia/radio touchscreen.
11 Glovebox.
12 Passenger Airbag location.
13 Heating or air conditioning con-
trols.
14 Token holder.
15 Cruise control/speed limiter main
control.
16 Handbrake.
17 ECO mode switch.
18 Gear lever.
19 Ignition switch.
20 Radio and/or navigation system
remote control.
21 Multimedia system voice control
button.
22 Steering wheel adjustment control.
23 Cruise control/speed limiter con-
trol.
24 Headlight adjustment control.
25 Controls for:
– activation/deactivation of the parking distance control system;
– activation/deactivation of the Stop and Start function;
– activation/deactivation of the lane departure warning func-
tion.
Page 49 of 228
1.43
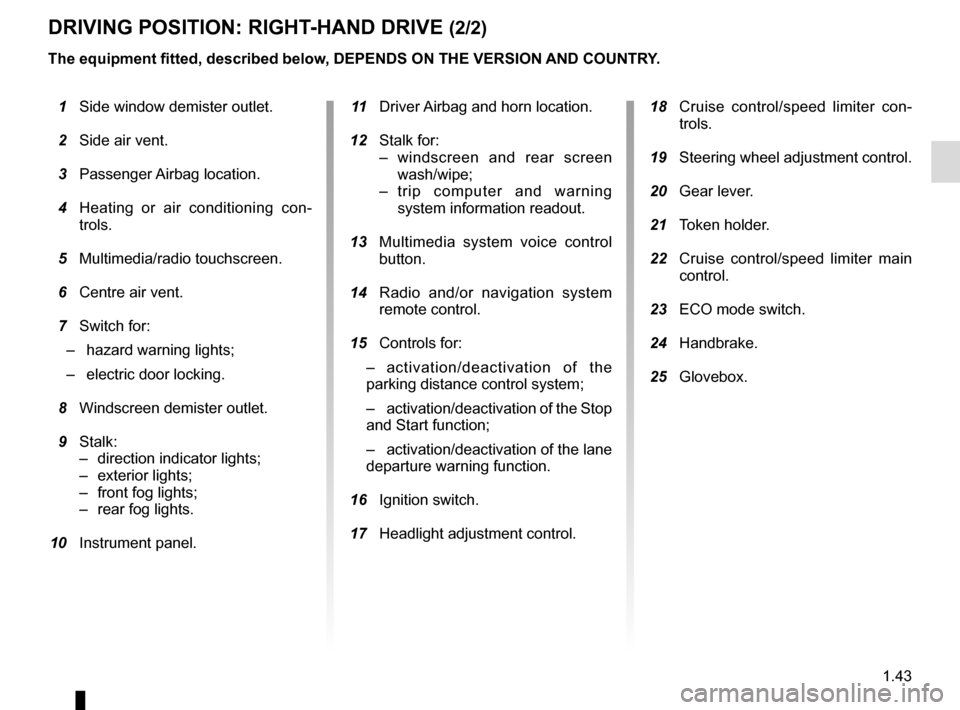
DRIVING POSITION: RIGHT-HAND DRIVE (2/2)
The equipment fitted, described below, DEPENDS ON THE VERSION AND COUNTRY.
1 Side window demister outlet.
2 Side air vent.
3 Passenger Airbag location.
4 Heating or air conditioning con-
trols.
5 Multimedia/radio touchscreen.
6 Centre air vent.
7 Switch for:
– hazard warning lights;
– electric door locking.
8 Windscreen demister outlet.
9 Stalk:
– direction indicator lights;
– exterior lights;
– front fog lights;
– rear fog lights.
10 Instrument panel. 11 Driver Airbag and horn location.
12 Stalk for:
– windscreen and rear screen wash/wipe;
– trip computer and warning system information readout.
13 Multimedia system voice control
button.
14 Radio and/or navigation system
remote control.
15 Controls for:
– activation/deactivation of the
parking distance control system;
– activation/deactivation of the Stop
and Start function;
– activation/deactivation of the lane
departure warning function.
16 Ignition switch.
17 Headlight adjustment control.
18 Cruise control/speed limiter con-
trols.
19 Steering wheel adjustment control.
20 Gear lever.
21 Token holder.
22 Cruise control/speed limiter main
control.
23 ECO mode switch.
24 Handbrake.
25 Glovebox.
Page 77 of 228
2.3
Stopping the engine
With the engine idling, turn the key
back to the Stop position.
Starting the engine
Engine warm or cold
– Turn the key to the start position
without depressing the accel-
erator.
– release the key as soon as the
engine starts.
STARTING, STOPPING THE ENGINE (2/2)
If the outside temperature is below
-10° C, hold the clutch pedal de-
pressed when starting the engine.
Driver’s responsibility
when parking or stopping
the vehicle
Never leave an animal,
child or adult who is not self-suffi-
cient alone in your vehicle, even for
a short time.
They may pose a risk to themselves
or to others by starting the engine,
activating equipment such as the
electric windows or locking the
doors, for example.
Also, in hot and/or sunny weather,
please remember that the tempera-
ture inside the passenger compart-
ment increases very quickly.
RISK OF DEATH OR SERIOUS
INJURY.
Never switch off the igni-
tion before the vehicle has
stopped completely. Once
the engine has stopped, the
brake servo, power-assisted steer-
ing, etc. and the passive safety de-
vices such as airbags and preten-
sioners will no longer operate.