check engine RENAULT ZOE 2016 1.G Owners Manual
[x] Cancel search | Manufacturer: RENAULT, Model Year: 2016, Model line: ZOE, Model: RENAULT ZOE 2016 1.GPages: 216, PDF Size: 6.48 MB
Page 12 of 216
1.6
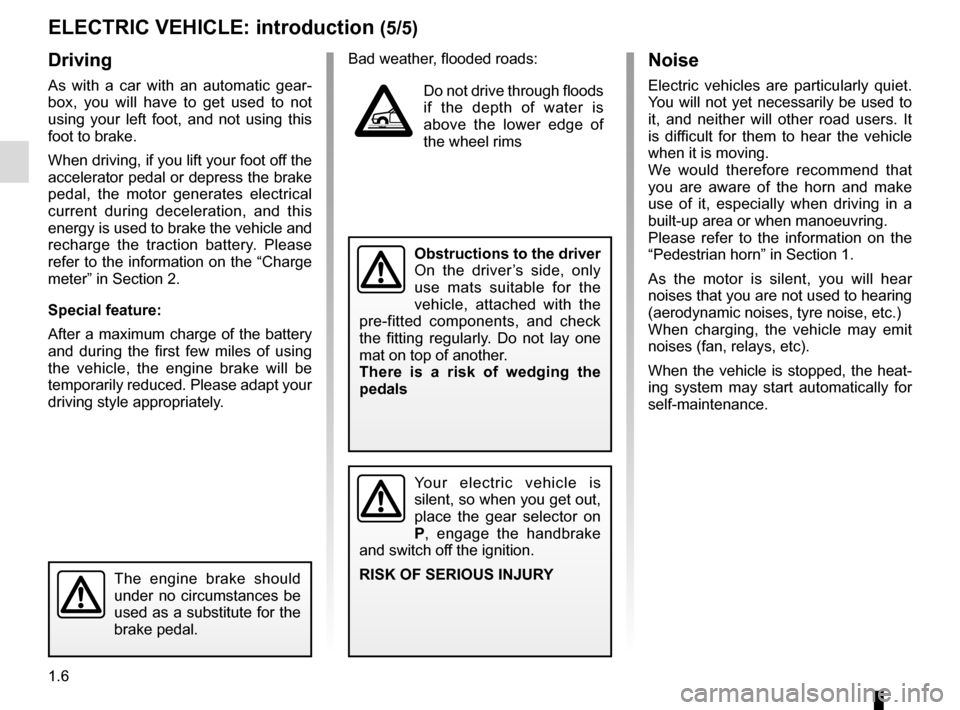
Driving
As with a car with an automatic gear-
box, you will have to get used to not
using your left foot, and not using this
foot to brake.
When driving, if you lift your foot off the
accelerator pedal or depress the brake
pedal, the motor generates electrical
current during deceleration, and this
energy is used to brake the vehicle and
recharge the traction battery. Please
refer to the information on the “Charge
meter” in Section 2.
Special feature:
After a maximum charge of the battery
and during the first few miles of using
the vehicle, the engine brake will be
temporarily reduced. Please adapt your
driving style appropriately.
ELECTRIC VEHICLE: introduction (5/5)
Bad weather, flooded roads:
Do not drive through floods
if the depth of water is
above the lower edge of
the wheel rims
Your electric vehicle is
silent, so when you get out,
place the gear selector on
P, engage the handbrake
and switch off the ignition.
RISK OF SERIOUS INJURY
The engine brake should
under no circumstances be
used as a substitute for the
brake pedal.
Noise
Electric vehicles are particularly quiet.
You will not yet necessarily be used to
it, and neither will other road users. It
is difficult for them to hear the vehicle
when it is moving.
We would therefore recommend that
you are aware of the horn and make
use of it, especially when driving in a
built-up area or when manoeuvring.
Please refer to the information on the
“Pedestrian horn” in Section 1.
As the motor is silent, you will hear
noises that you are not used to hearing
(aerodynamic noises, tyre noise, etc.)
When charging, the vehicle may emit
noises (fan, relays, etc).
When the vehicle is stopped, the heat-
ing system may start automatically for
self-maintenance.
Obstructions to the driver
On the driver’s side, only
use mats suitable for the
vehicle, attached with the
pre-fitted components, and check
the fitting regularly. Do not lay one
mat on top of another.
There is a risk of wedging the
pedals
Page 13 of 216
1.7
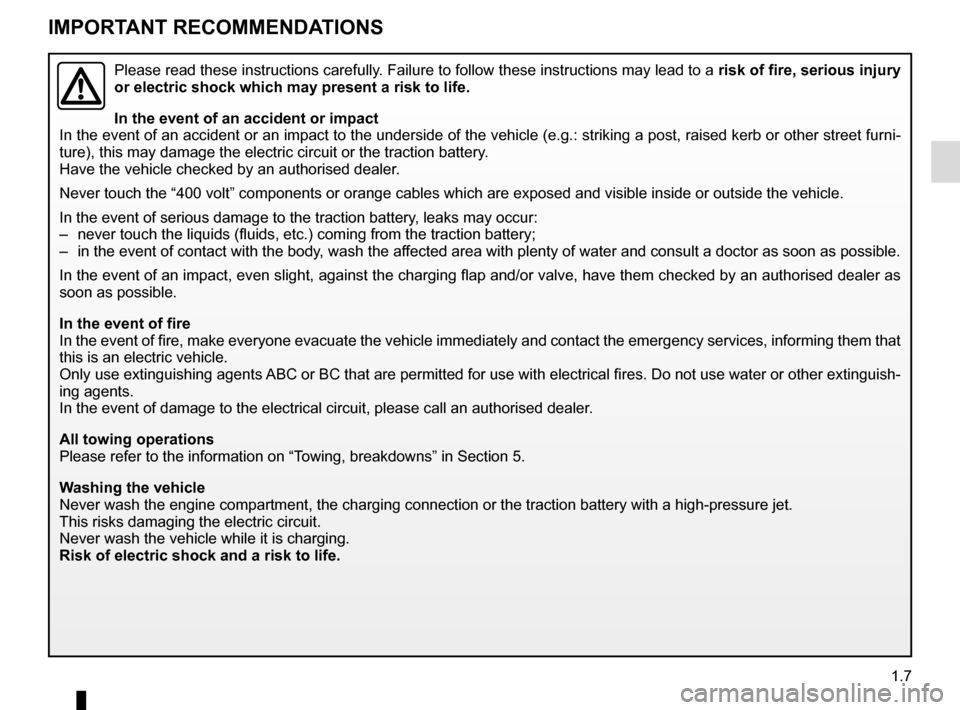
IMPORTANT RECOMMENDATIONS
Please read these instructions carefully. Failure to follow these instructions may lead to a risk of fire, serious injury
or electric shock which may present a risk to life.
In the event of an accident or impact
In the event of an accident or an impact to the underside of the vehicle\
(e.g.: striking a post, raised kerb or other street fu rni-
ture), this may damage the electric circuit or the traction battery.
Have the vehicle checked by an authorised dealer.
Never touch the “400 volt” components or orange cables which are e\
xposed and visible inside or outside the vehicle.
In the event of serious damage to the traction battery, leaks may occur:
– never touch the liquids (fluids, etc.) coming from the traction batter\
y;
– in the event of contact with the body, wash the affected area with plenty of water and consult a doctor as soon as possibl\
e.
In the event of an impact, even slight, against the charging flap and/or\
valve, have them checked by an authorised dealer as
soon as possible.
In the event of fire
In the event of fire, make everyone evacuate the vehicle immediately and\
contact the emergency services, informing them that
this is an electric vehicle.
Only use extinguishing agents ABC or BC that are permitted for use with electrical fires. Do not use w\
ater or other extinguish-
ing agents.
In the event of damage to the electrical circuit, please call an authori\
sed dealer.
All towing operations
Please refer to the information on “Towing, breakdowns” in Section 5.
Washing the vehicle
Never wash the engine compartment, the charging connection or the tracti\
on battery with a high-pressure jet.
This risks damaging the electric circuit.
Never wash the vehicle while it is charging.
Risk of electric shock and a risk to life.
Page 15 of 216

1.9
ELECTRIC VEHICLE: charging (2/8)
Important recommendations for charging your vehiclePlease read these instructions carefully. Failure to follow these instructions may lead to a risk of fire, serious injury
or electric shocks which could result in death.
Charging
Do not do anything to the vehicle during charging (washing, working in \
the engine compartment, etc.).
In the event of the presence of water, signs of corrosion or foreign bodies in the charging cord connector or\
in the vehicle ch arg-
ing socket, do not charge the vehicle. Fire hazard.
Do not attempt to touch the cord contacts, the domestic socket or the ve\
hicle charging socket, or introduce objects into them.
Never plug the charging cord into an adapter, multiple socket or extension lead.
The use of generators is prohibited.
Do not remove or change the vehicle charging socket or the charging cord\
. Fire hazard.
Do not modify or perform any action on the installation during charging.\
In the event of an impact, even slight, against the charging socket or v\
alve, have them checked by an authorised dealer as
soon as possible.
Take care of the cord: do not tread on it, immerse it in water or pull on\
it or let anything knock against it.
Check regularly that the charging cord is in good condition.
Do not use in the event of any damage to the charging cord (corrosion, \
discolouring, cuts, etc.) or to the unit. Please see an
authorised dealer for a replacement.
Page 34 of 216
1.28
OPENING AND CLOSING THE DOORS (2/2)
Driver’s responsibility when parking or stopping the vehicle
Never leave an animal, child or adult who is not self-sufficient alone on
your vehicle, even for a short time.
They may pose a risk to themselves or to others by starting the engine, \
activating equipment such as the electric windows or by locking the door\
s.
Also, in hot and/or sunny weather, please remember that the temperature inside
the passenger compartment increases very quickly.
RISK OF DEATH OR SERIOUS INJURY.
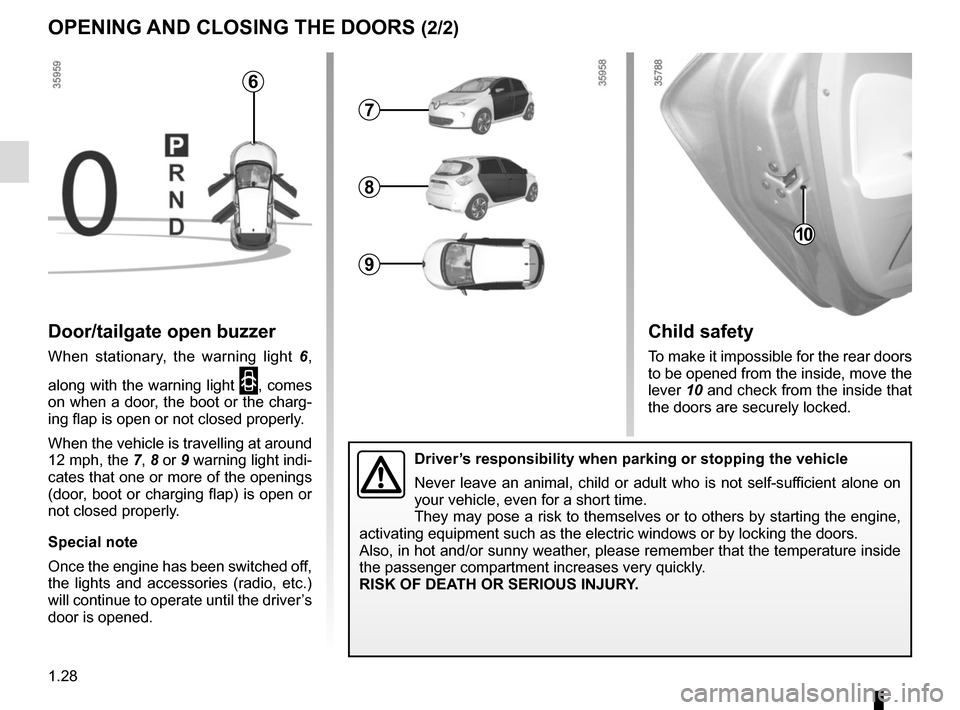
Child safety
To make it impossible for the rear doors
to be opened from the inside, move the
lever 10 and check from the inside that
the doors are securely locked.
10
Door/tailgate open buzzer
When stationary, the warning light 6,
along with the warning light
2, comes
on when a door, the boot or the charg-
ing flap is open or not closed properly.
When the vehicle is travelling at around
12 mph, the 7, 8 or 9 warning light indi-
cates that one or more of the openings
(door, boot or charging flap) is open or
not closed properly.
Special note
Once the engine has been switched off,
the lights and accessories (radio, etc.)
will continue to operate until the driver’s
door is opened.
6
7
8
9
Page 37 of 216
1.31
AUTOMATIC LOCKING WHEN DRIVING
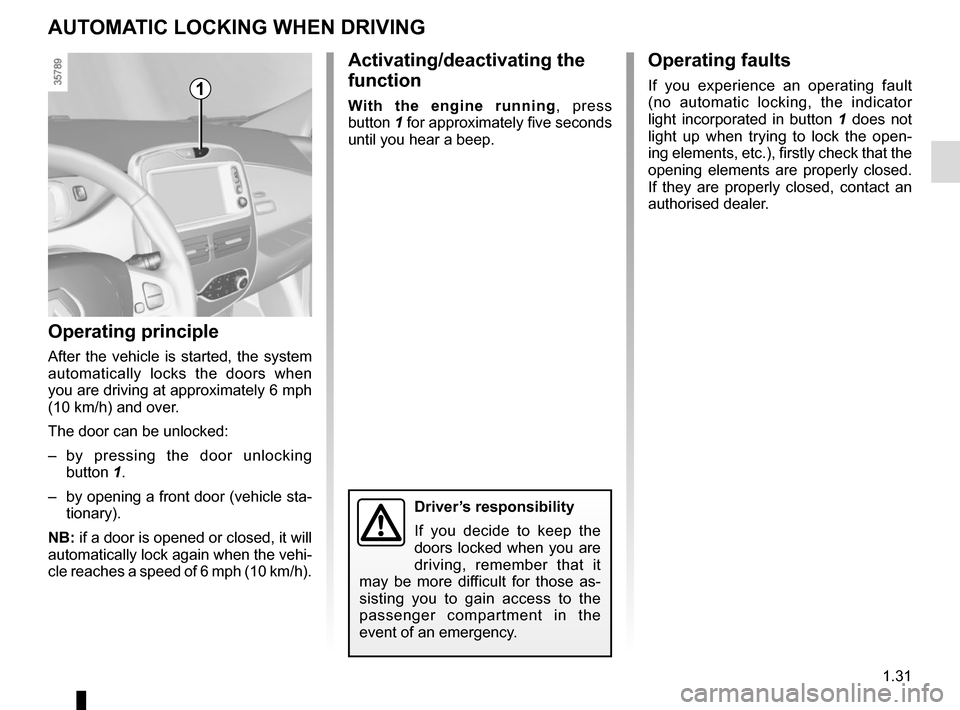
Activating/deactivating the
function
With the engine running, press
button 1 for approximately five seconds
until you hear a beep.
Operating principle
After the vehicle is started, the system
automatically locks the doors when
you are driving at approximately 6 mph
(10 km/h) and over.
The door can be unlocked:
– by pressing the door unlocking button 1.
– by opening a front door (vehicle sta- tionary).
NB: if a door is opened or closed, it will
automatically lock again when the vehi-
cle reaches a speed of 6 mph (10 km/h).
Operating faults
If you experience an operating fault
(no automatic locking, the indicator
light incorporated in button 1 does not
light up when trying to lock the open-
ing elements, etc.), firstly check that the
opening elements are properly closed.
If they are properly closed, contact an
authorised dealer.1
Driver’s responsibility
If you decide to keep the
doors locked when you are
driving, remember that it
may be more difficult for those as-
sisting you to gain access to the
passenger compartment in the
event of an emergency.
Page 40 of 216
1.34
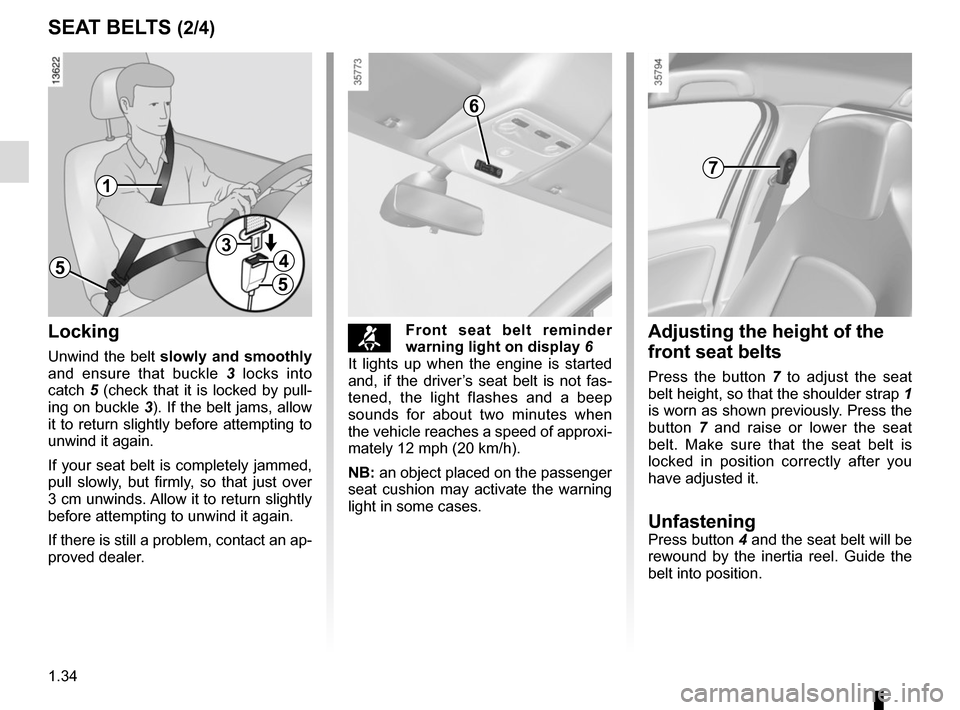
™Front seat belt reminder
warning light on display 6
It lights up when the engine is started
and, if the driver’s seat belt is not fas-
tened, the light flashes and a beep
sounds for about two minutes when
the vehicle reaches a speed of approxi-
mately 12 mph (20 km/h).
NB: an object placed on the passenger
seat cushion may activate the warning
light in some cases.
SEAT BELTS (2/4)
Locking
Unwind the belt slowly and smoothly
and ensure that buckle 3 locks into
catch 5 (check that it is locked by pull-
ing on buckle 3). If the belt jams, allow
it to return slightly before attempting to
unwind it again.
If your seat belt is completely jammed,
pull slowly, but firmly, so that just over
3 cm unwinds. Allow it to return slightly
before attempting to unwind it again.
If there is still a problem, contact an ap-
proved dealer.
1
5
34
5
Adjusting the height of the
front seat belts
Press the button 7 to adjust the seat
belt height, so that the shoulder strap 1
is worn as shown previously. Press the
button 7 and raise or lower the seat
belt. Make sure that the seat belt is
locked in position correctly after you
have adjusted it.
UnfasteningPress button 4 and the seat belt will be
rewound by the inertia reel. Guide the
belt into position.
7
6
Page 50 of 216
1.44
CHILD SAFETY: General information (1/2)
Carrying children
Children, and adults, must be correctly
seated and strapped in for all journeys.
The children being carried in your vehi-
cle are your responsibility.
A child is not a miniature adult. Children
are at risk of specific injuries as their
muscles and bones have not yet fin-
ished growing. The seat belt alone
would not provide suitable protection.
Use an approved child seat and ensure
you use it correctly.
A collision at 30 mph
(50 km/h) is the same as fall-
ing a distance of 10 metres.
Transporting a child without
a restraint is the equivalent of allow-
ing him or her to play on a fourth-
floor balcony without railings.
Never travel with a child held in your
arms. In the event of an accident,
you will not be able to keep hold of
the child, even if you yourself are
wearing a seat belt.
If your vehicle has been involved in
a road accident, replace the child
seat and have the seat belts and
ISOFIX anchorage points checked.
To prevent the doors being
opened, use the “Child
safety” device (refer to the
information on “Opening
and closing the doors” in Section 1).
Driver’s responsibility
when parking or stopping
the vehicle
Never leave an animal,
child or adult who is not self-suffi-
cient alone on your vehicle, even for
a short time.
They may pose a risk to themselves
or to others by starting the engine,
activating equipment such as the
electric windows or by locking the
doors.
Also, in hot and/or sunny weather,
please remember that the tempera-
ture inside the passenger compart-
ment increases very quickly.
RISK OF DEATH OR SERIOUS
INJURY.
Page 86 of 216
1.80
EXTERIOR LIGHTING AND SIGNALS (1/3)
Before driving at night, check that the electrical equipment is operatin\
g
correctly and adjust the headlight beams (if your vehicle is not carryi\
ng
its normal load). As a general precaution, check that the lights are not ob-
scured (by dirt, mud, snow or objects being transported).
31
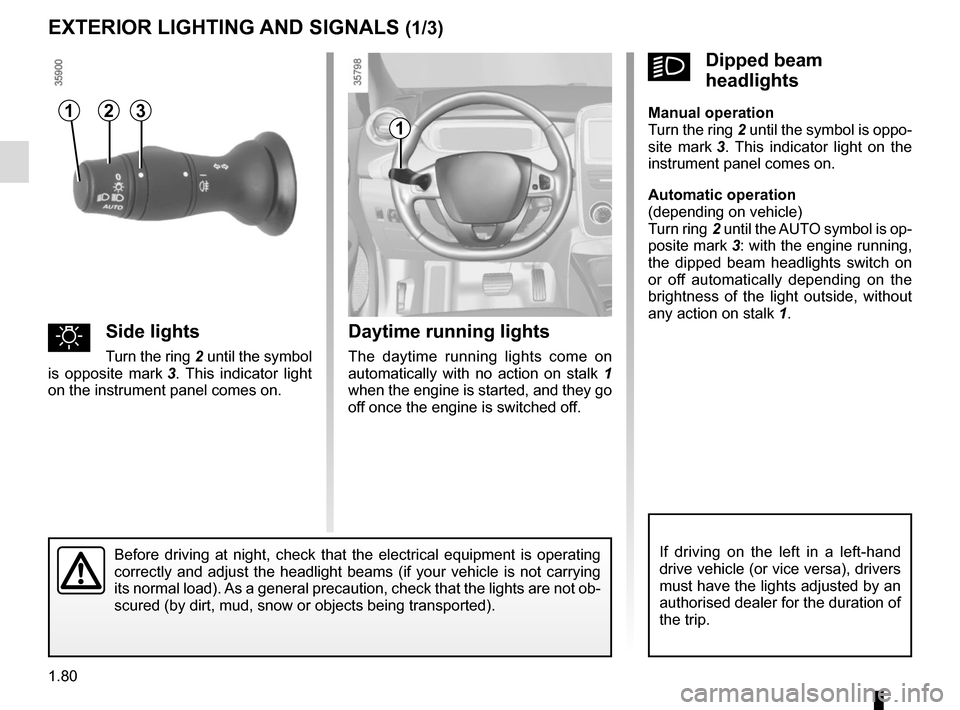
kDipped beam
headlights
Manual operation
Turn the ring 2 until the symbol is oppo-
site mark 3. This indicator light on the
instrument panel comes on.
Automatic operation
(depending on vehicle)
Turn ring 2 until the AUTO symbol is op-
posite mark 3: with the engine running,
the dipped beam headlights switch on
or off automatically depending on the
brightness of the light outside, without
any action on stalk 1.2
If driving on the left in a left-hand
drive vehicle (or vice versa), drivers
must have the lights adjusted by an
authorised dealer for the duration of
the trip.
1
uSide lights
Turn the ring 2 until the symbol
is opposite mark 3. This indicator light
on the instrument panel comes on.
Daytime running lights
The daytime running lights come on
automatically with no action on stalk 1
when the engine is started, and they go
off once the engine is switched off.
Page 91 of 216
1.85
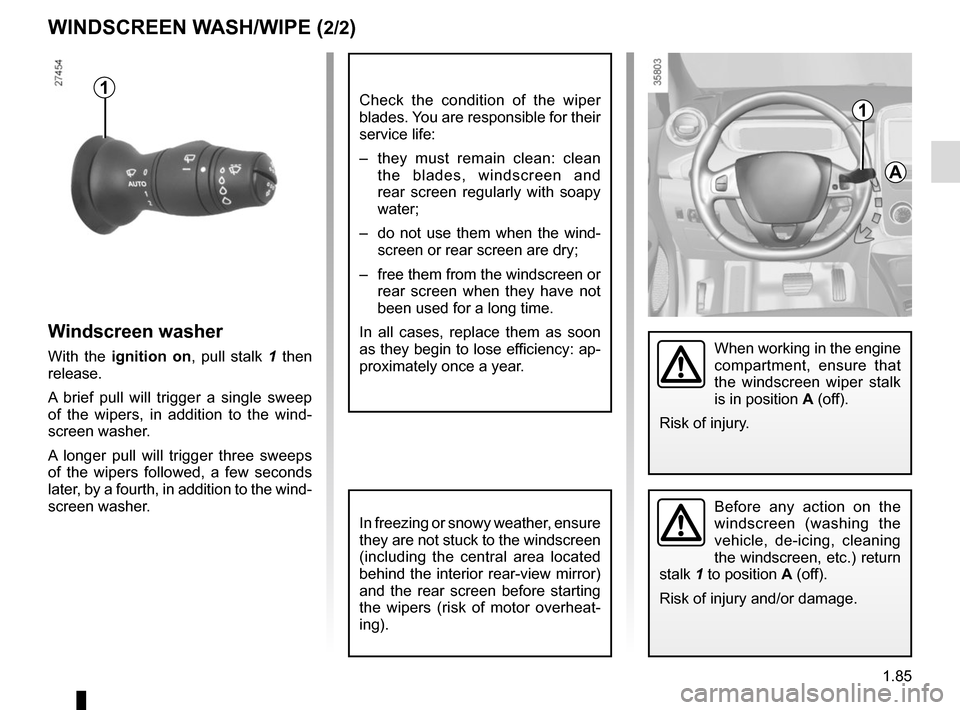
Windscreen washer
With the ignition on, pull stalk 1 then
release.
A brief pull will trigger a single sweep
of the wipers, in addition to the wind-
screen washer.
A longer pull will trigger three sweeps
of the wipers followed, a few seconds
later, by a fourth, in addition to the wind-
screen washer.
WINDSCREEN WASH/WIPE (2/2)
In freezing or snowy weather, ensure
they are not stuck to the windscreen
(including the central area located
behind the interior rear-view mirror)
and the rear screen before starting
the wipers (risk of motor overheat-
ing).
1
A
When working in the engine
compartment, ensure that
the windscreen wiper stalk
is in position A (off).
Risk of injury.
Before any action on the
windscreen (washing the
vehicle, de-icing, cleaning
the windscreen, etc.) return
stalk 1 to position A (off).
Risk of injury and/or damage.
1Check the condition of the wiper
blades. You are responsible for their
service life:
– they must remain clean: clean the blades, windscreen and
rear screen regularly with soapy
water;
– do not use them when the wind- screen or rear screen are dry;
– free them from the windscreen or rear screen when they have not
been used for a long time.
In all cases, replace them as soon
as they begin to lose efficiency: ap-
proximately once a year.
Page 97 of 216
2.5
Only engage D or R when the vehi-
cle is stopped, with your foot on the
brake and the accelerator pedal re-
leased.
Driving
While driving, press the accelerator
pedal to achieve the desired speed.
The reversing lights will come on as
soon as reverse gear is selected (with
the ignition on).
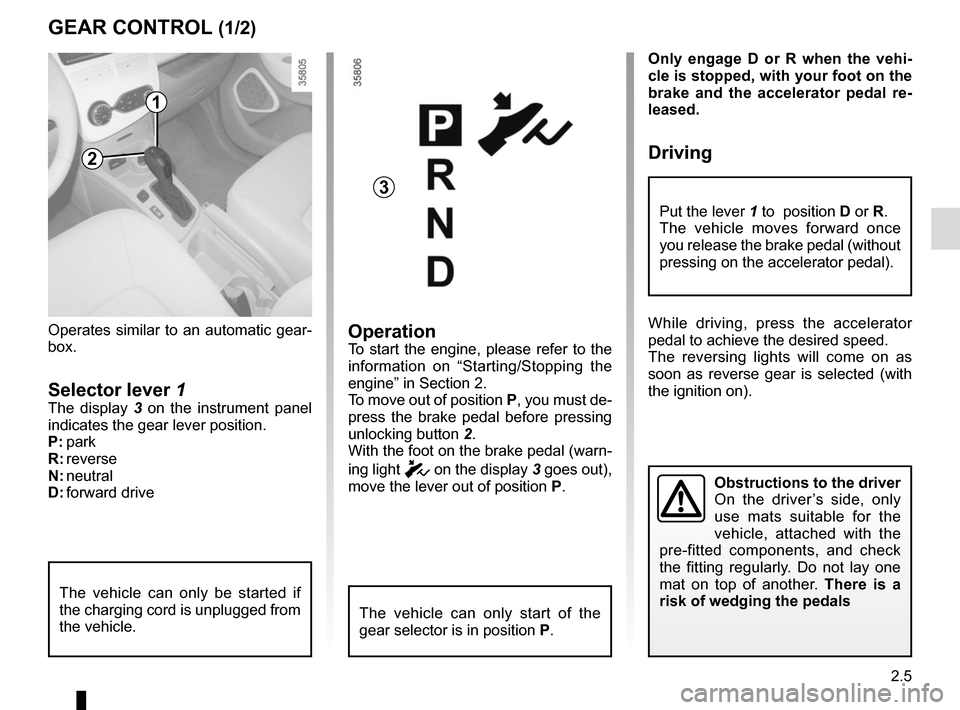
GEAR CONTROL (1/2)
2
1
Operates similar to an automatic gear-
box.
Selector lever 1The display 3 on the instrument panel
indicates the gear lever position.
P: park
R: reverse
N: neutral
D: forward drive
OperationTo start the engine, please refer to the
information on “Starting/Stopping the
engine” in Section 2.
To move out of position P, you must de-
press the brake pedal before pressing
unlocking button 2.
With the foot on the brake pedal (warn-
ing light
c on the display 3 goes out),
move the lever out of position P.
The vehicle can only start of the
gear selector is in position P.
The vehicle can only be started if
the charging cord is unplugged from
the vehicle.
Obstructions to the driver
On the driver’s side, only
use mats suitable for the
vehicle, attached with the
pre-fitted components, and check
the fitting regularly. Do not lay one
mat on top of another. There is a
risk of wedging the pedals
Put the lever 1 to position D or R.
The vehicle moves forward once
you release the brake pedal (without
pressing on the accelerator pedal).
3