key SAAB 9-3 2001 User Guide
[x] Cancel search | Manufacturer: SAAB, Model Year: 2001, Model line: 9-3, Model: SAAB 9-3 2001Pages: 260, PDF Size: 12.01 MB
Page 45 of 260

45 Security
Overview of, LED signals and SID messagesSome signals may differ between model variants for different
countries.Status LED signal
Activation (during 10-second delay). Comes on for 10 seconds.
Alarm activated (after delay). Flashes once every third
second.
Deactivation. Comes on for 2 seconds.
Alarm not activated. Off.
Door, trunk lid or hood open or
opened during delay period.Flashes three times per sec-
ond for 10 seconds.
Unlocking the trunk lid. Flashes three times per sec-
ond for 10 seconds.
Closing of door, trunk lid or hood
after delay period.Comes on for 10 seconds.
Car immobilized but not locked.
Car alarm not activated.Flashes twice at three sec-
onds intervals.
Fault in a switch serving doors, hood
or trunk lid.Flashing (instead of being
on continuously) during
delay period.
SID message Reason/action
SERVICE THEFT ALARM Probably a faulty sensor or siren.
Have the car checked by an author-
ized Saab dealer.
KEY NOT ACCEPTED Fault in key transmitter or in igni-
tion-switch receiver. Turn ignition
switch to ON and press one of the
buttons on the remote control. Start
the engine.
Have the car checked by an author-
ized Saab dealer.
REPLACE KEY BATTERY Fit a new battery in the key.
DOOR ALARM ONLY Window-glass sensor is disabled.
FULL THEFT ALARM Window-glass sensor is included in
circuit.
REMOTE KEY
TRANSPONDRTurn the ignition key to position ON
and then press the button for open-
ing the trunk lid. SID displays the
number of keys (remote key) and
transmitters (transponders) coded to
the car.
ProCarManuals.com
Page 52 of 260
52 Convertible4 Raise the side windows by sliding the
ROOF button forward a second time.
Alternatively, use the central operating
switch for the side windows.
5 Check that there are no fault messages
on the SID; see page 54.Manual raising of the
soft topPoints 6 to 8 are only valid if the soft top is
operated manually when the soft top ton-
neau is locked.1 Tip the backrests of the rear seat for-
ward.
2 Unlock the rear-seat backrest with the
ignition key just outboard of the left rear
headrest and tip it forward.
3 Remove the round rubber cover over the
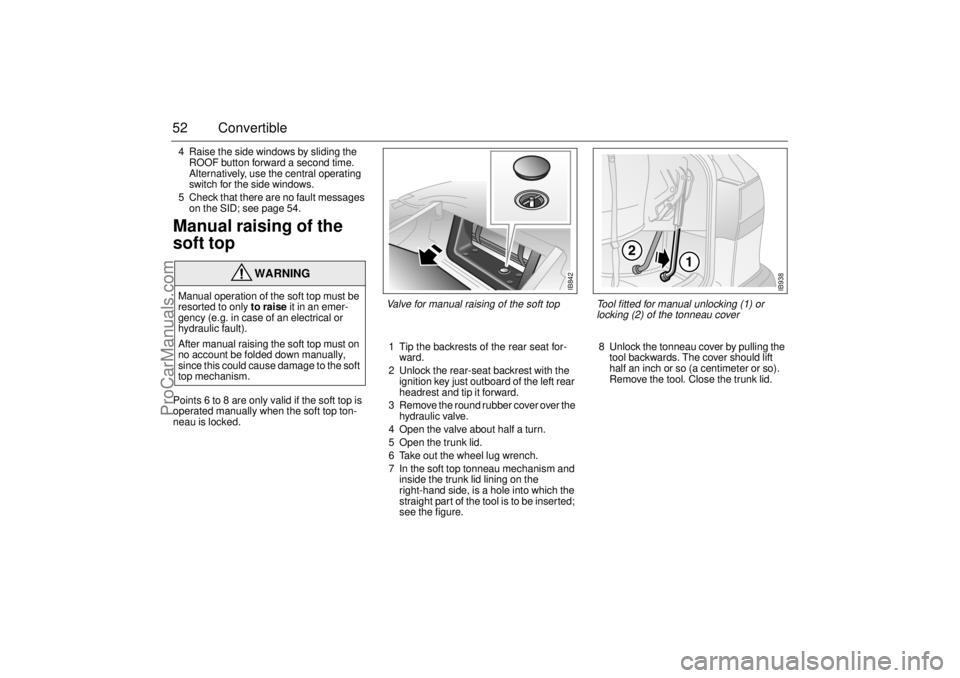
hydraulic valve.
4 Open the valve about half a turn.
5 Open the trunk lid.
6 Take out the wheel lug wrench.
7 In the soft top tonneau mechanism and
inside the trunk lid lining on the
right-hand side, is a hole into which the
straight part of the tool is to be inserted;
see the figure. 8 Unlock the tonneau cover by pulling the
tool backwards. The cover should lift
half an inch or so (a centimeter or so).
Remove the tool. Close the trunk lid.
WARNING
Manual operation of the soft top must be
resorted to only to raise it in an emer-
gency (e.g. in case of an electrical or
hydraulic fault).
After manual raising the soft top must on
no account be folded down manually,
since this could cause damage to the soft
top mechanism.
Valve for manual raising of the soft top
IB842
IB938
Tool fitted for manual unlocking (1) or
locking (2) of the tonneau cover
ProCarManuals.com
Page 56 of 260
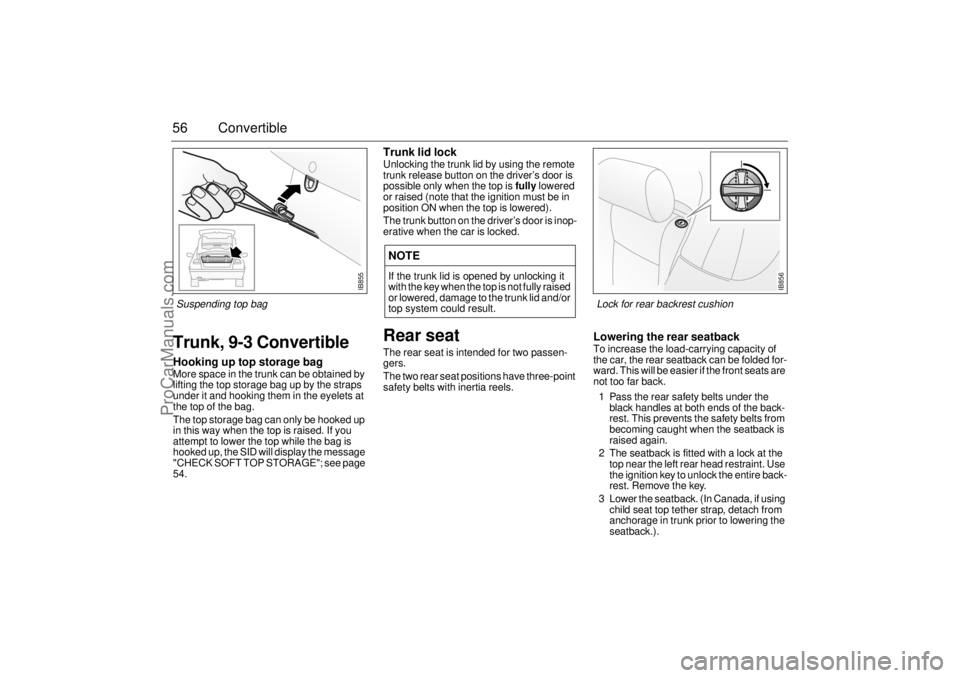
56 ConvertibleTrunk, 9-3 ConvertibleHooking up top storage bagMore space in the trunk can be obtained by
lifting the top storage bag up by the straps
under it and hooking them in the eyelets at
the top of the bag.
The top storage bag can only be hooked up
in this way when the top is raised. If you
attempt to lower the top while the bag is
hooked up, the SID will display the message
"CHECK SOFT TOP STORAGE"; see page
54.
Trunk lid lockUnlocking the trunk lid by using the remote
trunk release button on the driver’s door is
possible only when the top is fully lowered
or raised (note that the ignition must be in
position ON when the top is lowered).
The trunk button on the driver’s door is inop-
erative when the car is locked.Rear seatThe rear seat is intended for two passen-
gers.
The two rear seat positions have three-point
safety belts with inertia reels.
Lowering the rear seatbackTo increase the load-carrying capacity of
the car, the rear seatback can be folded for-
ward. This will be easier if the front seats are
not too far back.
1 Pass the rear safety belts under the
black handles at both ends of the back-
rest. This prevents the safety belts from
becoming caught when the seatback is
raised again.
2 The seatback is fitted with a lock at the
top near the left rear head restraint. Use
the ignition key to unlock the entire back-
rest. Remove the key.
3 Lower the seatback. (In Canada, if using
child seat top tether strap, detach from
anchorage in trunk prior to lowering the
seatback.).
NOTEIf the trunk lid is opened by unlocking it
with the key when the top is not fully raised
or lowered, damage to the trunk lid and/or
top system could result.
IB855
Suspending top bag
IB856
Lock for rear backrest cushion
ProCarManuals.com
Page 61 of 260
61 Instruments and controls
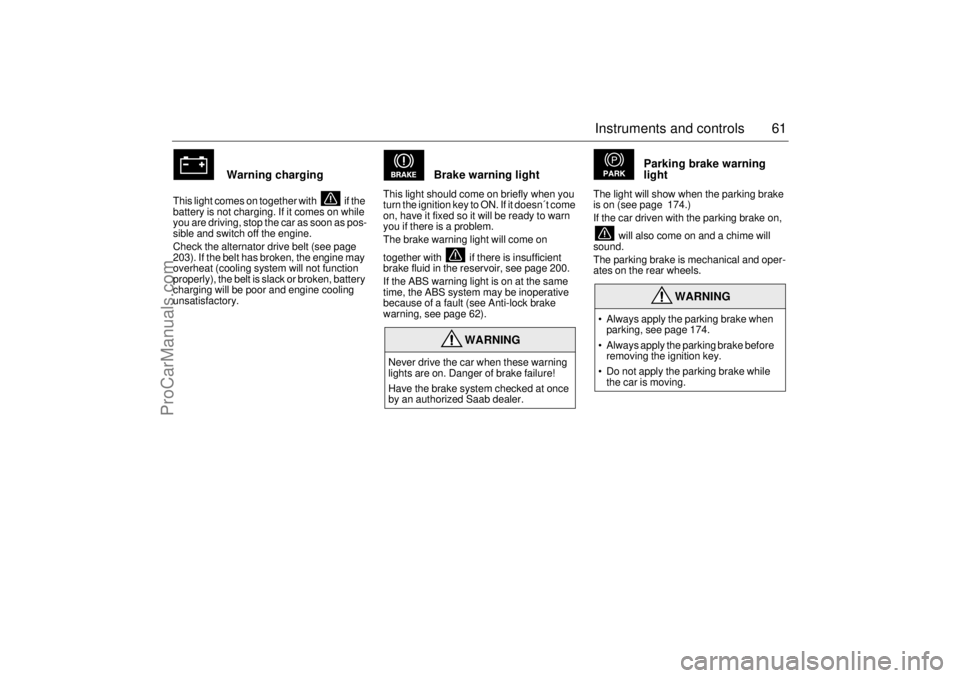
Warning charging
This light comes on together with if the
battery is not charging. If it comes on while
you are driving, stop the car as soon as pos-
sible and switch off the engine.
Check the alternator drive belt (see page
203). If the belt has broken, the engine may
overheat (cooling system will not function
properly), the belt is slack or broken, battery
charging will be poor and engine cooling
unsatisfactory.
Brake warning light
This light should come on briefly when you
turn the ignition key to ON. If it doesn´t come
on, have it fixed so it will be ready to warn
you if there is a problem.
The brake warning light will come on
together with if there is insufficient
brake fluid in the reservoir, see page 200.
If the ABS warning light is on at the same
time, the ABS system may be inoperative
because of a fault (see Anti-lock brake
warning, see page 62).
Parking brake warning
light
The light will show when the parking brake
is on (see page 174.)
If the car driven with the parking brake on,
will also come on and a chime will
sound.
The parking brake is mechanical and oper-
ates on the rear wheels.
WARNING
Never drive the car when these warning
lights are on. Danger of brake failure!
Have the brake system checked at once
by an authorized Saab dealer.
WARNING
Always apply the parking brake when
parking, see page 174.
Always apply the parking brake before
removing the ignition key.
Do not apply the parking brake while
the car is moving.
ProCarManuals.com
Page 73 of 260

73 Instruments and controls
The following CHECK messages may be
displayed: 1) This message will be displayed approximately
600 miles (1,000 km) before the next sched-
uled service is due, or when 365 days have
elapsed since the last service. The message
should be cleared at the time of that service
(see the Saab Warranties & Service Record
Booklet).
This message can also be deleted by first
briefly pressing the CLR button, then depress-
ing it a second time for at least eight seconds
until "SERVICE" appears on the display and a
chime sounds. The message can only be
deleted when it is shown on the SID.
Night panelTo improve night-driving conditions inside
the car, the Night Panel mode can be
selected. In this mode, the amount of infor-
mation displayed is reduced, and only the
most important instruments and displays
will be illuminated.
When the Night Panel button is pressed,
only the speedometer will be illuminated (up
to the 87-mph or 140-km/h graduation), all
the other instruments illumination will be
extinguished and their needles moved to
zero. Both the SID and the ACC displays will
be extinguished and the backlighting for
switches and other controls will be dimmed.
Note: All indicator and warning lights,
together with the display of CHECK mes-
sages, will operate as normal. The following conditions will wake up the
respective displays in the Night-Panel
mode:
Setting of the Audio System, SID or ACC
(display comes on for ten seconds).
CHECK message generated in the SID.
High engine revs cause the rev counter to
be illuminated until the engine speed has
fallen again.
If the quantity of fuel remaining falls below
4 gallons (15 liters), the fuel gauge will be
illuminated.
If the engine temperature rises above nor-
mal, the temperature gauge will be illumi-
nated.
If the speed of the car exceeds 84 mph
(135 km/h), the entire speedometer will
be illuminated.
In cars with automatic transmission, if the
selector lever is moved from D to position
3, 2 or 1, the selector indication on the
main instrument panel will be illuminated.
To restore the displays and lighting to the
normal mode, press the Night-Panel button. Display shows: See
page
BRAKE LIGHT FAILURE 208
FRONT LIGHT FAILURE 206
REAR LIGHT FAILURE 208
FOG LIGHT FAILURE 209
WASHER FLUID LEVEL LOW 205
TIGHTEN FUEL FILLER CAP 157
FILL COOLANT FLUID 198
KEY NOT ACCEPTED 45
REPLACE KEY BATTERY 45
SERVICE THEFT ALARM 45
TRANSMISSION OVERHEATING 165
TIME FOR SERVICE
1)
236
ProCarManuals.com
Page 74 of 260
74 Instruments and controlsUnits and language versions The SID has four sets of units:
CHECK messages can be displayed in six
language options: English, Swedish,
German, French, Italian and Spanish.
Selecting units and language 1 Press the CLR and SET buttons at the
same time for 4 seconds until an audible
signal sounds.
2 Press or to select the required
units.
3 Touch SET.
4 Press or to select the required
language.
5 Touch SET.
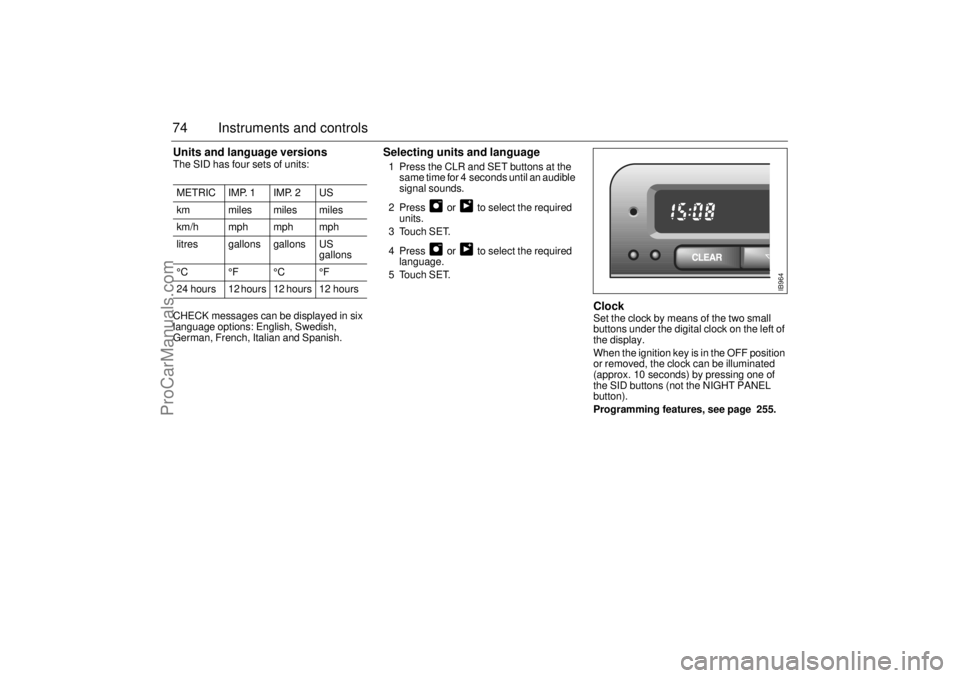
Clock Set the clock by means of the two small
buttons under the digital clock on the left of
the display.
When the ignition key is in the OFF position
or removed, the clock can be illuminated
(approx. 10 seconds) by pressing one of
the SID buttons (not the NIGHT PANEL
button).
Programming features, see page 255. METRIC IMP. 1 IMP. 2 US
km miles miles miles
km/h mph mph mph
litres gallons gallons US
gallons
°C °F °C °F
24 hours 12 hours 12 hours 12 hours
IB964
ProCarManuals.com
Page 76 of 260
76 Instruments and controlsCourtesy Headlamp Feature A delay function allows the headlights to
remain on low beam for about 30 seconds
after the driver’s door has been closed.
To activate this function,
Switch off the ignition and remove the key
Open the driver’s door
Pull the high/low beam control stalk
towards the steering wheel like you are
flashing the high beam, see page 75. The
low beam headlights will now come on
immediately after the driver’s door has
been closed (within 30 seconds) and will
remain on for about 30 seconds.
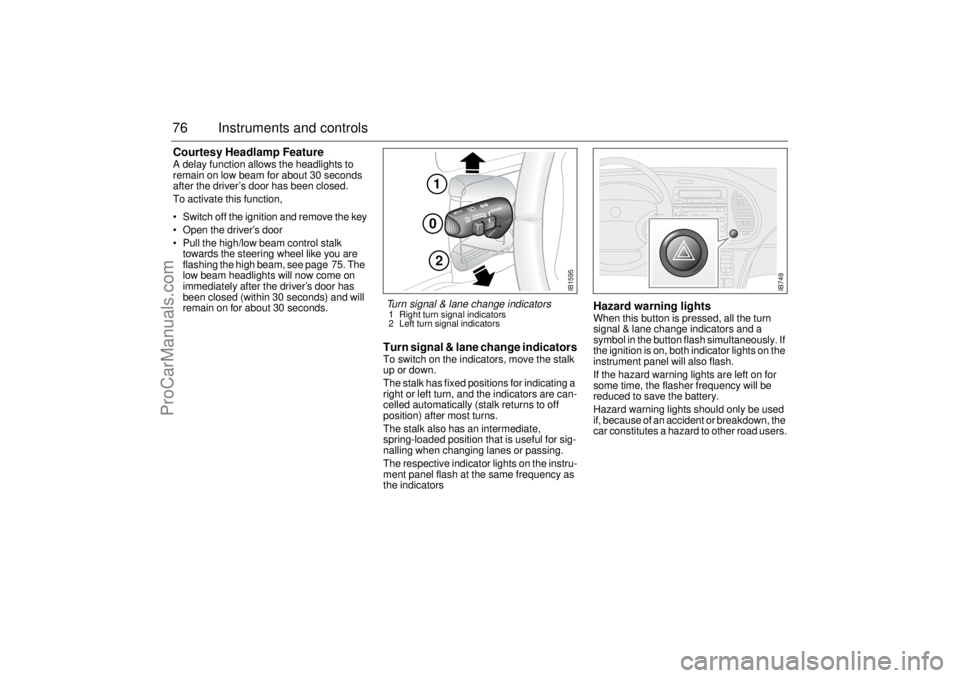
Turn signal & lane change indicatorsTo switch on the indicators, move the stalk
up or down.
The stalk has fixed positions for indicating a
right or left turn, and the indicators are can-
celled automatically (stalk returns to off
position) after most turns.
The stalk also has an intermediate,
spring-loaded position that is useful for sig-
nalling when changing lanes or passing.
The respective indicator lights on the instru-
ment panel flash at the same frequency as
the indicators
Hazard warning lightsWhen this button is pressed, all the turn
signal & lane change indicators and a
symbol in the button flash simultaneously. If
the ignition is on, both indicator lights on the
instrument panel will also flash.
If the hazard warning lights are left on for
some time, the flasher frequency will be
reduced to save the battery.
Hazard warning lights should only be used
if, because of an accident or breakdown, the
car constitutes a hazard to other road users.
102
IB1595
Turn signal & lane change indicators 1 Right turn signal indicators
2 Left turn signal indicators
IB749
ProCarManuals.com
Page 90 of 260
90 Instruments and controlsCalibrationIf the battery has been disconnected or has run flat, the system will
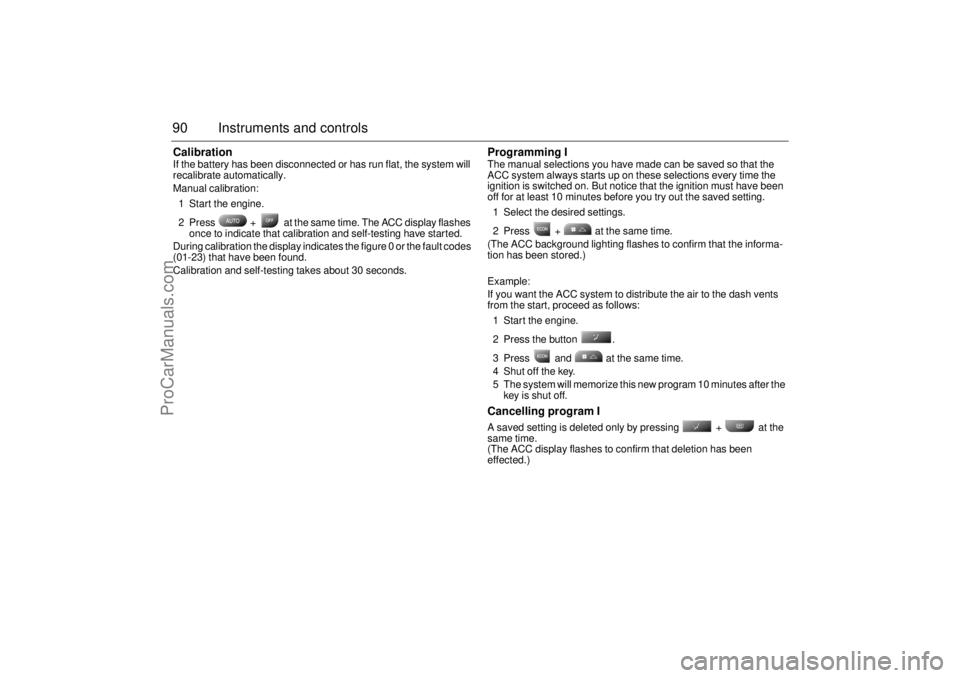
recalibrate automatically.
Manual calibration:
1 Start the engine.
2 Press + at the same time. The ACC display flashes
once to indicate that calibration and self-testing have started.
During calibration the display indicates the figure 0 or the fault codes
(01-23) that have been found.
Calibration and self-testing takes about 30 seconds.
Programming IThe manual selections you have made can be saved so that the
ACC system always starts up on these selections every time the
ignition is switched on. But notice that the ignition must have been
off for at least 10 minutes before you try out the saved setting.
1 Select the desired settings.
2 Press + at the same time.
(The ACC background lighting flashes to confirm that the informa-
tion has been stored.)
Example:
If you want the ACC system to distribute the air to the dash vents
from the start, proceed as follows:
1 Start the engine.
2 Press the button .
3 Press and at the same time.
4 Shut off the key.
5 The system will memorize this new program 10 minutes after the
key is shut off.Cancelling program I A saved setting is deleted only by pressing + at the
same time.
(The ACC display flashes to confirm that deletion has been
effected.)
ProCarManuals.com
Page 95 of 260
95 Saab 9-3 Audio System
Quick guide to the Saab 9-3
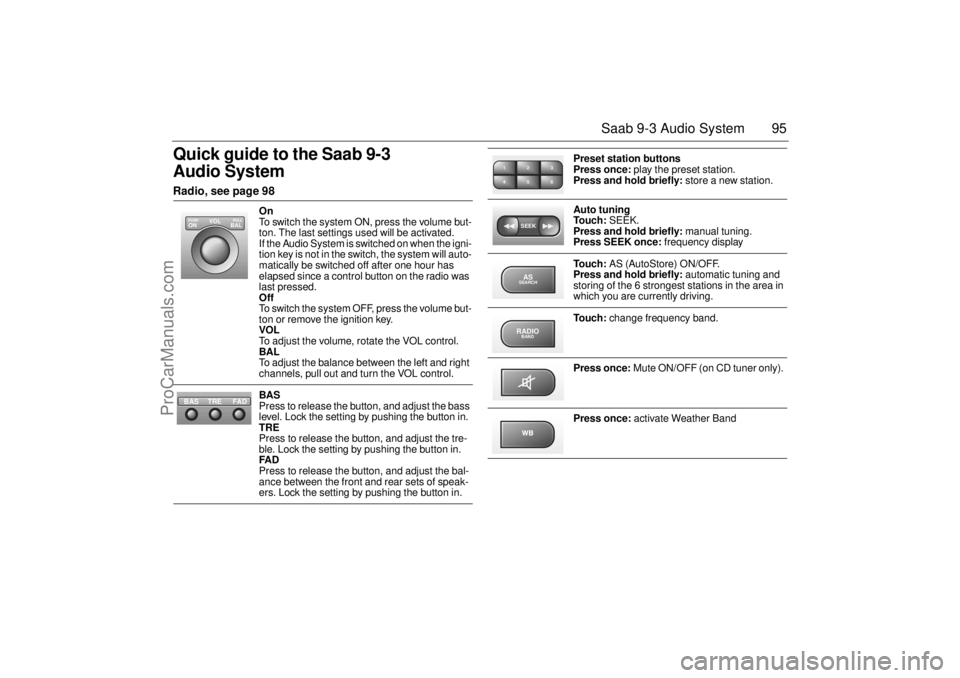
Audio System Radio, see page 98
On
To switch the system ON, press the volume but-
ton. The last settings used will be activated.
If the Audio System is switched on when the igni-
tion key is not in the switch, the system will auto-
matically be switched off after one hour has
elapsed since a control button on the radio was
last pressed.
Off
To switch the system OFF, press the volume but-
ton or remove the ignition key.
VOL
To adjust the volume, rotate the VOL control.
BAL
To adjust the balance between the left and right
channels, pull out and turn the VOL control.
BAS
Press to release the button, and adjust the bass
level. Lock the setting by pushing the button in.
TRE
Press to release the button, and adjust the tre-
ble. Lock the setting by pushing the button in.
FAD
Press to release the button, and adjust the bal-
ance between the front and rear sets of speak-
ers. Lock the setting by pushing the button in.
VOL
BAL ON
PULL PUSH
TREFAD BAS
Preset station buttons
Press once: play the preset station.
Press and hold briefly: store a new station.
Auto tuning
To u c h : SEEK.
Press and hold briefly: manual tuning.
Press SEEK once: frequency display
To u c h : AS (AutoStore) ON/OFF.
Press and hold briefly: automatic tuning and
storing of the 6 strongest stations in the area in
which you are currently driving.
To u c h : change frequency band.
Press once: Mute ON/OFF (on CD tuner only).
Press once: activate Weather Band
2 13
5 46SEEKASSEARCHRADIOBAND
ProCarManuals.com
Page 97 of 260
97 Saab 9-3 Audio System
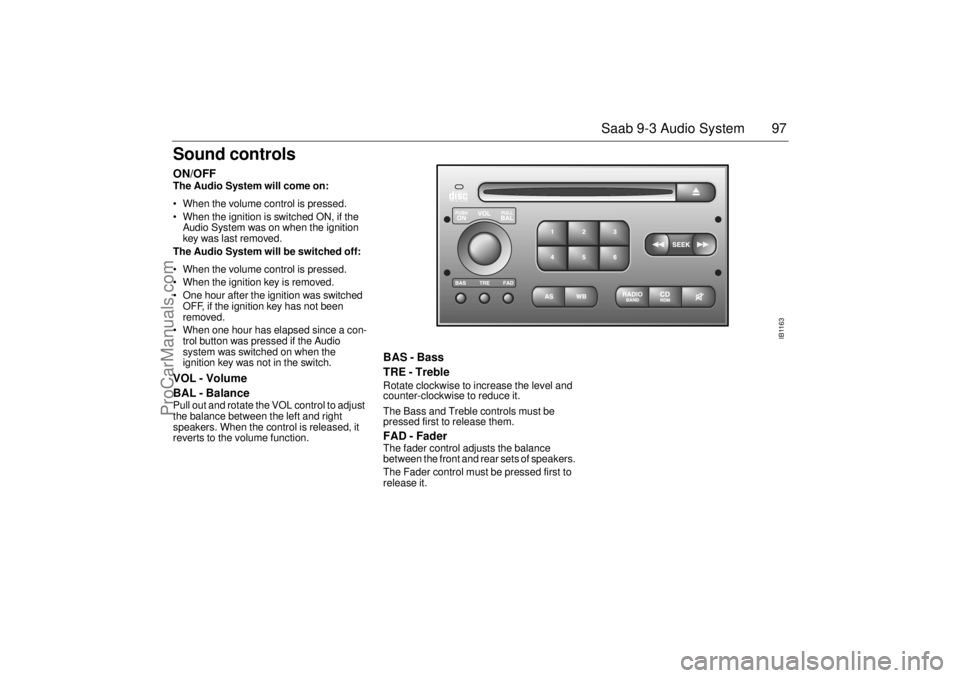
Sound controls ON/OFF The Audio System will come on:
• When the volume control is pressed.
When the ignition is switched ON, if the
Audio System was on when the ignition
key was last removed.
The Audio System will be switched off:
When the volume control is pressed.
When the ignition key is removed.
One hour after the ignition was switched
OFF, if the ignition key has not been
removed.
When one hour has elapsed since a con-
trol button was pressed if the Audio
system was switched on when the
ignition key was not in the switch. VOL - Volume
BAL - Balance Pull out and rotate the VOL control to adjust
the balance between the left and right
speakers. When the control is released, it
reverts to the volume function.
BAS - Bass
TRE - Treble Rotate clockwise to increase the level and
counter-clockwise to reduce it.
The Bass and Treble controls must be
pressed first to release them.FAD - Fader The fader control adjusts the balance
between the front and rear sets of speakers.
The Fader control must be pressed first to
release it.
IB1163
ProCarManuals.com