remote start SAAB 9-3 2003 User Guide
[x] Cancel search | Manufacturer: SAAB, Model Year: 2003, Model line: 9-3, Model: SAAB 9-3 2003Pages: 256, PDF Size: 21.66 MB
Page 112 of 256
112 Interior equipmentInterior rearview mirror with garage
opener, autodimming function and
compass (certain variants only)
Retain your original garage door opener
(transmitter) for future programming proce-
dures (i.e., new vehicle purchase). It is also
suggested that upon the sale of the vehicle,
the programmed garage opener buttons be
erased for security purposes, see page 113.Preparations for first-time programming
Before programming the garage opener for
the first time, you must delete any factory
codes.
Press and hold buttons 1 and 3 for about
20 seconds until the LED starts to flash.
This deletes the factory codes and initiates
the programming phase.
Programming the garage opener
The garage opener can record and store the
frequencies of three different remote con-
trols.
The battery in the remote control should be
fairly new for programming to work well.
1 Turn the ignition ON.
2 Hold your existing garage door opener
1–3 in. (3–7 cm) below the rearview
mirror. Sit where you can see the LED
(4) during programming.
3 Press the button on the remote control
and the desired button on the rear view
mirror at the same time.
4 The LED will now start to flash, slowly at
first and then rapidly. The rapidly flash-
ing LED indicates that programming is
complete and that you can release the
buttons.
The remote control may stop transmitting
during programming. If so, continue to hold
the button on the rearview mirror and
release and press the button on the remote
control every other second, "cycling" until
programming is completed.
WARNING
Make sure that people and objects are out
of the way of moving door or gate to
prevent potential harm or damage.
When programming the garage opener,
you may be operating a garage door or
gate operator.
Do not use the garage opener with any
garage door opener that lacks the safety
stop and reverse feature as required by
federal safety standards. (This includes
any garage door opener model manufac-
tured before April 1, 1982.). A garage
door opener which cannot detect an
object, signaling the door to stop and
reverse, does not meet current federal
safety standards. Using a garage door
opener without these features increases
risk of serious injury or death.
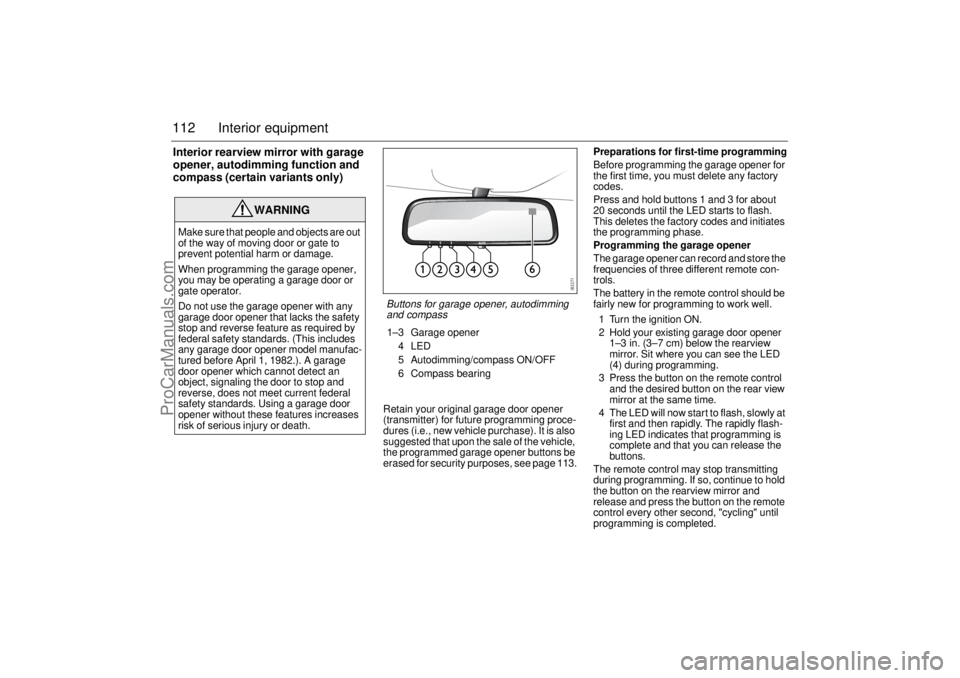
Buttons for garage opener, autodimming
and compass1–3 Garage opener
4LED
5 Autodimming/compass ON/OFF
6 Compass bearing
ProCarManuals.com
Page 113 of 256

113 Interior equipment
The LED will flash slowly at first and then
rapidly. The rapidly flashing LED indicates
that programming is complete and that you
can release the buttons.
Reprogramming a button that has previ-
ously been programmed
1 Press and hold the desired button on the
rearview mirror for the entire program-
ming sequence.
2 The LED will start to flash slowly after
20 seconds.
3 Hold your existing garage door opener
1–3 in. (3–7 cm) from the rearview
mirror and press the button on the
remote control.
4 Reprogramming is complete when the
LED starts to flash rapidly.
The previous frequency is now erased and
replaced by the new one. Reprogramming
one button does not affect the other buttons.Complete erase
Completely erase the memory of the garage
opener by pressing and holding buttons
1 and 3 simultaneously for 20 seconds.
Confirmation is provided by the LED flash-
ing rapidly for 10 seconds.
A complete erase deletes the frequencies
from all three buttons. It is not possible to
erase the memory of a single button.
Opening a garage door
Press and hold the appropriate button until
the garage door starts to open.
You can of course still use your original
garage door opener even if you have pro-
grammed the garage opener in the rearview
mirror.Garage doors with rolling security codes
Garage doors with rolling security codes
manufactured after 1996 can be identified
as follows:
Read the instruction manual for the
garage door.
Programming the garage opener in the
rearview mirror seems to be successful
but the garage door does not open.
Press and hold the programmed button.
The garage door uses a rolling security
code if the LED flashes rapidly and after
2 seconds shines constantly.
If the garage door remote control uses roll-
ing security codes, proceed as follows
having programmed the garage opener:
1 Localise the button labelled "learn" or
"smart" on the motor unit of the garage
door. The location and color of this
button varies between makes.
2 Press and release the "learn" button on
the motor unit. Step 3 must be
performed within 30 seconds of Step 2.
3 Press the programmed button on the
rearview mirror twice (some garage
doors require the button to be pressed
three times; refer to the door’s instruc-
tion manual).NOTICESwitch off the power supply to the garage
door or gate (or park the car beyond the
range of the remote control) while
programming using the "cycling" method
to prevent damaging the electrical motor.
ProCarManuals.com
Page 122 of 256
122 Starting and drivingIgnition switchThe ignition switch is located on the center
console between the front seats. In cars
with automatic transmission, the remote
control can only be removed when the
selector lever is in position P.NOTICETake care not to spill drinks or to drop
crumbs over the ignition switch. If dirt or
liquid gets into it, the switch may not
operate properly.
WARNING
• Always remove the remote control
before leaving children unattended in
the car.
Apply the parking brake before remov-
ing the remote control.
Never remove the remote control
while the car is moving. This will acti-
vate the steering wheel lock and make
it impossible to steer the car.
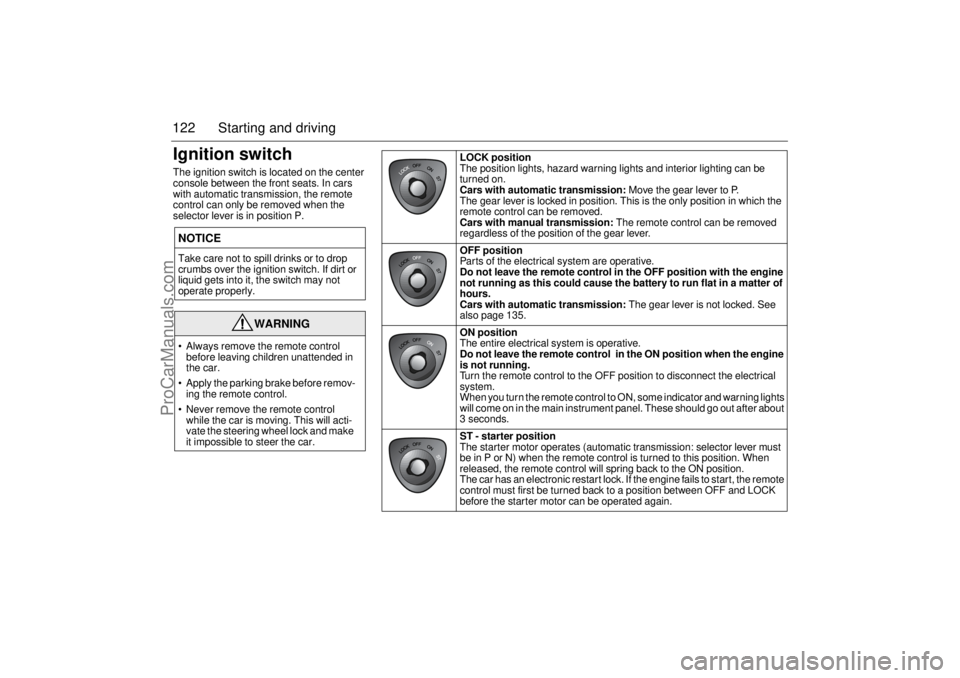
LOCK position
The position lights, hazard warning lights and interior lighting can be
turned on.
Cars with automatic transmission: Move the gear lever to P.
The gear lever is locked in position. This is the only position in which the
remote control can be removed.
Cars with manual transmission: The remote control can be removed
regardless of the position of the gear lever.
OFF position
Parts of the electrical system are operative.
Do not leave the remote control in the OFF position with the engine
not running as this could cause the battery to run flat in a matter of
hours.
Cars with automatic transmission: The gear lever is not locked. See
also page 135.
ON position
The entire electrical system is operative.
Do not leave the remote control in the ON position when the engine
is not running.
Turn the remote control to the OFF position to disconnect the electrical
system.
When you turn the remote control to ON, some indicator and warning lights
will come on in the main instrument panel. These should go out after about
3 seconds.
ST - starter position
The starter motor operates (automatic transmission: selector lever must
be in P or N) when the remote control is turned to this position. When
released, the remote control will spring back to the ON position.
The car has an electronic restart lock. If the engine fails to start, the remote
control must first be turned back to a position between OFF and LOCK
before the starter motor can be operated again.
ProCarManuals.com
Page 123 of 256
123 Starting and driving
Steering wheel lockThe steering wheel lock is electronic. The
lock engages when the remote control is
removed from the ignition and unlocks when
the remote control is inserted. A click can be
heard when the steering wheel lock locks
and unlocks.
If the car is parked with one front wheel
touching the curb, for example, you may
need to turn the steering wheel slightly
when you insert the remote control to allow
the steering wheel lock to unlock. If you do
not succeed on first attempt you must
remove the remote control before trying
again. Turn the steering wheel and insert
the remote control into the ignition switch.
If the steering wheel lock does not disen-
gage it will not be possible to turn the remote
control in the ignition switch.
The following message is shown on the SID:If a fault arises affecting the steering wheel
lock, the following message will be
displayed on the SID:
If the steering wheel lock malfunctions while
the remote control is in the ignition switch,
this may prevent the removal of the remote
control or prevent the car from being
restarted once the engine has been
switched off.
If you have to leave the car, lock the car by
pressing down the lock buttons on the
doors. Lock the front left door from outside
with the traditional key (see page 40). The
car is now locked but the alarm is inactive.
Starting the engine
Steering wheel locked.
Pull out key, turn steering
wheel. Try again.
Steering lock malfunc.
Make a safe stop.
Contact Saab dealer.
WARNING
When starting the engine:
- Sit down in the driver’s seat.
- Depress the clutch pedal fully. If the
gear lever is not in the neutral position,
the clutch pedal must be fully
depressed or the car will jump
forwards or backwards, which may
cause a crash.
- Never start the car from outside the
vehicle, e.g. through a window that is
down. This could lead to serious
personal injury.
Cars with automatic transmission:
select position P to remove the ignition
key. The key can only be removed in
this gear position.
Carbon monoxide (CO) is a colorless,
odorless, poisonous gas. Be alert to
the danger of CO – always open the
garage doors before starting the
engine in the garage.
Do not rest or sleep in the car when
parked with the engine running. There
is a risk of depressing the accelerator
which could lead to engine damage.
There is also a danger of CO poison-
ing if the exhaust system is leaking.
ProCarManuals.com
Page 124 of 256

124 Starting and drivingDo not run the starter motor for more than
25 seconds at a time. Wait 20–30 seconds
before running the starter again, to give the
battery time to recover.
Avoid racing the engine or putting a heavy
load on it before it has warmed up. Let the
engine idle for at least 10 seconds and then
drive away as long as the engine oil warning
light has gone out to enable the engine to
attain its normal temperature as quickly as
possible
It is possible for air to enter the lubricating
system in conjunction with an oil or oil-filter
change, or if the car has been stored for
some time. This air can cause the hydraulic
cam followers to emit a ticking noise, which
can persist for up to 15 minutes after start-
ing. Although this is quite normal and does
not indicate any malfunction, it is advisable
not to exceed 3,000 rpm before the noise
has disappeared.
Starting the engineAvoid racing the engine or loading it heavily
before it has warmed up. Do not drive away
before the warning and indicator lights have
gone out.
The engine has an automatic choke and
should be started as follows:
Cars with manual transmission
To start the engine the clutch pedal must
be fully depressed.
1 Make sure the parking brake is applied.
2 Depress the clutch pedal but do not
touch the accelerator.
3 Start the engine. Let the remote control
spring back as soon as the engine has
started and is running smoothly.
Allow the engine to idle for about
10 seconds. Do not apply full throttle for at
least 3 minutes after starting.Cars with automatic transmission
The selector lever must be in the P or N
position.
1 The selector lever must be in the P or N
position.
2 Keep your foot on the brake pedal.
Note! Once the engine has started, the
brake pedal will sink. This is perfectly
normal.
3 Start the engine. Let the remote control
spring back as soon as the engine has
started and is running smoothly.
Allow the engine to idle for about
10 seconds. Do not apply full throttle for at
least 3 minutes after starting.
ProCarManuals.com
Page 134 of 256
134 Starting and drivingAutomatic transmissionThe automatic transmission has an elec-
tronic control module. The control module
receives information including accelerator
position and road speed. Using this and
other information, it controls the hydraulic
pressure of the transmission to ensure that
gear changing is as smooth as possible.The remote control can only be removed
when the selector lever is in the P position.The engine can only be started when the
selector lever is in the P or N position.
When the car is stationary, the engine must
be idling when you move the selector lever
from one position to another. If not, the
transmission could be damaged.
WARNING
Depress the brake pedal when shifting
the selector lever from P or N.
The car must be at a standstill before
P, R or N is selected. You have to have
your foot on the brake pedal to move
the lever out of P. If the car is still
moving when a drive position is subse-
quently selected, this could cause a
crash or damage the automatic trans-
mission.
Never park the car with the selector
lever in a drive position, even if the
parking brake is on.
If you want to leave the car with the
engine running, move the selector
lever to P or N and apply the parking
brake.
NOTICEAfter selecting a drive position, pause
briefly to allow the gear to engage (the car
starts to pull a little) before you acceler-
ate.
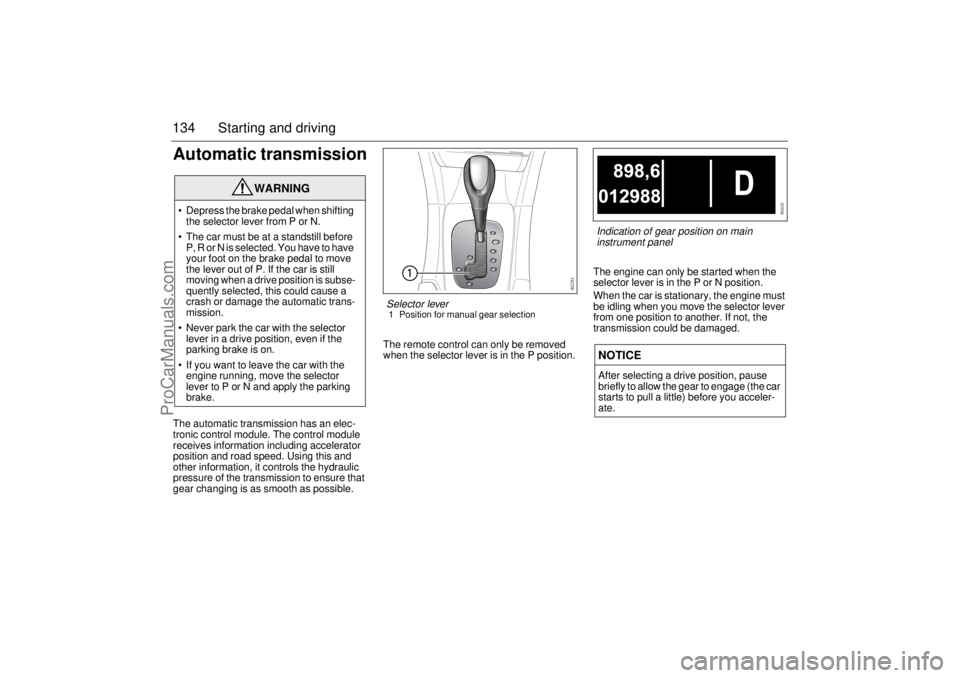
Selector lever1 Position for manual gear selection
Indication of gear position on main
instrument panel
ProCarManuals.com
Page 145 of 256
145 Starting and driving
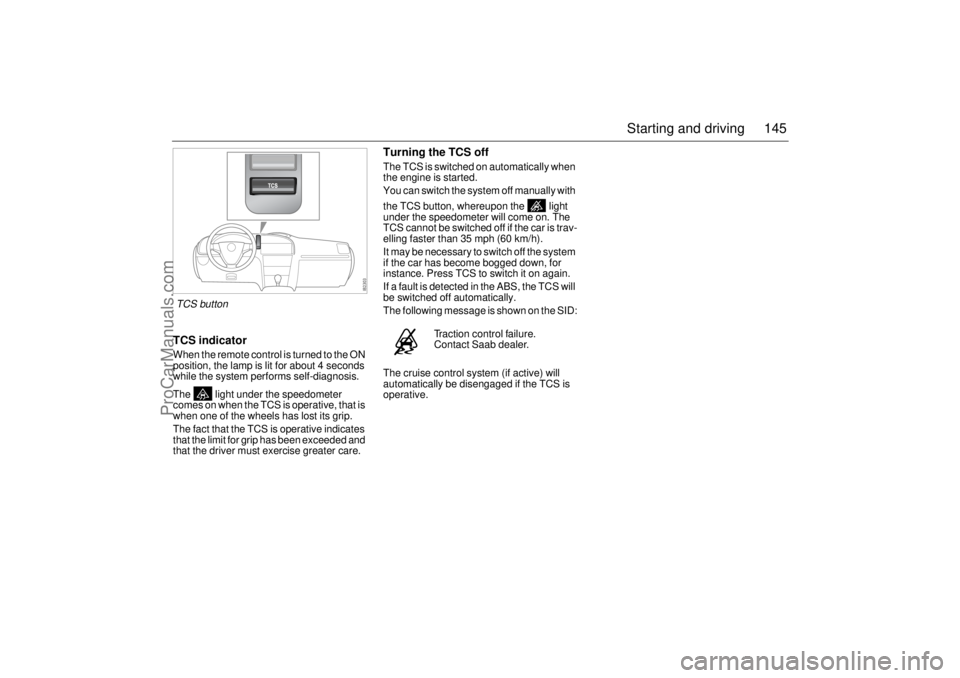
TCS indicatorWhen the remote control is turned to the ON
position, the lamp is lit for about 4 seconds
while the system performs self-diagnosis.
The light under the speedometer
comes on when the TCS is operative, that is
when one of the wheels has lost its grip.
The fact that the TCS is operative indicates
that the limit for grip has been exceeded and
that the driver must exercise greater care.
Turning the TCS offThe TCS is switched on automatically when
the engine is started.
You can switch the system off manually with
the TCS button, whereupon the light
under the speedometer will come on. The
TCS cannot be switched off if the car is trav-
elling faster than 35 mph (60 km/h).
It may be necessary to switch off the system
if the car has become bogged down, for
instance. Press TCS to switch it on again.
If a fault is detected in the ABS, the TCS will
be switched off automatically.
The following message is shown on the SID:
The cruise control system (if active) will
automatically be disengaged if the TCS is
operative.
Traction control failure.
Contact Saab dealer.
TCS button
ProCarManuals.com
Page 147 of 256
147 Starting and driving
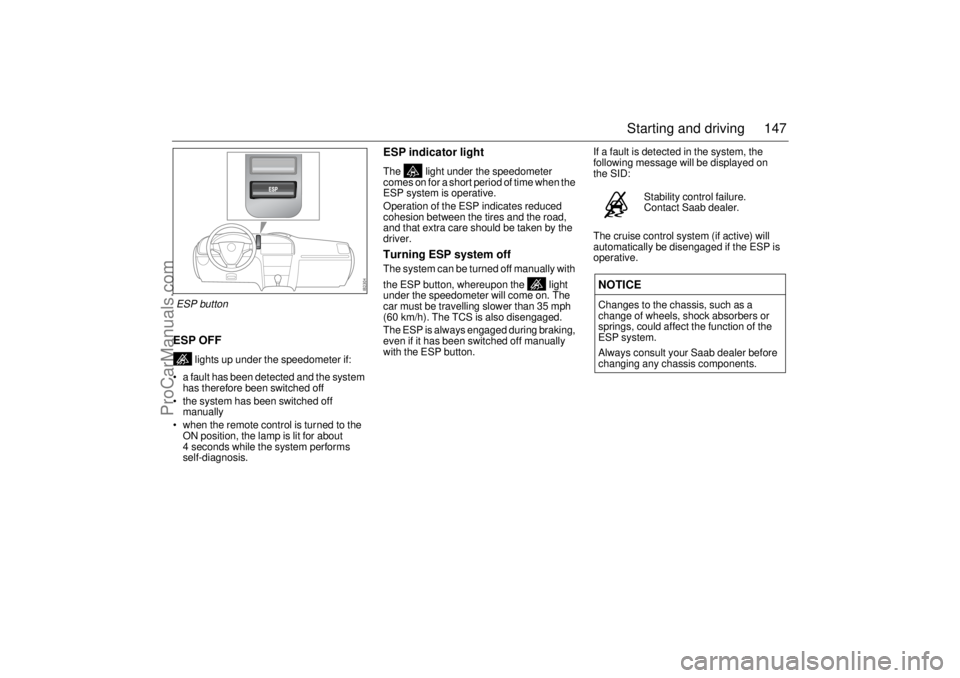
ESP OFF
lights up under the speedometer if:
a fault has been detected and the system
has therefore been switched off
the system has been switched off
manually
when the remote control is turned to the
ON position, the lamp is lit for about
4 seconds while the system performs
self-diagnosis.
ESP indicator lightThe light under the speedometer
comes on for a short period of time when the
ESP system is operative.
Operation of the ESP indicates reduced
cohesion between the tires and the road,
and that extra care should be taken by the
driver.Turning ESP system offThe system can be turned off manually with
the ESP button, whereupon the light
under the speedometer will come on. The
car must be travelling slower than 35 mph
(60 km/h). The TCS is also disengaged.
The ESP is always engaged during braking,
even if it has been switched off manually
with the ESP button.If a fault is detected in the system, the
following message will be displayed on
the SID:
The cruise control system (if active) will
automatically be disengaged if the ESP is
operative.
Stability control failure.
Contact Saab dealer.
NOTICEChanges to the chassis, such as a
change of wheels, shock absorbers or
springs, could affect the function of the
ESP system.
Always consult your Saab dealer before
changing any chassis components.
ESP button
ProCarManuals.com
Page 148 of 256
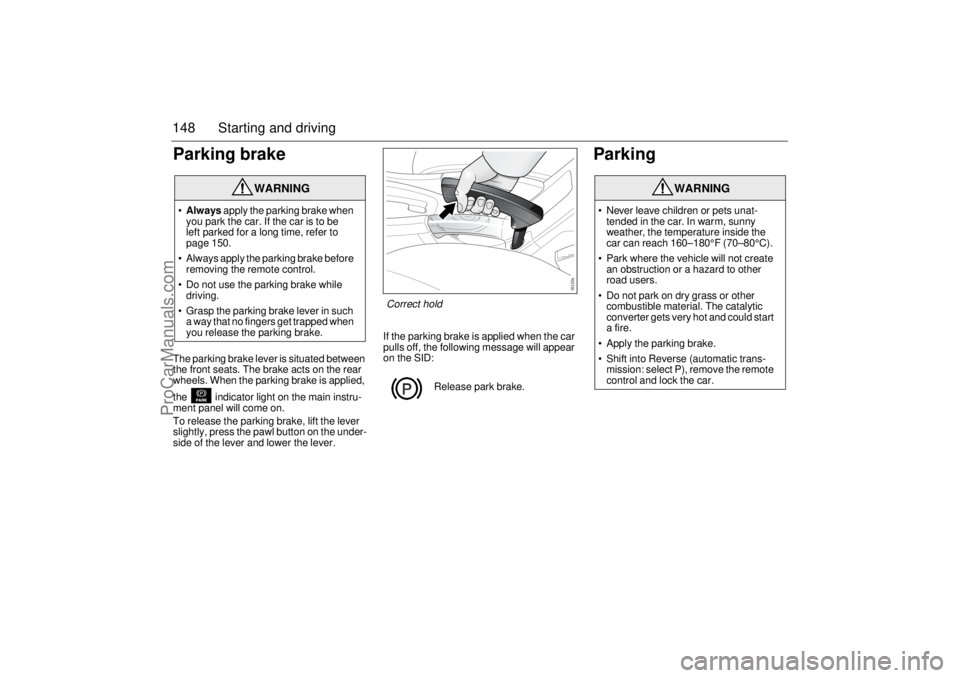
148 Starting and drivingParking brakeThe parking brake lever is situated between
the front seats. The brake acts on the rear
wheels. When the parking brake is applied,
the indicator light on the main instru-
ment panel will come on.
To release the parking brake, lift the lever
slightly, press the pawl button on the under-
side of the lever and lower the lever.If the parking brake is applied when the car
pulls off, the following message will appear
on the SID:
Parking
WARNING
Always apply the parking brake when
you park the car. If the car is to be
left parked for a long time, refer to
page 150.
Always apply the parking brake before
removing the remote control.
Do not use the parking brake while
driving.
Grasp the parking brake lever in such
a way that no fingers get trapped when
you release the parking brake.
Release park brake.
WARNING
Never leave children or pets unat-
tended in the car. In warm, sunny
weather, the temperature inside the
car can reach 160–180°F (70–80°C).
Park where the vehicle will not create
an obstruction or a hazard to other
road users.
Do not park on dry grass or other
combustible material. The catalytic
converter gets very hot and could start
a fire.
Apply the parking brake.
Shift into Reverse (automatic trans-
mission: select P), remove the remote
control and lock the car.
Correct hold
ProCarManuals.com
Page 149 of 256
149 Starting and driving
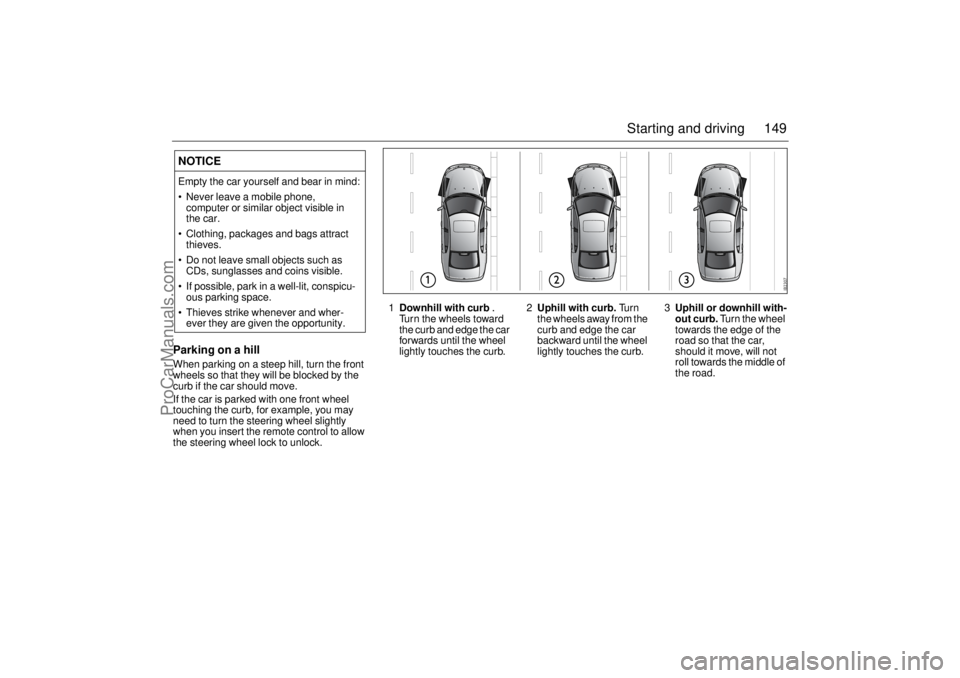
Parking on a hillWhen parking on a steep hill, turn the front
wheels so that they will be blocked by the
curb if the car should move.
If the car is parked with one front wheel
touching the curb, for example, you may
need to turn the steering wheel slightly
when you insert the remote control to allow
the steering wheel lock to unlock.NOTICEEmpty the car yourself and bear in mind:
Never leave a mobile phone,
computer or similar object visible in
the car.
Clothing, packages and bags attract
thieves.
Do not leave small objects such as
CDs, sunglasses and coins visible.
If possible, park in a well-lit, conspicu-
ous parking space.
Thieves strike whenever and wher-
ever they are given the opportunity.
1Downhill with curb
.
Turn the wheels toward
the curb and edge the car
forwards until the wheel
lightly touches the curb.2Uphill with curb. Tu r n
the wheels away from the
curb and edge the car
backward until the wheel
lightly touches the curb.3Uphill or downhill with-
out curb. Turn the wheel
towards the edge of the
road so that the car,
should it move, will not
roll towards the middle of
the road.
ProCarManuals.com