jacking SAAB 9-3 2003 Owners Manual
[x] Cancel search | Manufacturer: SAAB, Model Year: 2003, Model line: 9-3, Model: SAAB 9-3 2003Pages: 256, PDF Size: 21.66 MB
Page 8 of 256

8
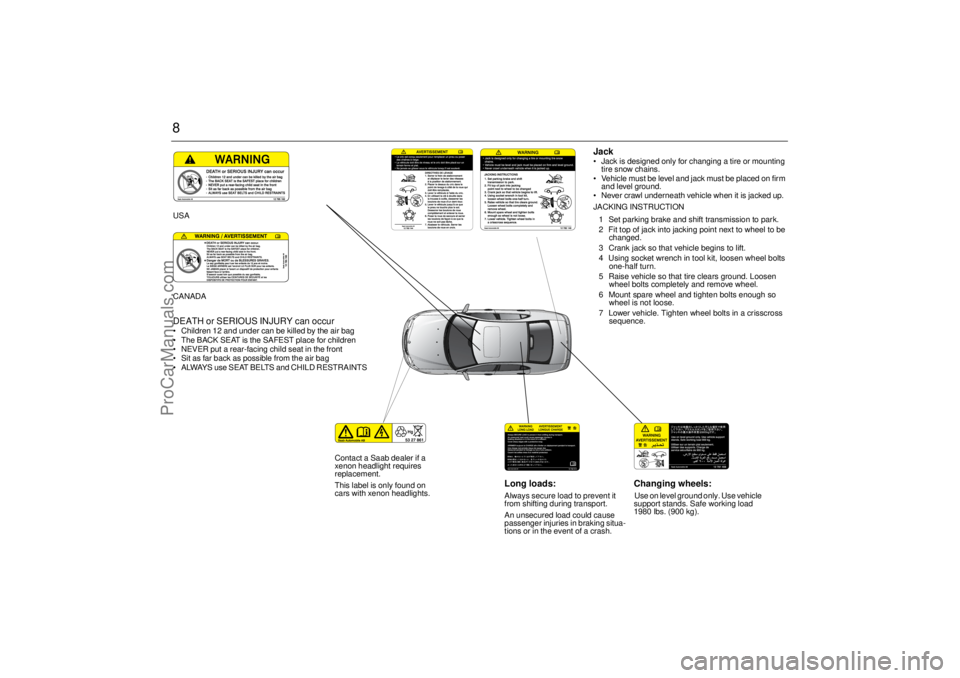
Long loads:Always secure load to prevent it
from shifting during transport.
An unsecured load could cause
passenger injuries in braking situa-
tions or in the event of a crash.
Changing wheels:Use on level ground only. Use vehicle
support stands. Safe working load
1980 lbs. (900 kg).
Contact a Saab dealer if a
xenon headlight requires
replacement.
This label is only found on
cars with xenon headlights.
DEATH or SERIOUS INJURY can occur Children 12 and under can be killed by the air bag
The BACK SEAT is the SAFEST place for children
NEVER put a rear-facing child seat in the front
Sit as far back as possible from the air bag
ALWAYS use SEAT BELTS and CHILD RESTRAINTSUSA
CANADA
Jack Jack is designed only for changing a tire or mounting
tire snow chains.
Vehicle must be level and jack must be placed on firm
and level ground.
Never crawl underneath vehicle when it is jacked up.
JACKING INSTRUCTION
1 Set parking brake and shift transmission to park.
2 Fit top of jack into jacking point next to wheel to be
changed.
3 Crank jack so that vehicle begins to lift.
4 Using socket wrench in tool kit, loosen wheel bolts
one-half turn.
5 Raise vehicle so that tire clears ground. Loosen
wheel bolts completely and remove wheel.
6 Mount spare wheel and tighten bolts enough so
wheel is not loose.
7 Lower vehicle. Tighten wheel bolts in a crisscross
sequence.
ProCarManuals.com
Page 214 of 256

214 Car careChanging a wheel
WARNING
The car jack is designed solely for use
in changing a wheel or fitting snow
chains. It must not be used to
support the car during repair work
or servicing.
Never crawl under a car that is
supported only by a jack.
Special care must be taken if the car is
on a slope - use wedge-shaped wheel
chocks!
Position chocks, one ahead and one
behind, the wheel that is diagonally
opposite to the one to be changed.
Switch on the hazard warning lights if
the car is on a road.
Apply the parking brake and leave the
car in gear (1st or reverse). Automatic
transmission: move the selector lever
to the P position.
Ensure that everybody is out of the car
before jacking it up.
Never start the engine while the car is
jacked up.
If possible, make sure the jack is
standing on a firm, level surface.
The jack should be stored correctly
under the carpeting in the trunk. If it
lies loose in the car, it could thrown
forward and cause personal injury in
the event of a crash or if the car rolls
over.
Do not use the jack on a car other than
your Saab 9-3.
Grit, salt and rust can clog the inner
threads if the car has been driven for
several years exclusively with alloy
wheels.
If steel wheels are now fitted, the bolt
hole threads in the brake hubs should
be cleaned before the thinner steel
wheels are fitted. It may otherwise not
be possible to achieve the correct
clamping force, despite tightening the
wheel bolts to the correct torque.
ProCarManuals.com
Page 215 of 256

215 Car care
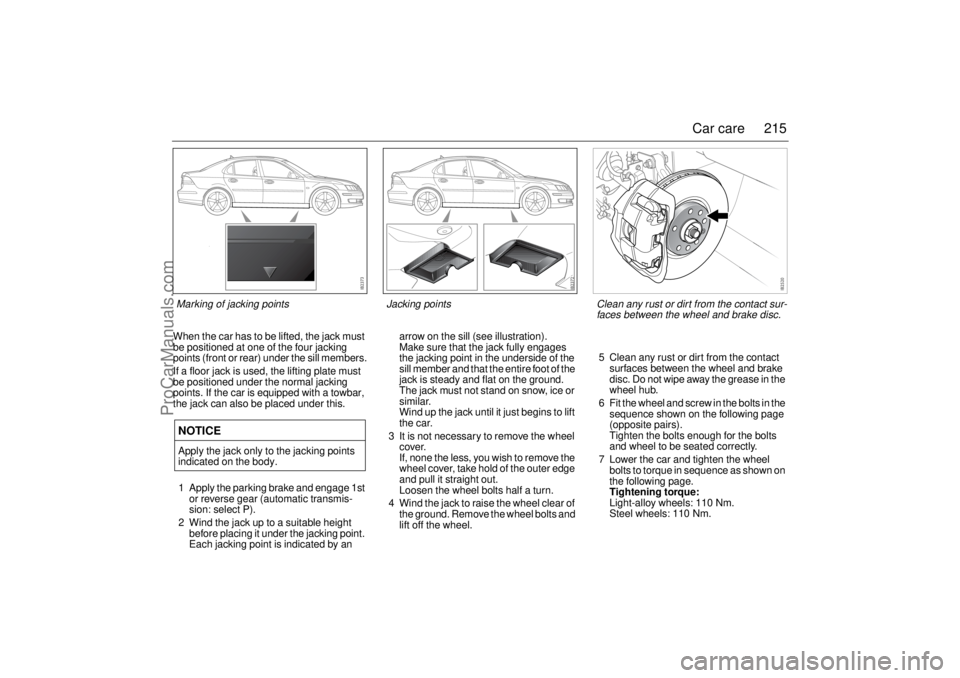
When the car has to be lifted, the jack must
be positioned at one of the four jacking
points (front or rear) under the sill members.
If a floor jack is used, the lifting plate must
be positioned under the normal jacking
points. If the car is equipped with a towbar,
the jack can also be placed under this.
1 Apply the parking brake and engage 1st
or reverse gear (automatic transmis-
sion: select P).
2 Wind the jack up to a suitable height
before placing it under the jacking point.
Each jacking point is indicated by an arrow on the sill (see illustration).
Make sure that the jack fully engages
the jacking point in the underside of the
sill member and that the entire foot of the
jack is steady and flat on the ground.
The jack must not stand on snow, ice or
similar.
Wind up the jack until it just begins to lift
the car.
3 It is not necessary to remove the wheel
cover.
If, none the less, you wish to remove the
wheel cover, take hold of the outer edge
and pull it straight out.
Loosen the wheel bolts half a turn.
4 Wind the jack to raise the wheel clear of
the ground. Remove the wheel bolts and
lift off the wheel.5 Clean any rust or dirt from the contact
surfaces between the wheel and brake
disc. Do not wipe away the grease in the
wheel hub.
6 Fit the wheel and screw in the bolts in the
sequence shown on the following page
(opposite pairs).
Tighten the bolts enough for the bolts
and wheel to be seated correctly.
7 Lower the car and tighten the wheel
bolts to torque in sequence as shown on
the following page.
Tightening torque:
Light-alloy wheels: 110 Nm.
Steel wheels: 110 Nm.NOTICEApply the jack only to the jacking points
indicated on the body.
Jacking points
Marking of jacking points
Clean any rust or dirt from the contact sur-
faces between the wheel and brake disc.
ProCarManuals.com