lock SAAB 9-3 2005 Manual Online
[x] Cancel search | Manufacturer: SAAB, Model Year: 2005, Model line: 9-3, Model: SAAB 9-3 2005Pages: 292, PDF Size: 23 MB
Page 211 of 292
209 Car care
Always connect the positive (red) cable to
the battery’s positive (+) terminal, and the
negative (black) cable to the negative (-)
terminal of the battery. Always disconnect
both battery leads when boost charging the
battery.
A car with standard equipment specifica-
tions and a fully charged battery can be left
for up to 40 days and still have a sufficient
charge for starting. If extra equipment is fit-
ted, such as a mobile phone, the charge
may only be sufficient for about 15 days.NOTICE If boost charging never use anything
but a 12-volt charger, see page 193.
Do not connect the battery termi-
nals, + and –, incorrectly.
Serious damage can occur to the car’s
electrical system if a battery or alterna-
tor lead is disconnected while the
engine is running.
Exercise special care when removing
and fitting the positive (+) cable so as
not to damage the battery disconnect
switch.
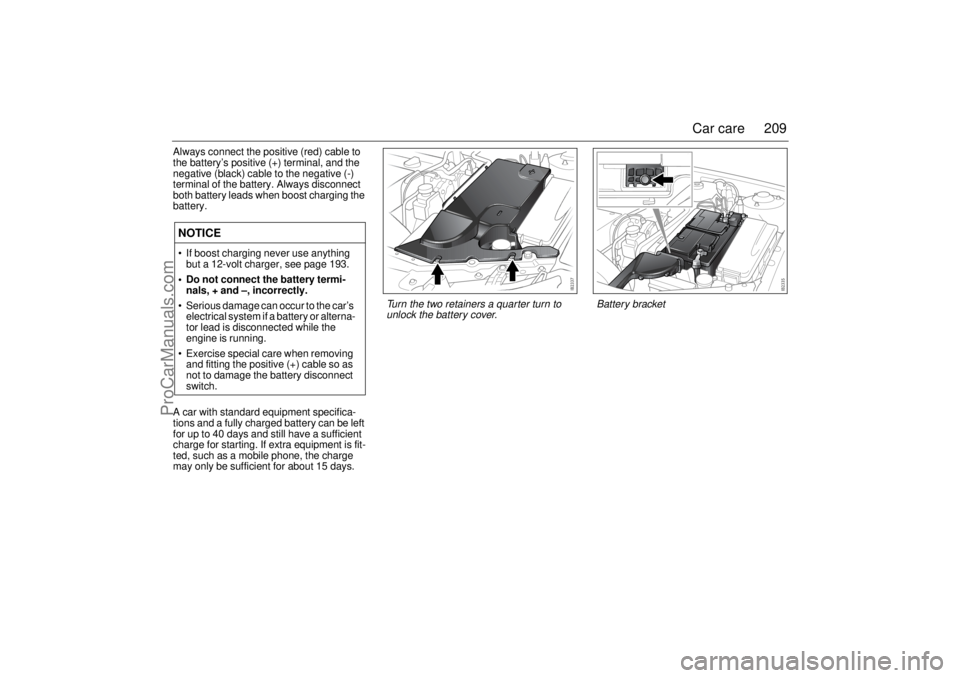
Turn the two retainers a quarter turn to
unlock the battery cover.
Battery bracket
ProCarManuals.com
Page 217 of 292

215 Car care
Low beam, halogenLeft-hand side
1 Lift aside the hose running along the side of the battery cover.
2 Release the two retainers (a quarter of a turn counterclockwise)
in the leading edge of the cover and remove the cover.
3 Pull up the washer fluid filler pipe.
4 Remove the air pipe from the front edge of the battery box.
5 Pull up the fuse panel in front of the battery (certain variants),
see page 233.
Both sides
1 Remove the cover from the rear of the headlight.
2 Twist the bulb holder counterclockwise and withdraw the holder
from the reflector.
3 Change the bulb without touching the glass with your fingers.
Insert the bulb holder into the reflector and twist it clockwise until
it locks.4 Refit the cover over the rear of the headlight.
Left-hand side
5 Refit the air pipe to the front of the battery box.
6 Refit the washer fluid filler pipe.
7 Refit the battery cover.
NOTICEDo not fit bulbs with a higher rating than 55 W as this could
damage the headlight reflector. Furthermore, the car’s wiring is
not designed to cope with higher wattages.
Retainers on the battery cover Changing the low beam bulb
ProCarManuals.com
Page 218 of 292
216 Car careHigh beam, halogenLeft-hand side
1 Lift aside the hose running along the side of the battery cover.
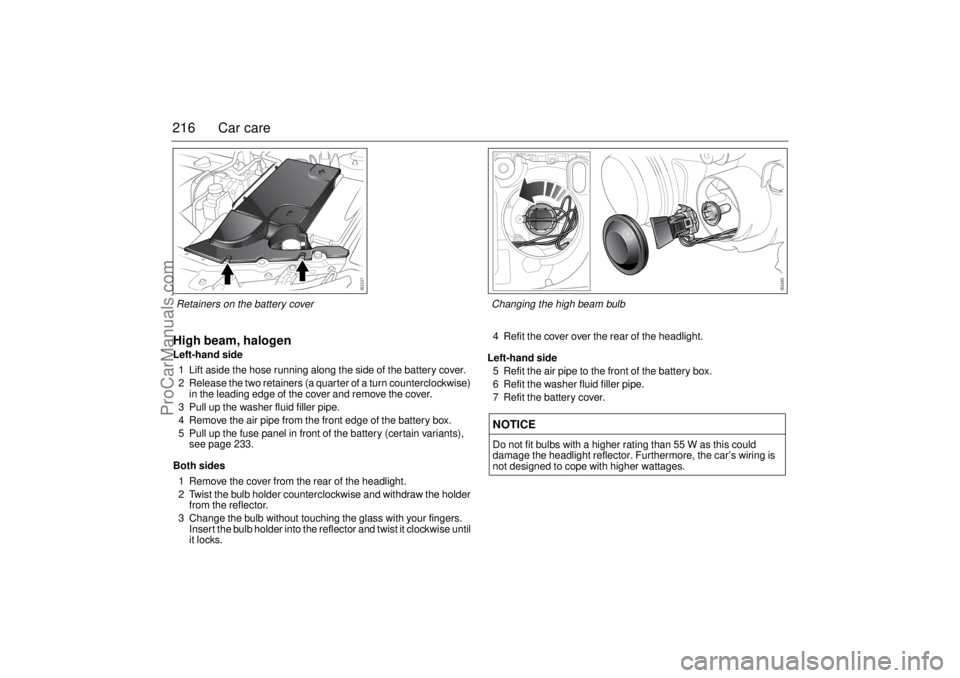
2 Release the two retainers (a quarter of a turn counterclockwise)
in the leading edge of the cover and remove the cover.
3 Pull up the washer fluid filler pipe.
4 Remove the air pipe from the front edge of the battery box.
5 Pull up the fuse panel in front of the battery (certain variants),
see page 233.
Both sides
1 Remove the cover from the rear of the headlight.
2 Twist the bulb holder counterclockwise and withdraw the holder
from the reflector.
3 Change the bulb without touching the glass with your fingers.
Insert the bulb holder into the reflector and twist it clockwise until
it locks.4 Refit the cover over the rear of the headlight.
Left-hand side
5 Refit the air pipe to the front of the battery box.
6 Refit the washer fluid filler pipe.
7 Refit the battery cover.
NOTICEDo not fit bulbs with a higher rating than 55 W as this could
damage the headlight reflector. Furthermore, the car’s wiring is
not designed to cope with higher wattages.
Retainers on the battery cover Changing the high beam bulb
ProCarManuals.com
Page 220 of 292
218 Car careBoth sides:
1 The bulb holder has a bayonet fitting.
Turn the bulb holder counterclockwise
and withdraw it.
2 The bulb also has a bayonet fitting.
Press in the bulb and twist it counter-
clockwise.
3 Fit the new bulb.
4 To facilitate fitting, look in through the
headlight lens when fitting the bulb.
Check that the new bulb is firmly seated.
Left-hand side:
5 Refit the air pipe to the front edge of the
battery box.
6 Refit the washer fluid filler pipe.
7 Refit the battery cover and hose.
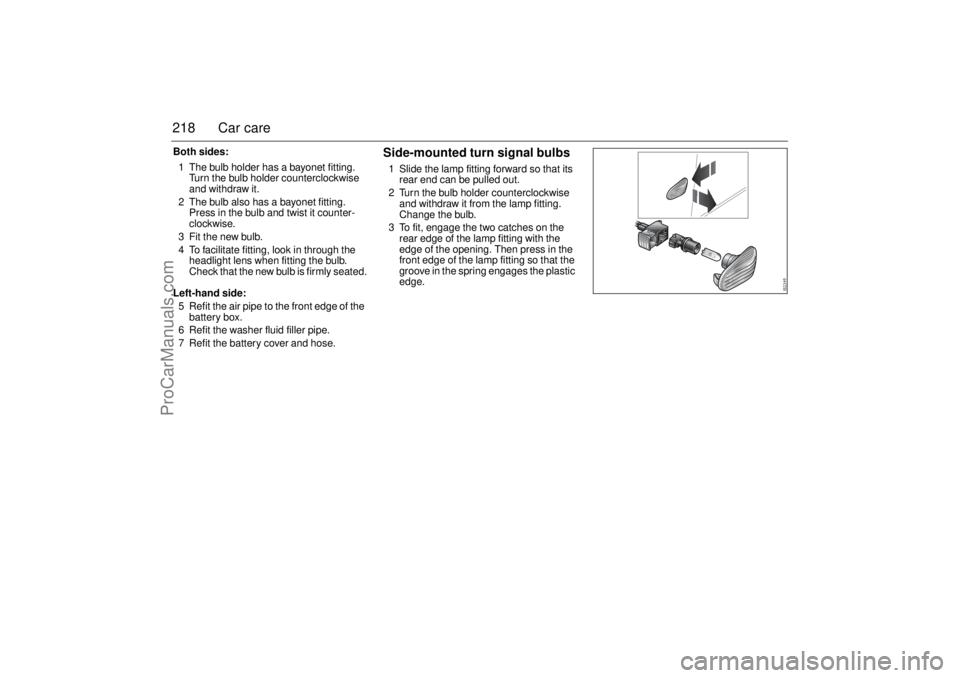
Side-mounted turn signal bulbs1 Slide the lamp fitting forward so that its
rear end can be pulled out.
2 Turn the bulb holder counterclockwise
and withdraw it from the lamp fitting.
Change the bulb.
3 To fit, engage the two catches on the
rear edge of the lamp fitting with the
edge of the opening. Then press in the
front edge of the lamp fitting so that the
groove in the spring engages the plastic
edge.
ProCarManuals.com
Page 222 of 292
220 Car care
Stop lights, taillights and turn
signal bulbs, Sport Sedan1 Lower the cover in the trim behind the
lights.
Right-hand side: Unlock the plastic rivet
by depressing the centre no more than
3 mm. Take hold of the collar of the rivet
and pull it out. Refer also to page 221.
2 Lift the plastic lug on the lamp housing
that secures the bulb holder.
3 Carefully remove the entire bulb holder
unit from the lamp housing. Change the
bulb.
4 Refit the bulb holder. Press the bulb
holder home so that the plastic lug
snaps into place.
Stop lights, taillights and turn
signal bulbs, Convertible1 Remove the cover.
2 Carefully remove the bulb holder with
the broken bulb.The bulb holder has a
bayonet fitting.
3 Change the bulb.
4 Refit the bulb holder and cover.
If a stop light bulb fails, the adjacent taillight
will act as a stop light to ensure traffic safety.
Change the broken bulb when possible.
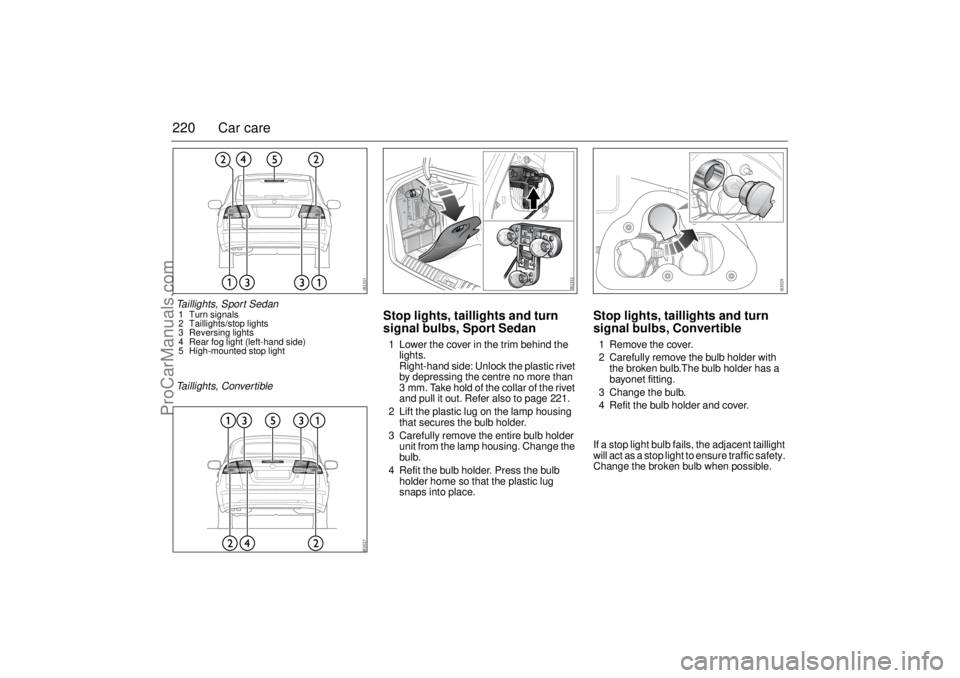
Taillights, Sport Sedan1 Turn signals
2 Taillights/stop lights
3 Reversing lights
4 Rear fog light (left-hand side)
5 High-mounted stop lightTaillights, Convertible
ProCarManuals.com
Page 223 of 292
221 Car care
Reversing lights and rear fog
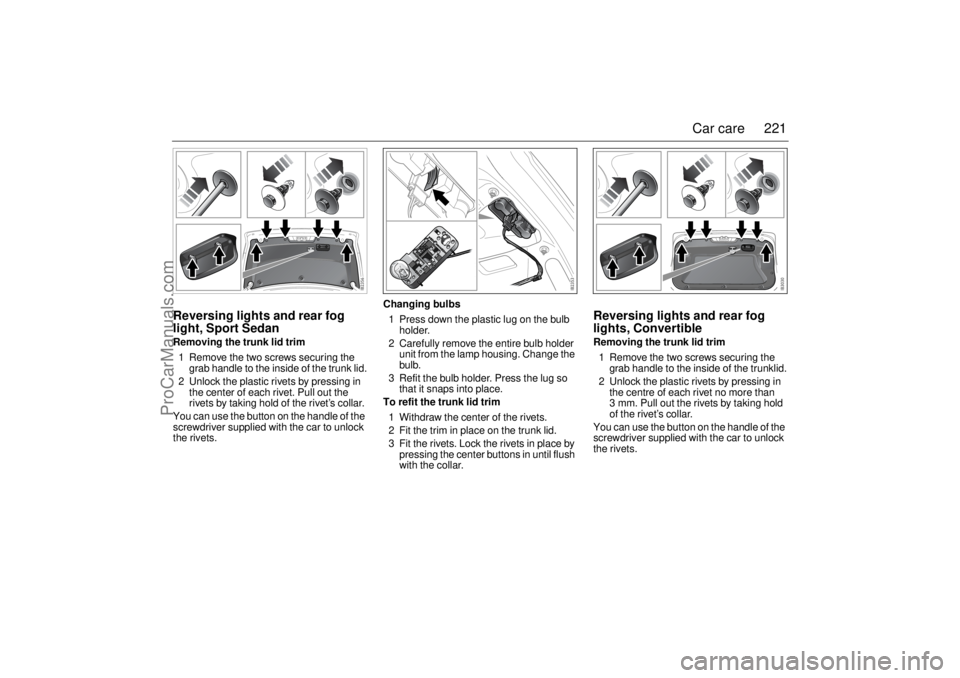
light, Sport SedanRemoving the trunk lid trim
1 Remove the two screws securing the
grab handle to the inside of the trunk lid.
2 Unlock the plastic rivets by pressing in
the center of each rivet. Pull out the
rivets by taking hold of the rivet’s collar.
You can use the button on the handle of the
screwdriver supplied with the car to unlock
the rivets.Changing bulbs
1 Press down the plastic lug on the bulb
holder.
2 Carefully remove the entire bulb holder
unit from the lamp housing. Change the
bulb.
3 Refit the bulb holder. Press the lug so
that it snaps into place.
To refit the trunk lid trim
1 Withdraw the center of the rivets.
2 Fit the trim in place on the trunk lid.
3 Fit the rivets. Lock the rivets in place by
pressing the center buttons in until flush
with the collar.
Reversing lights and rear fog
lights, ConvertibleRemoving the trunk lid trim
1 Remove the two screws securing the
grab handle to the inside of the trunklid.
2 Unlock the plastic rivets by pressing in
the centre of each rivet no more than
3 mm. Pull out the rivets by taking hold
of the rivet’s collar.
You can use the button on the handle of the
screwdriver supplied with the car to unlock
the rivets.
ProCarManuals.com
Page 224 of 292
222 Car careChanging bulbs
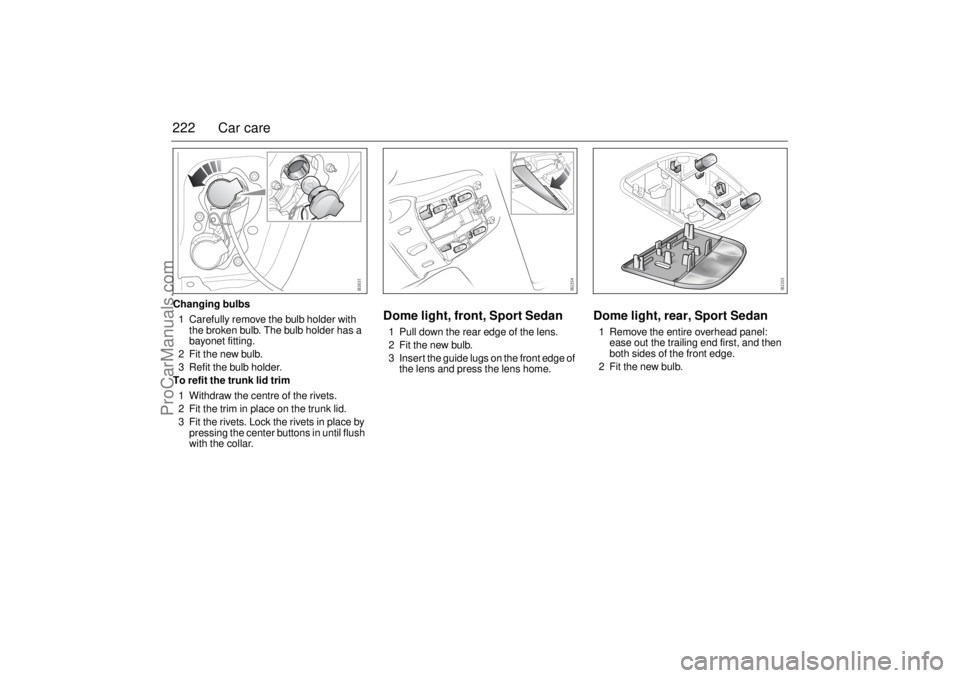
1 Carefully remove the bulb holder with
the broken bulb. The bulb holder has a
bayonet fitting.
2 Fit the new bulb.
3 Refit the bulb holder.
To refit the trunk lid trim
1 Withdraw the centre of the rivets.
2 Fit the trim in place on the trunk lid.
3 Fit the rivets. Lock the rivets in place by
pressing the center buttons in until flush
with the collar.
Dome light, front, Sport Sedan1 Pull down the rear edge of the lens.
2 Fit the new bulb.
3 Insert the guide lugs on the front edge of
the lens and press the lens home.
Dome light, rear, Sport Sedan1 Remove the entire overhead panel:
ease out the trailing end first, and then
both sides of the front edge.
2 Fit the new bulb.
ProCarManuals.com
Page 231 of 292
229 Car care
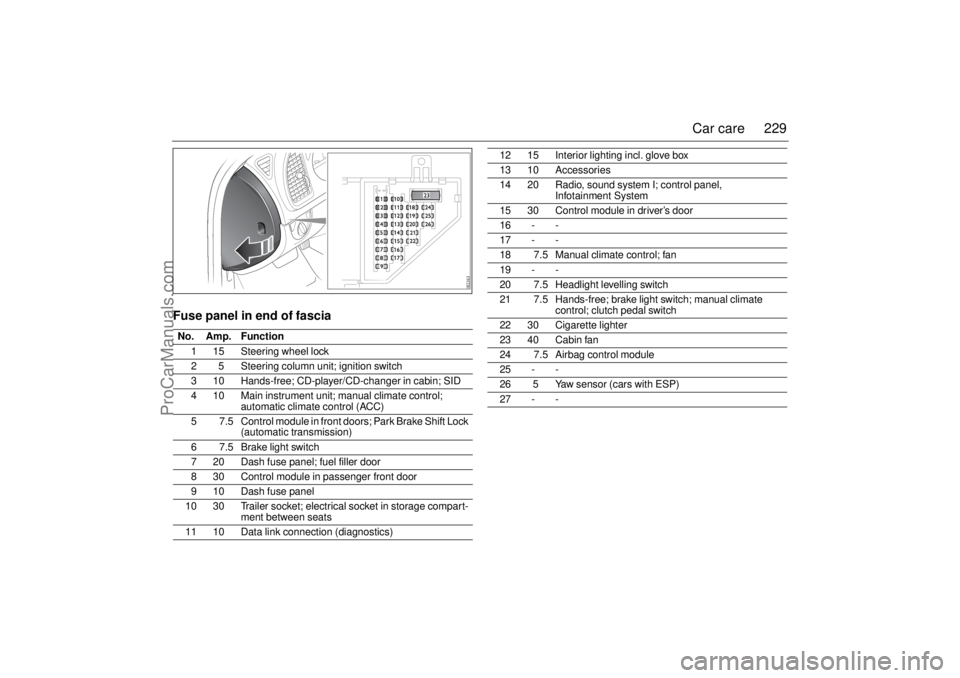
Fuse panel in end of fasciaNo. Amp. Function
1 15 Steering wheel lock
2 5 Steering column unit; ignition switch
3 10 Hands-free; CD-player/CD-changer in cabin; SID
4 10 Main instrument unit; manual climate control;
automatic climate control (ACC)
5 7.5 Control module in front doors; Park Brake Shift Lock
(automatic transmission)
6 7.5 Brake light switch
7 20 Dash fuse panel; fuel filler door
8 30 Control module in passenger front door
9 10 Dash fuse panel
10 30 Trailer socket; electrical socket in storage compart-
ment between seats
11 10 Data link connection (diagnostics)
12 15 Interior lighting incl. glove box
13 10 Accessories
14 20 Radio, sound system I; control panel,
Infotainment System
15 30 Control module in driver’s door
16 - -
17 - -
18 7.5 Manual climate control; fan
19 - -
20 7.5 Headlight levelling switch
21 7.5 Hands-free; brake light switch; manual climate
control; clutch pedal switch
22 30 Cigarette lighter
23 40 Cabin fan
24 7.5 Airbag control module
25 - -
26 5 Yaw sensor (cars with ESP)
27 - -
ProCarManuals.com
Page 250 of 292
248 Car careChanging a tire
WARNING
Lifting a vehicle and getting under it to do
maintenance or repairs is dangerous
without the appropriate safety equipment
and training. The jack provided with your
vehicle is designed only for changing a
flat tire. If it is used for anything else, you
or others could be badly injured or killed if
the vehicle slips off the jack. Use the jack
provided with your vehicle only for chang-
ing a flat tire.
Changing a tire can be dangerous. The
vehicle can slip off the jack and roll over
or fall on you or other people. You and
they could be badly injured or even killed.
Find a level place to change your tire. To
help prevent the vehicle from moving:
1 Set the parking brake firmly.
2 If you have an automatic transmis-
sion, put the shift lever in PARK (P).
For a manual transmission, leave the
car in gear (1st or REVERSE (R)).
3 Turn off the engine and do not restart
while the vehicle is raised.
4 Do not allow passengers to remain in
the vehicle.
To be even more certain the vehicle won't
move, you should put blocks at the front
and rear of the tire farthest away from the
one being changed. That would be the
tire, on the other side, at the opposite end
of the vehicle.
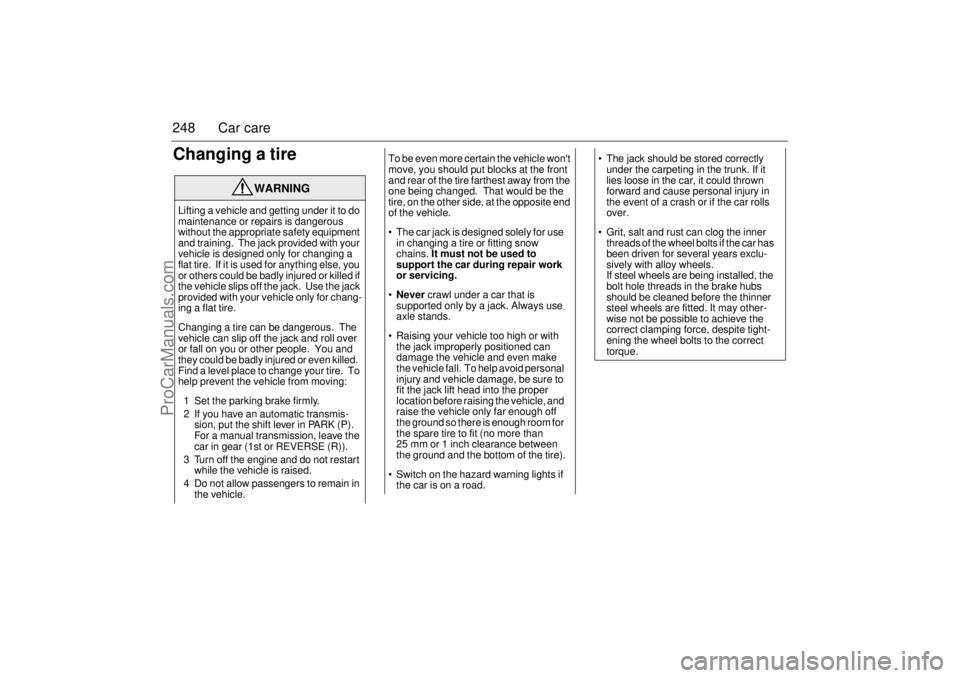
The car jack is designed solely for use
in changing a tire or fitting snow
chains. It must not be used to
support the car during repair work
or servicing.
Never crawl under a car that is
supported only by a jack. Always use
axle stands.
Raising your vehicle too high or with
the jack improperly positioned can
damage the vehicle and even make
the vehicle fall. To help avoid personal
injury and vehicle damage, be sure to
fit the jack lift head into the proper
location before raising the vehicle, and
raise the vehicle only far enough off
the ground so there is enough room for
the spare tire to fit (no more than
25 mm or 1 inch clearance between
the ground and the bottom of the tire).
Switch on the hazard warning lights if
the car is on a road.
The jack should be stored correctly
under the carpeting in the trunk. If it
lies loose in the car, it could thrown
forward and cause personal injury in
the event of a crash or if the car rolls
over.
Grit, salt and rust can clog the inner
threads of the wheel bolts if the car has
been driven for several years exclu-
sively with alloy wheels.
If steel wheels are being installed, the
bolt hole threads in the brake hubs
should be cleaned before the thinner
steel wheels are fitted. It may other-
wise not be possible to achieve the
correct clamping force, despite tight-
ening the wheel bolts to the correct
torque.
ProCarManuals.com
Page 253 of 292
251 Car care
Safety beltsCheck the function of the safety belts regu-
larly as follows:
Hold the diagonal strap and pull it sharply.
The safety belt should lock and it should
not be possible to withdraw it further.
Check the anchorage points in the floor.
They must not have suffered rust damage.
If a belt is worn or has any fraying edges, it
should be replaced.
Safety belts must not come into contact with
substances such as polishes, oil or chemi-
cals. If the belts get dirty, wash them with
warm water and a detergent or have them
replaced.
Upholstery and trimTo remove fluff and hairs from the seats,
door armrests and headlining, use a
vacuum cleaner, a moist lint-free cloth, or a
clothes brush. Remove spots and dirt using
a cloth moistened with lukewarm soapy
water.
When using a stain remover, always work
from the outside towards the centre to avoid
leaving a ring. If a soiled ring or spot should
remain, it can usually be removed using
lukewarm soapy water or water alone.
Spots left by liquids, such as soft drinks or
thin oil, must be removed at once with an
absorbent material, such as kitchen towel-
ling. Then clean with a stain remover.
White spirit is recommended for removing
grease and oil stains. A medium stiff brush
may also be used.Cleaning and caring for leather
upholsteryThe principal reason for treating leather
upholstery is to maintain its elegant appear-
ance and to provide it with a protective film.
Disco lour at ion caused by dust and wear
mainly affects the lighter shades, although
this is not detrimental to the leather, indeed,
the patina resulting from use is often consid-
ered desirable in leather. But if the leather is
allowed to become too grubby, it can start to
look shabby.
The leather upholstery should be cleaned
and reconditioned twice a year in conjunc-
tion with spring and autumn inspections. In
WARNING
If the car is involved in a crash, the safety
belts, belt pretensioners and other asso-
ciated components must be inspected at
a Saab dealer.
Never make any alterations or repairs to
the safety belts yourself but visit a Saab
dealer.
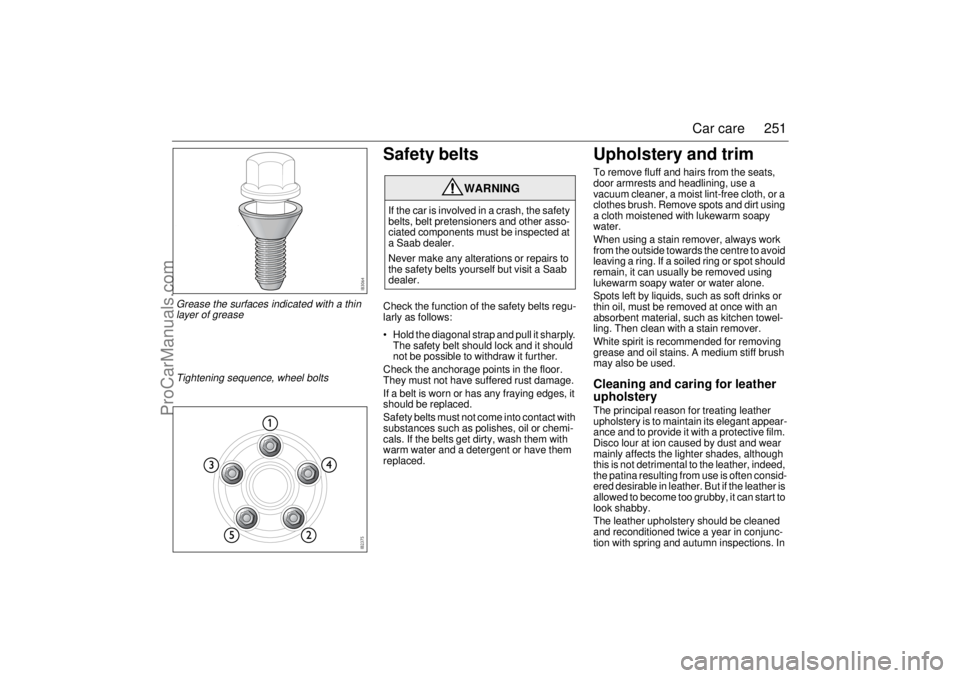
Tightening sequence, wheel boltsGrease the surfaces indicated with a thin
layer of grease
ProCarManuals.com