display SAAB 9-5 2002 User Guide
[x] Cancel search | Manufacturer: SAAB, Model Year: 2002, Model line: 9-5, Model: SAAB 9-5 2002Pages: 272, PDF Size: 16.26 MB
Page 64 of 272

64 Instruments and controlsThe following conditions will wake up the
respective displays in the Night-Panel
mode:
Setting of the Audio system, SID or ACC
(display comes on for ten seconds).
CHECK message generated in the SID.
High engine revs cause the rev counter to
be illuminated until the engine speed has
fallen again.
If the quantity of fuel remaining falls below
4 gallons (15 liters), the fuel gauge will be
illuminated.
If the engine temperature rises above nor-
mal, the temperature gauge will be illumi-
nated.
If the speed of the car exceeds 84 mph
(135 km/h), the entire speedometer will
be illuminated.
In cars with automatic transmission, if the
selector lever is moved from D to position
4, 3 or L, the selector indication on the
main instrument panel will be illuminated.
To restore the displays and lighting to the
normal mode, press the Night-Panel button.
Units and language versionsThe SID has four sets of units:
CHECK messages can be displayed in six
language options: English, Swedish,
German, French, Italian and Spanish. Selecting units and language 1 Press CLEAR and SET simultaneously
for four seconds until a chime sounds.
2 Press or to select the required
units.
3 Touch SET.
4 Press or to select the required
language.
5 Touch SET.
Clock Set the clock by means of the two buttons
under the digital clock on the left of the dis-
play.
When the ignition key is in the OFF position
or removed, the clock can be illuminated
(approx. 10 seconds) by pressing one of
the SID buttons (not the NIGHT PANEL but-
ton). METRIC IMP. 1 IMP. 2 US
km miles miles miles
km/h mph mph mph
liters UK gal UK gal US gal
°C °F °C °F
24-hour 12-hour 12-hour 12-hour
IB1156
CLEAR
ProCarManuals.com
Page 74 of 272
74 Instruments and controls
Temperature control The cabin is divided into two temperature
zones:
The driver’s zone.
The passenger zone (front and rear
seats).
The desired temperature can be set
between 58 and 82°F (15 and 27°C). In
addition, there are also HI and LO settings
(see below). The HI and LO settings for the
passenger zone can only be selected if they
are also selected for the driver’s zone.
The displayed temperature is not the abso-
lute temperature but corresponds to the
comfort level normally experienced at that
temperature after allowance has been
made for the air flow, relative humidity, solar
radiation, etc., currently prevailing inside
the car.
The most usual temperature setting is
64-76°F (18-24°C), depending on per-
sonal preference and what clothing is
worn.
It is recommended that changes in the
temperature setting be made in steps of
2°F (1°C).
Once the desired climate has been
achieved, the rear center vents can be
closed to prevent warm air being distrib-
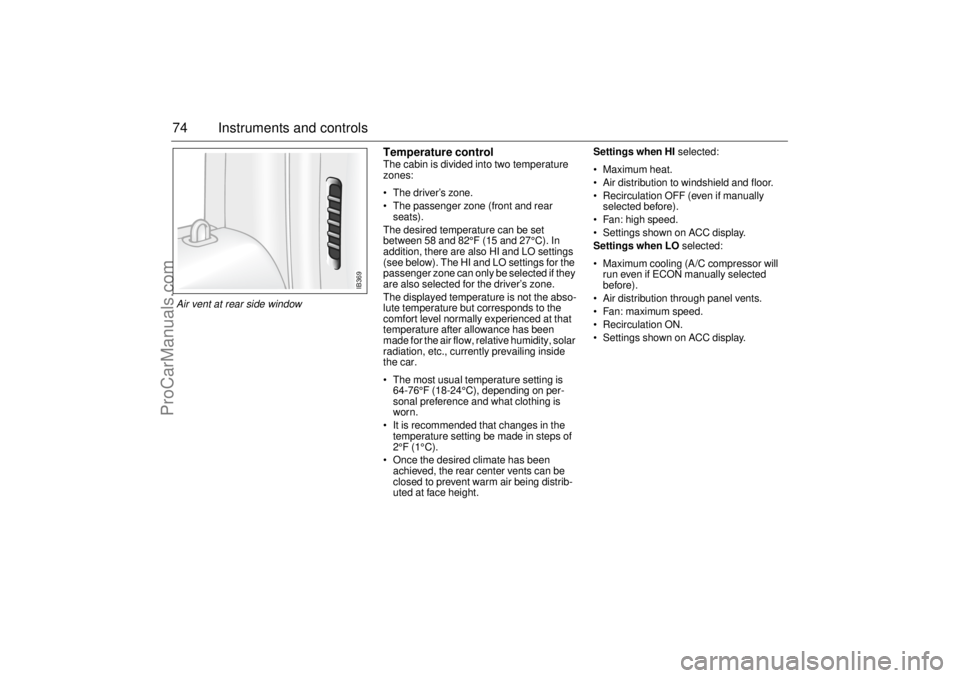
uted at face height.Settings when HI selected:
Maximum heat.
Air distribution to windshield and floor.
Recirculation OFF (even if manually
selected before).
Fan: high speed.
Settings shown on ACC display.
Settings when LO selected:
Maximum cooling (A/C compressor will
run even if ECON manually selected
before).
Air distribution through panel vents.
Fan: maximum speed.
Recirculation ON.
Settings shown on ACC display.
IB369
Air vent at rear side window
ProCarManuals.com
Page 75 of 272
75 Instruments and controls
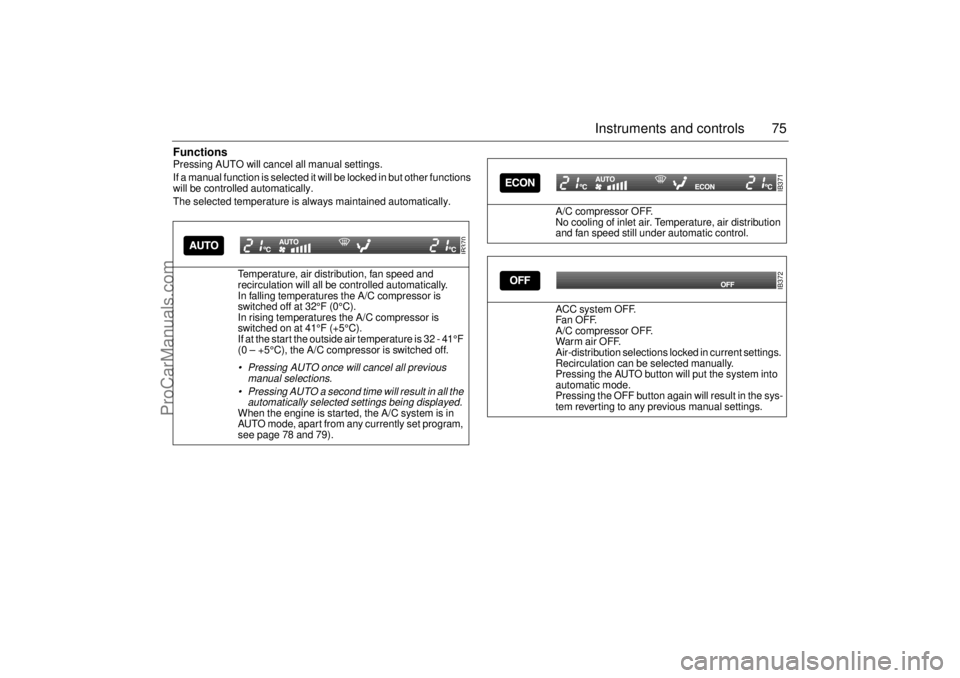
FunctionsPressing AUTO will cancel all manual settings.
If a manual function is selected it will be locked in but other functions
will be controlled automatically.
The selected temperature is always maintained automatically.
Temperature, air distribution, fan speed and
recirculation will all be controlled automatically.
In falling temperatures the A/C compressor is
switched off at 32°F (0°C).
In rising temperatures the A/C compressor is
switched on at 41°F (+5°C).
If at the start the outside air temperature is 32 - 41°F
(0 – +5°C), the A/C compressor is switched off.
Pressing AUTO once will cancel all previous
manual selections.
Pressing AUTO a second time will result in all the
automatically selected settings being displayed. When the engine is started, the A/C system is in
AUTO mode, apart from any currently set program,
see page 78 and 79).
IB370
A/C compressor OFF.
No cooling of inlet air. Temperature, air distribution
and fan speed still under automatic control.
ACC system OFF.
Fa n OF F.
A/C compressor OFF.
War m air OFF.
Air-distribution selections locked in current settings.
Recirculation can be selected manually.
Pressing the AUTO button will put the system into
automatic mode.
Pressing the OFF button again will result in the sys-
tem reverting to any previous manual settings.
IB371IB372
ProCarManuals.com
Page 76 of 272
76 Instruments and controls
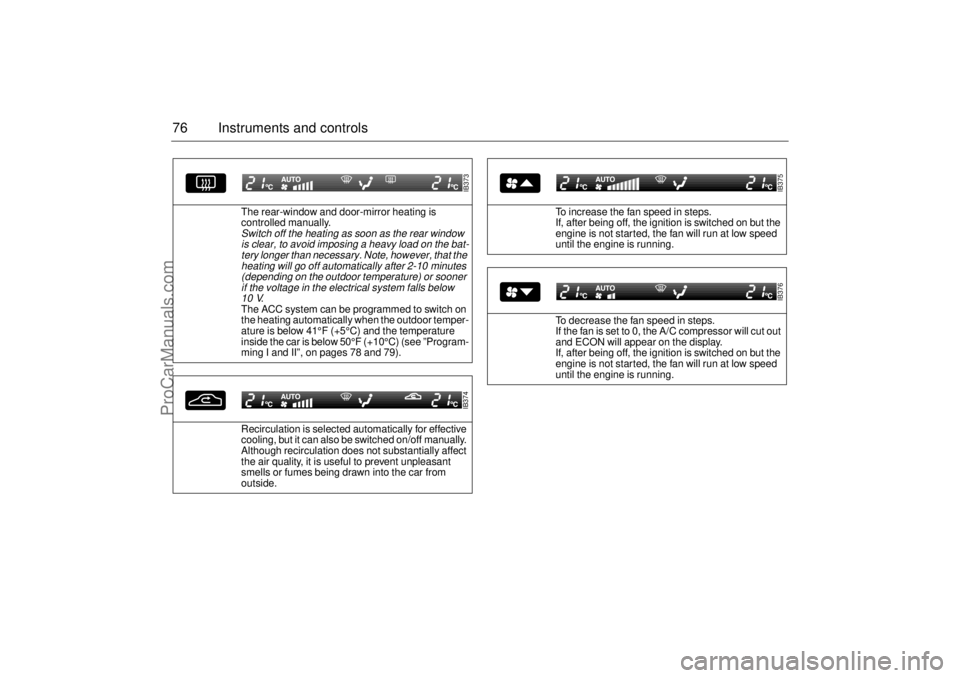
The rear-window and door-mirror heating is
controlled manually. Switch off the heating as soon as the rear window
is clear, to avoid imposing a heavy load on the bat-
tery longer than necessary. Note, however, that the
heating will go off automatically after 2-10 minutes
(depending on the outdoor temperature) or sooner
if the voltage in the electrical system falls below
10 V
.
The ACC system can be programmed to switch on
the heating automatically when the outdoor temper-
ature is below 41°F (+5°C) and the temperature
inside the car is below 50°F (+10°C) (see ”Program-
ming I and II”, on pages 78 and 79).
Recirculation is selected automatically for effective
cooling, but it can also be switched on/off manually.
Although recirculation does not substantially affect
the air quality, it is useful to prevent unpleasant
smells or fumes being drawn into the car from
outside.
IB373IB374
To increase the fan speed in steps.
If, after being off, the ignition is switched on but the
engine is not started, the fan will run at low speed
until the engine is running.
To decrease the fan speed in steps.
If the fan is set to 0, the A/C compressor will cut out
and ECON will appear on the display.
If, after being off, the ignition is switched on but the
engine is not started, the fan will run at low speed
until the engine is running.
IB375IB376
ProCarManuals.com
Page 78 of 272
78 Instruments and controlsStarting in cold weather
To start with, the system will automatically select the defroster set-
ting, maximum heat and low fan speed.
As the engine warms up, air will also be distributed through the floor
vents and the fan speed will be increased.
As the temperature inside the car nears the selected value, both the
fan speed and the heat will be decreased to a level determined by
the system.
Starting in hot weather
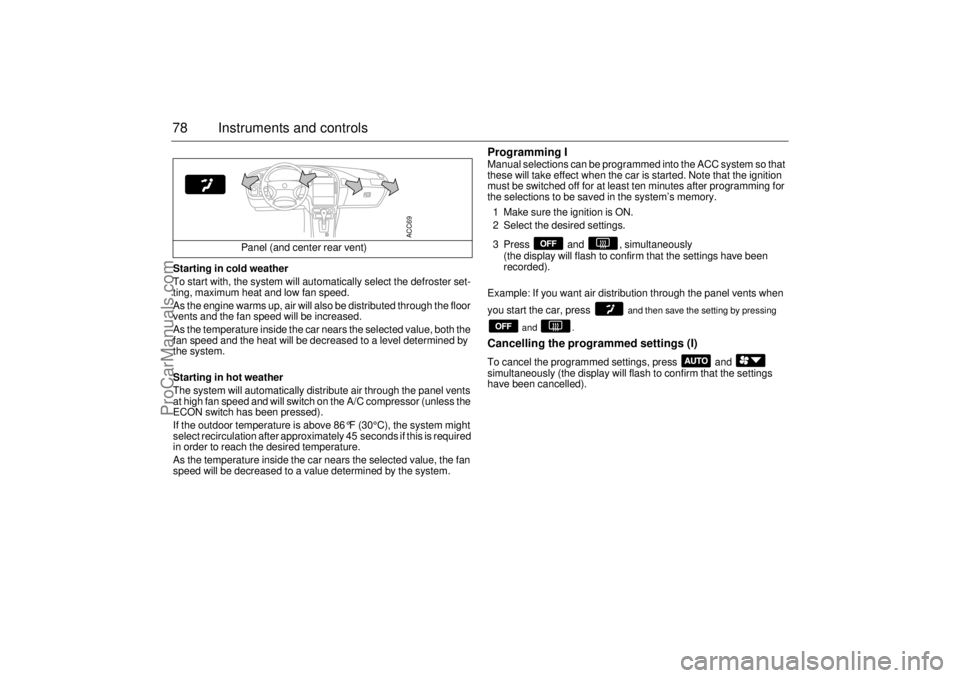
The system will automatically distribute air through the panel vents
at high fan speed and will switch on the A/C compressor (unless the
ECON switch has been pressed).
If the outdoor temperature is above 86
°F (30°C), the system might
select recirculation after approximately 45 seconds if this is required
in order to reach the desired temperature.
As the temperature inside the car nears the selected value, the fan
speed will be decreased to a value determined by the system.
Programming IManual selections can be programmed into the ACC system so that
these will take effect when the car is started. Note that the ignition
must be switched off for at least ten minutes after programming for
the selections to be saved in the system’s memory.
1 Make sure the ignition is ON.
2 Select the desired settings.
3 Press and , simultaneously
(the display will flash to confirm that the settings have been
recorded).
Example: If you want air distribution through the panel vents when
you start the car, press
and then save the setting by pressing
and .
Cancelling the programmed settings (I) To cancel the programmed settings, press and
simultaneously (the display will flash to confirm that the settings
have been cancelled). Panel (and center rear vent)
ACC69
ProCarManuals.com
Page 80 of 272
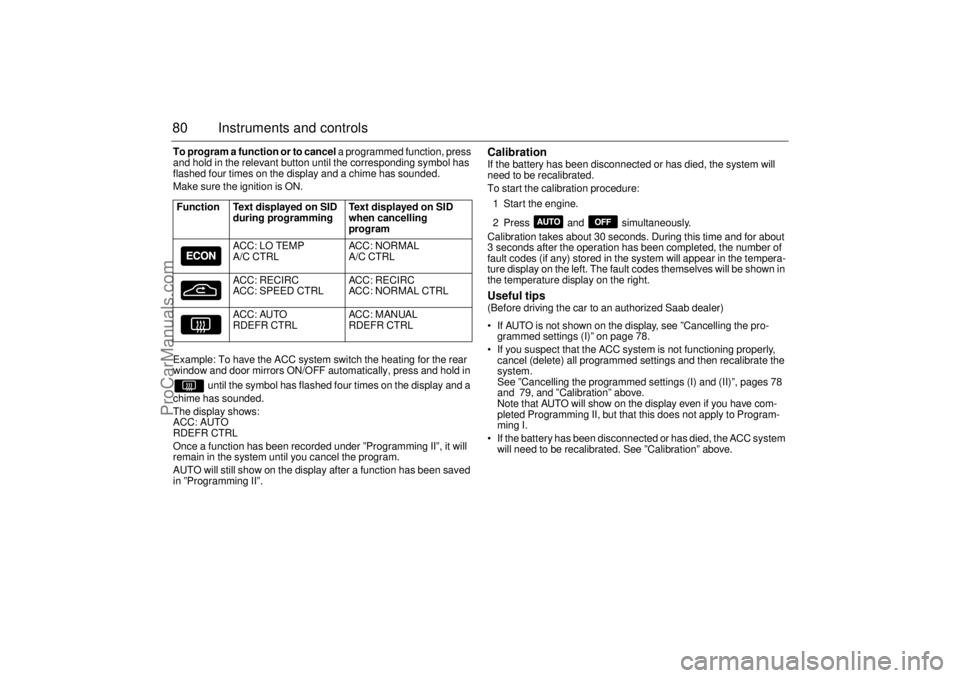
80 Instruments and controlsTo program a function or to cancel a programmed function, press
and hold in the relevant button until the corresponding symbol has
flashed four times on the display and a chime has sounded.
Make sure the ignition is ON.
Example: To have the ACC system switch the heating for the rear
window and door mirrors ON/OFF automatically, press and hold in
until the symbol has flashed four times on the display and a
chime has sounded.
The display shows:
ACC: AUTO
RDEFR CTRL
Once a function has been recorded under ”Programming II”, it will
remain in the system until you cancel the program.
AUTO will still show on the display after a function has been saved
in ”Programming II”.
Calibration If the battery has been disconnected or has died, the system will
need to be recalibrated.
To start the calibration procedure:
1 Start the engine.
2 Press and simultaneously.
Calibration takes about 30 seconds. During this time and for about
3 seconds after the operation has been completed, the number of
fault codes (if any) stored in the system will appear in the tempera-
ture display on the left. The fault codes themselves will be shown in
the temperature display on the right. Useful tips (Before driving the car to an authorized Saab dealer)
If AUTO is not shown on the display, see ”Cancelling the pro-
grammed settings (I)” on page 78.
If you suspect that the ACC system is not functioning properly,
cancel (delete) all programmed settings and then recalibrate the
system.
See ”Cancelling the programmed settings (I) and (II)”, pages 78
and 79, and ”Calibration” above.
Note that AUTO will show on the display even if you have com-
pleted Programming II, but that this does not apply to Program-
ming I.
If the battery has been disconnected or has died, the ACC system
will need to be recalibrated. See ”Calibration” above. Function Text displayed on SID
during programming Text displayed on SID
when cancelling
program
ACC: LO TEMP
A/C CTRLACC: NORMAL
A/C CTRL
ACC: RECIRC
ACC: SPEED CTRLACC: RECIRC
ACC: NORMAL CTRL
ACC: AUTO
RDEFR CTRLACC: MANUAL
RDEFR CTRL
ProCarManuals.com
Page 84 of 272

84 Saab 9-5 Audio SystemTo get the best out of your Saab 9-5 Audio
System, we recommend that you read
through this entire section.
The Saab 9-5 Audio System is available in
two versions: Premium on the 9-5 Linear
and Prestige on the 9-5 Arc and 9-5 Aero
(Prestige system is also available as an
option in the U.S. on the 9-5 Linear model.)
Both models have been specially matched
to the Saab 9-5 cabin.
The two models are comprised of a radio,
CD player and cassette player.
A six-disc CD changer for installation in the
luggage compartment is available as a
dealer-installed accessory/option.
The Premium model has seven speakers:
three mounted in the fascia (the center
speaker further enhances the overall sound
image) and one in each door.
The Prestige model (harman kardon) has
nine speakers (9-5 Sport Wagon has eight
speakers): three mounted in the fascia (the
center speaker further enhances the sound
image), one in each door and two subwoof-
ers in the rear window shelf (9-5 Sport
Wagon: one subwoofer in the luggage com-
partment). The subwoofers enhance repro-
duction of the lowest bass notes.The Audio System is connected to the Saab
Information Display (SID), which is at the
top of the main instrument panel. Mes-
sages, indicators and the like for the Audio
System are shown on this display.
Indicator
AS Radio is in Autostore mode
RDM Random playback of CD
tracks when CD player
selected
(DOLBY B/C) DOLBY B/C noise reduction
on for cassette player
ProCarManuals.com
Page 88 of 272

88 Saab 9-5 Audio SystemRadio Press the RADIO button to switch to the
radio when another source is active. Preset station buttons (1) Press once (release within a second) to
select a preset station, e.g.
The small figure on the far right of the dis-
play is the number of the preset button
selected.
Presetting a station
Press and hold in the desired button (for
more than a second) to store the currently
tuned station. During this time, the radio will
be mute. The sound will return as soon as
the station has been stored.
Tuning (2) Automatic seek tuning:
Press briefly to search for higher fre-
quencies or for lower frequencies.
Manual tuning:
To switch to the manual-tuning function,
press or and release quickly
(a chime will sound and the M indicator will
appear on the display).
The function will revert to automatic seek
tuning two seconds after the last manual fre-
quency change has been made.
Waveband selector (3) Press the BAND button repeatedly to move
through the waveband selections: FM1,
FM2, and AM. AS, Autostore (4) The autostore mode provides an additional
preset function that can be used to search
for and to store stations when you are in an
area where you are unfamiliar with the sta-
tions and their frequencies.
Press the AS/SEARCH button to switch the
Autostore mode ON/OFF. When the
Autostore mode is ON, the AS indicator will
show at the bottom of the display.
IB1843
ProCarManuals.com
Page 89 of 272

89 Saab 9-5 Audio System
Press and hold in the AS/SEARCH button
for more than a second to initiate a search
for the six strongest stations.
Each time the system finds and stores a sta-
tion, the number on the far right of the dis-
play will change. If the system cannot find
six stations with good reception, the remain-
ing preset buttons will be empty. If one of
these empty buttons is pressed, U**** (FM)
or AM**** will appear on the display.
When the system leaves the AS mode, it
returns to the station that was selected
before the AS mode was activated.
The AS mode can also be used in the AM
band.
ProCarManuals.com
Page 90 of 272

90 Saab 9-5 Audio SystemCassette player Before playing a tape, make sure that the
label is secure and that the cassette is not
warped, otherwise the cassette can
become jammed in the deck. The cassette
player automatically senses whether the
tape is normal or metal (Type I or Type II). TAPE (1) Turn on the cassette player by pressing
or by inserting a cassette in the
deck, with the exposed tape to the right.
Playback will start with the side that is facing
up (indicated by A on the display). The dis-
play will now be as follows: Playback direction (2) To play the other side of the tape,
press .
The deck will automatically change the play-
back direction when the end of the tape is
reached, be it during playback, fast
forward/rewind or music search.
Dolby
® noise reduction (3)
Press TAPE/DOLBY to switch on Dolby NR
B/C.
Dolby B/C should be on for playback of
tapes recorded with Dolby B/C, and off for
those recorded without Dolby B/C.
Eject button (4) To stop playback of a tape, press the eject
button or select another source.
If you select another source without press-
ing the eject button, the tape will remain in
the deck but the head and pinch rollers will
be clear of the tape. The same applies if the
Audio System is switched off while a tape is
being played. Tapes can still be ejected
when the system is turned off.
IB1844
3
5
2
4
1
ProCarManuals.com