height SAAB 9-5 2004 Owners Manual
[x] Cancel search | Manufacturer: SAAB, Model Year: 2004, Model line: 9-5, Model: SAAB 9-5 2004Pages: 288, PDF Size: 16.91 MB
Page 12 of 288
12 SafetySeats Both front seats are electrically operated.
On certain models the driver´s seat is
equipped with a memory function.
To facilitate getting into the car, both seats
can be adjusted when either of the front
doors is open.
For safety reasons, if the door is closed, the
seat can only be adjusted when the ignition
is ON.
Note, however, that both seats can be
adjusted for 30 seconds after both doors
have been closed. The following seat adjustments can be
made to achieve a comfortable driving
position:
height
legroom
backrest rake angle
lumbar support
head-restraint height
We recommend that adjustments to the
driver’s seat be performed in the following
order:
1height
2 legroom
3 seat tilt angle
4 backrest rake angle
Lastly, adjust the steering wheel (see page
120).
Side airbags (see page 35).Head restraint(see page 16).
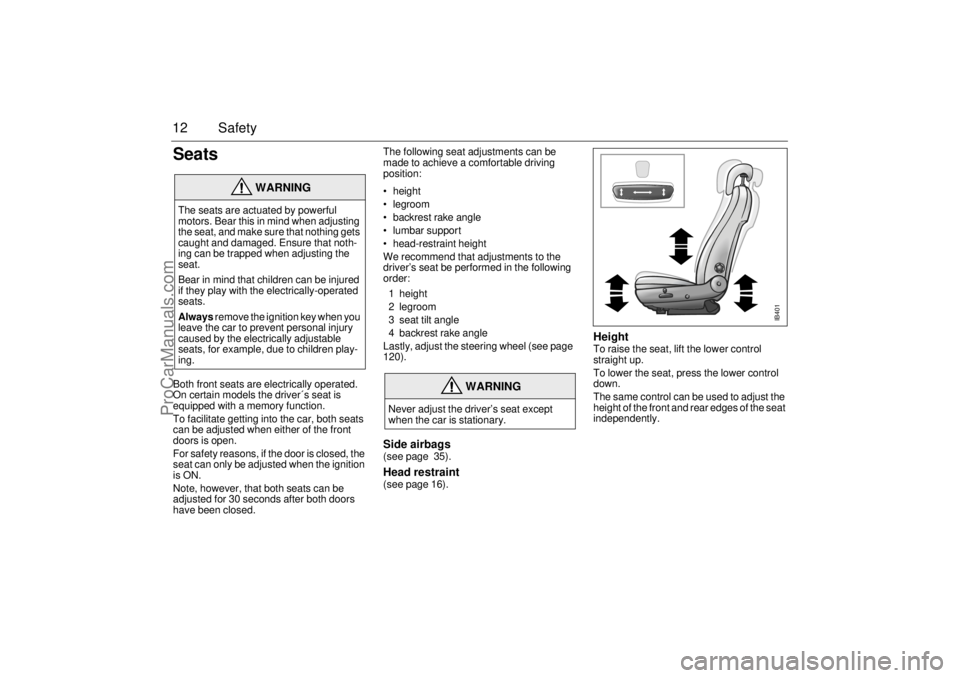
Height To raise the seat, lift the lower control
straight up.
To lower the seat, press the lower control
down.
The same control can be used to adjust the
height of the front and rear edges of the seat
independently.
WARNING
The seats are actuated by powerful
motors. Bear this in mind when adjusting
the seat, and make sure that nothing gets
caught and damaged. Ensure that noth-
ing can be trapped when adjusting the
seat.
Bear in mind that children can be injured
if they play with the electrically-operated
seats.
Always remove the ignition key when you
leave the car to prevent personal injury
caused by the electrically adjustable
seats, for example, due to children play-
ing.
WARNING
Never adjust the driver’s seat except
when the car is stationary.
IB401
ProCarManuals.com
Page 16 of 288
16 SafetyHead restraintThe front seats in the Saab 9-5 are
equipped with Saab Active Head Restraints
(SAHRs). These reduce the risk of whiplash
injury if the car is hit from behind.
In the event of a rear-end crash, the body is
forced back against the backrest. This, in
turn, causes the mechanism to press the
head restraint forward and upward, thus
limiting the backward movement of the
head.
The SAHR is a mechanical system, actu-
ated by body weight. The mechanism is built
into the top of the backrest, where it is
connected to the head restraint.
Therefore, the SAHR does not need to be
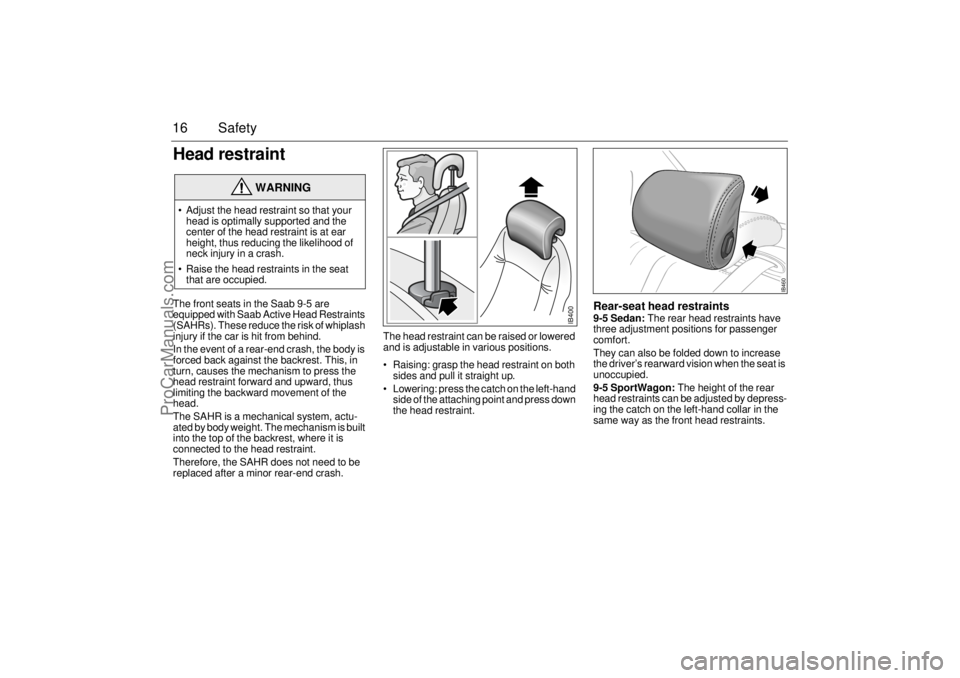
replaced after a minor rear-end crash.The head restraint can be raised or lowered
and is adjustable in various positions.
Raising: grasp the head restraint on both
sides and pull it straight up.
Lowering: press the catch on the left-hand
side of the attaching point and press down
the head restraint.
Rear-seat head restraints9-5 Sedan: The rear head restraints have
three adjustment positions for passenger
comfort.
They can also be folded down to increase
the driver’s rearward vision when the seat is
unoccupied.
9-5 SportWagon: The height of the rear
head restraints can be adjusted by depress-
ing the catch on the left-hand collar in the
same way as the front head restraints.
WARNING
Adjust the head restraint so that your
head is optimally supported and the
center of the head restraint is at ear
height, thus reducing the likelihood of
neck injury in a crash.
Raise the head restraints in the seat
that are occupied.
IB460
IB400
ProCarManuals.com
Page 20 of 288
20 SafetyBelt height adjustmentThe front safety belts and the outside belts
in the rear (9-5 Sedan) are equipped with
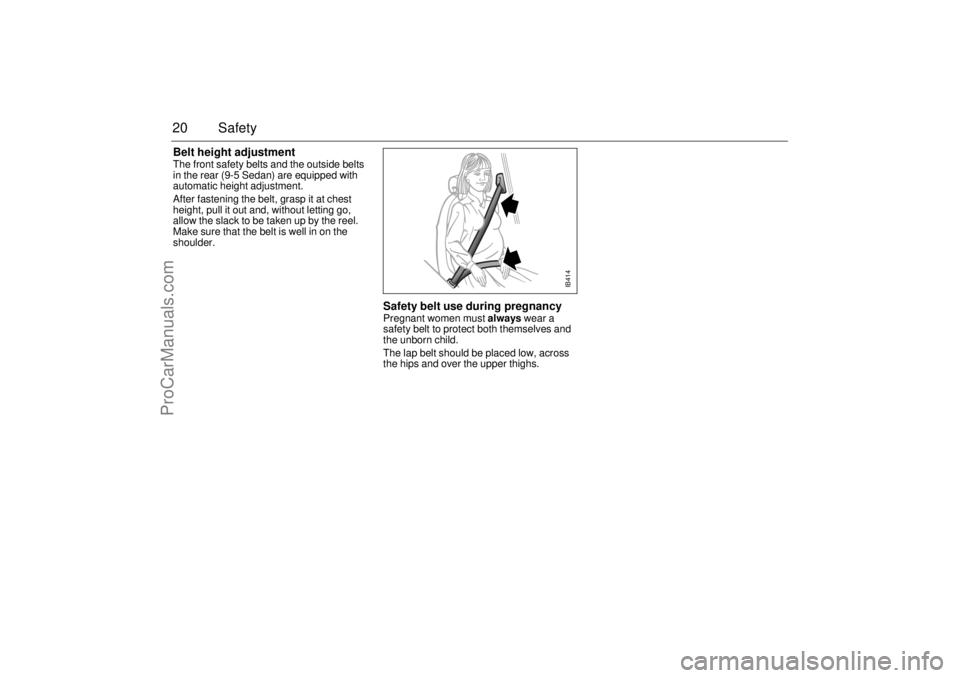
automatic height adjustment.
After fastening the belt, grasp it at chest
height, pull it out and, without letting go,
allow the slack to be taken up by the reel.
Make sure that the belt is well in on the
shoulder.
Safety belt use during pregnancyPregnant women must always wear a
safety belt to protect both themselves and
the unborn child.
The lap belt should be placed low, across
the hips and over the upper thighs.
IB414
ProCarManuals.com
Page 77 of 288
77 Instruments and controls
Temperature control The cabin is divided into two temperature
zones:
The driver’s zone
The passenger zone (front and rear
seats)
The desired temperature can be set
between 58 and 82°F (15 and 27°C). In
addition, there are also HI and LO settings
(see below). The HI and LO settings for the
passenger zone can only be selected if they
are also selected for the driver’s zone.
The displayed temperature is not the abso-
lute temperature but corresponds to the
comfort level normally experienced at that
temperature after allowance has been
made for the air flow, relative humidity, solar
radiation, etc., currently prevailing inside
the car.
The most usual temperature setting is
64–76°F (18–24°C), depending on per-
sonal preference and what clothing is
worn.
It is recommended that changes in the
temperature setting be made in steps of
2°F (1°C).
Once the desired climate has been
achieved, the rear center vents can be
closed to prevent warm air being distrib-
uted at face height.Settings when HI selected:
Maximum heat
Air distribution to windshield and floor
Recirculation OFF (even if manually
selected before)
Fan: high speed
Settings shown on ACC display
Settings when LO selected:
Maximum cooling (A/C compressor will
run even if ECON manually selected
before)
Air distribution through panel vents
Fan: maximum speed
Recirculation ON
Settings shown on ACC display
IB369
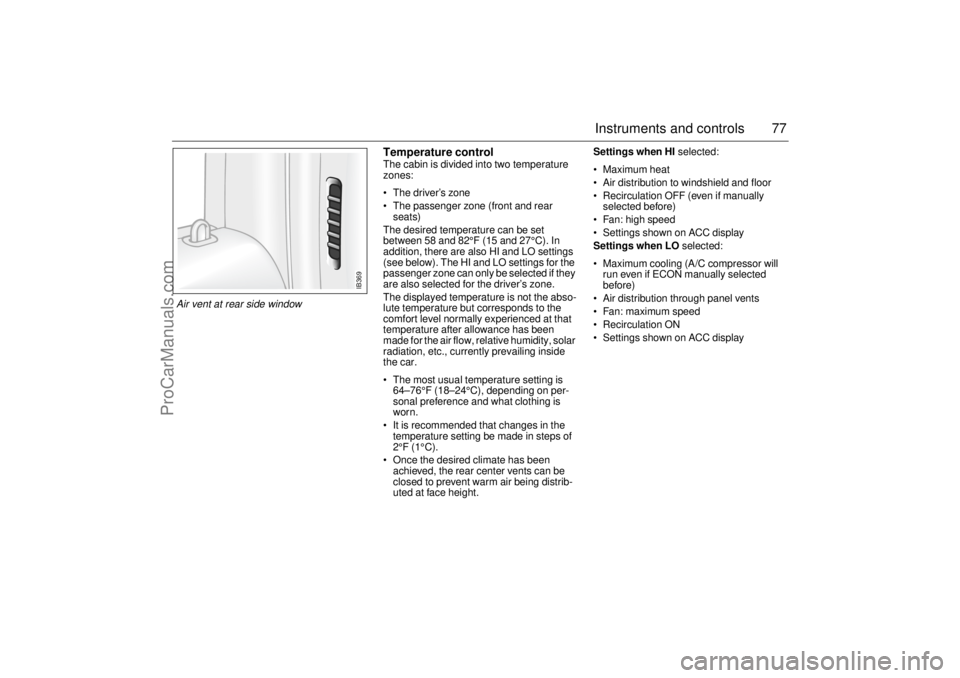
Air vent at rear side window
ProCarManuals.com
Page 138 of 288
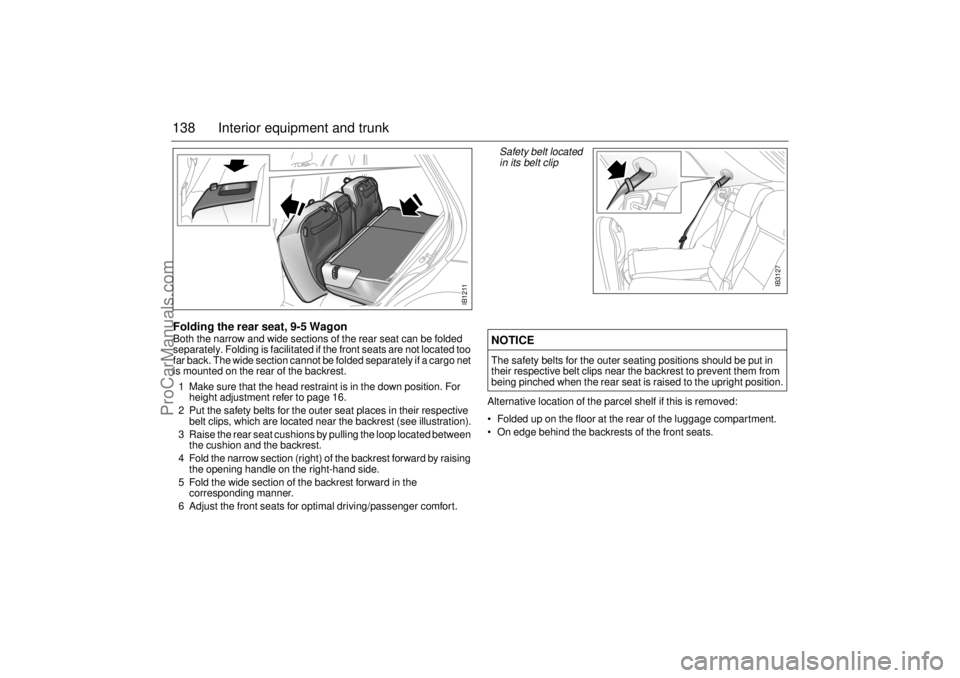
138 Interior equipment and trunkFolding the rear seat, 9-5 WagonBoth the narrow and wide sections of the rear seat can be folded
separately. Folding is facilitated if the front seats are not located too
far back. The wide section cannot be folded separately if a cargo net
is mounted on the rear of the backrest.
1 Make sure that the head restraint is in the down position. For
height adjustment refer to page 16.
2 Put the safety belts for the outer seat places in their respective
belt clips, which are located near the backrest (see illustration).
3 Raise the rear seat cushions by pulling the loop located between
the cushion and the backrest.
4 Fold the narrow section (right) of the backrest forward by raising
the opening handle on the right-hand side.
5 Fold the wide section of the backrest forward in the
corresponding manner.
6 Adjust the front seats for optimal driving/passenger comfort.
Alternative location of the parcel shelf if this is removed:
Folded up on the floor at the rear of the luggage compartment.
On edge behind the backrests of the front seats.NOTICEThe safety belts for the outer seating positions should be put in
their respective belt clips near the backrest to prevent them from
being pinched when the rear seat is raised to the upright position.
IB1211
IB3127
Safety belt located
in its belt clip
ProCarManuals.com
Page 139 of 288
139 Interior equipment and trunk
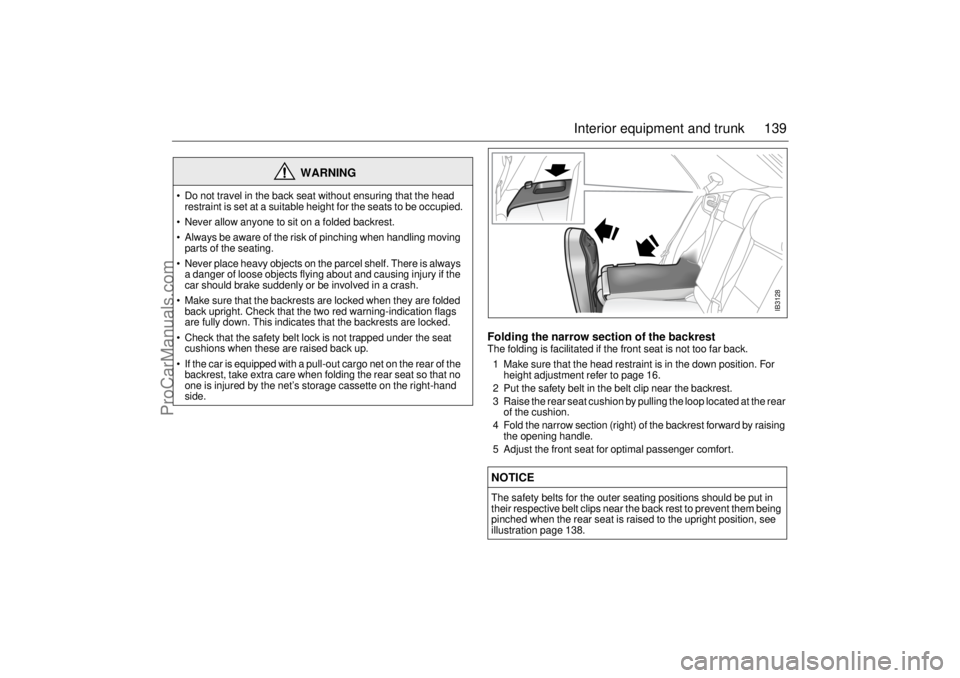
Folding the narrow section of the backrestThe folding is facilitated if the front seat is not too far back.
1 Make sure that the head restraint is in the down position. For
height adjustment refer to page 16.
2 Put the safety belt in the belt clip near the backrest.
3 Raise the rear seat cushion by pulling the loop located at the rear
of the cushion.
4 Fold the narrow section (right) of the backrest forward by raising
the opening handle.
5 Adjust the front seat for optimal passenger comfort.
WARNING
Do not travel in the back seat without ensuring that the head
restraint is set at a suitable height for the seats to be occupied.
Never allow anyone to sit on a folded backrest.
Always be aware of the risk of pinching when handling moving
parts of the seating.
Never place heavy objects on the parcel shelf. There is always
a danger of loose objects flying about and causing injury if the
car should brake suddenly or be involved in a crash.
Make sure that the backrests are locked when they are folded
back upright. Check that the two red warning-indication flags
are fully down. This indicates that the backrests are locked.
Check that the safety belt lock is not trapped under the seat
cushions when these are raised back up.
If the car is equipped with a pull-out cargo net on the rear of the
backrest, take extra care when folding the rear seat so that no
one is injured by the net’s storage cassette on the right-hand
side.
NOTICEThe safety belts for the outer seating positions should be put in
their respective belt clips near the back rest to prevent them being
pinched when the rear seat is raised to the upright position, see
illustration page 138.
IB3128
ProCarManuals.com
Page 200 of 288
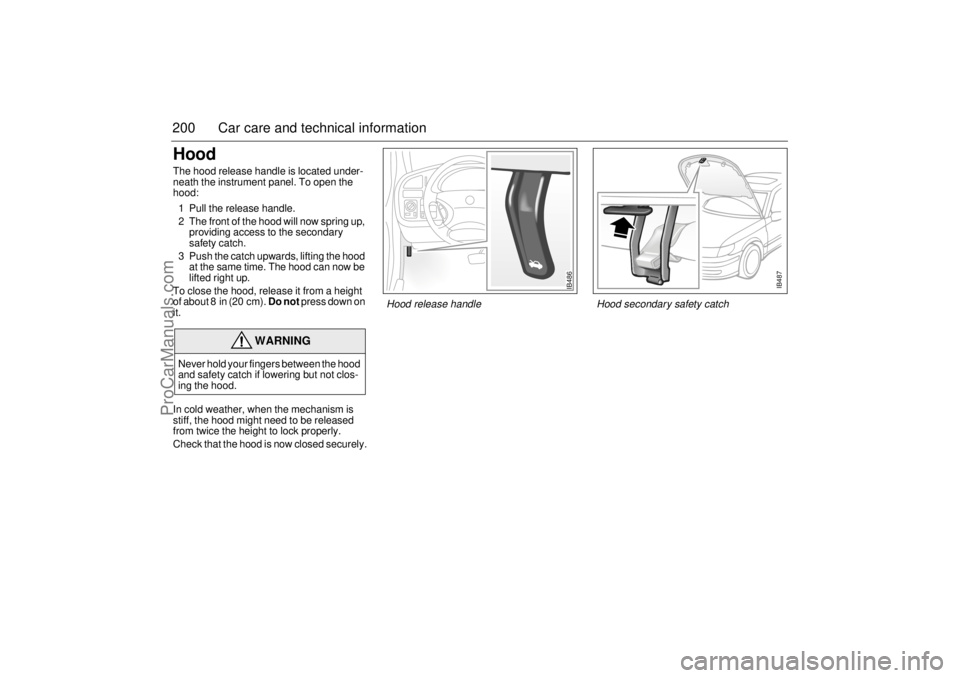
200 Car care and technical informationHood The hood release handle is located under-
neath the instrument panel. To open the
hood:
1 Pull the release handle.
2 The front of the hood will now spring up,
providing access to the secondary
safety catch.
3 Push the catch upwards, lifting the hood
at the same time. The hood can now be
lifted right up.
To close the hood, release it from a height
of about 8 in (20 cm). Do not press down on
it.
In cold weather, when the mechanism is
stiff, the hood might need to be released
from twice the height to lock properly.
Check that the hood is now closed securely.
WARNING
Never hold your fingers between the hood
and safety catch if lowering but not clos-
ing the hood.
IB487
IB486
Hood release handle Hood secondary safety catch
ProCarManuals.com
Page 238 of 288
238 Car care and technical informationWheel Alignment and Tire Balance
The wheels on your vehicle were aligned
and balanced carefully at the factory to give
you the longest tire life and best overall per-
formance.
Scheduled wheel alignment and wheel bal-
ancing are not needed. However, if you
notice unusual tire wear or your vehicle pull-
ing one way or the other, the alignment may
need to be reset. If you notice your vehicle
vibrating when driving on a smooth road,
your wheels may need to be rebalanced.
Wheel Replacement
Replace any wheel that is bent, cracked or
badly rusted or corroded. If wheel nuts keep
coming loose, the wheel, wheel bolts and
wheel nuts should be replaced. If the wheel
leaks air, replace it (except some aluminum
wheels, which can sometimes be repaired).
See your dealer if any of these conditions
exist.
Your dealer will know the kind of wheel you
need.
Each new wheel should have the same
load-carrying capacity, diameter, width,
offset and be mounted the same way as the
one it replaces.
If you need to replace any of your wheels,
wheel bolts or wheel nuts, replace them only
with new Saab original equipment parts.
This way, you will be sure to have the right
wheel, wheel bolts and wheel nuts for your
vehicle.
Notice:
The wrong wheel can also cause
problems with bearing life, brake cool-
ing, speedometer or odometer calibra-
tion, headlamp aim, bumper height, vehi-
cle ground clearance and tire or tire
chain clearance to the body and chassis.
See “Changing a wheel” on page 247.Used Replacement Wheels
WARNING
Using the wrong replacement wheels,
wheel bolts or wheel nuts on your vehicle
can be dangerous. It could affect the
braking and handling of your vehicle,
make your tires lose air and make you
lose control. You could have a collision in
which you or others could be injured.
Always use the correct wheel, wheel bolts
and wheel nuts for replacement.
WARNING
When fitting just one new pair of tires,
these should be fitted to the rear wheels,
as these are more critical to the direc-
tional stability of the car (e.g. on braking
or in a skid). The existing rear wheels
should therefore be moved to the front.
WARNING
Putting a used wheel on your vehicle is
dangerous. You can’t know how it’s been
used or how far it’s been driven. It could
fail suddenly and cause a crash. If you
have to replace a wheel, use a new GM
original equipment wheel.
ProCarManuals.com
Page 240 of 288

240 Car care and technical informationTire Sidewall LabelingUseful information about a tire is molded
into it´s sidewall.
Tire size: The tire size ia a combination of
letters and numbers used to define a partic-
ular tire´s width, height, aspect ratio, con-
struction type and service description.
Department of Transportation (DOT):
The Department of Transportation (DOT)
code indicates that the tire is in compliance
with the U.S. Department of Transportation
Motor Vehicle Safety standards.
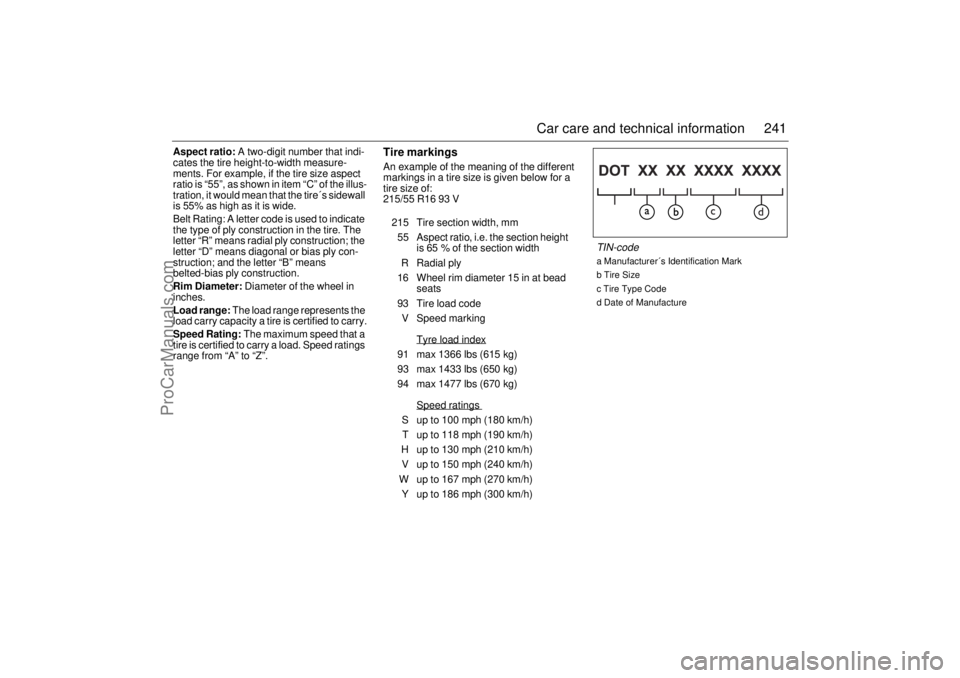
Tire Identification Number (TIN): The let-
ters and numbers following DOT code are
the Tire Identification Number (TIN). The
TIN shows the manufacturer and plant
code, tire size, and date the tire was manu-
factured. The TIN is molded onto both sides
of the tire.
Tire Ply Material: The type of cord and
number of plies in the sidewall and under
the tread.Uniform Tire Quality Grading (UTQG):
Tire manufacturers are required to grade
tires based on performance factors: tread-
wear, traction and temperature resistance.
For more information see “Uniform Tire
Quality Grading” on page 237.
Maximum Cold Inflation Load Limit: Max-
imum load that can be carried and the max-
imum pressure needed to support that load.
For information on recommended tire pres-
sure see “Lowest recommended tire pres-
sure, cold tires” on page 279and “Loading
Your Vehicle” on page 242.
Tire SizeThe following illustration shows an example
of a typical passenger car tire size.
Passenger (P-Metric) Tire: The United
States version of a metric tire sizing system.
The letter “P” as the first character in the tire
size means a passenger vehicle tire engi-
neered to standards set by the U.S Tire and
Rim Association.
Tire Width: The three-digit number indi-
cates the tire section width in millimeters
from sidewall to sidewall.P215/55 R 16 93 H
|| |||||
ab c d e f g
a Passenger (P-Metric) Tire
bTire Width
c Aspect Ratio
d Belt Rating
e Rim diameter
f Load range
g Speed rating
ProCarManuals.com
Page 241 of 288
241 Car care and technical information
Aspect ratio: A two-digit number that indi-
cates the tire height-to-width measure-
ments. For example, if the tire size aspect
ratio is “55”, as shown in item “C” of the illus-
tration, it would mean that the tire´s sidewall
is 55% as high as it is wide.
Belt Rating: A letter code is used to indicate
the type of ply construction in the tire. The
letter “R” means radial ply construction; the
letter “D” means diagonal or bias ply con-
struction; and the letter “B” means
belted-bias ply construction.
Rim Diameter: Diameter of the wheel in
inches.
Load range: The load range represents the
load carry capacity a tire is certified to carry.
Speed Rating: The maximum speed that a
tire is certified to carry a load. Speed ratings
range from “A” to “Z”.
Tire markingsAn example of the meaning of the different
markings in a tire size is given below for a
tire size of:
215/55 R16 93 V 215 Tire section width, mm
55 Aspect ratio, i.e. the section height
is 65 % of the section width
R Radial ply
16 Wheel rim diameter 15 in at bead
seats
93 Tire load code
V Speed marking
Tyre load index91 max 1366 lbs (615 kg)
93 max 1433 lbs (650 kg)
94 max 1477 lbs (670 kg)
Speed ratings S up to 100 mph (180 km/h)
T up to 118 mph (190 km/h)
H up to 130 mph (210 km/h)
V up to 150 mph (240 km/h)
W up to 167 mph (270 km/h)
Y up to 186 mph (300 km/h)
TIN-codea Manufacturer´s Identification Mark
b Tire Size
c Tire Type Code
d Date of Manufacture
ProCarManuals.com