change wheel SAAB 9-5 2005 Owners Manual
[x] Cancel search | Manufacturer: SAAB, Model Year: 2005, Model line: 9-5, Model: SAAB 9-5 2005Pages: 276, PDF Size: 16.72 MB
Page 5 of 276
3
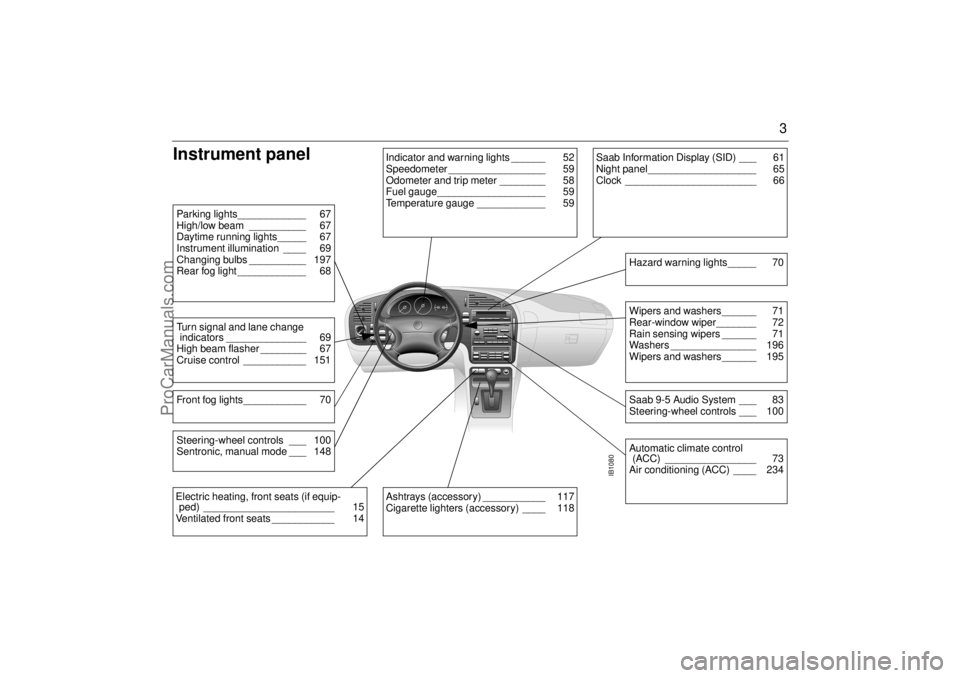
Instrument panel
IB1080
Indicator and warning lights ______ 52
Speedometer _________________ 59
Odometer and trip meter ________ 58
Fuel gauge___________________ 59
Temperature gauge ____________ 59
Parking lights____________ 67
High/low beam __________ 67
Daytime running lights_____ 67
Instrument illumination ____ 69
Changing bulbs __________ 197
Rear fog light ____________ 68Turn signal and lane change
indicators ______________ 69
High beam flasher ________ 67
Cruise control ___________ 151Front fog lights___________ 70
Ashtrays (accessory) ___________ 117
Cigarette lighters (accessory) ____ 118
Saab Information Display (SID) ___ 61
Night panel___________________ 65
Clock _______________________ 66
Wipers and washers ______ 71
Rear-window wiper_______ 72
Rain sensing wipers ______ 71
Washers _______________ 196
Wipers and washers ______ 195Saab 9-5 Audio System ___ 83
Steering-wheel controls ___ 100Hazard warning lights_____ 70Automatic climate control
(ACC) ________________ 73
Air conditioning (ACC) ____ 234
Electric heating, front seats (if equip-
ped) _______________________ 15
Ventilated front seats ___________ 14Steering-wheel controls ___ 100
Sentronic, manual mode ___ 148
ProCarManuals.com
Page 6 of 276
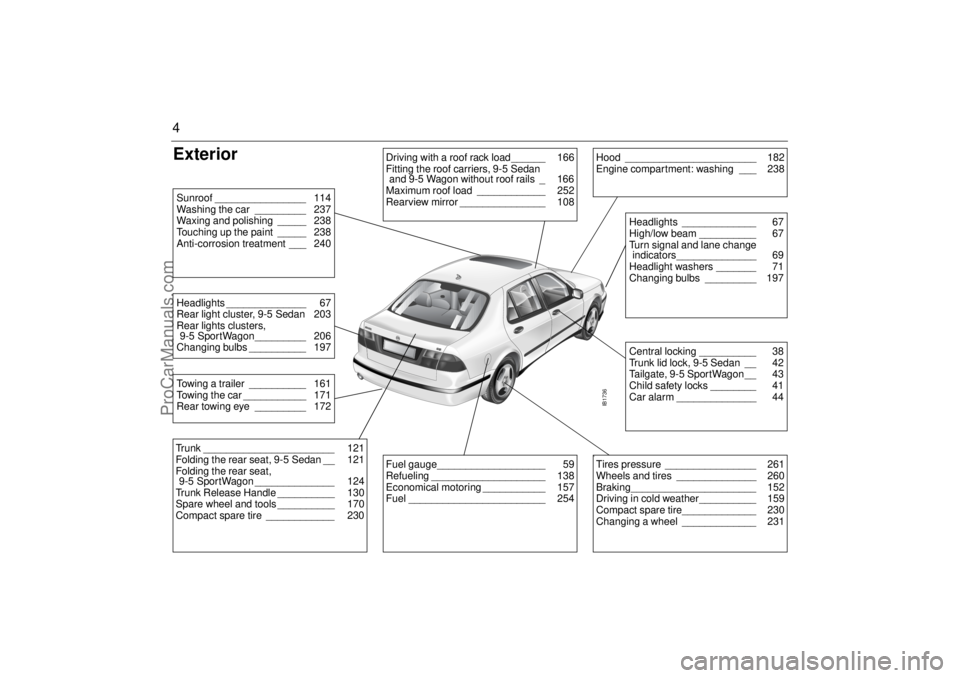
4Exterior
IB1736
Driving with a roof rack load______ 166
Fitting the roof carriers, 9-5 Sedan
and 9-5 Wagon without roof rails _ 166
Maximum roof load ____________ 252
Rearview mirror _______________ 108
Hood _______________________ 182
Engine compartment: washing ___ 238
Central locking __________ 38
Trunk lid lock, 9-5 Sedan __ 42
Tailgate, 9-5 SportWagon __ 43
Child safety locks ________ 41
Car alarm ______________ 44Headlights _____________ 67
High/low beam __________ 67
Turn signal and lane change
indicators______________ 69
Headlight washers _______ 71
Changing bulbs _________ 197
Fuel gauge___________________ 59
Refueling ____________________ 138
Economical motoring ___________ 157
Fuel ________________________ 254
b Tires pressure ________________ 261
Wheels and tires ______________ 260
Braking______________________ 152
Driving in cold weather__________ 159
Compact spare tire_____________ 230
Changing a wheel _____________ 231
Trunk _______________________ 121
Folding the rear seat, 9-5 Sedan __ 121
Folding the rear seat,
9-5 SportWagon ______________ 124
Trunk Release Handle __________ 130
Spare wheel and tools __________ 170
Compact spare tire ____________ 230Towing a trailer __________ 161
Towing the car ___________ 171
Rear towing eye _________ 172Headlights ______________ 67
Rear light cluster, 9-5 Sedan 203
Rear lights clusters,
9-5 SportWagon_________ 206
Changing bulbs __________ 197Sunroof ________________ 114
Washing the car _________ 237
Waxing and polishing _____ 238
Touching up the paint _____ 238
Anti-corrosion treatment ___ 240
ProCarManuals.com
Page 10 of 276
8
IB336
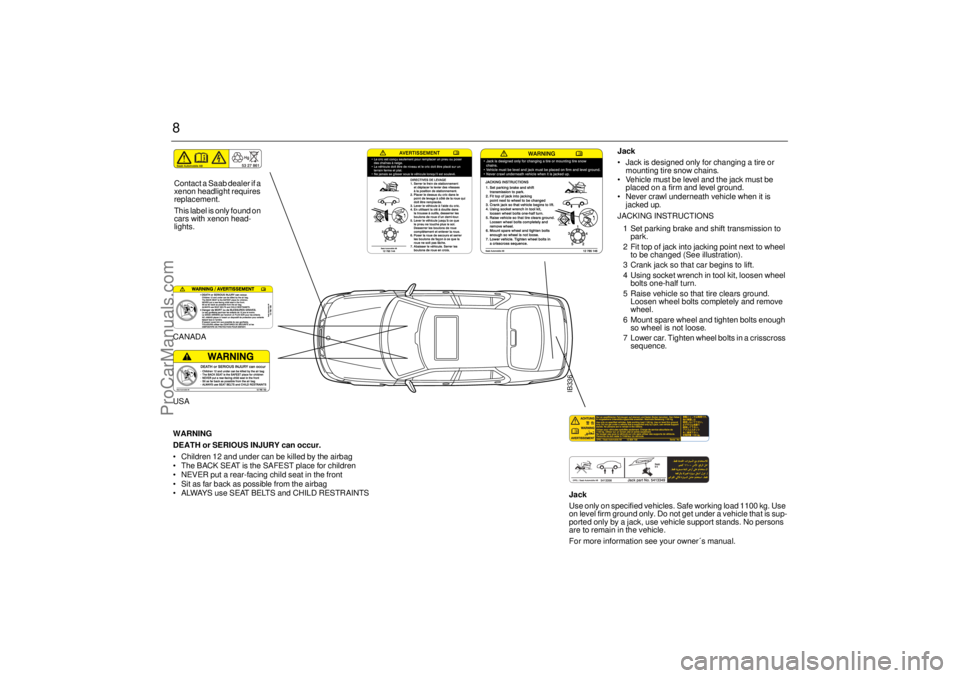
Jack
Jack is designed only for changing a tire or
mounting tire snow chains.
Vehicle must be level and the jack must be
placed on a firm and level ground.
Never crawl underneath vehicle when it is
jacked up.
JACKING INSTRUCTIONS
1 Set parking brake and shift transmission to
park.
2 Fit top of jack into jacking point next to wheel
to be changed (See illustration).
3 Crank jack so that car begins to lift.
4 Using socket wrench in tool kit, loosen wheel
bolts one-half turn.
5 Raise vehicle so that tire clears ground.
Loosen wheel bolts completely and remove
wheel.
6 Mount spare wheel and tighten bolts enough
so wheel is not loose.
7 Lower car. Tighten wheel bolts in a crisscross
sequence.
CANADAUSA
WARNING
DEATH or SERIOUS INJURY can occur.
Children 12 and under can be killed by the airbag
The BACK SEAT is the SAFEST place for children
NEVER put a rear-facing child seat in the front
Sit as far back as possible from the airbag
ALWAYS use SEAT BELTS and CHILD RESTRAINTSContact a Saab dealer if a
xenon headlight requires
replacement.
This label is only found on
cars with xenon head-
lights.
Jack
Use only on specified vehicles. Safe working load 1100 kg. Use
on level firm ground only. Do not get under a vehicle that is sup-
ported only by a jack, use vehicle support stands. No persons
are to remain in the vehicle.
For more information see your owner´s manual.
ProCarManuals.com
Page 85 of 276

83 Saab 9-5 Audio System
Quick guide to the Saab
9-5 Audio System _____ 85
Sound controls ________ 87
Radio ________________ 88
Cassette player ________ 90
CD player _____________ 93
CD changer ___________ 95
Programmable functions 99
Steering-wheel controls _ 100
Security lock __________ 101
Technical data _________ 102
Fault codes ___________ 104
Saab 9-5 Audio System
ProCarManuals.com
Page 102 of 276
100 Saab 9-5 Audio SystemLoudness ON/OFF To change the default setting:
The default setting for this function is ON.
– Press and hold the BAND button at the
same time as you switch on the Audio
System.
– After START VOL appears, release the
BAND button.
– Select LOUDNESS using
– Select ON or OFF using the VOL control.
– Wait 10 seconds or press one of the but-
tons on the bottom row of the Audio Sys-
tem, e.g. RADIO/BAND, to save the new
default setting.
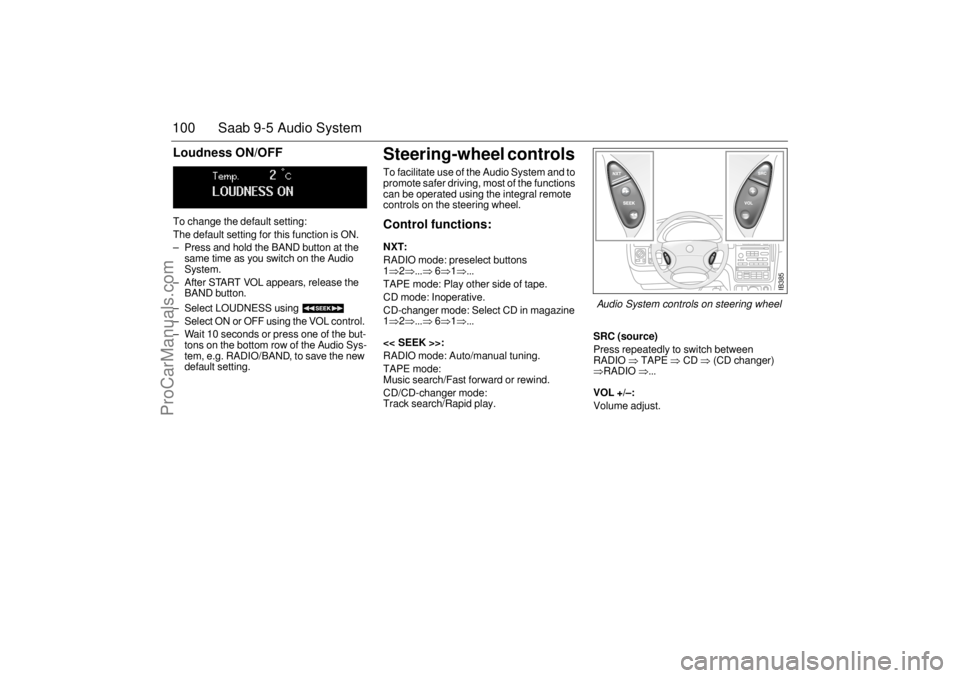
Steering-wheel controls To facilitate use of the Audio System and to
promote safer driving, most of the functions
can be operated using the integral remote
controls on the steering wheel. Control functions: NXT: RADIO mode: preselect buttons
1⇒2⇒...⇒
6⇒1⇒...
TAPE mode: Play other side of tape.
CD mode: Inoperative.
CD-changer mode: Select CD in magazine
1⇒2⇒...⇒
6⇒1⇒...
<< SEEK >>:
RADIO mode: Auto/manual tuning.
TAPE mode:
Music search/Fast forward or rewind.
CD/CD-changer mode:
Track search/Rapid play.
SRC (source)Press repeatedly to switch between
RADIO
⇒ TAPE
⇒ CD
⇒ (CD changer)
⇒RADIO
⇒...
VOL +/–: Volume adjust.
IB385
Audio System controls on steering wheel
ProCarManuals.com
Page 131 of 276
129 Interior equipment and trunk
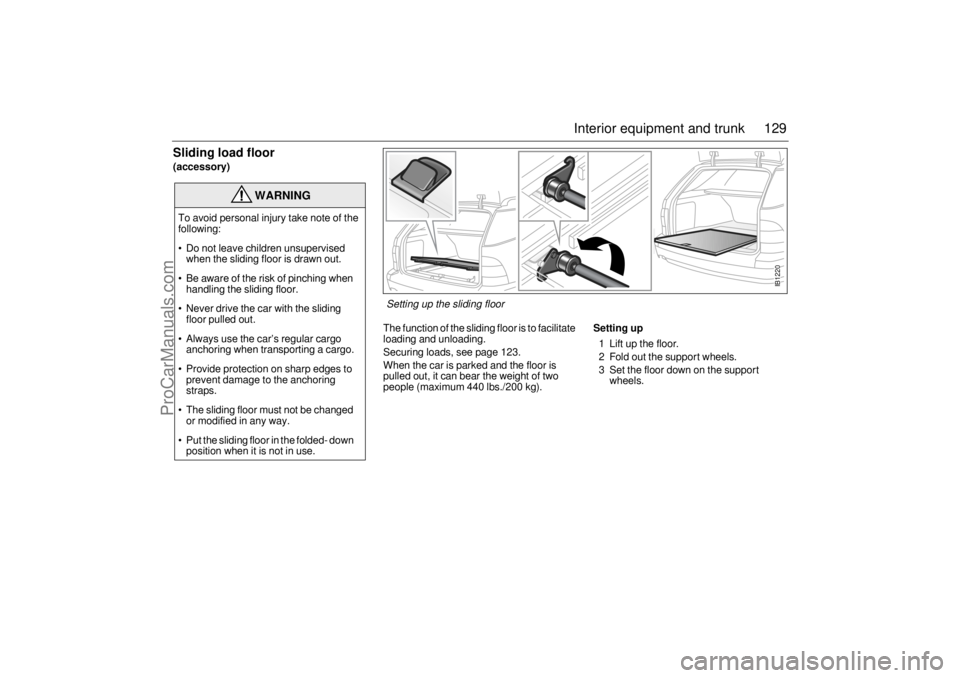
Sliding load floor(accessory)
The function of the sliding floor is to facilitate
loading and unloading.
Securing loads, see page 123.
When the car is parked and the floor is
pulled out, it can bear the weight of two
people (maximum 440 lbs./200 kg).
Setting up1 Lift up the floor.
2 Fold out the support wheels.
3 Set the floor down on the support
wheels.
WARNING
To avoid personal injury take note of the
following:
Do not leave children unsupervised
when the sliding floor is drawn out.
Be aware of the risk of pinching when
handling the sliding floor.
Never drive the car with the sliding
floor pulled out.
Always use the car’s regular cargo
anchoring when transporting a cargo.
Provide protection on sharp edges to
prevent damage to the anchoring
straps.
The sliding floor must not be changed
or modified in any way.
Put the sliding floor in the folded- down
position when it is not in use.
IB1220
Setting up the sliding floor
ProCarManuals.com
Page 150 of 276
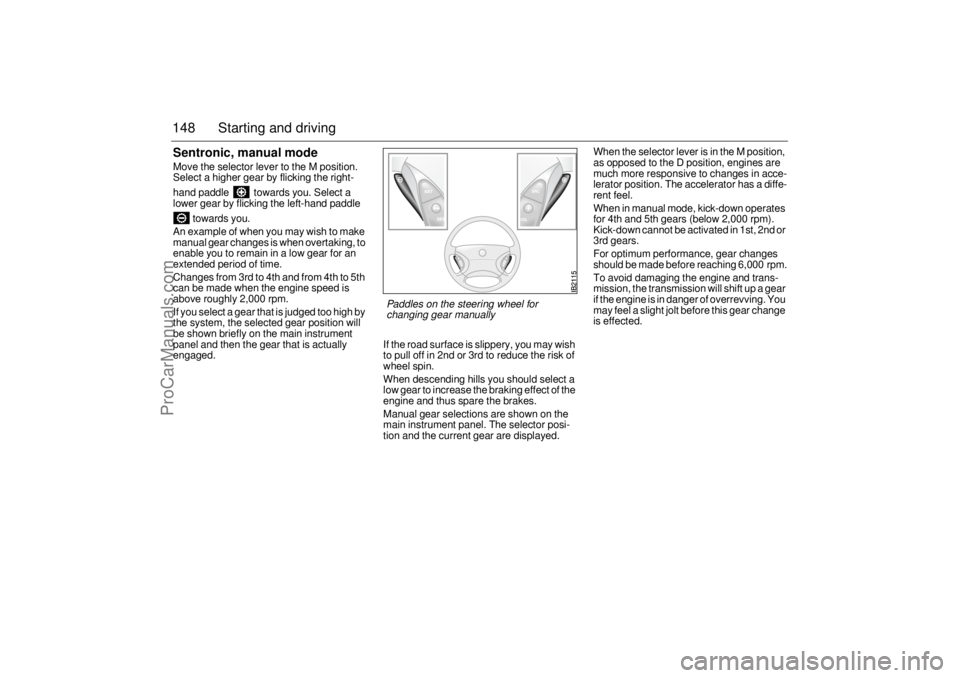
148 Starting and drivingSentronic, manual modeMove the selector lever to the M position.
Select a higher gear by flicking the right-
hand paddle towards you. Select a
lower gear by flicking the left-hand paddle
towards you.
An example of when you may wish to make
manual gear changes is when overtaking, to
enable you to remain in a low gear for an
extended period of time.
Changes from 3rd to 4th and from 4th to 5th
can be made when the engine speed is
above roughly 2,000 rpm.
If you select a gear that is judged too high by
the system, the selected gear position will
be shown briefly on the main instrument
panel and then the gear that is actually
engaged.If the road surface is slippery, you may wish
to pull off in 2nd or 3rd to reduce the risk of
wheel spin.
When descending hills you should select a
low gear to increase the braking effect of the
engine and thus spare the brakes.
Manual gear selections are shown on the
main instrument panel. The selector posi-
tion and the current gear are displayed.When the selector lever is in the M position,
as opposed to the D position, engines are
much more responsive to changes in acce-
lerator position. The accelerator has a diffe-
rent feel.
When in manual mode, kick-down operates
for 4th and 5th gears (below 2,000 rpm).
Kick-down cannot be activated in 1st, 2nd or
3rd gears.
For optimum performance, gear changes
should be made before reaching 6,000 rpm.
To avoid damaging the engine and trans-
mission, the transmission will shift up a gear
if the engine is in danger of overrevving. You
may feel a slight jolt before this gear change
is effected.
Paddles on the steering wheel for
changing gear manually
ProCarManuals.com
Page 152 of 276
150 Starting and drivingIf you move the selector lever from D to L, down shifts will follow a
set pattern to avoid damaging the engine or transmission.
Manual gear-changing is not recommended on slippery roads.
If one of the drive wheels spins excessively, the engine torque will
be reduced to avoid damaging the transmission.Adaptive gear-change patternsAdaptive gear-change patterns are selected automatically depend-
ing on the engine load and the present temperature of the transmis-
sion. The function is available in Normal and Sport modes.
The changes occur at a higher engine speed and the car remains in
the same gear for longer, if the transmission control module senses
that the load has not decreased. These gear-change patterns pre-
vent unnecessary changing up and down, when for example driving
up or down long slopes with a trailer or caravan, and to prevent over-
heating the transmission oil. The adaptive gear-change function is
also selected automatically when the transmission oil becomes too
hot, to protect the transmission itself from damage and to lower the
oil temperature.
The adaptive gear-change pattern function is deselected when:
The engine is switched off.
The load is reduced so much that the function is no longer requi-
red.
”Automatic transmission, fault indicator” appears on main
instrument panel, see page 146.
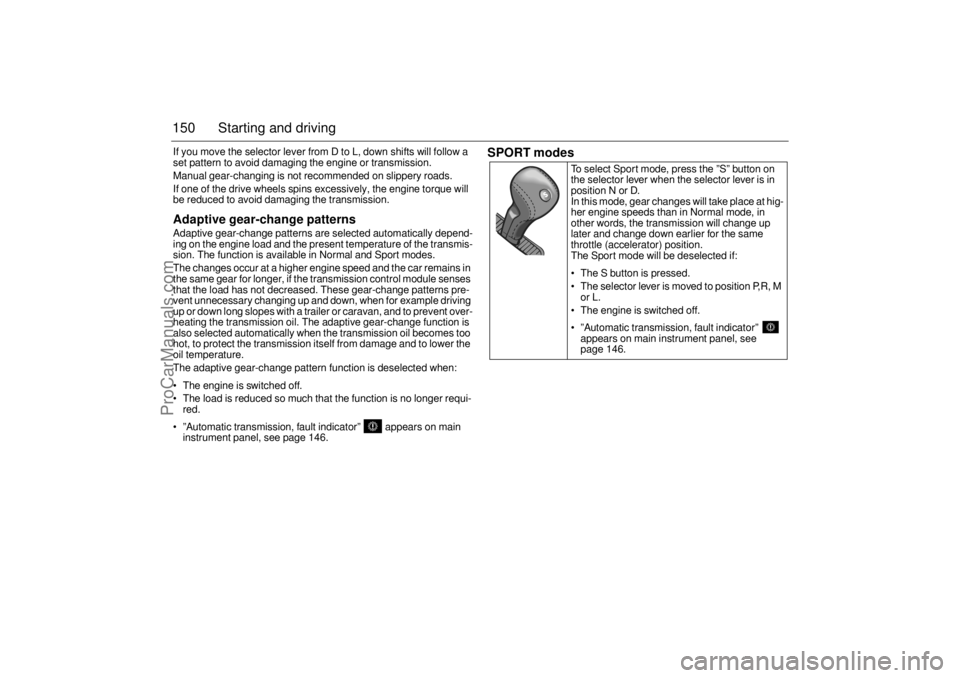
SPORT modes
To select Sport mode, press the ”S” button on
the selector lever when the selector lever is in
position N or D.
In this mode, gear changes will take place at hig-
her engine speeds than in Normal mode, in
other words, the transmission will change up
later and change down earlier for the same
throttle (accelerator) position.
The Sport mode will be deselected if:
The S button is pressed.
The selector lever is moved to position P,R, M
or L.
The engine is switched off.
”Automatic transmission, fault indicator”
appears on main instrument panel, see
page 146.
ProCarManuals.com
Page 162 of 276
160 Starting and drivingIf winter tires are fitted, the same type must
be fitted on all wheels. Your Saab dealer will
be pleased to advise you on the best tires for
your car.
Remember that tires age. It may therefore
be necessary to change them before they
reach the legal wear limit, as they gradually
lose their friction properties.
The best response if the car gets into a front-
wheel skid is to freewheel (manual gearbox
only), i.e. disengage the clutch (so that the
wheels are neither driven or retarded by the
engine.
If the car has automatic transmission, ease
up on the accelerator and steer carefully in
the desired direction.
In a rear-wheel skid, steer in the same direc-
tion that the rear of the car is moving.
Tire chainsIf you want to fit tire chains (where legally
permitted) they should only be fitted to the
tires recommended under ”Specifications”
(see page 260).
Consult your Saab dealer for details of
approved tire chains.
Driving in hot weather Always check the coolant level before
starting a journey. The level should be just
below the MAX mark.
At the end of a journey, if the engine has
worked hard, allow it to idle for two or
three minutes before switching it off.
If the needle on the temperature gauge
enters the red zone:
1 Bring the car to a standstill but leave the
engine running. Do
not
remove the cap
on the expansion tank even if the tank is
empty. If the needle on the temperature
gauge continues to rise while the engine
is idling, switch off the engine.
WARNING
Do not exceed 30 mph (50 km/h)
when tire chains are fitted.
Tire chains can reduce the directional
stability of the car.
Tire chains must not be used on the
rear wheels. NOTICE Check the links frequently for wear.
Check that the chains do not contact
the wheel-arch liner at full lock.
See section ”Specifications”,
page 260, for information on allowable
wheel dimensions for the fitting of tire
chains.
ProCarManuals.com
Page 166 of 276
164 Starting and drivingRecommendations for cars with manual
gearboxRises in coolant temperature are indicated
by the temperature gauge in the main instru-
ment panel.
The following steps are taken in order as the
temperature of the engine increases:
A/C compressor is switched off.
engine torque is reduced.
When continuing your journey, select a gear
in which the engine speed is about
3,000 rpm until the incline eases.
Driving considerations Always take extra care when towing a
trailer, as the car’s handling will be different
and its braking effect reduced. The trailer’s
braking system and suspension also have a
considerable effect on these characteris-
tics, see also ”Driving with a load” page 168.
If the car has automatic transmission, select
position D when ascending steep hills. This
ensures that the adaptive gear change pat-
terns are operational, see page 150. Use
position D or L for steep descents.
Checks before drivingMake sure that the car and camper or trailer
are in good working order. This is essential
since towing a camper or trailer increases
the strain on the car.
Check and if necessary adjust the tire
pressure of the car and camper or trailer.
Make sure all wheel bolts are properly
tightened.
Make sure that the equipment joining the
car and camper or trailer is properly secu-
red and adjusted.
Make sure the camper or trailer’s electri-
cal cable is properly connected and is not
so long that it drags along the ground.
Also, make sure the cable is not too short
and risks breaking when turning a corner.
Check all bulbs.
Check the car and camper or trailer bra-
kes.
Make sure that all items on or in the cara-
van or trailer are properly secured.
Make sure that the camper or trailer’s
jockey wheel is raised and locked.
Check the distribution of the load so that
the car and camper or trailer are well
balanced.
Check that the rearview mirrors provide
the best possible rearward vision.
Make sure the camper or trailer’s safety
cable is correctly attached.
WARNING
Utilize the braking effect of the engine
(1st, 2nd or 3rd gear) when you are
descending long or steep hills to spare
the brakes.
Brake failure can result from overheated
brakes!
NOTICEIf the ”Automatic transmission, fault indi-
cator” indicator comes on, cease
towing until the problem has been recti-
fied.
ProCarManuals.com