spare wheel SAAB 9-5 2005 Owners Manual
[x] Cancel search | Manufacturer: SAAB, Model Year: 2005, Model line: 9-5, Model: SAAB 9-5 2005Pages: 276, PDF Size: 16.72 MB
Page 6 of 276
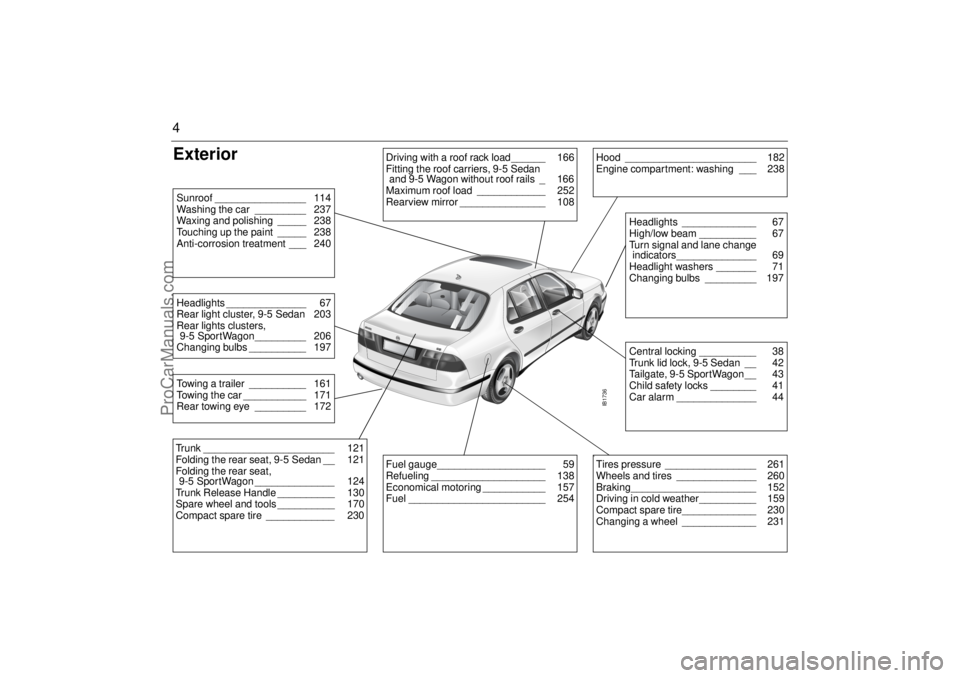
4Exterior
IB1736
Driving with a roof rack load______ 166
Fitting the roof carriers, 9-5 Sedan
and 9-5 Wagon without roof rails _ 166
Maximum roof load ____________ 252
Rearview mirror _______________ 108
Hood _______________________ 182
Engine compartment: washing ___ 238
Central locking __________ 38
Trunk lid lock, 9-5 Sedan __ 42
Tailgate, 9-5 SportWagon __ 43
Child safety locks ________ 41
Car alarm ______________ 44Headlights _____________ 67
High/low beam __________ 67
Turn signal and lane change
indicators______________ 69
Headlight washers _______ 71
Changing bulbs _________ 197
Fuel gauge___________________ 59
Refueling ____________________ 138
Economical motoring ___________ 157
Fuel ________________________ 254
b Tires pressure ________________ 261
Wheels and tires ______________ 260
Braking______________________ 152
Driving in cold weather__________ 159
Compact spare tire_____________ 230
Changing a wheel _____________ 231
Trunk _______________________ 121
Folding the rear seat, 9-5 Sedan __ 121
Folding the rear seat,
9-5 SportWagon ______________ 124
Trunk Release Handle __________ 130
Spare wheel and tools __________ 170
Compact spare tire ____________ 230Towing a trailer __________ 161
Towing the car ___________ 171
Rear towing eye _________ 172Headlights ______________ 67
Rear light cluster, 9-5 Sedan 203
Rear lights clusters,
9-5 SportWagon_________ 206
Changing bulbs __________ 197Sunroof ________________ 114
Washing the car _________ 237
Waxing and polishing _____ 238
Touching up the paint _____ 238
Anti-corrosion treatment ___ 240
ProCarManuals.com
Page 10 of 276
8
IB336
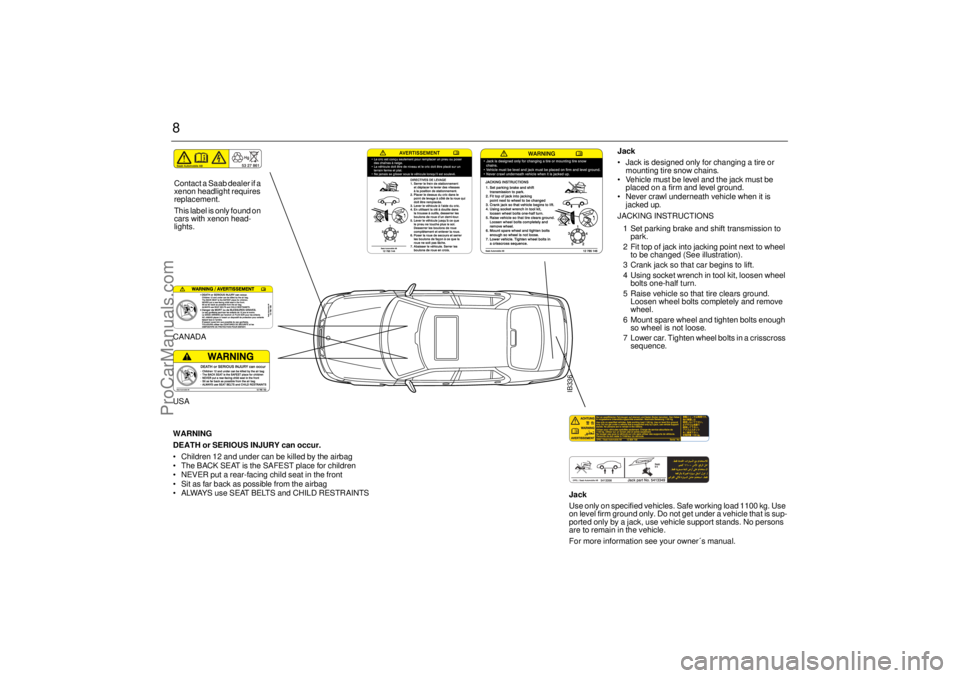
Jack
Jack is designed only for changing a tire or
mounting tire snow chains.
Vehicle must be level and the jack must be
placed on a firm and level ground.
Never crawl underneath vehicle when it is
jacked up.
JACKING INSTRUCTIONS
1 Set parking brake and shift transmission to
park.
2 Fit top of jack into jacking point next to wheel
to be changed (See illustration).
3 Crank jack so that car begins to lift.
4 Using socket wrench in tool kit, loosen wheel
bolts one-half turn.
5 Raise vehicle so that tire clears ground.
Loosen wheel bolts completely and remove
wheel.
6 Mount spare wheel and tighten bolts enough
so wheel is not loose.
7 Lower car. Tighten wheel bolts in a crisscross
sequence.
CANADAUSA
WARNING
DEATH or SERIOUS INJURY can occur.
Children 12 and under can be killed by the airbag
The BACK SEAT is the SAFEST place for children
NEVER put a rear-facing child seat in the front
Sit as far back as possible from the airbag
ALWAYS use SEAT BELTS and CHILD RESTRAINTSContact a Saab dealer if a
xenon headlight requires
replacement.
This label is only found on
cars with xenon head-
lights.
Jack
Use only on specified vehicles. Safe working load 1100 kg. Use
on level firm ground only. Do not get under a vehicle that is sup-
ported only by a jack, use vehicle support stands. No persons
are to remain in the vehicle.
For more information see your owner´s manual.
ProCarManuals.com
Page 133 of 276

131 Starting and driving
IB1754
Starting and driving
Ignition switch ________ 132
Starting the engine ____ 133
Important considerations
for driving___________ 136
Refueling ____________ 138
Engine Break-In Period_ 142
Gear changing ________ 142
Cruise control ________ 151
Braking ______________ 152
Electronic Stability
Program (ESP) _______ 155
Economical motoring __ 157
Driving in cold weather_ 159
Driving in hot weather _ 160
Towing a trailer _______ 161 Driving with a roof rack
load_________________ 166
Driving at night ________ 168
Driving with a load _____ 168
Driving considerations
with compact spare
wheel/tire fitted _______ 170
Spare wheel and tools __ 170
Driving with the trunk
lid/tailgate open _______ 171
Driving in deep water ___ 171
Towing the car_________ 171
Jump starting _________ 174
Saab Parking Assistance 177
Parking brake _________ 179
Parking _______________ 179
ProCarManuals.com
Page 150 of 276
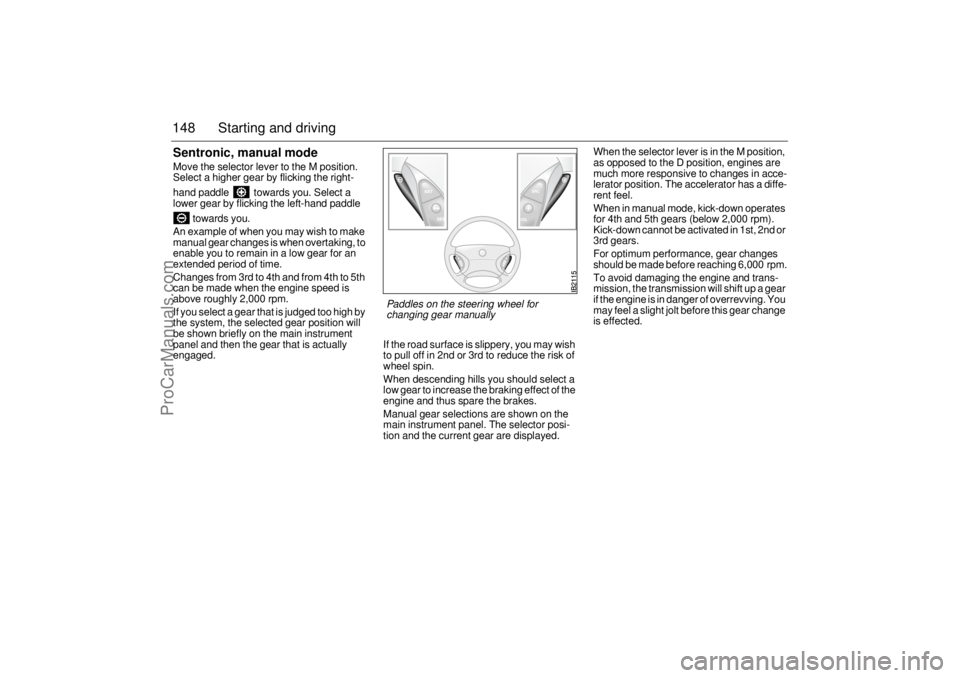
148 Starting and drivingSentronic, manual modeMove the selector lever to the M position.
Select a higher gear by flicking the right-
hand paddle towards you. Select a
lower gear by flicking the left-hand paddle
towards you.
An example of when you may wish to make
manual gear changes is when overtaking, to
enable you to remain in a low gear for an
extended period of time.
Changes from 3rd to 4th and from 4th to 5th
can be made when the engine speed is
above roughly 2,000 rpm.
If you select a gear that is judged too high by
the system, the selected gear position will
be shown briefly on the main instrument
panel and then the gear that is actually
engaged.If the road surface is slippery, you may wish
to pull off in 2nd or 3rd to reduce the risk of
wheel spin.
When descending hills you should select a
low gear to increase the braking effect of the
engine and thus spare the brakes.
Manual gear selections are shown on the
main instrument panel. The selector posi-
tion and the current gear are displayed.When the selector lever is in the M position,
as opposed to the D position, engines are
much more responsive to changes in acce-
lerator position. The accelerator has a diffe-
rent feel.
When in manual mode, kick-down operates
for 4th and 5th gears (below 2,000 rpm).
Kick-down cannot be activated in 1st, 2nd or
3rd gears.
For optimum performance, gear changes
should be made before reaching 6,000 rpm.
To avoid damaging the engine and trans-
mission, the transmission will shift up a gear
if the engine is in danger of overrevving. You
may feel a slight jolt before this gear change
is effected.
Paddles on the steering wheel for
changing gear manually
ProCarManuals.com
Page 166 of 276
164 Starting and drivingRecommendations for cars with manual
gearboxRises in coolant temperature are indicated
by the temperature gauge in the main instru-
ment panel.
The following steps are taken in order as the
temperature of the engine increases:
A/C compressor is switched off.
engine torque is reduced.
When continuing your journey, select a gear
in which the engine speed is about
3,000 rpm until the incline eases.
Driving considerations Always take extra care when towing a
trailer, as the car’s handling will be different
and its braking effect reduced. The trailer’s
braking system and suspension also have a
considerable effect on these characteris-
tics, see also ”Driving with a load” page 168.
If the car has automatic transmission, select
position D when ascending steep hills. This
ensures that the adaptive gear change pat-
terns are operational, see page 150. Use
position D or L for steep descents.
Checks before drivingMake sure that the car and camper or trailer
are in good working order. This is essential
since towing a camper or trailer increases
the strain on the car.
Check and if necessary adjust the tire
pressure of the car and camper or trailer.
Make sure all wheel bolts are properly
tightened.
Make sure that the equipment joining the
car and camper or trailer is properly secu-
red and adjusted.
Make sure the camper or trailer’s electri-
cal cable is properly connected and is not
so long that it drags along the ground.
Also, make sure the cable is not too short
and risks breaking when turning a corner.
Check all bulbs.
Check the car and camper or trailer bra-
kes.
Make sure that all items on or in the cara-
van or trailer are properly secured.
Make sure that the camper or trailer’s
jockey wheel is raised and locked.
Check the distribution of the load so that
the car and camper or trailer are well
balanced.
Check that the rearview mirrors provide
the best possible rearward vision.
Make sure the camper or trailer’s safety
cable is correctly attached.
WARNING
Utilize the braking effect of the engine
(1st, 2nd or 3rd gear) when you are
descending long or steep hills to spare
the brakes.
Brake failure can result from overheated
brakes!
NOTICEIf the ”Automatic transmission, fault indi-
cator” indicator comes on, cease
towing until the problem has been recti-
fied.
ProCarManuals.com
Page 172 of 276
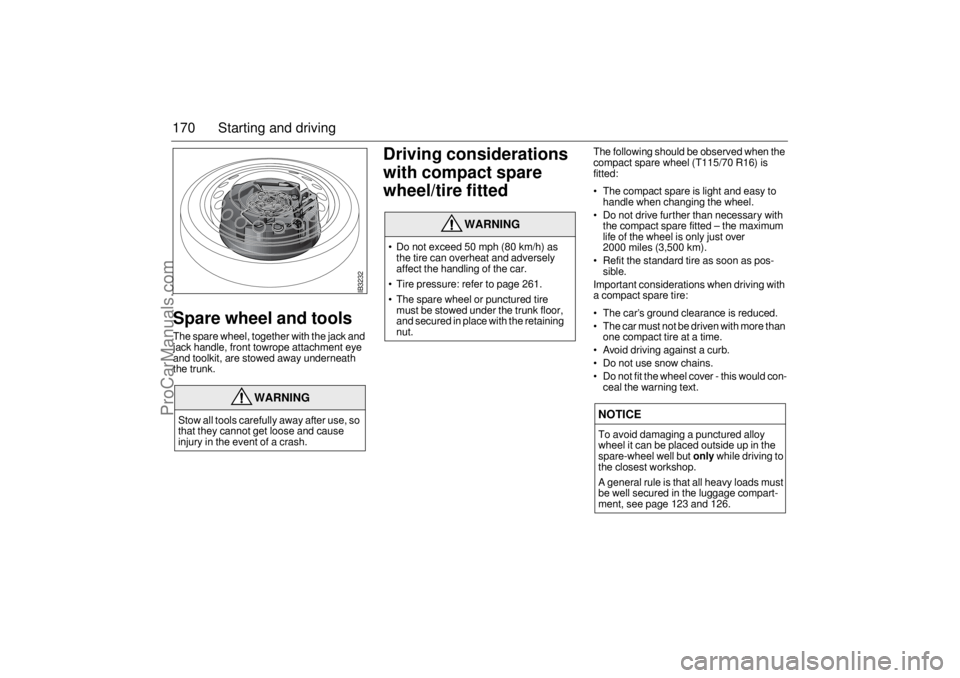
170 Starting and drivingSpare wheel and toolsThe spare wheel, together with the jack and
jack handle, front towrope attachment eye
and toolkit, are stowed away underneath
the trunk.
Driving considerations
with compact spare
wheel/tire fitted
The following should be observed when the
compact spare wheel (T115/70 R16) is
fitted:
The compact spare is light and easy to
handle when changing the wheel.
Do not drive further than necessary with
the compact spare fitted – the maximum
life of the wheel is only just over
2000 miles (3,500 km).
Refit the standard tire as soon as pos-
sible.
Important considerations when driving with
a compact spare tire:
The car’s ground clearance is reduced.
The car must not be driven with more than
one compact tire at a time.
Avoid driving against a curb.
Do not use snow chains.
Do not fit the wheel cover - this would con-
ceal the warning text.
WARNING
Stow all tools carefully away after use, so
that they cannot get loose and cause
injury in the event of a crash.
WARNING
Do not exceed 50 mph (80 km/h) as
the tire can overheat and adversely
affect the handling of the car.
Tire pressure: refer to page 261.
The spare wheel or punctured tire
must be stowed under the trunk floor,
and secured in place with the retaining
nut.
NOTICETo avoid damaging a punctured alloy
wheel it can be placed outside up in the
spare-wheel well but
only
while driving to
the closest workshop.
A general rule is that all heavy loads must
be well secured in the luggage compart-
ment, see page 123 and 126.
IB3232
ProCarManuals.com
Page 174 of 276
172 Starting and drivingFront towing eye
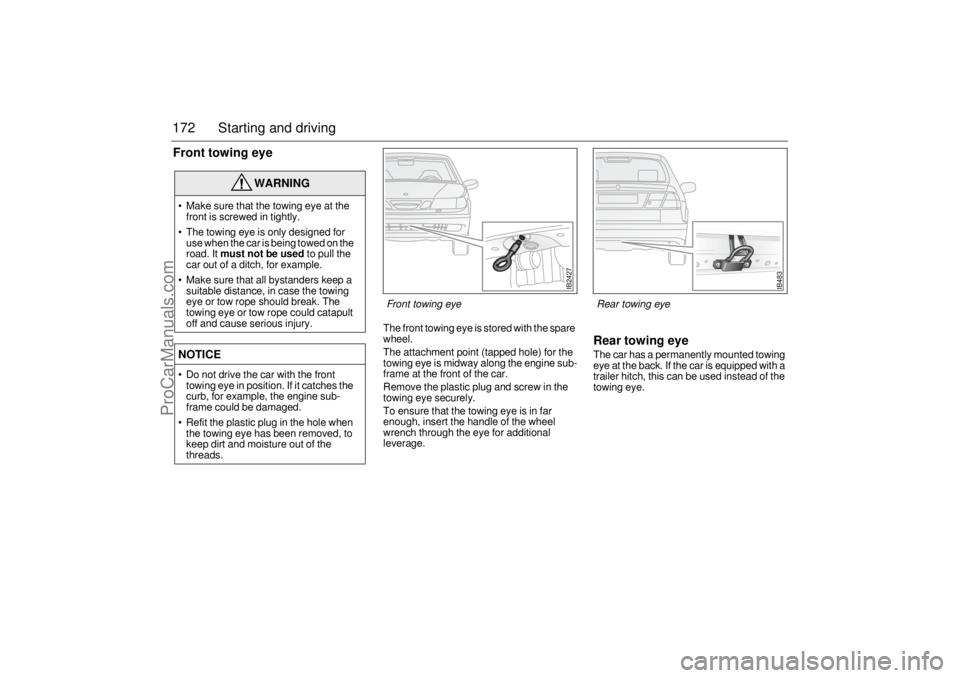
The front towing eye is stored with the spare
wheel.
The attachment point (tapped hole) for the
towing eye is midway along the engine sub-
frame at the front of the car.
Remove the plastic plug and screw in the
towing eye securely.
To ensure that the towing eye is in far
enough, insert the handle of the wheel
wrench through the eye for additional
leverage.
Rear towing eyeThe car has a permanently mounted towing
eye at the back. If the car is equipped with a
trailer hitch, this can be used instead of the
towing eye.
WARNING
Make sure that the towing eye at the
front is screwed in tightly.
The towing eye is only designed for
use when the car is being towed on the
road. It
must not be used
to pull the
car out of a ditch, for example.
Make sure that all bystanders keep a
suitable distance, in case the towing
eye or tow rope should break. The
towing eye or tow rope could catapult
off and cause serious injury.
NOTICE Do not drive the car with the front
towing eye in position. If it catches the
curb, for example, the engine sub-
frame could be damaged.
Refit the plastic plug in the hole when
the towing eye has been removed, to
keep dirt and moisture out of the
threads.
IB2427
Front towing eye
IB483
Rear towing eye
ProCarManuals.com
Page 220 of 276
218 Car care and technical informationWhen to checkCheck your tires once a month or more.
Don’t forget your compact spare tire. It
should be at 60 psi (420 kPa).How to CheckUse a good quality pocket-type gauge to
check tire pressure. You can’t tell if your
tires are properly inflated simply by looking
at them. Radial tires may look properly infla-
ted even when they’re underinflated.
Be sure to put the valve caps back on the
valve stems. They help prevent leaks by
keeping out dirt and moisture.Tire Inspection and RotationAny time you notice unusual wear, rotate
your tires as soon as possible and check
wheel alignment. Also check for damaged
tires or wheels. See “When It Is Time for
New Tires” on page 219 and “Wheel Repla-
cement” on page 222 for more information.
The purpose of regular rotation is to achieve
more uniform wear for all tires on the
vehicle. The first rotation is the most impor-
tant.
When rotating your tires, always use the
correct rotation pattern. Left front tire to left
rear. Left rear tire to right front. Right front to
right rear. Right rear to left front.
Don’t include the compact spare tire in your
tire rotation.
After the tires have been rotated, adjust the
front and rear inflation pressures as shown
on the Tire-Loading Information label. Make certain that all wheel nuts are properly tigh-
tened. See page 233.
Flat spottingAll tires get hot, especially on long journeys
or when the car is driven hard. After the car
has been parked with hot tires and the tires
have cooled down, a flat spot can form in the
tire, where it is in contact with the ground.
The same can occur if the car has not been
moved for a long time.
Flat spots can cause vibration that can be
felt through the steering wheel, similar to
that experienced when the wheels need
balancing.
Flat spots of this type disappear once the
tires get hot again, usually after 10–15 miles
(20–25 km) of driving at cruising speed.
WARNING
Rust or dirt on a wheel, or on the parts to
which it is fastened, can make wheel nuts
become loose after a time. The wheel
could come off and cause an accident.
When you change a wheel, remove any
rust or dirt from places where the wheel
attaches to the vehicle. In an emergency,
you can use a cloth or a paper towel to do
this; but be sure to use a scraper or wire
brush later, if you need to, to get all the
rust or dirt off. See “Changing a wheel” on
page 231.
ProCarManuals.com
Page 222 of 276

220 Car care and technical informationThe wheels and tires have been carefully
matched to the characteristics of the car and
play a key role in its outstanding roadhol-
ding and handling.
Do not take it for granted that a wheel/tire
combination will work in the best possible
way, just because it can be fitted to the car.
To ensure that the speedometer is as accu-
rate as possible it should be reprogrammed
if wheels of a different dimension are fitted.
Contact a Saab dealer.
Because of front wheel drive, the front tires
tend to wear faster than the rear ones. New
tires should always be fitted in pairs, so that
tires on the same axle have the same
amount of tread.
Store wheels lying flat or hanging –
never
standing upright.
NOTICEAlways
consult your Saab dealer before
changing the wheels and tires on your
Saab.
Wide wheels and tires with sidewalls that
are too low can:
be damaged in potholes etc.
cause springs, shock absorbers and
wheel bearings and body mountings
can be overloaded.
cause the wheels to come into contact
with chassis and body components.
can affect the function of the Elec-
tronic Stability Program (ESP).
The speed and load limits for the tires
must not be exceeded; see page 225.
Wheels larger than 17” must not be fitted.
The maximum permissible offset is
49 mm.
WARNING
Mixing tires could cause you to lose
control while driving. If you mix tires of
different sizes or types (radial and bias-
belted tires), the vehicle may not handle
properly, and you could have a crash.
Using tires of different sizes may also
cause damage to your vehicle. Be sure to
use the same size and type tires on all
wheels. It’s all right to drive with your
compact spare temporarily, it was devel-
oped for use on your vehicle. See
“Compact spare tire” on page 230.
WARNING
If you use bias-ply tires on your vehicle,
the wheel rim flanges could develop
cracks after many miles of driving. A tire
and/or wheel could fail suddenly, causing
a crash. Use only radial-ply tires with the
wheels on your vehicle.
ProCarManuals.com
Page 223 of 276

221 Car care and technical information
Uniform Tire Quality GradingQuality grades can be found where applica-
ble on the tire sidewall between tread shoul-
der and maximum section width. For
example:Treadwear 200 Traction AA
Temperature AThe following information relates to the
system developed by the United States
National Highway Traffic Safety Administra-
tion, which grades tires by treadwear, trac-
tion and temperature performance. (This
applies only to vehicles sold in the United
States.) The grades are molded on the side-
walls of most passenger car tires. The Uni-
form Tire Quality Grading system does not
apply to deep tread, winter-type snow tires,
space-saver or temporary use spare tires,
tires with nominal rim diameters of 10 to 12
inches (25 to 30 cm), or to some limited-pro-
duction tires.
While the tires available on General Motors
passenger cars and light trucks may vary
with respect to these grades, they must also
conform to federal safety requirements and
additional General Motors Tire Perfor-
mance Criteria (TPC) standards.
TreadwearThe treadwear grade is a comparative
rating based on the wear rate of the tire
when tested under controlled conditions on
a specified government test course. For
example, a tire graded 150 would wear one
and a half (1.5) times as well on the govern-
ment course as a tire graded 100. The rela-
tive performance of tires depends upon the
actual conditions of their use, however, and
may depart significantly from the norm due
to variations in driving habits, service prac-
tices and differences in road characteristics
and climate.Traction – AA, A, B, CThe traction grades, from highest to lowest,
are AA, A, B, and C. Those grades repre-
sent the tire’s ability to stop on wet pave-
ment as measured under controlled condi-
tions on specified government test surfaces
of asphalt and concrete. A tire marked C
may have poor traction performance. War-
ning: The traction grade assigned to this tire
is based on straight-ahead braking traction
tests, and does not include acceleration,
cornering, hydroplaning, or peak traction
characteristics.
Temperature – A, B, CThe temperature grades are A (the highest),
B, and C, representing the tire’s resistance
to the generation of heat and its ability to dis-
sipate heat when tested under controlled
conditions on a specified indoor laboratory
test wheel. Sustained high temperature can
cause the material of the tire to degenerate
and reduce tire life, and excessive tempera-
ture can lead to sudden tire failure. The
grade C corresponds to a level of perfor-
mance which all passenger car tires must
meet under the Federal Motor Vehicle
Safety Standard No. 109. Grades B and A
represent higher levels of performance on
the laboratory test wheel than the minimum
required by law.
Warning: The temperature grade for this tire
is established for a tire that is properly infla-
ted and not overloaded. Excessive speed,
underinflation, or excessive loading, either
separately or in combination, can cause
heat buildup and possible tire failure.
ProCarManuals.com