garage door opener SAAB 9-7X 2008 Owners Manual
[x] Cancel search | Manufacturer: SAAB, Model Year: 2008, Model line: 9-7X, Model: SAAB 9-7X 2008Pages: 426, PDF Size: 2.77 MB
Page 114 of 426
Universal Home Remote
System
Universal Home Remote System
The Universal Home Remote System provides a way to
replace up to three hand-held Radio-Frequency (RF)
transmitters used to activate devices such as garage
door openers, security systems, and home lighting.
This device complies with Part 15 of the FCC Rules.
Operation is subject to the following two conditions:
1. This device may not cause harmful interference.
2. This device must accept any interference received,
including interference that may cause undesired
operation.
This device complies with RSS-210 of Industry Canada.
Operation is subject to the following two conditions:
1. This device may not cause interference.
2. This device must accept any interference received,
including interference that may cause undesired
operation of the device.
Changes or modi�cations to this system by other than
an authorized service facility could void authorization to
use this equipment.
Universal Home Remote System
Operation (With One Triangular LED)
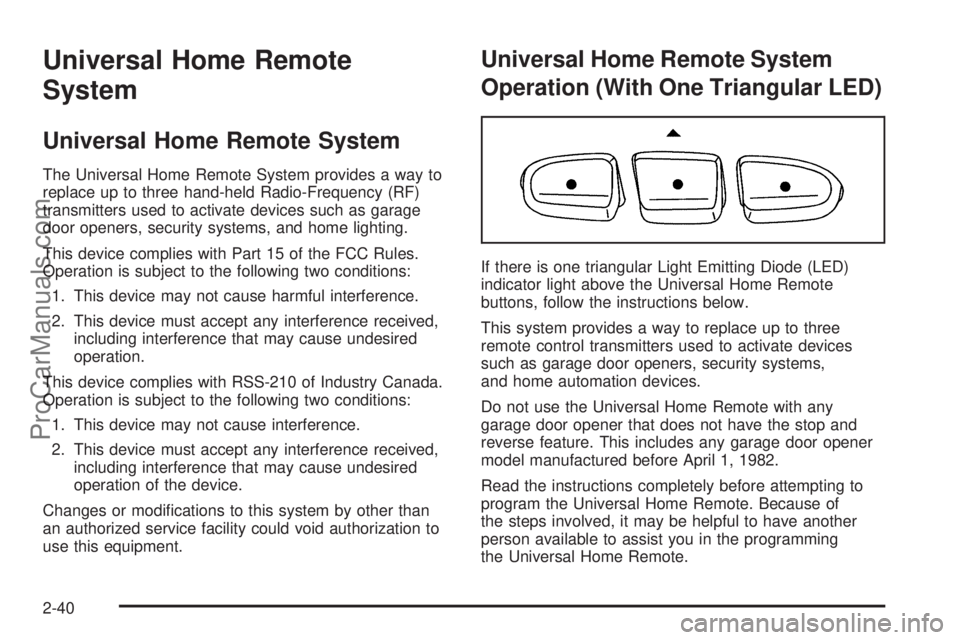
If there is one triangular Light Emitting Diode (LED)
indicator light above the Universal Home Remote
buttons, follow the instructions below.
This system provides a way to replace up to three
remote control transmitters used to activate devices
such as garage door openers, security systems,
and home automation devices.
Do not use the Universal Home Remote with any
garage door opener that does not have the stop and
reverse feature. This includes any garage door opener
model manufactured before April 1, 1982.
Read the instructions completely before attempting to
program the Universal Home Remote. Because of
the steps involved, it may be helpful to have another
person available to assist you in the programming
the Universal Home Remote.
2-40
ProCarManuals.com
Page 115 of 426
Keep the original hand-held transmitter for use in other
vehicles as well as for future Universal Home Remote
programming. It is also recommended that upon the
sale of the vehicle, the programmed Universal Home
Remote buttons should be erased for security purposes.
See “Erasing Universal Home Remote Buttons” later
in this section.
When programming a garage door, park outside of
the garage. Park directly in line with and facing
the garage door opener motor-head or gate motor-head.
Be sure that people and objects are clear of the
garage door or gate you are programming.
It is recommended that a new battery be installed in
your hand-held transmitter for quicker and more
accurate transmission of the radio-frequency signal.
Programming the Universal Home
Remote System
If you have questions or need help programming the
Universal Home Remote System, call 1-800-355-3515
or go to www.homelink.com.
Programming a garage door opener involves
time-sensitive actions, so read the entire procedure
before you begin. If you do not follow these actions,
the device will time out and you will have to repeat the
procedure.To program up to three devices:
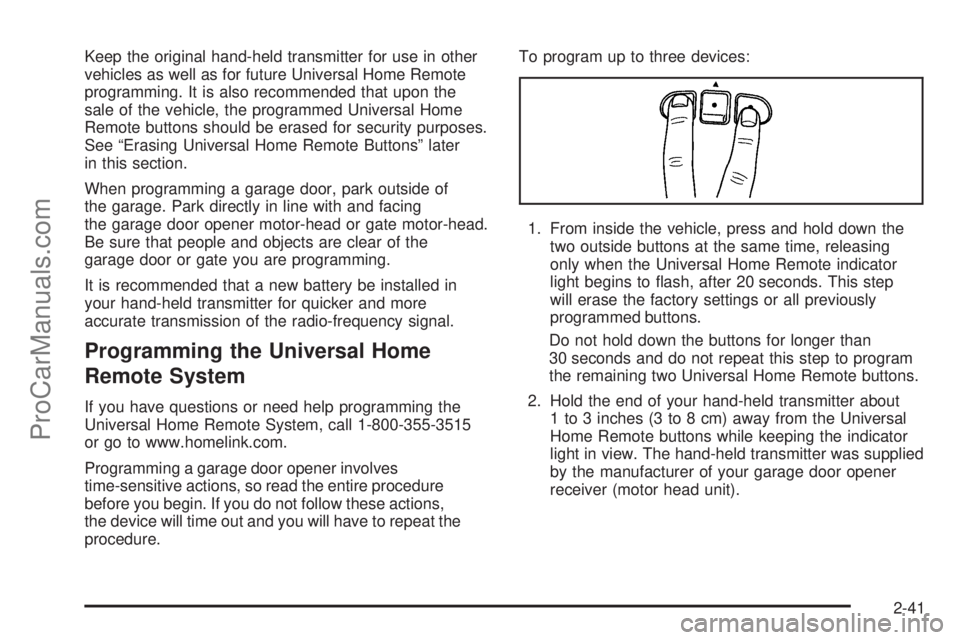
1. From inside the vehicle, press and hold down the
two outside buttons at the same time, releasing
only when the Universal Home Remote indicator
light begins to �ash, after 20 seconds. This step
will erase the factory settings or all previously
programmed buttons.
Do not hold down the buttons for longer than
30 seconds and do not repeat this step to program
the remaining two Universal Home Remote buttons.
2. Hold the end of your hand-held transmitter about
1 to 3 inches (3 to 8 cm) away from the Universal
Home Remote buttons while keeping the indicator
light in view. The hand-held transmitter was supplied
by the manufacturer of your garage door opener
receiver (motor head unit).
2-41
ProCarManuals.com
Page 116 of 426
3. At the same time, press and hold both the
Universal Home Remote button that you would
like to use to control the garage door and the
hand-held transmitter button. Do not release the
Universal Home Remote button or the hand-held
transmitter button until Step 4 has been completed.
Some entry gates and garage door openers may
require you to substitute Step 3 with the procedure
noted in “Gate Operator and Canadian
Programming” later in this section.
4. The indicator light on the Universal Home Remote
will �ash slowly at �rst and then rapidly after
Universal Home Remote successfully receives the
frequency signal from the hand-held transmitter.
Release both buttons.
5. Press and hold the newly-trained Universal Home
Remote button and observe the indicator light.
If the indicator light stays on continuously,
the programming is complete and your garage door
should move when the Universal Home Remote
button is pressed and released. You do not need to
continue the programming Steps 6 through 8 and
can stop here.
If the Universal Home Remote indicator light blinks
rapidly for two seconds and then turns to a
constant light, continue with the programming
Steps 6 through 8.It may be helpful to have another person available
to assist with the remaining steps.
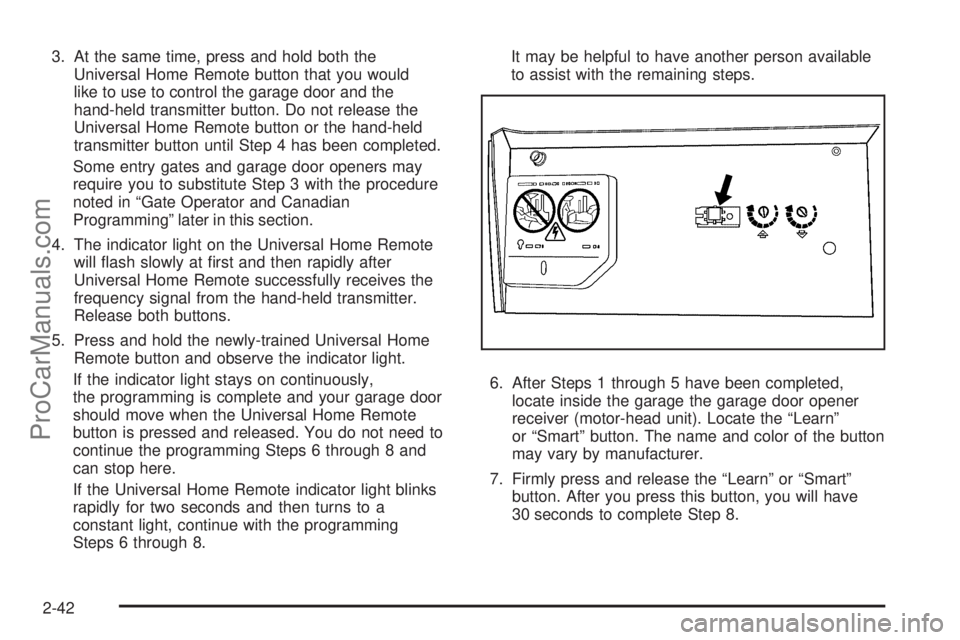
6. After Steps 1 through 5 have been completed,
locate inside the garage the garage door opener
receiver (motor-head unit). Locate the “Learn”
or “Smart” button. The name and color of the button
may vary by manufacturer.
7. Firmly press and release the “Learn” or “Smart”
button. After you press this button, you will have
30 seconds to complete Step 8.
2-42
ProCarManuals.com
Page 117 of 426
8. Immediately return to the vehicle. Firmly press and
hold the Universal Home Remote button, chosen in
Step 3 to control the garage door, for two seconds,
and then release it. If the garage door does not
move, press and hold the same button a second time
for two seconds, and then release it. Again, if the
door does not move, press and hold the same button
a third time for two seconds, and then release.
The Universal Home Remote should now activate
the garage door.
To program the remaining two Universal Home Remote
buttons, begin with Step 2 of “Programming the
Universal Home Remote System.” Do not repeat Step 1,
as this will erase all previous programming from the
Universal Home Remote buttons.
Gate Operator and Canadian
Programming
If you have questions or need help programming the
Universal Home Remote System, call 1-800-355-3515
or go to www.homelink.com.Canadian radio-frequency laws require transmitter
signals to time out or quit after several seconds of
transmission. This may not be long enough for Universal
Home Remote to pick up the signal during programming.
Similarly, some U.S. gate operators are manufactured
to time out in the same manner.
If you live in Canada, or you are having difficulty
programming a gate operator or garage door opener
by using the “Programming Universal Home Remote”
procedures, regardless of where you live, replace
Step 3 under “Programming Universal Home Remote”
with the following:
Continue to press and hold the Universal Home Remote
button while you press and release every two seconds
(cycle) the hand-held transmitter button until the
frequency signal has been successfully accepted by the
Universal Home Remote. The Universal Home Remote
indicator light will �ash slowly at �rst and then rapidly.
Proceed with Step 4 under “Programming Universal
Home Remote” to complete.
2-43
ProCarManuals.com
Page 411 of 426

This data can help provide a better understanding of the
circumstances in which crashes and injuries occur.
Important:EDR data is recorded by your vehicle only
if a non-trivial crash situation occurs; no data is
recorded by the EDR under normal driving conditions
and no personal data (e.g., name, gender, age, and
crash location) is recorded. However, other parties, such
as law enforcement, could combine the EDR data with
the type of personally identifying data routinely acquired
during a crash investigation.
To read data recorded by an EDR, special equipment is
required, and access to the vehicle or the EDR is
needed. In addition to the vehicle manufacturer, other
parties, such as law enforcement, that have the special
equipment, can read the information if they have
access to the vehicle or the EDR.
Saab will not access this data or share it with others
except: with the consent of the vehicle owner or, if the
vehicle is leased, with the consent of the lessee; in
response to an official request of police or similar
government office; as part of Saab’s defense of litigation
through the discovery process; or, as required by law.
Data that Saab collects or receives may also be used for
Saab research needs or may be made available to
others for research purposes, where a need is shown
and the data is not tied to a speci�c vehicle or
vehicle owner.OnStar®
If your vehicle has OnStar and you subscribe to the
OnStar services, please refer to the OnStar Terms and
Conditions for information on data collection and
use. See alsoOnStar
®System on page 2-36in this
manual for more information.
Navigation System
If your vehicle has a navigation system, use of the
system may result in the storage of destinations,
addresses, telephone numbers, and other trip
information. Refer to the navigation system operating
manual for information on stored data and for deletion
instructions.
Radio Frequency
Identi�cation (RFID)
RFID technology is used in some vehicles for functions
such as tire pressure monitoring and ignition system
security, as well as in connection with conveniences
such as key fobs for remote door locking/unlocking and
starting, and in-vehicle transmitters for garage door
openers. RFID technology in Saab vehicles does
not use or record personal information or link with any
other Saab system containing personal information.
7-15
ProCarManuals.com
Page 418 of 426
G
Gage
Check Gages Warning Light..........................3-43
Engine Coolant Temperature.........................3-36
Fuel..........................................................3-44
Oil Pressure...............................................3-40
Speedometer..............................................3-28
Tachometer.................................................3-28
Voltmeter Gage...........................................3-33
Garage Door Opener.......................................2-40
Gasoline
Octane........................................................ 5-5
Speci�cations............................................... 5-5
Gate Ajar Light...............................................3-43
Glove Box.....................................................2-44
H
Hazard Warning Flashers................................... 3-6
Head Restraints............................................... 1-7
Headlamp
Aiming.......................................................5-52
Headlamps............................................3-14, 5-53
Bulb Replacement.......................................5-52
Daytime Running Lamps...............................3-15
Electrical System.......................................5-111
Flash-to-Pass............................................... 3-8Headlamps (cont.)
Front Turn Signal, Sidemarker and
Parking Lamps.........................................5-54
Halogen Bulbs............................................5-53
High Intensity Discharge (HID) Lighting...........5-52
High/Low Beam Changer................................ 3-8
On Reminder..............................................3-15
Washer......................................................3-11
Heated Seats................................................... 1-3
Heater...........................................................3-20
Highbeam On Light.........................................3-42
High-Speed Operation, Tires.............................5-68
Highway Hypnosis...........................................4-16
Hill and Mountain Roads..................................4-16
Hood
Checking Things Under................................5-10
Release.....................................................5-10
Horn............................................................... 3-6
How to Wear Safety Belts Properly...................1-15
I
Ignition Positions.............................................2-20
Infants and Young Children,
Restraints...................................................1-32
In�ation - Tire Pressure...................................5-67
Instrument Panel
Overview..................................................... 3-4
6
ProCarManuals.com