tire pressure SAAB 9-7X 2008 Owners Manual
[x] Cancel search | Manufacturer: SAAB, Model Year: 2008, Model line: 9-7X, Model: SAAB 9-7X 2008Pages: 426, PDF Size: 2.77 MB
Page 123 of 426

Instrument Panel Overview...............................3-4
Hazard Warning Flashers................................3-6
Other Warning Devices...................................3-6
Horn.............................................................3-6
Tilt Wheel.....................................................3-6
Turn Signal/Multifunction Lever.........................3-7
Turn and Lane-Change Signals........................3-7
Headlamp High/Low-Beam Changer..................3-8
Flash-to-Pass.................................................3-8
Windshield Wipers..........................................3-9
Windshield Washer.......................................3-10
Rear Window Wiper/Washer...........................3-10
Headlamp Washer........................................3-11
Cruise Control..............................................3-11
Headlamps..................................................3-14
Headlamps on Reminder................................3-15
Daytime Running Lamps (DRL).......................3-15
Automatic Headlamp System..........................3-16
Fog Lamps..................................................3-17
Instrument Panel Brightness...........................3-17
Dome Lamps...............................................3-17
Dome Lamp Override....................................3-18
Entry Lighting...............................................3-18
Exit Lighting.................................................3-18
Reading Lamps............................................3-18Electric Power Management...........................3-18
Battery Run-Down Protection..........................3-19
Accessory Power Outlet(s).............................3-19
Climate Controls............................................3-20
Dual Automatic Climate Control System...........3-20
Outlet Adjustment.........................................3-24
Rear Climate Control System.........................3-24
Climate Controls Personalization.....................3-25
Warning Lights, Gages, and Indicators............3-26
Instrument Panel Cluster................................3-27
Speedometer and Odometer...........................3-28
Trip Odometer..............................................3-28
Tachometer.................................................3-28
Safety Belt Reminders...................................3-29
Airbag Readiness Light..................................3-30
Passenger Airbag Status Indicator...................3-31
Charging System Light..................................3-33
Voltmeter Gage............................................3-33
Brake System Warning Light..........................3-34
Antilock Brake System Warning Light...............3-35
StabiliTrak
®Service Light...............................3-36
StabiliTrak®Indicator Light..............................3-36
Engine Coolant Temperature Gage..................3-36
Tire Pressure Light.......................................3-37
Section 3 Instrument Panel
3-1
ProCarManuals.com
Page 159 of 426
If you have been operating your vehicle under normal
driving conditions, you should pull off the road, stop your
vehicle and turn off the engine as soon as possible.
SeeEngine Overheating on page 5-30.
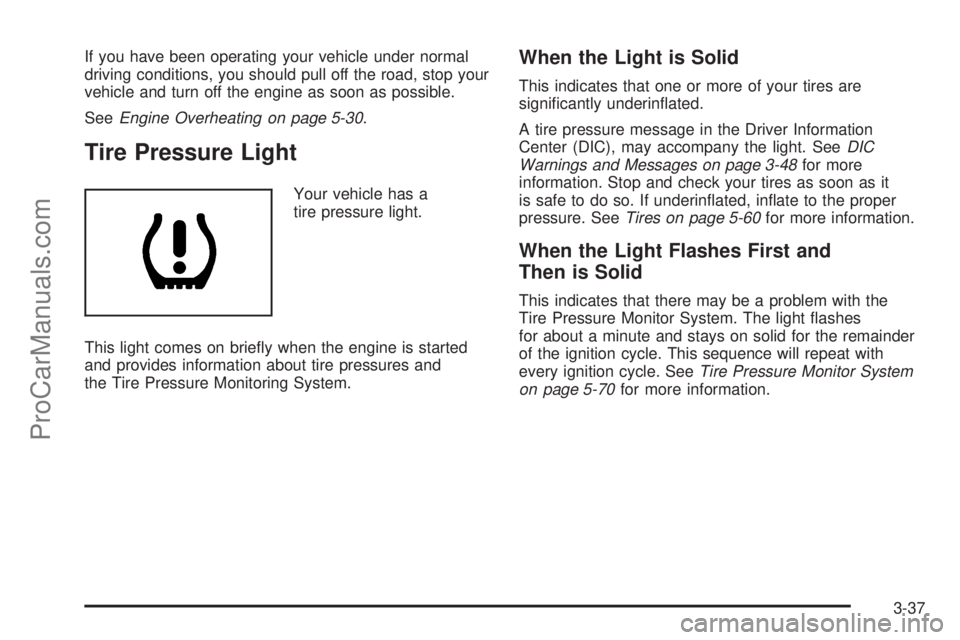
Tire Pressure Light
Your vehicle has a
tire pressure light.
This light comes on brie�y when the engine is started
and provides information about tire pressures and
the Tire Pressure Monitoring System.
When the Light is Solid
This indicates that one or more of your tires are
signi�cantly underin�ated.
A tire pressure message in the Driver Information
Center (DIC), may accompany the light. SeeDIC
Warnings and Messages on page 3-48for more
information. Stop and check your tires as soon as it
is safe to do so. If underin�ated, in�ate to the proper
pressure. SeeTires on page 5-60for more information.
When the Light Flashes First and
Then is Solid
This indicates that there may be a problem with the
Tire Pressure Monitor System. The light �ashes
for about a minute and stays on solid for the remainder
of the ignition cycle. This sequence will repeat with
every ignition cycle. SeeTire Pressure Monitor System
on page 5-70for more information.
3-37
ProCarManuals.com
Page 167 of 426
Driver Information Center (DIC)
The Driver Information Center (DIC) display is located
on the instrument panel cluster, below the speedometer.
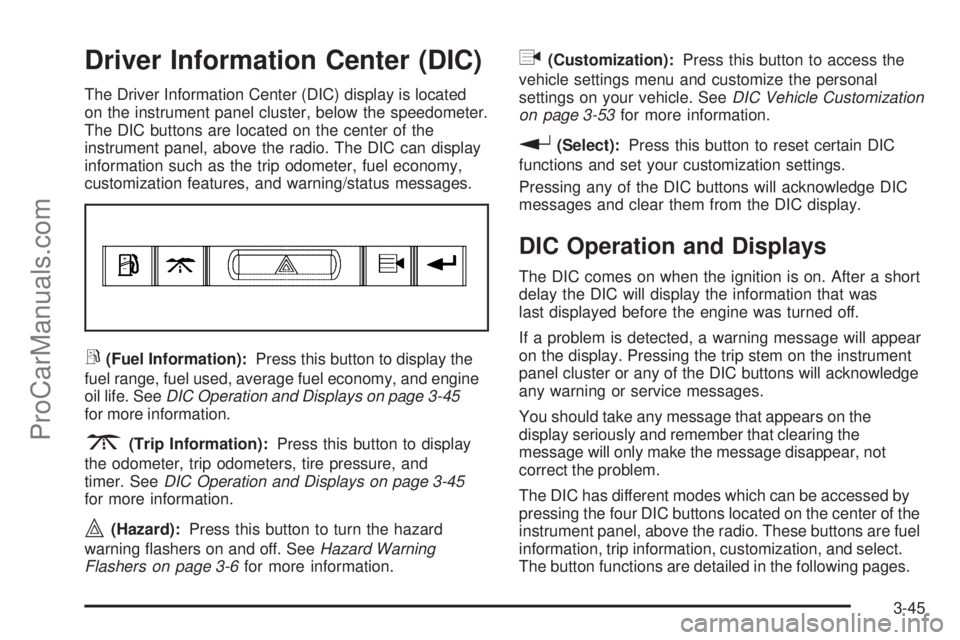
The DIC buttons are located on the center of the
instrument panel, above the radio. The DIC can display
information such as the trip odometer, fuel economy,
customization features, and warning/status messages.
r(Fuel Information):Press this button to display the
fuel range, fuel used, average fuel economy, and engine
oil life. SeeDIC Operation and Displays on page 3-45
for more information.
3(Trip Information):Press this button to display
the odometer, trip odometers, tire pressure, and
timer. SeeDIC Operation and Displays on page 3-45
for more information.
|(Hazard):Press this button to turn the hazard
warning �ashers on and off. SeeHazard Warning
Flashers on page 3-6for more information.
q(Customization):Press this button to access the
vehicle settings menu and customize the personal
settings on your vehicle. SeeDIC Vehicle Customization
on page 3-53for more information.
r(Select):Press this button to reset certain DIC
functions and set your customization settings.
Pressing any of the DIC buttons will acknowledge DIC
messages and clear them from the DIC display.
DIC Operation and Displays
The DIC comes on when the ignition is on. After a short
delay the DIC will display the information that was
last displayed before the engine was turned off.
If a problem is detected, a warning message will appear
on the display. Pressing the trip stem on the instrument
panel cluster or any of the DIC buttons will acknowledge
any warning or service messages.
You should take any message that appears on the
display seriously and remember that clearing the
message will only make the message disappear, not
correct the problem.
The DIC has different modes which can be accessed by
pressing the four DIC buttons located on the center of the
instrument panel, above the radio. These buttons are fuel
information, trip information, customization, and select.
The button functions are detailed in the following pages.
3-45
ProCarManuals.com
Page 168 of 426
Fuel Information Button
r
(Fuel Information):Press this button to scroll
through the fuel range, fuel used, average fuel economy,
and the engine oil life system.
Fuel Range:Press the fuel information button until
RANGE appears on the display. This mode shows the
remaining distance you can drive without refueling. It is
based on fuel economy and the fuel remaining in the fuel
tank. The display will show LOW if the fuel level is low.
The fuel economy data used to determine fuel range is
an average of recent driving conditions. As your driving
conditions change, this data is gradually updated.
Fuel range cannot be reset.
Fuel Used:Press the fuel information button until
FUEL USED appears on the display. This mode shows
the number of gallons or liters of fuel used since the
last reset of this menu item. To reset the fuel used
information, press and hold the select button for
one second while FUEL USED is displayed.
Average Fuel Economy:Press the fuel information
button until AVG. ECON appears on the display.
This mode shows how many miles per gallon (MPG),
kilometers per liter (km/L), or liters per 100 kilometers
(L/100 km) your vehicle is getting based on current
and past driving conditions.Press and hold the select button for one second while
AVG. ECON is displayed to reset the average fuel
economy. Average fuel economy will then be calculated
starting from that point. If the average fuel economy is not
reset, it will be continually updated each time you drive.
Engine Oil Life System:Press the fuel information
button until ENGINE OIL LIFE appears on the display.
The engine oil life system shows an estimate of the
oil’s remaining useful life. It will show 100% when the
system is reset after an oil change. It will alert you
to change your oil on a schedule consistent with your
driving conditions.
Always reset the engine oil life system after an oil
change. To reset the engine oil life system, see
Engine Oil Life System on page 5-22.
In addition to the engine oil life system monitoring the
oil life, additional maintenance is recommended in the
Maintenance Schedule in this manual. SeeEngine Oil
on page 5-18andScheduled Maintenance on page 6-3.
Trip Information Button
3
(Trip Information):Press this button to scroll
through the odometer, trip odometers, tire pressures,
and timer.
3-46
ProCarManuals.com
Page 169 of 426
Odometer:Press the trip information button until
ODOMETER appears on the display. This mode
shows the total distance the vehicle has been driven
in either miles or kilometers. Pressing the trip stem
located on the instrument panel cluster with the vehicle
off will also display the odometer.
Trip A:Press the trip information button until TRIP A
appears on the display. This mode shows the current
distance traveled since the last reset for TRIP A in either
miles or kilometers.
Trip B:Press the trip information button until TRIP B
appears on the display. This mode shows the current
distance traveled since the last reset for TRIP B in
either miles or kilometers.
To reset TRIP A or TRIP B information, press and hold
the select button for one second while in one of the
trip modes. This will reset the information for TRIP A
or TRIP B.
You can also reset the TRIP A or TRIP B while they are
displayed by pressing the trip stem. If you press and
hold the trip stem or the select button for more than
four seconds, the display will show the distance traveled
since the last ignition cycle for TRIP A or TRIP B.Tire Pressures:Press the trip information button
until TIRE PRESSURES appears on the display. This
mode shows the tire pressure in pounds per square
inch (psi) or kilopascals (kPa). Press the select button
to scroll through the following information:
LF TIRE shows the tire pressure for the front
driver’s side tire.
RF TIRE shows the tire pressure for the front
passenger’s side tire.
LR TIRE shows the tire pressure for the rear
driver’s side tire.
RR TIRE shows the tire pressure for the rear
passenger’s side tire.
Timer:The DIC can be used as a timer. Press the
select button while TIMER is displayed to start the timer.
The display will show the amount of time that has passed
since the timer was last reset, not including time the
ignition is off. Time will continue to be counted as long
as the ignition is on, even if another display is being
shown on the DIC. The timer will record up to 99 hours,
59 minutes, and 59 seconds (99:59:59), after which the
display will roll back to zero.
To stop the counting of time, press the select button
brie�y while TIMER is displayed.
To reset the timer to zero, press and hold the select
button while TIMER is displayed.
3-47
ProCarManuals.com
Page 170 of 426
Customization Button
q
(Customization):Press this button to access
the VEHICLE SETTINGS menu and customize
the settings to your vehicle. SeeDIC Vehicle
Customization on page 3-53for more information.
Select Button
r
(Select):Press the select button to reset certain
DIC functions, turn off or acknowledge messages on
the DIC display, and set your customization settings.
For example, this button will allow you to reset the trip
odometers, turn off the FUEL LEVEL LOW message,
and enables you to scroll through and select the
language in which the DIC information will appear.
DIC Warnings and Messages
Messages are displayed on the DIC to notify the driver
that the status of the vehicle has changed and that
some action may be needed to correct the condition.
Multiple messages may appear one after another.
Some messages may not require immediate action.
Press any of the DIC buttons on the instrument panel
or the trip odometer reset stem on the instrument panel
cluster to acknowledge that you received the messages
and to clear them from the display.Some messages cannot be cleared from the display
because they are more urgent. These messages require
action before they can be removed from the DIC display.
Take any messages that appear on the display seriously
and remember that clearing the messages will only make
the messages disappear, not correct the problem.
The following are the possible messages that can be
displayed and some information about them.
CHANGE ENGINE OIL
This message displays when the engine oil needs to
be changed and service is required for your vehicle.
SeeScheduled Maintenance on page 6-3andEngine
Oil on page 5-18for more information. Also see
Engine Oil Life System on page 5-22for information
on how to reset the message. This message clears
itself after 10 seconds until the next ignition cycle.
CHECK TIRE PRESSURE
This message displays when the pressure in one or
more of the vehicle’s tires needs to be checked.
If a tire pressure message appears on the DIC,
stop as soon as you can. Have the tire pressures
checked and set to those shown on the Tire Loading
Information label. SeeTires on page 5-60,Loading Your
Vehicle on page 4-22, andInflation - Tire Pressure on
page 5-67. The DIC also shows the tire pressure values.
3-48
ProCarManuals.com
Page 171 of 426

SeeDIC Operation and Displays on page 3-45.Ifthe
tire pressure is low, the low tire pressure warning
light comes on. SeeTire Pressure Light on page 3-37.
CHECK WASHER FLUID
This message displays if the washer �uid level is low.
Adding washer �uid to the windshield washer �uid
reservoir clears this message. SeeWindshield Washer
Fluid on page 5-39. This message clears itself after
10 seconds, or you can manually clear it from the
DIC display.
CURB VIEW ACTIVATED
This message displays when the passenger outside
rearview mirror moves into the curb view position.
SeeOutside Curb View Assist Mirror on page 2-35
for more information.
DRIVER DOOR AJAR
This message displays and a chime sounds if the driver
door is not fully closed. Stop and turn off the vehicle,
check the door for obstructions, and close the door
again. Check to see if the message still appears
on the DIC.
ENGINE COOLANT HOT/ENGINE
OVERHEATED
Notice:If you drive your vehicle while the engine
is overheating, severe engine damage may occur.
If an overheat warning appears on the instrument
panel cluster and/or DIC, stop the vehicle as soon
as possible. Do not increase the engine speed
above normal idling speed. SeeEngine Overheating
on page 5-30for more information.
This message displays and a chime sounds if the
cooling system temperature gets hot. SeeEngine
Overheating on page 5-30for the proper course
of action. This message clears when the coolant
temperature drops to a safe operating temperature.
FRONT FOG LAMPS OFF
This message displays if the fog lamps are turned off.
The message clears after 10 seconds. If you turn on
the high-beam headlamps, the fog lamps also turn
off and this message appears on the DIC. The fog
lamps turn back on again when you switch back
to low-beam headlamps. SeeFog Lamps on page 3-17
andTurn Signal/Multifunction Lever on page 3-7for
more information.
3-49
ProCarManuals.com
Page 174 of 426
SERVICE STABILITRAK
If this message displays, it means there may be a
problem with the StabiliTrak®system. If this message
appears, try to reset the system by performing the
following: stop; turn off the engine; then start the
engine again. If this message still comes on, it means
there is a problem. You should see your dealer/retailer
for service. The vehicle is safe to drive, however,
you do not have the bene�t of StabiliTrak
®, so reduce
your speed and drive accordingly.
SERVICE TIRE MONITOR
This message displays if a part on the Tire Pressure
Monitor System (TPMS) is not working properly. The tire
pressure light also �ashes and then remains on during
the same ignition cycle. SeeTire Pressure Light on
page 3-37. Several conditions may cause this message
to appear. SeeTire Pressure Monitor Operation on
page 5-71for more information. If the warning comes on
and stays on, there may be a problem with the TPMS.
See your dealer/retailer.
STABILITRAK ACTIVE
This message displays anytime the StabiliTrak®system
activates to maintain vehicle stability. Any combination
of engine speed management, brake traction control,
and stability control displays this message.
STABILITRAK NOT READY
This message may display if driving conditions delay
StabiliTrak®system initialization. This is normal.
Once the system initializes, this message will no
longer be displayed on the DIC.
STABILITRAK OFF
This message displays when you press the StabiliTrak®
button for more than �ve seconds or when stability
control has been automatically disabled. The StabiliTrak®
button is located on the transmission shift handle.
To limit wheel spin and realize the full bene�ts of the
stability enhancement system, you should normally leave
StabiliTrak
®on. However, you should turn StabiliTrak®off
if your vehicle gets stuck in sand, mud, ice, or snow and
you want to rock your vehicle to attempt to free it, or if you
are driving in extreme off-road conditions and require
more wheel spin. SeeIf Your Vehicle is Stuck in Sand,
Mud, Ice, or Snow on page 4-21. To turn the StabiliTrak
®
system back on, press the StabiliTrak®button again.
The message may display if the brake system warning
light is on. SeeBrake System Warning Light on
page 3-34.
The message turns off as soon as the conditions that
caused the message to be displayed are no longer
present.
3-52
ProCarManuals.com
Page 219 of 426
Let us say the road is wet and you are driving safely.
Suddenly, an animal jumps out in front of you. You slam
on the brakes and continue braking. Here is what
happens with ABS:
A computer senses that wheels are slowing down. If
one of the wheels is about to stop rolling, the computer
will separately work the brakes at each front wheel
and at both rear wheels.
ABS can change the brake pressure faster than any
driver could. The computer is programmed to make the
most of available tire and road conditions. This can
help you steer around the obstacle while braking hard.
As you brake, the computer keeps receiving updates
on wheel speed and controls braking pressure
accordingly.
Remember: ABS does not change the time you need to
get your foot up to the brake pedal or always decrease
stopping distance. If you get too close to the vehicle
in front of you, you will not have time to apply the brakes
if that vehicle suddenly slows or stops. Always leave
enough room up ahead to stop, even though you
have ABS.
Using ABS
Do not pump the brakes. Just hold the brake pedal down
�rmly and let antilock work for you. You might feel the
brakes vibrate or notice some noise, but this is normal.
Braking in Emergencies
With ABS, you can steer and brake at the same time.
In many emergencies, steering can help you more than
even the very best braking.
Limited-Slip Rear Axle
Your vehicle may have this feature. A limited-slip rear
axle can give you additional traction on snow, mud, ice,
sand or gravel. It works like a standard axle most of
the time, but when one of the rear wheels has no
traction and the other does, this feature will allow the
wheel with traction to move the vehicle.
StabiliTrak®System
Your vehicle is equipped with StabiliTrak®, Electronic
Stability Control (ESC) which combines antilock
brake, traction and stability control systems and helps
the driver maintain directional control of the vehicle
in most driving conditions.
Traction control activates when the controller senses
wheel spin. StabiliTrak
®will selectively apply the brakes
and reduce engine torque to help regain traction.
4-5
ProCarManuals.com
Page 229 of 426
Hydroplaning
Hydroplaning is dangerous. Water can build up
under your vehicle’s tires so they actually ride on the
water. This can happen if the road is wet enough
and you are going fast enough. When your vehicle is
hydroplaning, it has little or no contact with the road.
There is no hard and fast rule about hydroplaning.
The best advice is to slow down when the road is wet.
Other Rainy Weather Tips
Besides slowing down, other wet weather driving tips
include:
Allow extra following distance.
Pass with caution.
Keep windshield wiping equipment in good shape.
Keep the windshield washer �uid reservoir �lled.
Have good tires with proper tread depth.
SeeTires on page 5-60.
Before Leaving on a Long Trip
To prepare your vehicle for a long trip, consider having
it serviced by your dealer/retailer before departing.
Things to check on your own include:
Windshield Washer Fluid:Reservoir full?
Windows clean — inside and outside?
Wiper Blades:In good shape?
Fuel, Engine Oil, Other Fluids:All levels checked?
Lamps:Do they all work and are lenses clean?
Tires:Are treads good? Are tires in�ated to
recommended pressure?
Weather and Maps:Safe to travel?
Have
up-to-date maps?
4-15
ProCarManuals.com