SAAB 900 1986 Service Manual
900 1986
SAAB
SAAB
https://www.carmanualsonline.info/img/65/57499/w960_57499-0.png
SAAB 900 1986 Service Manual
Page 2 of 133
Downloaded from www.Manualslib.com manuals search engine Saab 900
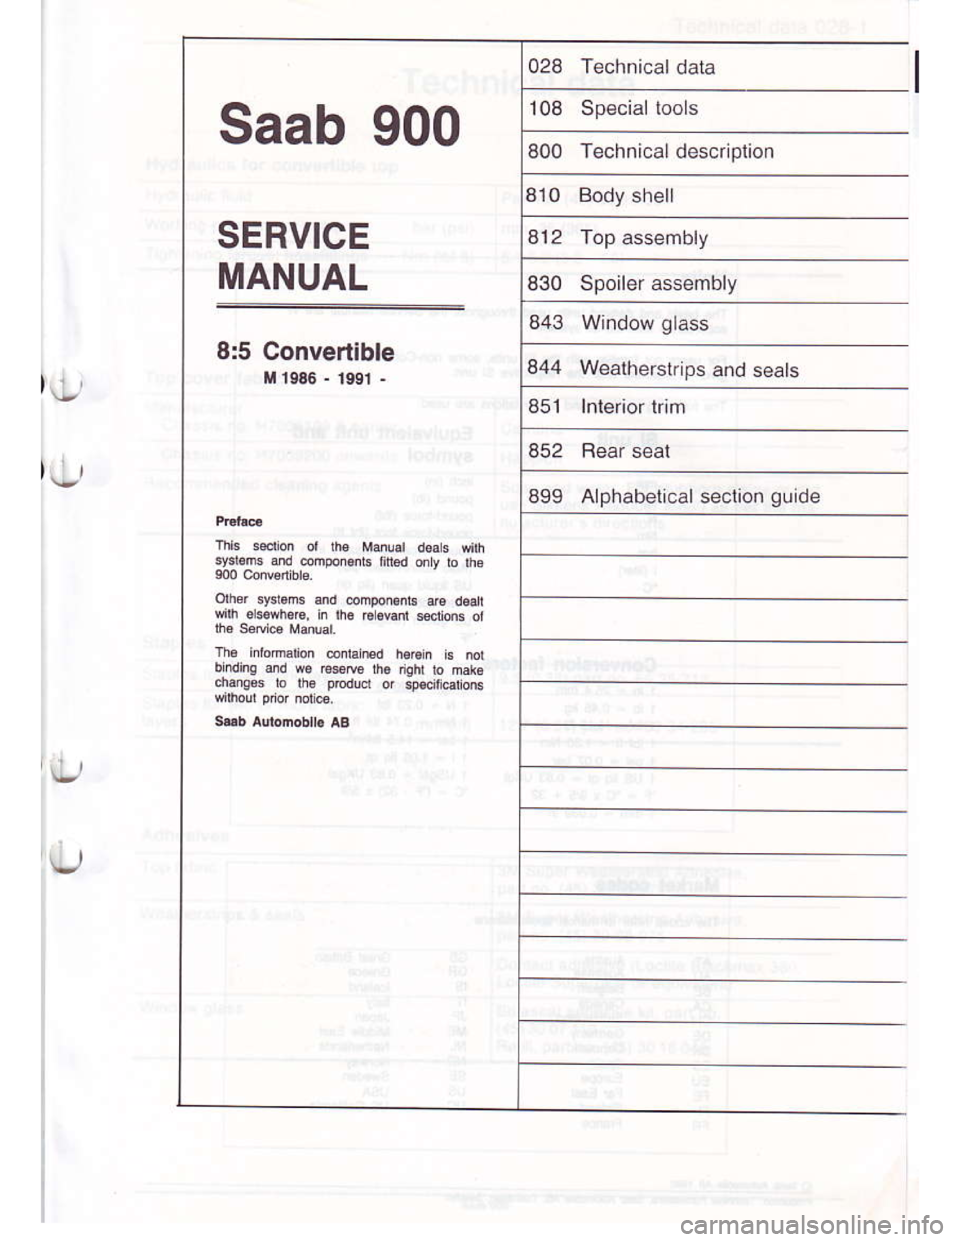
SERVICE
MANUAL
8:5 Convertlble
M i986 - r99r -
om&3Fl.m!andconpoMbarcd.ah
blidinged@l*roh'iglibhdo
6.n$sjoh€pddo'gp€.ilc|ong
108 Special tools
800 Technical descl plion
028 Technrcal data
810 Body shel
812 Top assembly
851 Inteior rrim
830Spoiler assembly
843 Window glass
844 Weatherstrips and seats
t;,
| ,-,
852 Rear seat
899 Alphabetical seclion guide
Page 44 of 133
Downloaded from www.Manualslib.com manuals search engine 812-20 Top assembly
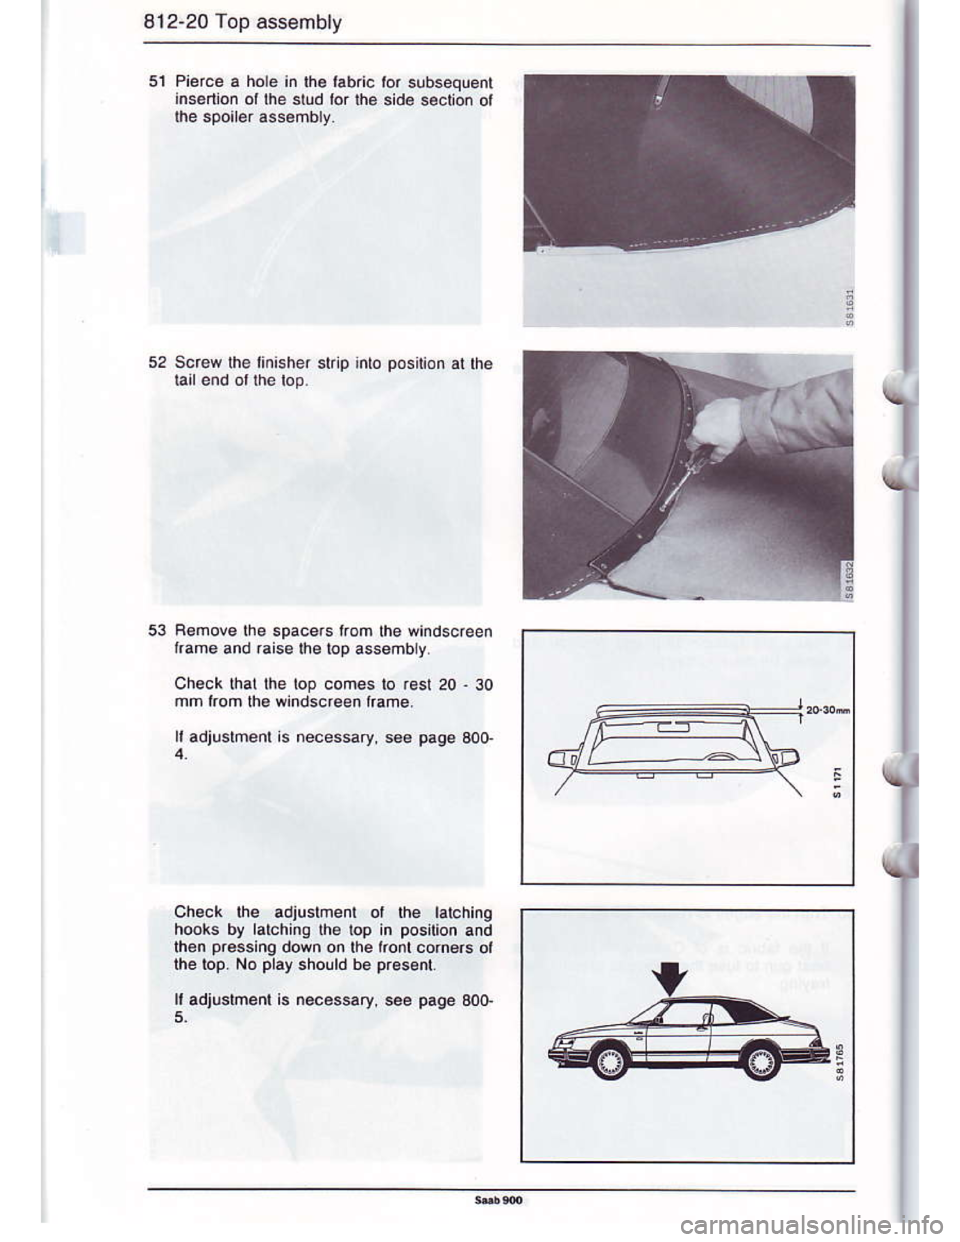
5l Pierce a hole in Ihe labric lor subsequenl
ins6rlon or lhe siud lor lhe sid€ section ot
lhe spoiler assombly
53 Remove the spacers irom rhe windscreen
trame and raise lhe lop assembly.
check thal lhe top comes b rost 20 30
mm rrom lhe windscreen lrame.
li adjuslnenl is necessary s€6 page 300
check the adjuslnenl ot rhe lalching
hools by lalchinq rhe top in position and
lhen pr63in9 down on the lro corn6rs ol
lhe iop. No play should be present
It adjuslment is necessary. see page 300.
5.
T
\I
Page 45 of 133
Downloaded from www.Manualslib.com manuals search engine Top assembly 812-2i
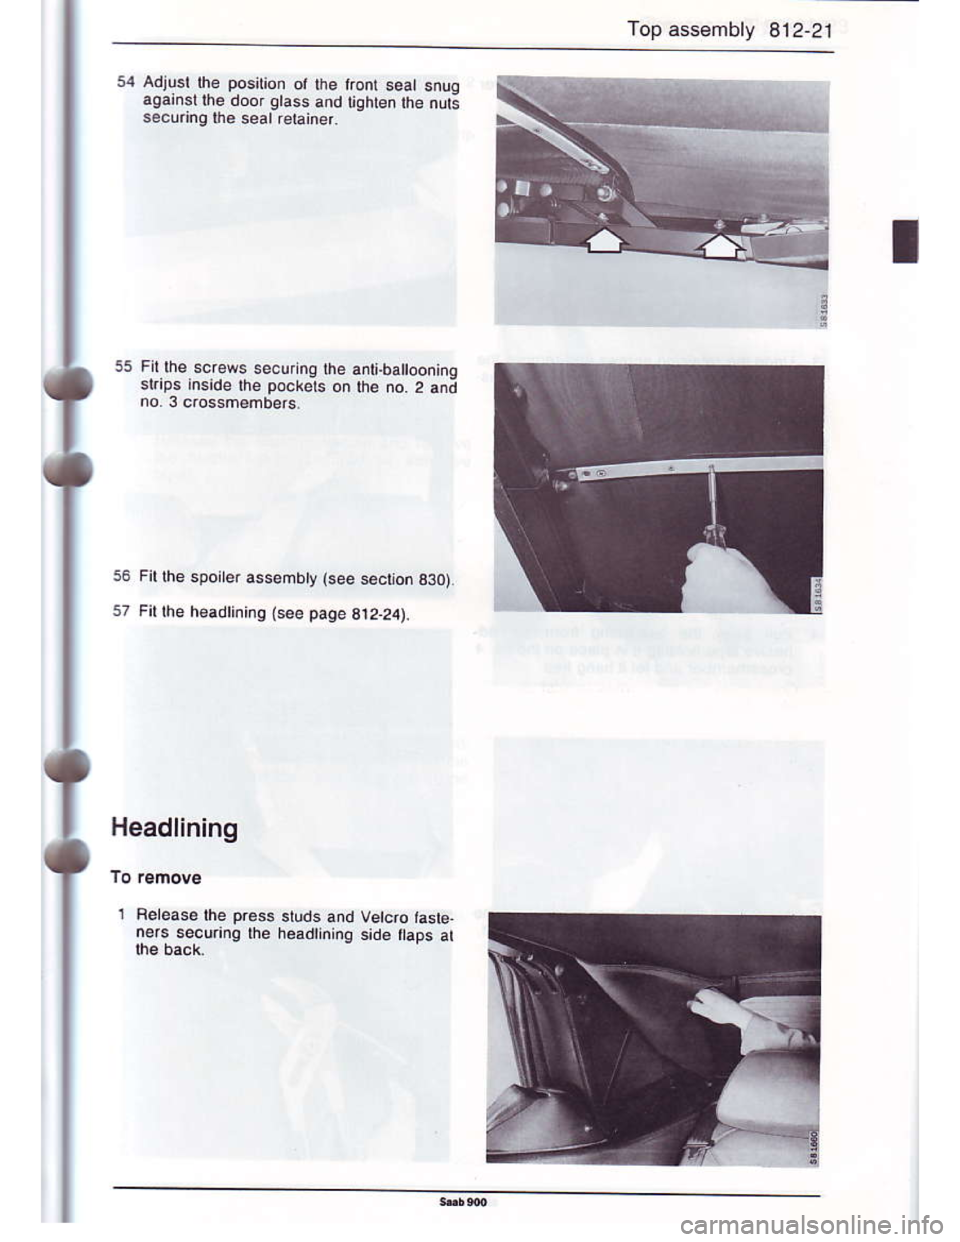
54 Adjusl the position ot lhe
agarnsl |ne door glass and
secunnq|nesealreIainer.
q
55 Fir lhe screws securnq lhe anx.ba oonrnaslrips inside the pocrets on lh€ no 2 an;no.3 c.ossm€mbe.s
56 Fil lhe spoiler assembty (see soction B3O)
s7 Fil ihe h€adlininq (see page B12.Aa).
Headlining
1 Feleaselhe prese studs and vetdo taslenss sekcu.ing lhe h6adtining sid6 flaps al
Page 61 of 133
Downloaded from www.Manualslib.com manuals search engine Top assembly 812-37
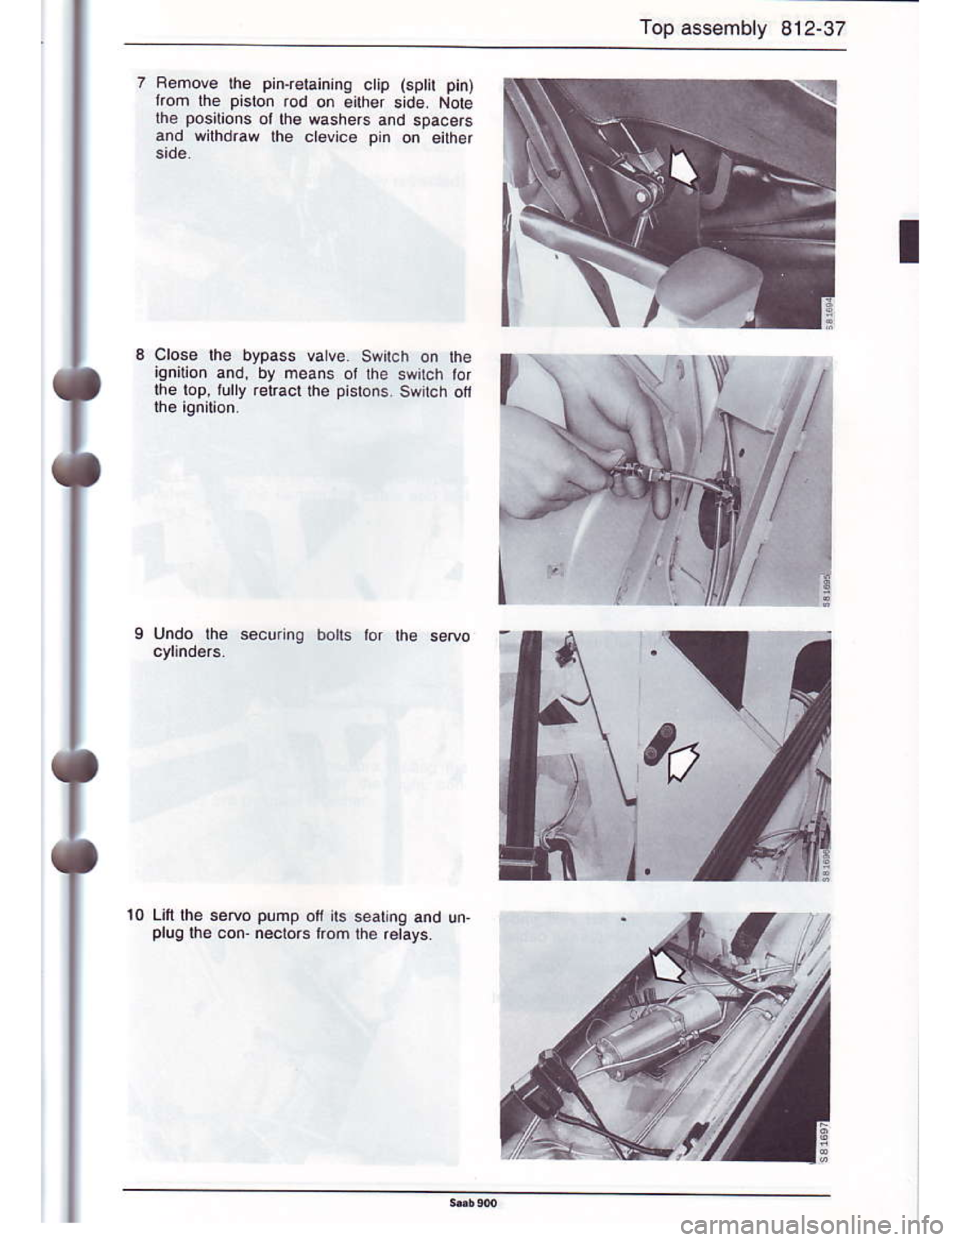
7 Rsmove the pin{eraininq ctip (sph pin)
trom the piston rod on €iher side. Nole
lhe positions ol the washers and spacers
and wilhdraq the clsvice pin on eifier
close lhe bypass valve. switch on h€
,gnition and. by means ot lh. switch tor
the lop, lully .etract th€ pislons. switch ofi
undo Lhe s€cu.i.o bolrs lor the setoo
Laft lhe setuo pump oil ils sealing andplug lhe co.. nectors lroh the relays.
Page 69 of 133
Downloaded from www.Manualslib.com manuals search engine Top assembly 812-45
3
I
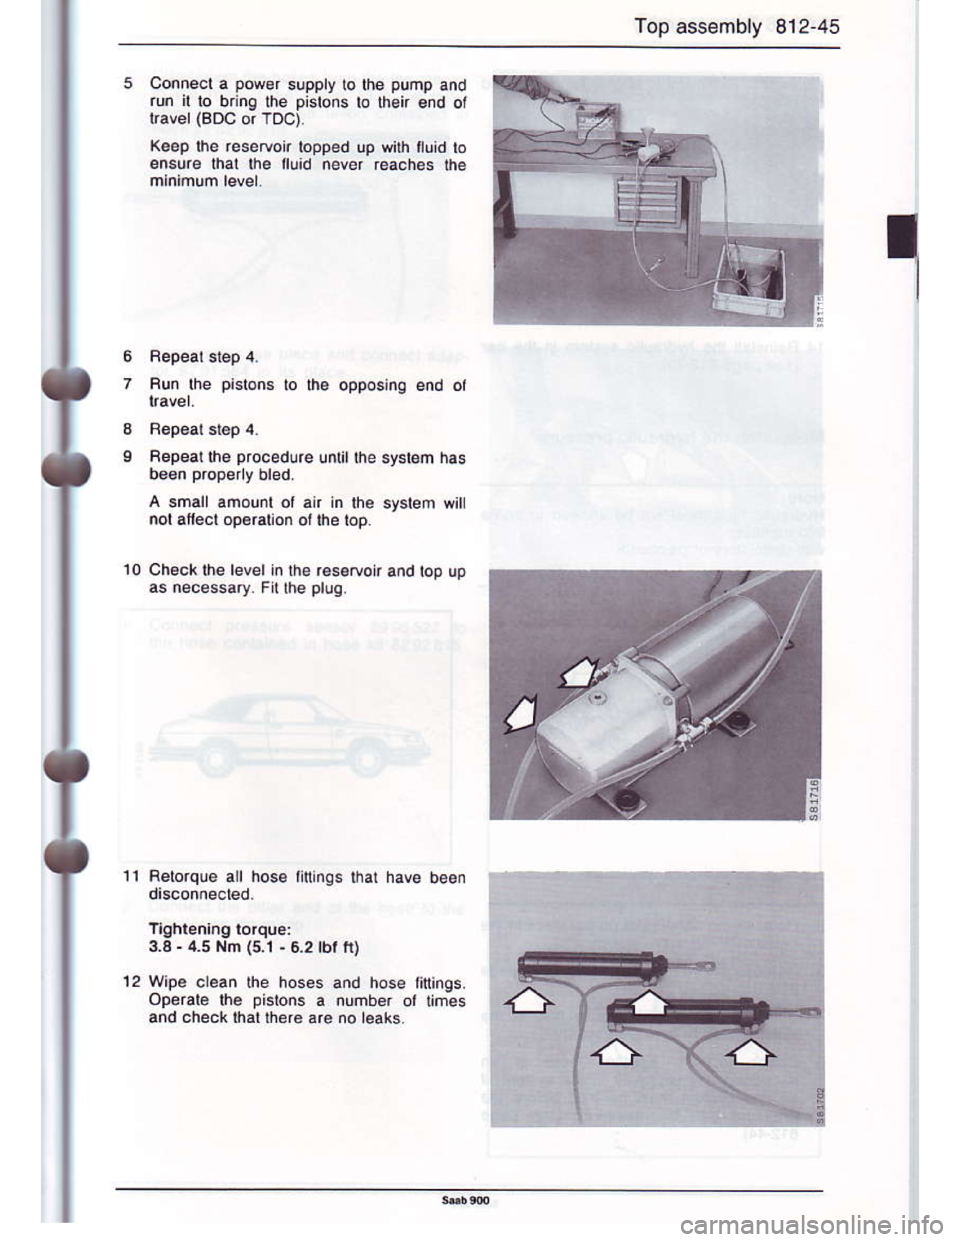
Conneot a power suppry to the pump and
run to bing lhe pislons lo lh€k end ot
Keep lhe .eseryoir topped up with ttuid lo
ensure thal lhe lluid never r6.ches the
Fun lhe pistons to lhe opposinq end ol
Fepeatlhe procedure untilthe sysl6h has
a smarr amoud ol an in the system wil
nol afiecl operalion oilhe lop.
Checklhe levelin rho r.setuoirand top up
as necessary Fil the plug.
Retorque all hose iininqs lhat have been
3,3 - 4.5 Nm (5.1 .5,2 |bl n)
Wipe clean the hoses and hose fininOs.
Operata $e pislons a number ol limes
and check thalfiere are no leaks
Page 81 of 133
Downloaded from www.Manualslib.com manuals search engine Spoiler assembly 830-1
Spoiler assembly
Fear assembly .... ... .. 3304
Side assembly
(Chassls no. 17011109 a sa le4
1 Aemove the rearseat cushion (see page
3s2-1)
2 R€move lhe rea.seat backesl (s€e pa96
352r).
3 Femove lhe side rrio (see paqe 451 1).
Save lhe washers tlom the
as lhese will be needed in
spoiler (wh€re applicable)
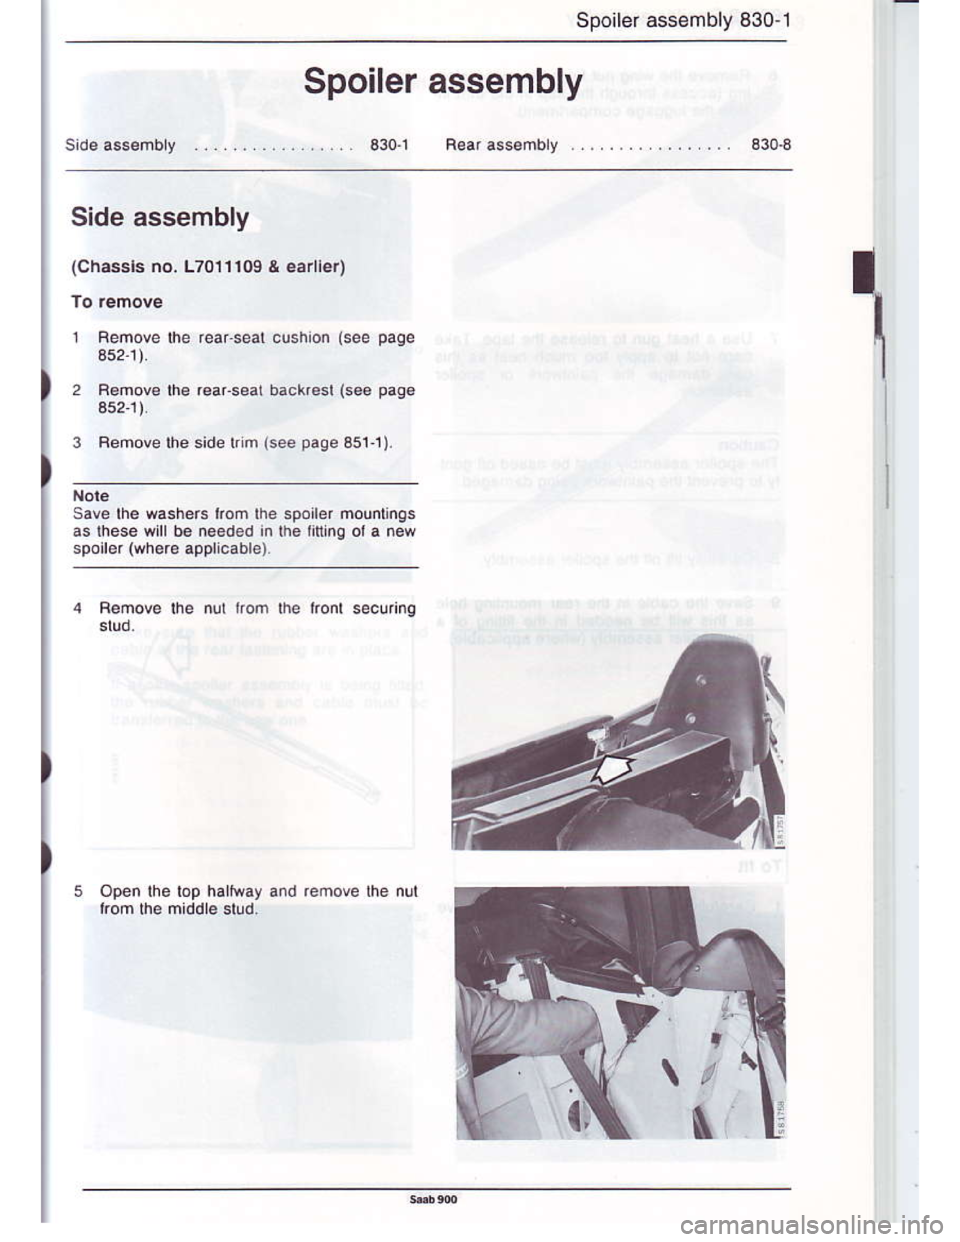
B€moee the nul rrom the lronl secuing
Page 82 of 133
Downloaded from www.Manualslib.com manuals search engine 830-2 Spoiler assembly
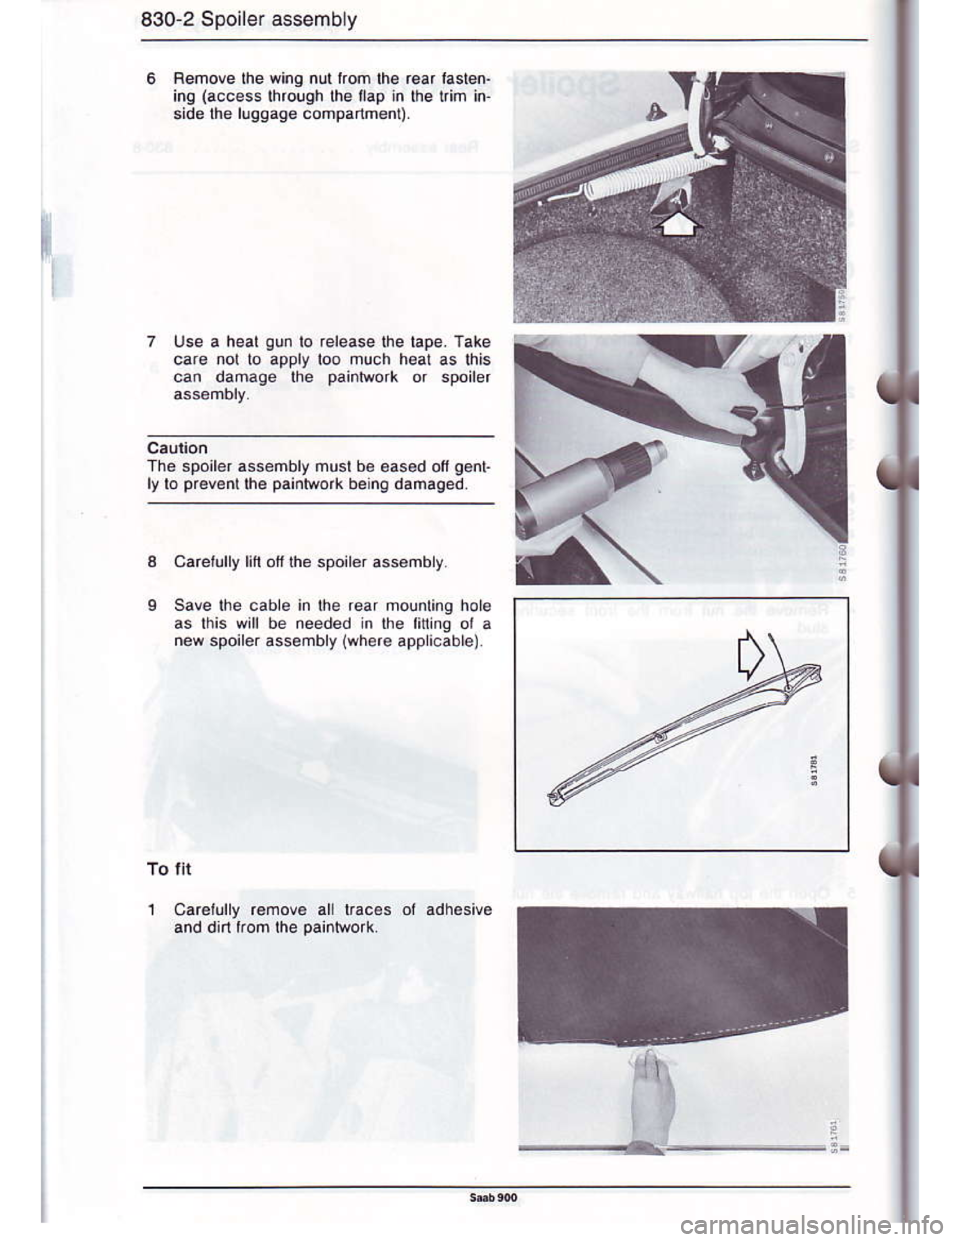
Renove the winq nutlrom lhe rear laslen-
ing (access lhrough lhe lap in lhe lim in
side lhe llqqage companment)
The spoiler assembly musl b€ oased ofi gent
lylo prevent the paintlso beng damaged.
Caretllly lifi ofthe spoile, assemby.
Save the cable in the rear mounling hoe
as lhis will be needed n ihe fininc ol a
new spoile. assembly (wh€re appicable)
Carelully remova all lraces ol adhesive
and dirt kom the paintwork
4i
Page 83 of 133
Downloaded from www.Manualslib.com manuals search engine Spoiler assembly 830-3
1
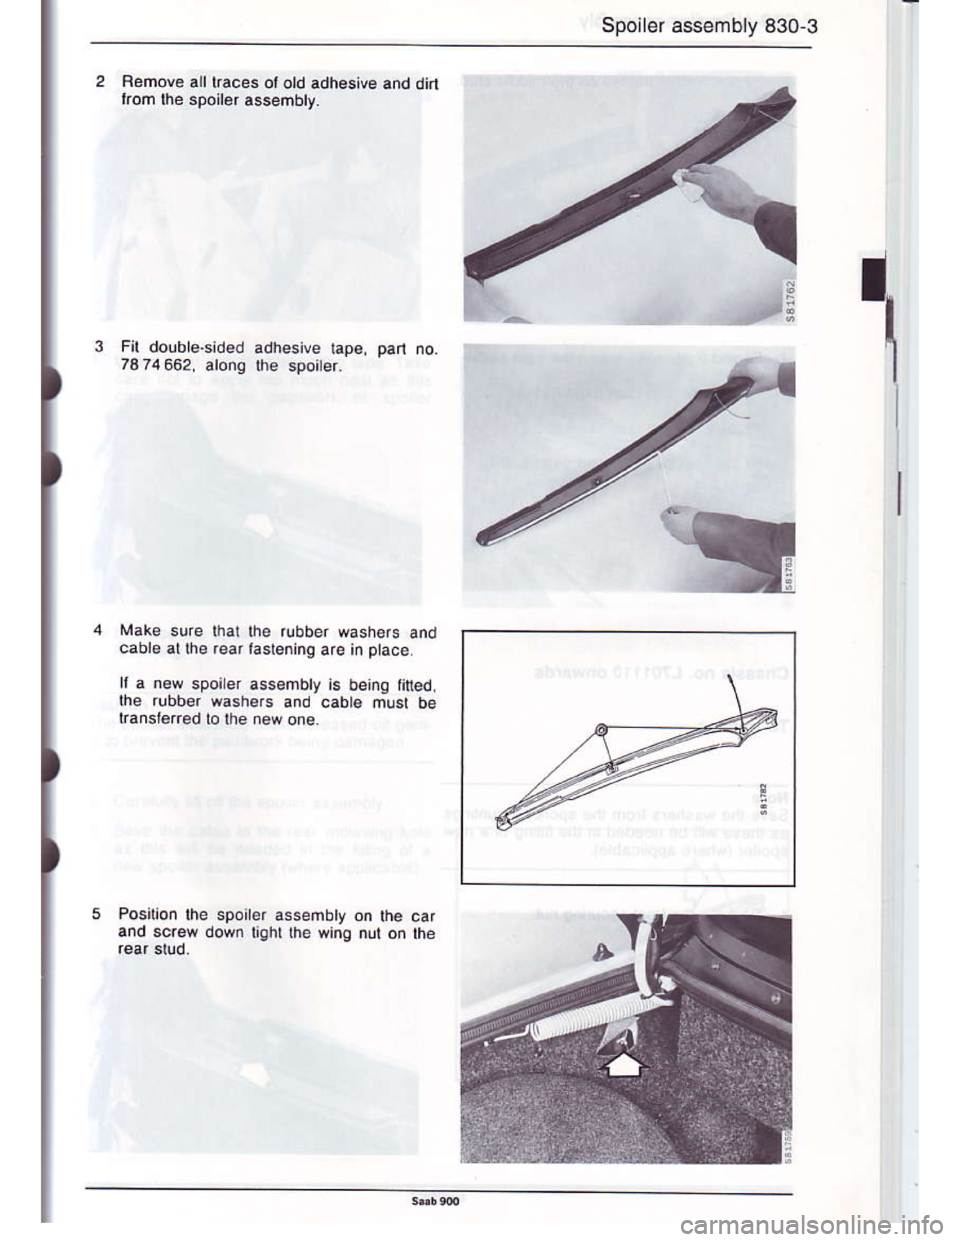
Rohove all lraces ol old adhesive and dirl
rrom lhe spoiler assembty.
Make sure that lhe rlbber wash€rs and
cabre allhe rear lasr6ning are in plac€.
rr a now spoiler ass€mbly is beinq tited.
lne rubber washers and cabl6 musr be
ranslered to the n€w one
Po.ition lhe spoiler assembty on lhe car
and screw down lighl lhe wing Dut on the
Page 84 of 133
Downloaded from www.Manualslib.com manuals search engine 830-4 Spoiler assembly
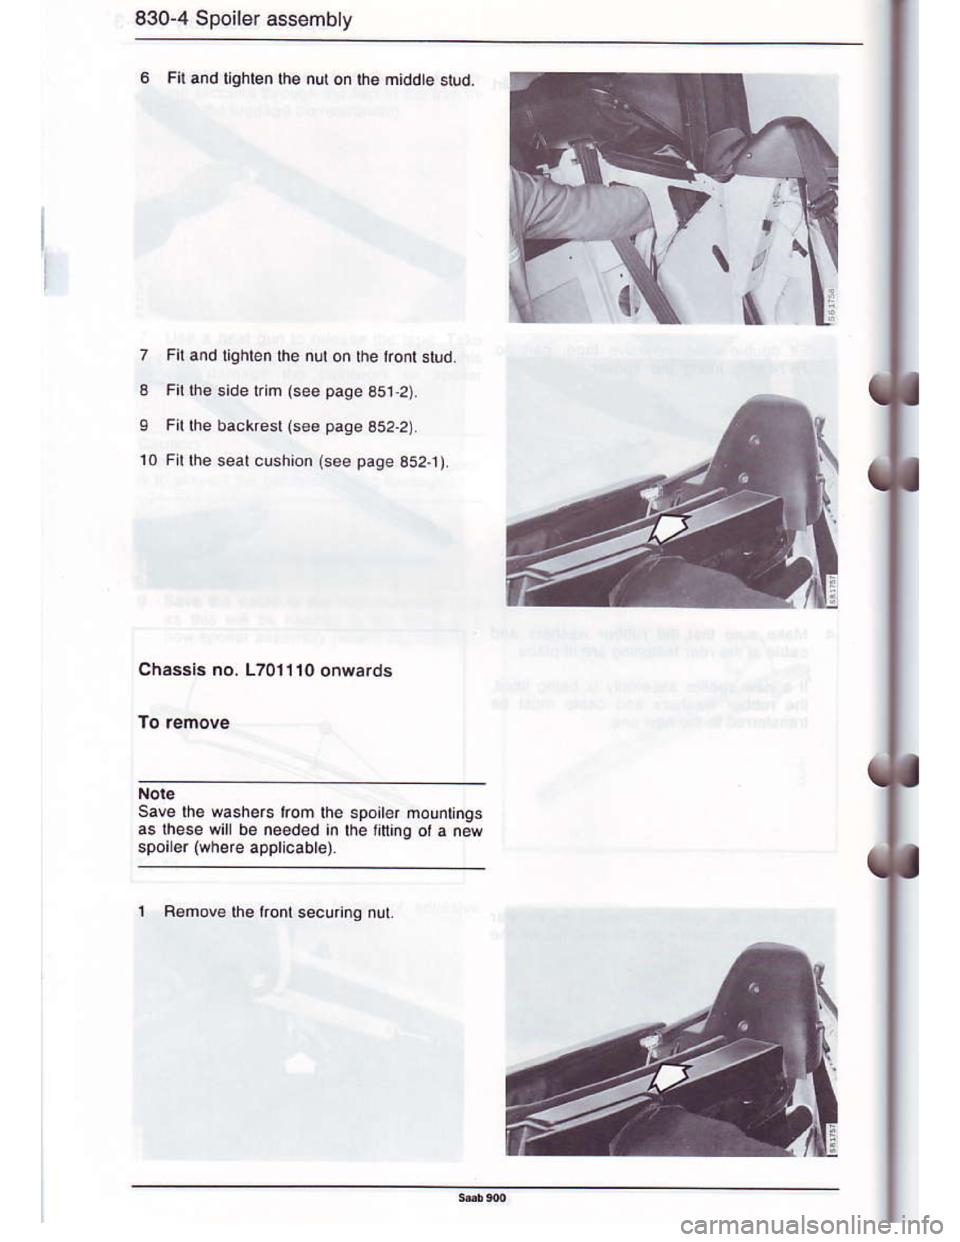
7 Filand liqhlen lhe nut on the ko slud
8 Fil $e side kim (see page a51.2)
9 Fit the backesl (see paqe 352.2)
10 F I lhe seal cushion (see page 352J)
Chassis no. L701110 onwards
Save lhe washers lrom the
as lhese will be needed in
spoirer {where aPPlicable).
Rgmove the konr securng nur.
Fir and lEhren lhe nut on rhe middte stud.
Page 85 of 133
Downloaded from www.Manualslib.com manuals search engine Spoilsr assembly 830-5
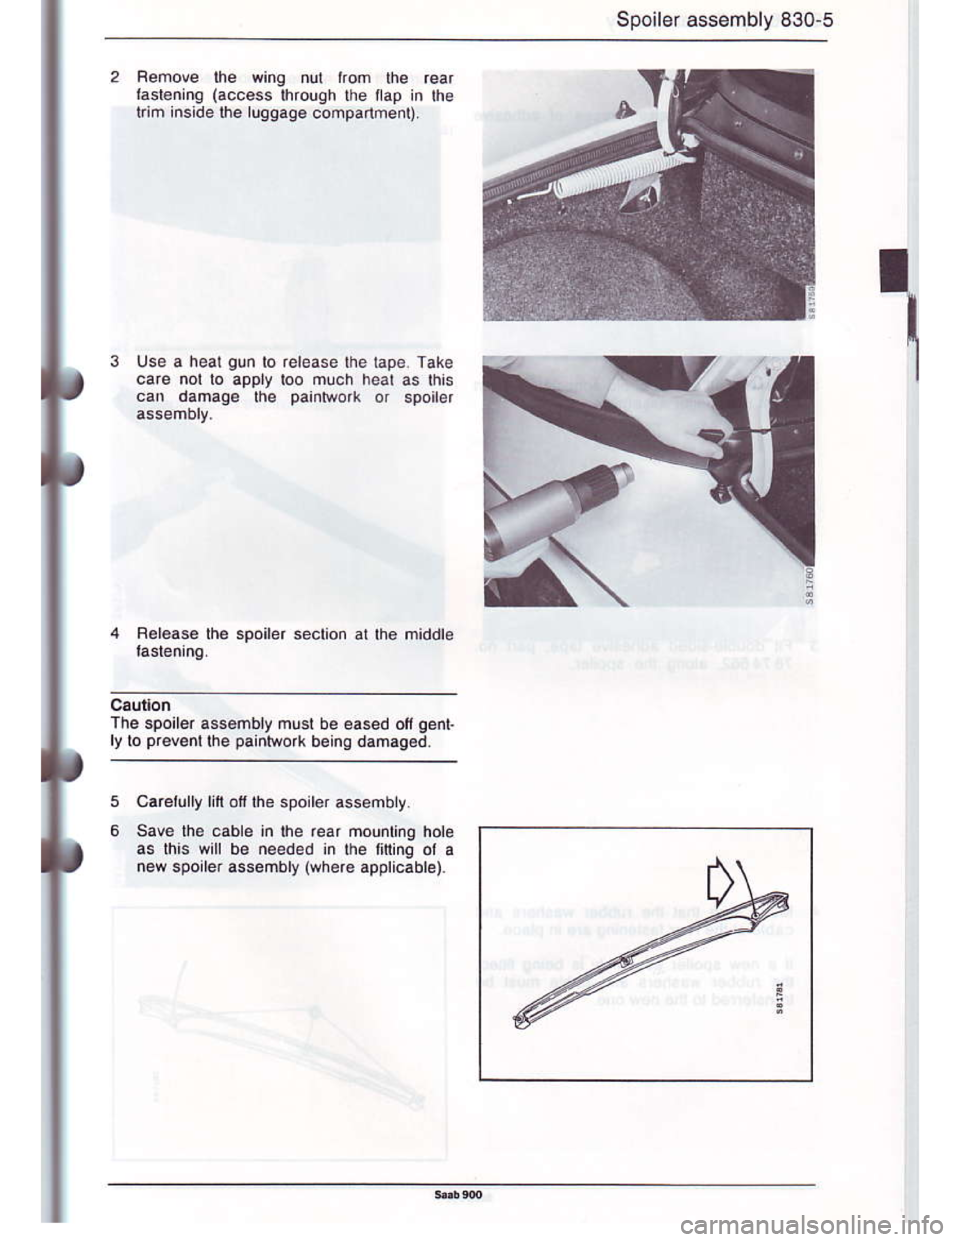
Femove lhe wing nll liom the rear
lasl€ning (access Ihrough lhe llap in lhe
l m insidelhe luggage compartnent)
Belease the spoiler secton al rho middle
Tne spoiler assohbly must be eased olt qenr
ly to prevenl the paintwo( being damagsd.
Caretully m otr the spoild assembly
Save the cable in Ihe .ear mountinO hole
as this will be n€eded in lhe fininq ol a
new spoirer assembly (where applicable).
