air condition SATURN ASTRA 2008 Owners Manual
[x] Cancel search | Manufacturer: SATURN, Model Year: 2008, Model line: ASTRA, Model: SATURN ASTRA 2008Pages: 304, PDF Size: 1.92 MB
Page 23 of 304
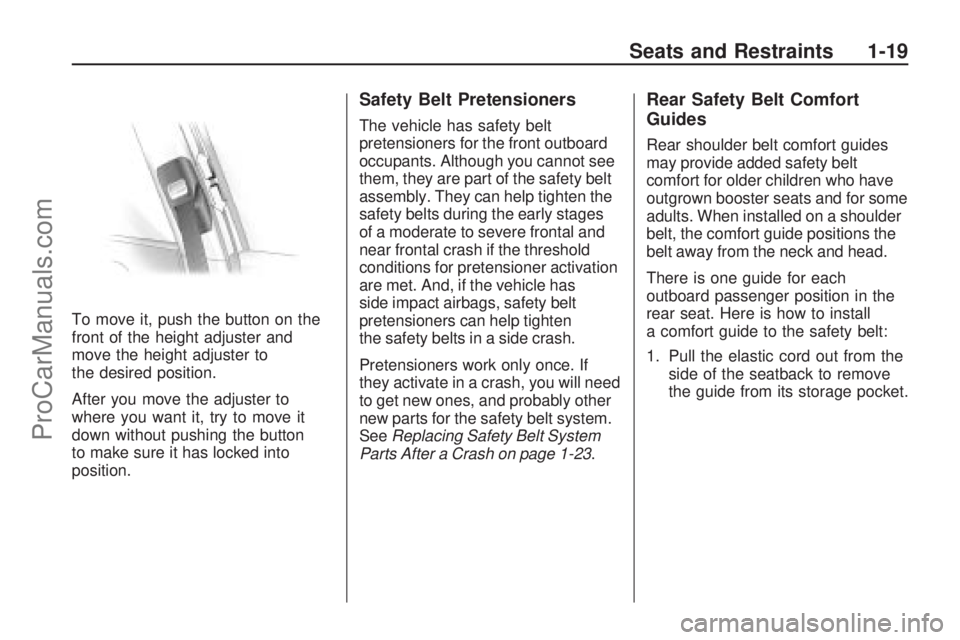
To move it, push the button on the
front of the height adjuster and
move the height adjuster to
the desired position.
After you move the adjuster to
where you want it, try to move it
down without pushing the button
to make sure it has locked into
position.
Safety Belt Pretensioners
The vehicle has safety belt
pretensioners for the front outboard
occupants. Although you cannot see
them, they are part of the safety belt
assembly. They can help tighten the
safety belts during the early stages
of a moderate to severe frontal and
near frontal crash if the threshold
conditions for pretensioner activation
are met. And, if the vehicle has
side impact airbags, safety belt
pretensioners can help tighten
the safety belts in a side crash.
Pretensioners work only once. If
they activate in a crash, you will need
to get new ones, and probably other
new parts for the safety belt system.
SeeReplacing Safety Belt System
Parts After a Crash on page 1-23.
Rear Safety Belt Comfort
Guides
Rear shoulder belt comfort guides
may provide added safety belt
comfort for older children who have
outgrown booster seats and for some
adults. When installed on a shoulder
belt, the comfort guide positions the
belt away from the neck and head.
There is one guide for each
outboard passenger position in the
rear seat. Here is how to install
a comfort guide to the safety belt:
1. Pull the elastic cord out from the
side of the seatback to remove
the guide from its storage pocket.
Seats and Restraints 1-19
ProCarManuals.com
Page 34 of 304
Passenger Sensing
System
The vehicle has a passenger
sensing system for the right front
passenger position. The passenger
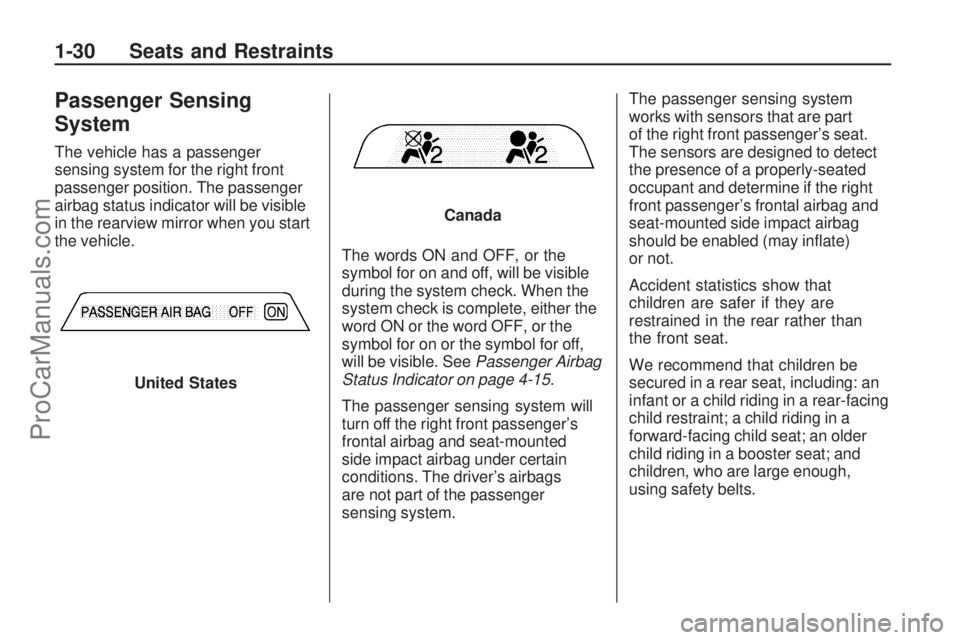
airbag status indicator will be visible
in the rearview mirror when you start
the vehicle.
The words ON and OFF, or the
symbol for on and off, will be visible
during the system check. When the
system check is complete, either the
word ON or the word OFF, or the
symbol for on or the symbol for off,
will be visible. SeePassenger Airbag
Status Indicator on page 4-15.
The passenger sensing system will
turn off the right front passenger’s
frontal airbag and seat-mounted
side impact airbag under certain
conditions. The driver’s airbags
are not part of the passenger
sensing system.The passenger sensing system
works with sensors that are part
of the right front passenger’s seat.
The sensors are designed to detect
the presence of a properly-seated
occupant and determine if the right
front passenger’s frontal airbag and
seat-mounted side impact airbag
should be enabled (may in�ate)
or not.
Accident statistics show that
children are safer if they are
restrained in the rear rather than
the front seat.
We recommend that children be
secured in a rear seat, including: an
infant or a child riding in a rear-facing
child restraint; a child riding in a
forward-facing child seat; an older
child riding in a booster seat; and
children, who are large enough,
using safety belts. United States
Canada
1-30 Seats and Restraints
ProCarManuals.com
Page 57 of 304
Securing Child Restraints
(Right Front Seat)
Your vehicle has airbags. A rear
seat is a safer place to secure a
forward-facing child restraint.
SeeWhere to Put the Restraint
on page 1-43.
In addition, your vehicle has a
passenger sensing system which
is designed to turn off the right
front passenger’s frontal and
seat-mounted side impact airbag
under certain conditions. See
Passenger Sensing System on
page 1-30andPassenger Airbag
Status Indicator on page 4-15for
more information on this, including
important safety information.
A label on your sun visor says,
“Never put a rear-facing child seat
in the front.” This is because the risk
to the rear-facing child is so great,
if the airbag deploys.
{CAUTION
A child in a rear-facing child
restraint can be seriously
injured or killed if the right
front passenger airbag in�ates.
This is because the back of
the rear-facing child restraint
would be very close to the
in�ating airbag. A child in a
forward-facing child restraint
can be seriously injured or
killed if the right front passenger
airbag in�ates and the
passenger seat is in a forward
position.
Even if the passenger sensing
system has turned off the right
front passenger frontal airbag,
no system is fail-safe. No one
can guarantee that an airbag will
not deploy under some unusual
circumstance, even though it is
turned off.
(Continued)
CAUTION (Continued)
Secure rear-facing child
restraints in a rear seat, even if
the airbag is off. If you secure
a forward-facing child restraint
in the right front seat, always
move the front passenger seat
as far back as it will go. It is
better to secure the child
restraint in a rear seat.
SeePassenger Sensing System
on page 1-30for additional
information.
If your child restraint has the LATCH
system, seeLower Anchors and
Tethers for Children (LATCH) on
page 1-45for how to install your child
restraint using LATCH. If you secure
a child restraint using a safety belt
and it uses a top tether, seeLower
Anchors and Tethers for Children
(LATCH) on page 1-45for top tether
anchor locations.
Seats and Restraints 1-53
ProCarManuals.com
Page 93 of 304
If, after several seconds, both status
indicator lights remain on, or if there
are no lights at all, there may be
a problem with the lights or the
passenger sensing system.
See your dealer/retailer for service.
{CAUTION
If the airbag readiness light in
the instrument panel cluster
ever comes on and stays on, it
means that something may be
wrong with the airbag system.
If this ever happens, have the
vehicle serviced promptly,
because an adult-size person
sitting in the right front
passenger’s seat may not have
the protection of the airbag(s).
SeeAirbag Readiness Light
on page 4-14for more on this,
including important safety
information.
Charging System Light
This light comes on brie�y when the
ignition is turned on, but the engine is
not running, as a check to show the
light is working. It should go out
when the engine is started.
If the light stays on, or comes
on while driving, there may be a
problem with the electrical charging
system. Have it checked by your
dealer/retailer. Driving while this
light is on could drain the battery.
If a short distance must be driven
with the light on, be sure to turn off
all accessories, such as the radio
and air conditioner.
Brake System Warning
Light
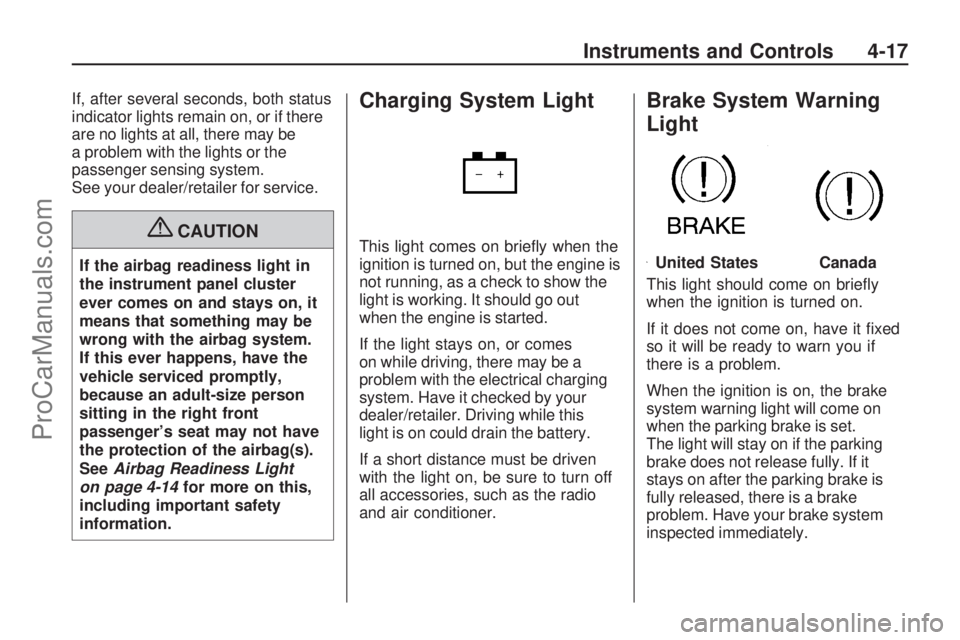
This light should come on brie�y
when the ignition is turned on.
If it does not come on, have it �xed
so it will be ready to warn you if
there is a problem.
When the ignition is on, the brake
system warning light will come on
when the parking brake is set.
The light will stay on if the parking
brake does not release fully. If it
stays on after the parking brake is
fully released, there is a brake
problem. Have your brake system
inspected immediately.
United StatesCanada
Instruments and Controls 4-17
ProCarManuals.com
Page 102 of 304
Driver Information
Center (DIC)
Vehicles with a Driver Information
Center (DIC) can display:
Time
Outside temperature
Date or audio system, if it is
turned on
Trip computer, on vehicles with
this feature
Warning messages
The type of information and how it is
displayed depends on the equipment
of the vehicle and the settings of the
trip computer and audio system.SeeDIC Operation and Displays
(Base Level DIC and Audio) on
page 4-27orDIC Operation and
Displays (Uplevel DIC and Audio)
on page 4-31andAudio System(s)
on page 6-1for more information.
An F in the display indicates a fault.
See your dealer/retailer for service.
Outside Air Temperature
The DIC shows the temperature
outside of the vehicle in either
degrees Fahrenheit or degrees
Celsius. A fall in temperature
is displayed immediately, while a
rise in temperature is displayed
after a short delay.On vehicles with the base level DIC,
Qdisplays when the outside air
temperature is cold enough to
create icy road conditions.
On vehicles with the uplevel DIC,
“Slippery road” displays.
The road surface may already be
icy even though the DIC shows
a few degrees above freezing.
Adjust your driving accordingly.
4-26 Instruments and Controls
ProCarManuals.com
Page 115 of 304
OnStar service is provided to you
subject to the OnStar Terms and
Conditions. You may cancel your
OnStar service at any time by
contacting OnStar. A complete
OnStar Owner’s Guide and the
OnStar Terms and Conditions are
included in the vehicle’s OnStar
Subscriber glove box literature.
For more information, visit
onstar.com or onstar.ca, contact
OnStar at 1-888-4-ONSTAR
(1-888-466-7827) or TTY
1-877-248-2080, or press the
OnStar button to speak with an
OnStar advisor 24 hours a day,
7 days a week.
Not all OnStar features are available
on all vehicles. To check if your
vehicle is equipped to provide the
services described below, or for a
full description of OnStar services
and system limitations, see the
OnStar Owner’s Guide in your
glove box or visit onstar.com.OnStar Services
For new vehicles with OnStar,
the Safe & Sound Plan, or the
Directions & Connections Plan
is included for one year from the
date of purchase. You can extend
this plan beyond the �rst year,
or upgrade to the Directions &
Connections Plan. For more
information, press the OnStar
button to speak with an advisor.
Some OnStar services (such as
Remote Door Unlock or Stolen
Vehicle Location Assistance) may
not be available until you register
with OnStar.Available Services with
Safe & Sound PlanAutomatic Noti�cation of Airbag
Deployment
Link to Emergency Services
Roadside Assistance
Stolen Vehicle Location
Assistance
AccidentAssist
Remote Door Unlock/Vehicle
Alert
OnStar Vehicle Diagnostics
GM Goodwrench On Demand
Diagnostics (if equipped)
OnStar Hands-Free Calling with
30 complimentary minutes
OnStar Virtual Advisor
(U.S. Only)
Instruments and Controls 4-39
ProCarManuals.com
Page 150 of 304

Y(Vent):This mode directs air to
the instrument panel outlets.
X(Defog):This mode directs air
to the windshield and front door
windows. To reduce fogging, press
#to turn on the air conditioner.
The fan must also be on.
W(Defog/Floor):This mode
directs air to the windshield, front
door windows, and �oor outlets.
To reduce fogging, press
#to turn
on the air conditioner. The fan
must also be on.
[(Floor):This mode directs
most of the air to the �oor outlets.Temperature Control Knob
Turn the center knob clockwise or
counterclockwise to increase or
decrease the temperature inside the
vehicle.
Fan Speed Control Knob
Turn the right knob clockwise or
counterclockwise to increase
or decrease the fan speed. The
speed settings can be adjusted
between 1 (Low) and 4 (High).
When the fan is off, the air
conditioning compressor is also off.
There will be some air�ow from
the outlets when driving, even with
the fan in the off position.
A(Fan):Select this position to
turn the fan off.
Air Conditioning
For vehicles with air conditioning.
#(Air Conditioning):Press
to turn the air conditioning system
on or off. An indicator light inside
the button comes on when the air
conditioning is activated. The air
conditioning can only be operated
if the engine is on and the fan is
running.
When the air conditioning is on
the air is cooled and dehumidi�ed.
If cooling or dehumidi�cation is not
desired, turn off the air conditioning
to save fuel.
On hot days, open the windows
brie�y to let the hot inside air
escape, then close them. This helps
to reduce the time it takes for the
vehicle to cool down.
7-2 Climate Controls
ProCarManuals.com
Page 151 of 304
For quicker cool down, do the
following:
1. Press
#to turn on the air
conditioning.
2. Select
Ymode.
3. Set the temperature knob to the
coldest temperature.
4. Set the fan knob to 4.
5. Open all vents.
Recirculation
^(Recirculation):Press to
turn the recirculation mode on or off.
An indicator light inside the button
comes on when the recirculation
mode is active. This mode
recirculates air inside the passenger
compartment and prevents outside
air from entering the vehicle.The quality of the passenger
compartment air may decrease
since the amount of outside
air entering the vehicle is reduced.
When the recirculation mode is
used without air conditioning, the
air humidity increases, and the
windows may fog. Avoid using the
recirculation mode during high
periods of humidity or cool outside
temperatures since this may result in
increased window fogging. If window
fogging is experienced, select the
defrost mode.
Rear Window Defogger
The rear window defogger uses a
warming grid to remove fog from the
rear window.
The rear window defogger will only
work when the ignition is in
ON/RUN.
=(Rear Window Defogger):
Press to turn the rear window
defogger on or off. An indicator
light inside the button will be lit
when in use.
If your vehicle has heated mirrors,
they turn on when the rear window
defogger button is pressed. Press
the button again to turn them off.
For more information, seeOutside
Power Mirror(s) on page 2-12.
The rear window defogger will stay
on for approximately 15 minutes
after the button is pressed, unless
the ignition is turned off.
Notice:Do not use anything
sharp on the inside of the rear
window. If you do, you could cut
or damage the warming grid, and
the repairs would not be covered
by the vehicle warranty. Do not
attach a temporary vehicle
license, tape, a decal or anything
similar to the defogger grid.
Climate Controls 7-3
ProCarManuals.com
Page 152 of 304
Outlet Adjustment
Use the thumbwheel below the air
outlets to change the direction of the
air �ow. Use the vertical thumbwheel
next to the outlets to control the
amount of air �ow or to shut off the
air�ow completely.
Keep all outlets open whenever
possible for best system
performance.
Operation Tips
Clear away any ice, snow, or
leaves from the air inlets at
the base of the windshield that
can block the �ow of air into
the vehicle.
Use of non-GM approved hood
de�ectors can adversely affect
the performance of the system.
Keep the path under all seats
clear of objects to help circulate
the air inside the vehicle
more effectively.
If fogging reoccurs while in vent
or bi-level modes with mild
temperature throughout the
vehicle, turn on the air conditioner
to reduce windshield fogging.
7-4 Climate Controls
ProCarManuals.com
Page 172 of 304
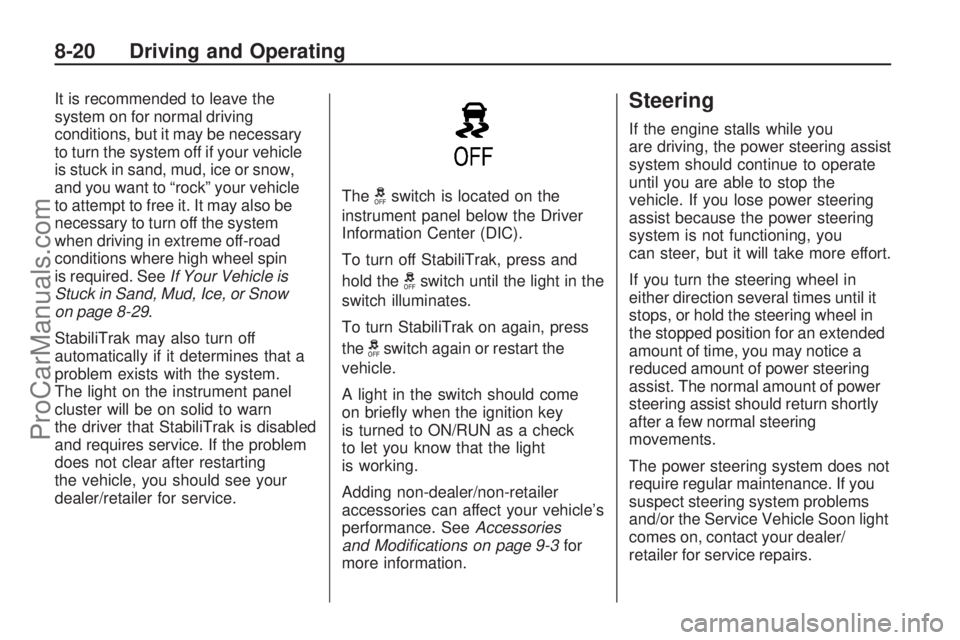
It is recommended to leave the
system on for normal driving
conditions, but it may be necessary
to turn the system off if your vehicle
is stuck in sand, mud, ice or snow,
and you want to “rock” your vehicle
to attempt to free it. It may also be
necessary to turn off the system
when driving in extreme off-road
conditions where high wheel spin
is required. SeeIf Your Vehicle is
Stuck in Sand, Mud, Ice, or Snow
on page 8-29.
StabiliTrak may also turn off
automatically if it determines that a
problem exists with the system.
The light on the instrument panel
cluster will be on solid to warn
the driver that StabiliTrak is disabled
and requires service. If the problem
does not clear after restarting
the vehicle, you should see your
dealer/retailer for service.The
gswitch is located on the
instrument panel below the Driver
Information Center (DIC).
To turn off StabiliTrak, press and
hold the
gswitch until the light in the
switch illuminates.
To turn StabiliTrak on again, press
the
gswitch again or restart the
vehicle.
A light in the switch should come
on brie�y when the ignition key
is turned to ON/RUN as a check
to let you know that the light
is working.
Adding non-dealer/non-retailer
accessories can affect your vehicle’s
performance. SeeAccessories
and Modifications on page 9-3for
more information.
Steering
If the engine stalls while you
are driving, the power steering assist
system should continue to operate
until you are able to stop the
vehicle. If you lose power steering
assist because the power steering
system is not functioning, you
can steer, but it will take more effort.
If you turn the steering wheel in
either direction several times until it
stops, or hold the steering wheel in
the stopped position for an extended
amount of time, you may notice a
reduced amount of power steering
assist. The normal amount of power
steering assist should return shortly
after a few normal steering
movements.
The power steering system does not
require regular maintenance. If you
suspect steering system problems
and/or the Service Vehicle Soon light
comes on, contact your dealer/
retailer for service repairs.
8-20 Driving and Operating
ProCarManuals.com