display SATURN AURA 2009 User Guide
[x] Cancel search | Manufacturer: SATURN, Model Year: 2009, Model line: AURA, Model: SATURN AURA 2009Pages: 408, PDF Size: 2.61 MB
Page 144 of 408

Instrument Panel Brightness
The knob with this
symbol is located on
the instrument panel to
the left of the steering
column.
Turn the knob clockwise or counterclockwise to brighten
or dim the lights.
Turn the knob completely clockwise to turn on the
interior lamps.
Dome Lamps
The dome lamps come on when any door is opened.
They turn off after all the doors are closed.
The dome lamps can also be turned on by turning the
instrument panel brightness knob, located on the
instrument panel to the left of the steering column,
clockwise to the farthest position. In this position, the
dome lamps remain on whether a door is opened or
closed.
Entry/Exit Lighting
The lamps inside the vehicle come on when any door is
opened. These lamps fade out about 20 seconds after all
of the doors have been closed or when the ignition is
turned to ON/RUN. They also come on when the unlock
symbol button or the horn symbol is pressed on the
Remote Keyless Entry (RKE) system transmitter.
The lamps inside the vehicle stay on for about
20 seconds after the key is removed from the ignition
to provide light as you exit.
Parade Dimming
Parade dimming is a separate lighting mode that comes
on while the parking lamps are turned on during the day.
It prevents the display lights and indicator lights from
being dim, while the parking lamps are used during
the day.
Reading Lamps
For vehicles with front and rear reading lamps, press the
lens to turn the lamp on and off, while the doors are
closed. These lamps come on automatically when any
door is opened.
3-16
ProCarManuals.com
Page 145 of 408
Electric Power Management
The vehicle has Electric Power Management (EPM) that
estimates the battery’s temperature and state of charge.
It then adjusts the voltage for best performance and
extended life of the battery.
When the battery’s state of charge is low, the voltage is
raised slightly to quickly bring the charge back up. When
the state of charge is high, the voltage is lowered slightly
to prevent overcharging. If the vehicle has a voltmeter
gage or a voltage display on the Driver Information
Center (DIC), you may see the voltage move up or down.
This is normal. If there is a problem, an alert will be
displayed.
The battery can be discharged at idle if the electrical
loads are very high. This is true for all vehicles. This is
because the generator (alternator) may not be spinning
fast enough at idle to produce all the power that is
needed for very high electrical loads.A high electrical load occurs when several of the
following are on, such as: headlamps, high beams, fog
lamps, rear window defogger, climate control fan at high
speed, heated seats, engine cooling fans, trailer loads,
and loads plugged into accessory power outlets.
EPM works to prevent excessive discharge of the battery.
It does this by balancing the generator’s output and the
vehicle’s electrical needs. It can increase engine idle
speed to generate more power, whenever needed. It can
temporarily reduce the power demands of some
accessories.
Normally, these actions occur in steps or levels, without
being noticeable. In rare cases at the highest levels of
corrective action, this action may be noticeable to the
driver. If so, a Driver Information Center (DIC) message
might be displayed, such as BATTERY SAVER ACTIVE,
BATTERY VOLTAGE LOW, or LOW BATTERY. If this
message is displayed, it is recommended that the driver
reduce the electrical loads as much as possible. SeeDIC
Warnings and Messages on page 3-45.
3-17
ProCarManuals.com
Page 151 of 408

Automatic Climate Control System
For vehicles with this system, the heating, cooling,
and ventilation can be automatically controlled.
A. Fan Control
B. Air Conditioning
C. Recirculation
D. Outside Air
E. Rear Window
DefoggerF. Air Delivery Mode
Control
G. Display
H. Temperature
Control
Automatic Operation
AUTO (Automatic):Select AUTO on both the fan speed
control and the air delivery mode control knobs to activate
the automatic system. When automatic operation is
active the system controls the inside temperature and air
delivery.
To place the system in automatic mode do the following:
1. Turn the fan knob and the mode knob to the AUTO
position.
The current set temperature displays. When AUTO
is selected, the air conditioning operation and air
inlet is automatically controlled. The air conditioning
compressor runs while the outside temperature is
over about 40°F (4°C). The air inlet will normally be
set to outside air. If it is hot outside, the air inlet may
automatically switch to recirculate inside air to help
quickly cool down the vehicle.
2. Set the temperature.
An initial setting of 73°F (23°C) is recommended.
Allow about 20 minutes for the system to regulate.
Press
worxto adjust the temperature setting as
necessary. If the temperature is set at 60°F (15°C)
the system remains at the maximum cooling setting.
If the temperature is set at 90°F (32°C) the system
remains at the maximum heat setting. Choosing
either maximum setting does not cause the vehicle
to heat or cool any faster.
3-23
ProCarManuals.com
Page 154 of 408

Rear Window Defogger
The rear window defogger uses a warming grid to
remove fog from the rear window.
<(Rear):Press to turn the rear window defogger on
or off. An indicator light comes on to show that the rear
window defogger is on.
If driving below 50 mph (80 km/h), the rear window
defogger turns off about 15 minutes after the button is
pressed. If additional warming time is needed, press the
button again.
If the vehicle’s speed is maintained above 50 mph
(80 km/h), the rear window defogger remains on once
the button is pressed.
For vehicles with heated outside mirrors, the surface of
the outside mirrors will also heat when the rear window
defogger is activated. SeeOutside Power Mirrors on
page 2-37.
Notice:Do not use a razor blade or sharp object to
clear the inside rear window. Do not adhere anything
to the defogger grid lines in the rear glass. These
actions may damage the rear defogger. Repairs
would not be covered by your warranty.
Remote Start Climate Control Operation
For vehicles with remote start, when it is activated the
climate control system heats and cools the inside of the
vehicle using the previous system settings before the
vehicle was turned off. The climate control knobs will
remain active during a remote start. However, the climate
control buttons will be inactive until the ignition is turned
on by the key. If the fan is off, the climate control system
will not operate during remote start.
With the automatic climate control system, the
climate control displays “RS” in place of the temperature
to indicate that remote start is activated. For best
performance, turn both the fan and mode knobs to AUTO.
If the temperature is cold enough and the mode knob is
set to AUTO, the system begins in defrost to clear the
windows. SeeRemote Keyless Entry (RKE) System
Operation on page 2-5.
Outlet Adjustment
There are four main air outlets on the instrument panel.
Move the lever located in the center of each outlet
side-to-side or up and down, to change the direction and
amount of air�ow in the vehicle. The center thumbwheel
does not control the main outlets.
3-26
ProCarManuals.com
Page 157 of 408
Speedometer and Odometer
The speedometer shows the speed in miles per
hour (mph) or kilometers per hour (km/h). SeeDIC
Vehicle Personalization on page 3-50for more
information.
The odometer shows how far the vehicle has been
driven, in either miles (used in the United States)
or kilometers (used in Canada).
This vehicle has a tamper resistant odometer. The
digital odometer will read 999,999 if it is turned back.
If the vehicle needs a new odometer installed, if possible,
it must be set to the mileage total of the old odometer.
If that is not possible, then it is set at zero and a label
must be put on the driver’s door to show the old mileage
reading when the new odometer was installed.
Trip Odometer
The trip odometer can show how far the vehicle has
been driven since the odometer was last reset.
The trip odometer is accessed and reset through the
Driver Information Center (DIC). SeeDIC Operation and
Displays on page 3-43for more information.
Tachometer
The tachometer displays the engine speed in revolutions
per minute (rpm).
Safety Belt Reminders
Safety Belt Reminder Light
When the engine is started, a chime sounds for
several seconds to remind a driver to fasten the safety
belt, unless the driver safety belt is already buckled.
The safety belt light comes
on and stays on for
several seconds, then
�ashes for several more.
This chime and light are repeated if the driver remains
unbuckled and the vehicle is in motion. If the driver safety
belt is already buckled, neither the chime nor the light
comes on.
3-29
ProCarManuals.com
Page 161 of 408
Brake System Warning Light
The vehicle’s hydraulic brake system is divided into two
parts. If one part is not working, the other part can still
work and stop the vehicle. For good braking both parts
need to be working.
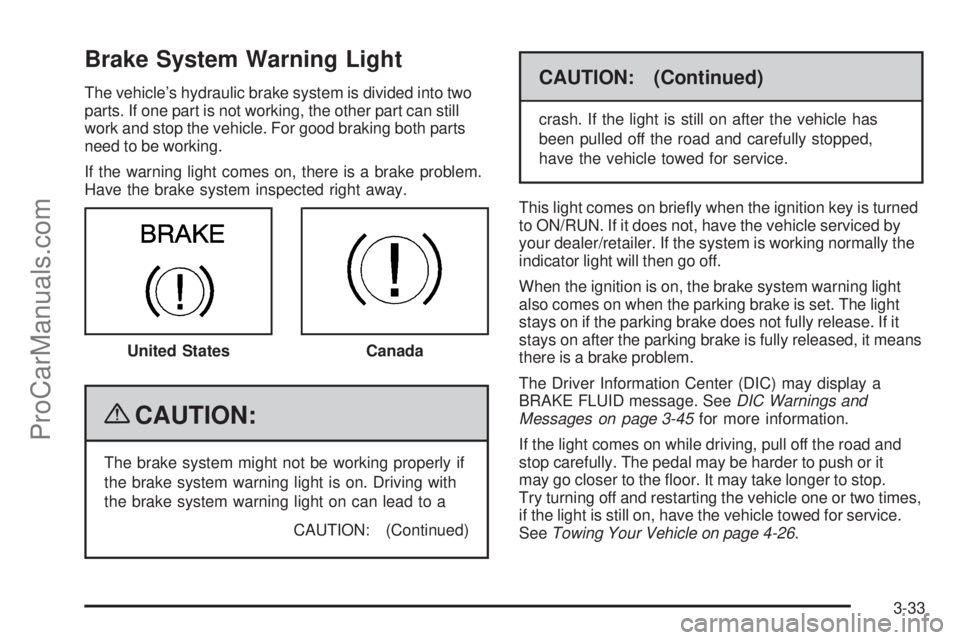
If the warning light comes on, there is a brake problem.
Have the brake system inspected right away.
{CAUTION:
The brake system might not be working properly if
the brake system warning light is on. Driving with
the brake system warning light on can lead to a
CAUTION: (Continued)
CAUTION: (Continued)
crash. If the light is still on after the vehicle has
been pulled off the road and carefully stopped,
have the vehicle towed for service.
This light comes on brie�y when the ignition key is turned
to ON/RUN. If it does not, have the vehicle serviced by
your dealer/retailer. If the system is working normally the
indicator light will then go off.
When the ignition is on, the brake system warning light
also comes on when the parking brake is set. The light
stays on if the parking brake does not fully release. If it
stays on after the parking brake is fully released, it means
there is a brake problem.
The Driver Information Center (DIC) may display a
BRAKE FLUID message. SeeDIC Warnings and
Messages on page 3-45for more information.
If the light comes on while driving, pull off the road and
stop carefully. The pedal may be harder to push or it
may go closer to the �oor. It may take longer to stop.
Try turning off and restarting the vehicle one or two times,
if the light is still on, have the vehicle towed for service.
SeeTowing Your Vehicle on page 4-26. United States
Canada
3-33
ProCarManuals.com
Page 162 of 408
Antilock Brake System (ABS)
Warning Light
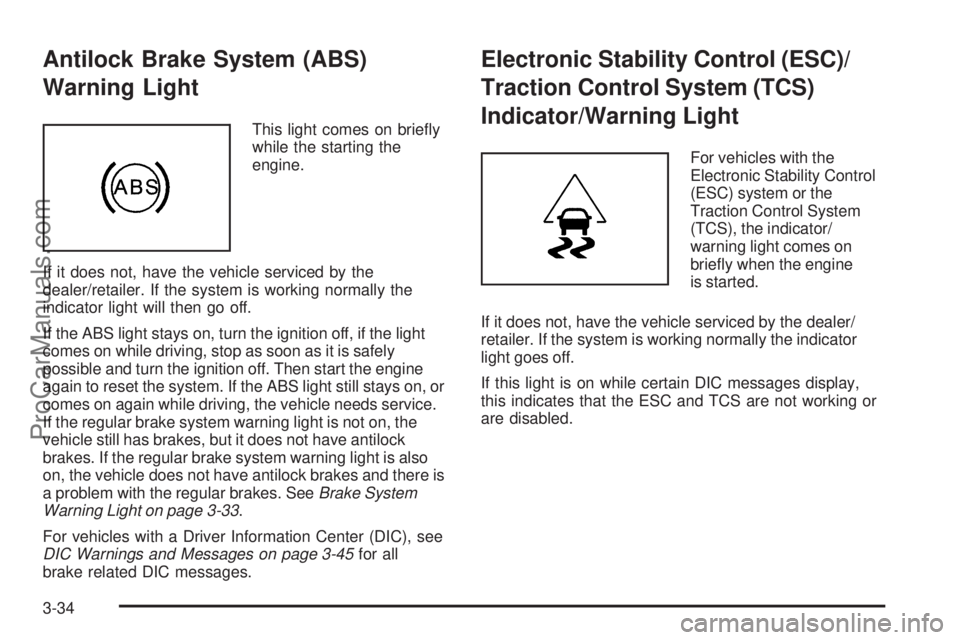
This light comes on brie�y
while the starting the
engine.
If it does not, have the vehicle serviced by the
dealer/retailer. If the system is working normally the
indicator light will then go off.
If the ABS light stays on, turn the ignition off, if the light
comes on while driving, stop as soon as it is safely
possible and turn the ignition off. Then start the engine
again to reset the system. If the ABS light still stays on, or
comes on again while driving, the vehicle needs service.
If the regular brake system warning light is not on, the
vehicle still has brakes, but it does not have antilock
brakes. If the regular brake system warning light is also
on, the vehicle does not have antilock brakes and there is
a problem with the regular brakes. SeeBrake System
Warning Light on page 3-33.
For vehicles with a Driver Information Center (DIC), see
DIC Warnings and Messages on page 3-45for all
brake related DIC messages.
Electronic Stability Control (ESC)/
Traction Control System (TCS)
Indicator/Warning Light
For vehicles with the
Electronic Stability Control
(ESC) system or the
Traction Control System
(TCS), the indicator/
warning light comes on
brie�y when the engine
is started.
If it does not, have the vehicle serviced by the dealer/
retailer. If the system is working normally the indicator
light goes off.
If this light is on while certain DIC messages display,
this indicates that the ESC and TCS are not working or
are disabled.
3-34
ProCarManuals.com
Page 171 of 408
Driver Information Center (DIC)
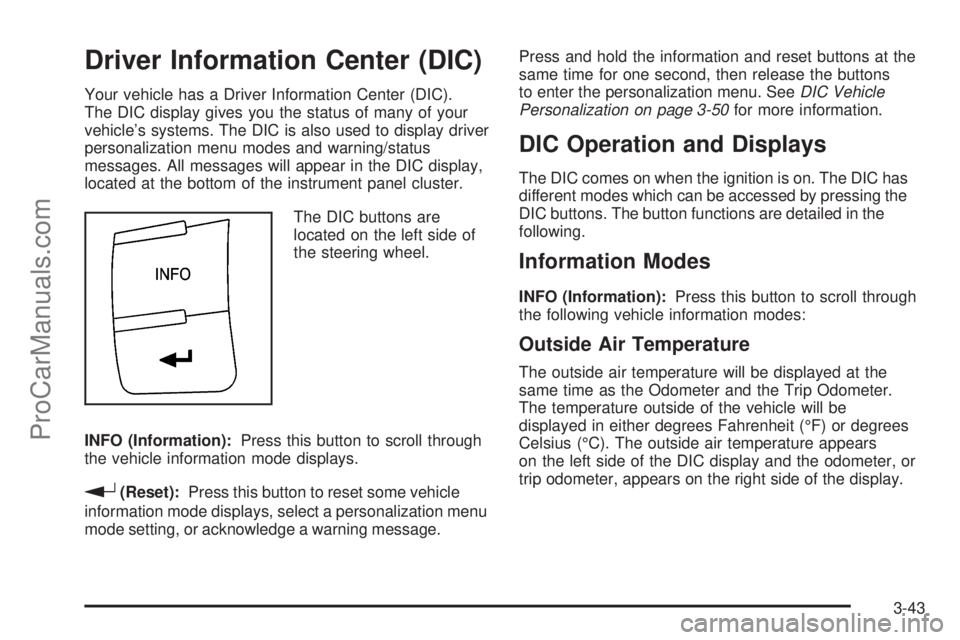
Your vehicle has a Driver Information Center (DIC).
The DIC display gives you the status of many of your
vehicle’s systems. The DIC is also used to display driver
personalization menu modes and warning/status
messages. All messages will appear in the DIC display,
located at the bottom of the instrument panel cluster.
The DIC buttons are
located on the left side of
the steering wheel.
INFO (Information):Press this button to scroll through
the vehicle information mode displays.
r(Reset):Press this button to reset some vehicle
information mode displays, select a personalization menu
mode setting, or acknowledge a warning message.Press and hold the information and reset buttons at the
same time for one second, then release the buttons
to enter the personalization menu. SeeDIC Vehicle
Personalization on page 3-50for more information.
DIC Operation and Displays
The DIC comes on when the ignition is on. The DIC has
different modes which can be accessed by pressing the
DIC buttons. The button functions are detailed in the
following.
Information Modes
INFO (Information):Press this button to scroll through
the following vehicle information modes:
Outside Air Temperature
The outside air temperature will be displayed at the
same time as the Odometer and the Trip Odometer.
The temperature outside of the vehicle will be
displayed in either degrees Fahrenheit (°F) or degrees
Celsius (°C). The outside air temperature appears
on the left side of the DIC display and the odometer, or
trip odometer, appears on the right side of the display.
3-43
ProCarManuals.com
Page 172 of 408
Odometer
Press the information button until the outside air
temperature and the odometer displays. This mode
shows the total distance the vehicle has been driven
in either miles (mi) or kilometers (km).
To change the DIC display to English or metric units,
see “UNITS” underDIC Vehicle Personalization on
page 3-50.
Trip Odometer
Press the information button until the outside air
temperature along with A or B displays. These modes
show the current distance traveled since the last reset for
each trip odometer in either miles (mi) or kilometers (km).
Both odometers can be used at the same time.
To reset the trip odometer to zero, press and hold the
reset button for a few seconds while the desired trip
odometer is displayed.
FUEL RANGE
Press the information button until FUEL RANGE displays.
This mode shows the remaining distance you can drive
without refueling in either miles (mi) or kilometers (km).
It is based on fuel economy and the fuel remaining in
the tank.When the fuel level is low, FUEL RANGE LOW displays.
The fuel economy data used to determine fuel range is
an average of recent driving conditions. As your driving
conditions change, this data is gradually updated.
The FUEL RANGE mode cannot be reset.
MPG (L/100 KM) AVG (Average)
Press the information button until MPG (L/100 KM) AVG
displays. This mode shows how many miles per
gallon (mpg) or liters per 100 kilometers (L/100 km)
your vehicle is getting based on current and past
driving conditions.
To reset the average fuel economy, press and hold the
reset button while MPG (L/100 KM) AVG is displayed.
Average fuel economy is then calculated starting from
that point. If the average fuel economy is not reset, it is
continually updated each time you drive.
MPG (L/100 KM) INST (Instantaneous)
Press the information button until MPG (L/100 KM) INST
displays. This mode shows the current fuel economy at
a particular moment and changes frequently as driving
conditions change. This mode shows the instantaneous
fuel economy in miles per gallon (mpg) or liters per
100 kilometers (L/100 km). Unlike average fuel economy,
this screen cannot be reset.
3-44
ProCarManuals.com
Page 173 of 408
AV (Average) SPEED
Press the information button until AV SPEED displays.
This mode shows the vehicle’s average speed in
miles per hour (mph) or kilometers per hour (km/h).
To reset the average vehicle speed, press and hold the
reset button while AV SPEED is displayed.
OIL LIFE
Press the information button until OIL LIFE displays.
The engine oil life system shows an estimate of the oil’s
remaining useful life. It shows 100% when the system
is reset after an oil change. It alerts you to change the oil
on a schedule consistent with your driving conditions.
In addition to the engine oil life system monitoring the
oil life, additional maintenance is recommended in the
Maintenance Schedule in this manual. SeeEngine Oil on
page 5-15andScheduled Maintenance on page 6-4.
Always reset the engine oil life system after an oil
change. See “How to Reset the Engine Oil Life System”
underEngine Oil Life System on page 5-18.
Tire Pressure
On vehicles with the Tire Pressure Monitor System
(TPMS), the pressure for each tire can be viewed
in the DIC. The tire pressure is shown in either
pounds per square inch (psi) or kilopascals (kPa).Press the information button until LF ## PSI (kPa) ## RF
displays for the front tires. Press the information button
again until LR ## PSI (kPa) ## RR displays for the rear
tires.
If a low tire pressure condition is detected by the system
while driving, a message advising you to check the tire
pressure appears in the display. SeeInflation - Tire
Pressure on page 5-52andDIC Warnings and Messages
on page 3-45for more information.
DIC Warnings and Messages
These messages appear if there is a problem detected
in one of your vehicle’s systems.
A message clears when the vehicle’s condition is no
longer present. To acknowledge a message and clear it
from the display, press and hold any of the DIC buttons.
If the condition is still present, the warning message
comes back on the next time the vehicle is turned off and
back on. With most messages, a warning chime sounds
when the message displays. Your vehicle may have other
warning messages.
AUTO (Automatic) LIGHTS OFF
This message displays if the automatic headlamp
system is disabled with the headlamp switch. See
Automatic Headlamp System on page 3-15for more
information.
3-45
ProCarManuals.com