reset SATURN AURA 2010 Owners Manual
[x] Cancel search | Manufacturer: SATURN, Model Year: 2010, Model line: AURA, Model: SATURN AURA 2010Pages: 428, PDF Size: 2.78 MB
Page 24 of 428
bg:Press to silence the vehicle speakers only. Press
again to turn the sound on. Press and hold longer
than two seconds to interact with the OnStar
®or
Bluetooth systems.
c:Press to reject an incoming call, or to end a call.
For more information, seeAudio Steering Wheel
Controls on page 4-82.
Bluetooth®
For vehicles with an in-vehicle Bluetooth system, it
allows users with a Bluetooth enabled cell phone
to make and receive hands-free calls using the vehicle’s
audio system and controls.
The Bluetooth enabled cell phone must be paired with
the in-vehicle Bluetooth system before it can be used in
the vehicle. Not all phones will support all functions.
For more information visit www.gm.com/bluetooth.
For more information, seeBluetooth
®on page 4-68.
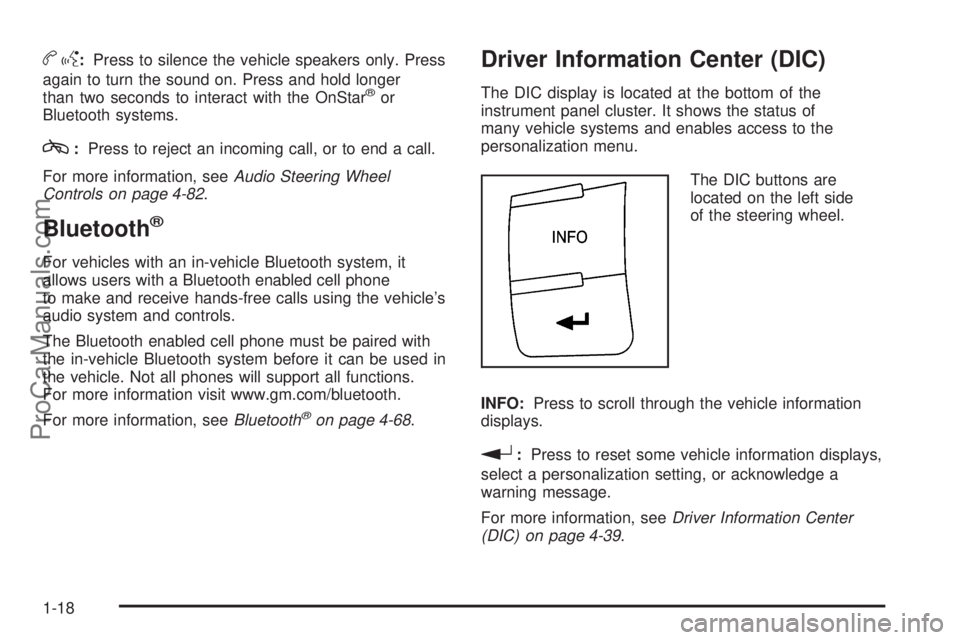
Driver Information Center (DIC)
The DIC display is located at the bottom of the
instrument panel cluster. It shows the status of
many vehicle systems and enables access to the
personalization menu.
The DIC buttons are
located on the left side
of the steering wheel.
INFO:Press to scroll through the vehicle information
displays.
r:Press to reset some vehicle information displays,
select a personalization setting, or acknowledge a
warning message.
For more information, seeDriver Information Center
(DIC) on page 4-39.
1-18
ProCarManuals.com
Page 25 of 428

Vehicle Personalization
Some vehicle features can be programmed by using the
DIC buttons on the left side of the steering wheel.
These features include:
•Oil Life Reset
•Units
•RKE Lock and Unlock Feedback
•Door Lock and Unlock Settings
•Language
SeeDIC Vehicle Personalization on page 4-46.
Cruise Control
The cruise control buttons
are located on the left side
of the steering wheel.
J:On/Off.
RES+:Press to resume or accelerate speed.
SET−:Press to set or decrease speed.
For more information, seeCruise Control on page 4-7.
1-19
ProCarManuals.com
Page 28 of 428
You may notice during cooler conditions that the low tire
pressure warning light will appear when the vehicle is
first started and then turn off as you drive. This may be
an early indicator that your tire pressures are getting
low and the tires need to be inflated to the proper
pressure.
Note:The Tire Pressure Monitor can alert you about
low tire pressure, but it does not replace normal monthly
tire maintenance. It is the driver’s responsibility to
maintain correct tire pressures.
SeeTire Pressure Monitor System on page 6-53and
Tire Pressure Monitor Operation on page 6-54.
Tire Sealant and Compressor Kit
This vehicle may come with a jack and spare tire or a
tire sealant and compressor kit. The kit can be used
to seal small punctures in the tread area of the tire.
SeeTire Sealant and Compressor Kit on page 6-67for
complete operating information.
Engine Oil Life System
The engine oil life system calculates engine oil life
based on vehicle use and displays a DIC message
when it is necessary to change the engine oil and filter.
The oil life system should be reset to 100% only
following an oil change.
Resetting the Oil Life System
1. Turn the ignition key to ON/RUN with the
engine off.
2. With the CHANGE OIL SOON message displayed,
press either of the DIC buttons to clear the
message. SeeDIC Warnings and Messages
on page 4-42.
3. Display OIL LIFE RESET on the DIC.
4. Press and hold the INFO button for at least one
second. An ACKNOWLEDGED message displays
for three seconds or until the next button is pressed.
This tells you the system has been reset.
SeeDIC Vehicle Personalization on page 4-46.
5. Turn the key to LOCK/OFF.
SeeEngine Oil Life System on page 6-20.
Fuel E85 (85% Ethanol)
If the vehicle has the 2.4L L4 engine (VIN Code 0),
you can use either unleaded gasoline or ethanol
fuel containing up to 85% ethanol (E85). SeeFuel on
page 6-5. In all other engines, use only the unleaded
gasoline described underGasoline Octane on page 6-6.
Vehicles that have the 2.4L L4 engine (VIN Code 0)
have a yellow fuel cap and can use 85% ethanol
fuel (E85). SeeFuel E85 (85% Ethanol) on page 6-8.
1-22
ProCarManuals.com
Page 123 of 428

Express Window Anti-Pinch Feature
If any object is in the path of the window when
the express-up is active, the window stops at the
obstruction and auto-reverse to a preset factory position.
Weather conditions such as severe icing may also
cause the window to auto-reverse. The window returns
to normal operation once the obstruction or condition
is removed.
Express Window Anti-Pinch Override
{WARNING:
If express override is activated, the window will not
reverse automatically. You or others could be
injured and the window could be damaged. Before
you use express override, make sure that all people
and obstructions are clear of the window path.
In an emergency, the anti-pinch feature can be
overridden in a supervised mode. Hold the window
switch all the way up to the second position. The window
rises for as long as the switch is held. Once the
switch is released, the express mode is re-activated.
In this mode, the window can still close on an object in
its path. Use care when using the override mode.
Window Lockout
The driver power window controls also include a
lockout button.
o(Window Lockout):Press the lockout button to
stop the rear passengers from using their window
switches. The driver and front passenger can still
operate all the windows with the lock on. When the red
part of the switch is visible, you have returned to
normal window operation.
Sun Visors
To block out glare, you can swing down the visors. You
can also remove them from the center mount and
swing them to the side, to block out glare from the side.
Your vehicle may have lighted visor vanity mirrors
located on the passenger and driver’s side visor. When
you lift the cover, the light will turn on.
Theft-Deterrent Systems
Vehicle theft is big business, especially in some cities.
This vehicle has theft-deterrent features, however,
they do not make it impossible to steal.
3-15
ProCarManuals.com
Page 141 of 428

Compass
Compass Operation
There is a compass display in the upper right corner of
the mirror.
Press
Oto turn the compass display on or off.
When the ignition and the compass feature are on, the
compass displays the current compass direction,
after a few seconds.
Compass Calibration
The compass can be calibrated by driving the vehicle in
circles at 5 mph (8 km) or less until the display reads
a direction.
If after a few seconds the display does not show a
compass direction, (N for North for example), there may
be a strong magnetic field interfering with the compass.
Interference can be caused by a magnetic antenna
mount, note pad holder, or similar object. If the letter C
appears in the compass window, the compass may
need to be reset or calibrated.
Compass Variance
The mirror is set to zone eight. If you do not live in zone
eight or drive out of the area, the compass variance
needs to be changed to the appropriate zone.To adjust for compass variance:
1. Find your current location and variance zone
number on the following zone map.
2. Press and hold
Ountil the zone number displays.
The number shown is the current zone number.
3. Scroll through the zone numbers that appear in the
window on the mirror by pressing the
Obutton.
Once you find your zone number, release the
button. After about four seconds, the mirror returns
3-33
ProCarManuals.com
Page 160 of 428
RES+ (Resume):Press to resume a set speed and to
accelerate the speed.
SET−(Set):Press to set a speed and to decrease the
speed.
To set a speed do the following:
1. Press
Ito turn cruise control on. The indicator
light on the button comes on.
2. Get up to the desired speed.
3. Press the SET−and release it. The cruise symbol
displays in the instrument panel cluster to show the
system is engaged.
4. Take your foot off the accelerator pedal.
When the brakes are applied, the cruise control
shuts off.
If the vehicle is in cruise control and the Traction
Control System (TCS) begins to limit wheel spin, the
cruise control automatically disengages. SeeTraction
Control System (TCS) on page 5-7. When road
conditions allow, the cruise control can be used again.
Resuming a Set Speed
If the cruise control is set at a desired speed and then
the brakes are applied, the cruise control is disengaged.
But it does not need to be reset. The cruise symbol in
the instrument panel cluster also goes out indicating
cruise is no longer engaged. Once the vehicle speed is
40 km/h (25 mph) or more, briefly press the RES+.
The vehicle returns to the previously set speed
and stays there.
Increasing Speed While Using Cruise
Control
There are two ways to increase the vehicle speed while
using cruise control:
•If the cruise control system is already engaged,
press and hold the RES+ button until the desired
speed is reached, then release it.
•To increase the vehicle speed in small amounts,
briefly press the RES+ and then release it. Each
time this is done, the vehicle goes about 1.6 km/h
(1 mph) faster.
4-8
ProCarManuals.com
Page 178 of 428

Speedometer and Odometer
The speedometer shows the speed in miles per hour
(mph) or kilometers per hour (km/h). SeeDIC Vehicle
Personalization on page 4-46for more information.
The odometer shows how far the vehicle has been
driven, in either miles (used in the United States) or
kilometers (used in Canada).
This vehicle has a tamper resistant odometer. The
digital odometer will read 999,999 if it is turned back.
If the vehicle needs a new odometer installed, if
possible, it must be set to the mileage total of the old
odometer. If that is not possible, then it is set at zero and
a label must be put on the driver’s door to show the
old mileage reading when the new odometer was
installed.
Trip Odometer
The trip odometer can show how far the vehicle has
been driven since the odometer was last reset.
The trip odometer is accessed and reset through the
Driver Information Center (DIC). SeeDIC Operation and
Displays on page 4-40for more information.
Tachometer
The tachometer displays the engine speed in revolutions
per minute (rpm).
Safety Belt Reminders
Safety Belt Reminder Light
When the engine is started, a chime sounds for several
seconds to remind a driver to fasten the safety belt,
unless the driver safety belt is already buckled.
The safety belt light comes
on and stays on for
several seconds, then
flashes for several more.
This chime and light are repeated if the driver remains
unbuckled and the vehicle is in motion. If the driver
safety belt is already buckled, neither the chime nor the
light comes on.
4-26
ProCarManuals.com
Page 183 of 428
WARNING: (Continued)
crash. If the light is still on after the vehicle has
been pulled off the road and carefully stopped,
have the vehicle towed for service.
This light comes on briefly when the ignition key is
turned to ON/RUN. If it does not, have the vehicle
serviced by your dealer/retailer. If the system is working
normally the indicator light will then go off.
When the ignition is on, the brake system warning light
also comes on when the parking brake is set. The
light stays on if the parking brake does not fully release.
If it stays on after the parking brake is fully released,
it means there is a brake problem.
The Driver Information Center (DIC) may display a
BRAKE FLUID message. SeeDIC Warnings and
Messages on page 4-42for more information.
If the light comes on while driving, pull off the road and
stop carefully. The pedal may be harder to push or it
may go closer to the floor. It may take longer to stop. Try
turning off and restarting the vehicle one or two times,
if the light is still on, have the vehicle towed for service.
SeeTowing Your Vehicle on page 5-24.
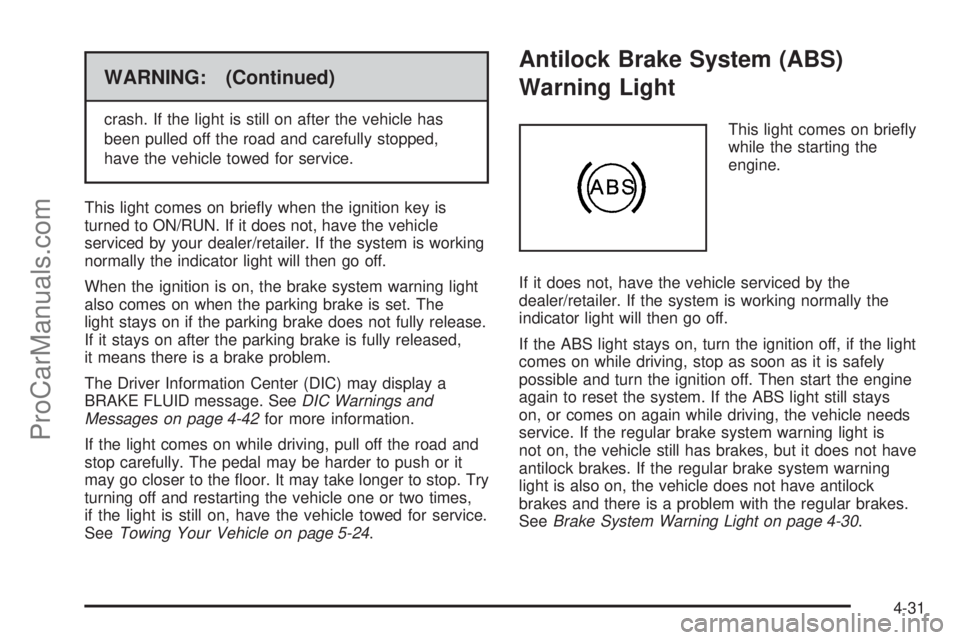
Antilock Brake System (ABS)
Warning Light
This light comes on briefly
while the starting the
engine.
If it does not, have the vehicle serviced by the
dealer/retailer. If the system is working normally the
indicator light will then go off.
If the ABS light stays on, turn the ignition off, if the light
comes on while driving, stop as soon as it is safely
possible and turn the ignition off. Then start the engine
again to reset the system. If the ABS light still stays
on, or comes on again while driving, the vehicle needs
service. If the regular brake system warning light is
not on, the vehicle still has brakes, but it does not have
antilock brakes. If the regular brake system warning
light is also on, the vehicle does not have antilock
brakes and there is a problem with the regular brakes.
SeeBrake System Warning Light on page 4-30.
4-31
ProCarManuals.com
Page 191 of 428
Here are four things that some owners ask about.
These are normal and do not indicate a problem with
the fuel gage:
•At the service station, the gas pump shuts off
before the gage reads full.
•It takes a little more or less fuel to fill up than the
gage indicated. For example, the gage may have
indicated the fuel tank was half full, but it actually
took a little more or less than half the fuel tank’s
capacity to fill it.
•The indicator moves a little when while turning a
corner or speeding up.
•The gage goes back to empty when the ignition is
turned off.
Driver Information Center (DIC)
Your vehicle has a Driver Information Center (DIC).
The DIC display gives you the status of many of your
vehicle’s systems. The DIC is also used to display driver
personalization menu modes and warning/status
messages. All messages will appear in the DIC display,
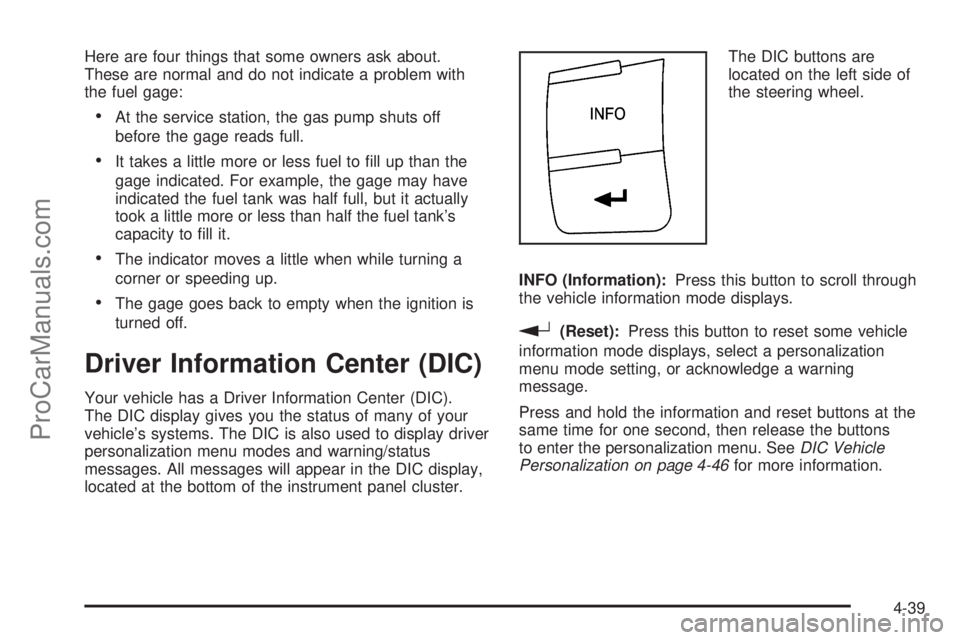
located at the bottom of the instrument panel cluster.The DIC buttons are
located on the left side of
the steering wheel.
INFO (Information):Press this button to scroll through
the vehicle information mode displays.
r(Reset):Press this button to reset some vehicle
information mode displays, select a personalization
menu mode setting, or acknowledge a warning
message.
Press and hold the information and reset buttons at the
same time for one second, then release the buttons
to enter the personalization menu. SeeDIC Vehicle
Personalization on page 4-46for more information.
4-39
ProCarManuals.com
Page 192 of 428
DIC Operation and Displays
The DIC comes on when the ignition is on. The DIC has
different modes which can be accessed by pressing
the DIC buttons. The button functions are detailed in the
following.
Information Modes
INFO (Information):Press this button to scroll through
the following vehicle information modes:
Outside Air Temperature
The outside air temperature will be displayed at the
same time as the Odometer and the Trip Odometer. The
temperature outside of the vehicle will be displayed in
either degrees Celsius (°C) or degrees Fahrenheit (°F).
The outside air temperature appears on the left side
of the DIC display and the odometer, or trip odometer,
appears on the right side of the display.
Odometer
Press the information button until the outside air
temperature and the odometer displays. This mode
shows the total distance the vehicle has been driven in
either kilometers (km) or miles (mi).
To change the DIC display to English or metric units,
see “UNITS” underDIC Vehicle Personalization on
page 4-46.
Trip Odometer
Press the information button until the outside air
temperature along with A or B displays. These modes
show the current distance traveled since the last reset for
each trip odometer in either kilometers (km) or miles (mi).
Both odometers can be used at the same time.
To reset the trip odometer to zero, press and hold the
reset button for a few seconds while the desired
trip odometer is displayed.
FUEL RANGE
Press the information button until FUEL RANGE
displays. This mode shows the remaining distance you
can drive without refueling in either kilometers (km)
or miles (mi). It is based on fuel economy and the fuel
remaining in the tank.
When the fuel level is low, FUEL RANGE LOW displays.
The fuel economy data used to determine fuel range
is an average of recent driving conditions. As your
driving conditions change, this data is gradually updated.
The FUEL RANGE mode cannot be reset.
4-40
ProCarManuals.com