low oil pressure SATURN AURA HYBRID 2010 Owners Manual
[x] Cancel search | Manufacturer: SATURN, Model Year: 2010, Model line: AURA HYBRID, Model: SATURN AURA HYBRID 2010Pages: 400, PDF Size: 2.46 MB
Page 4 of 400
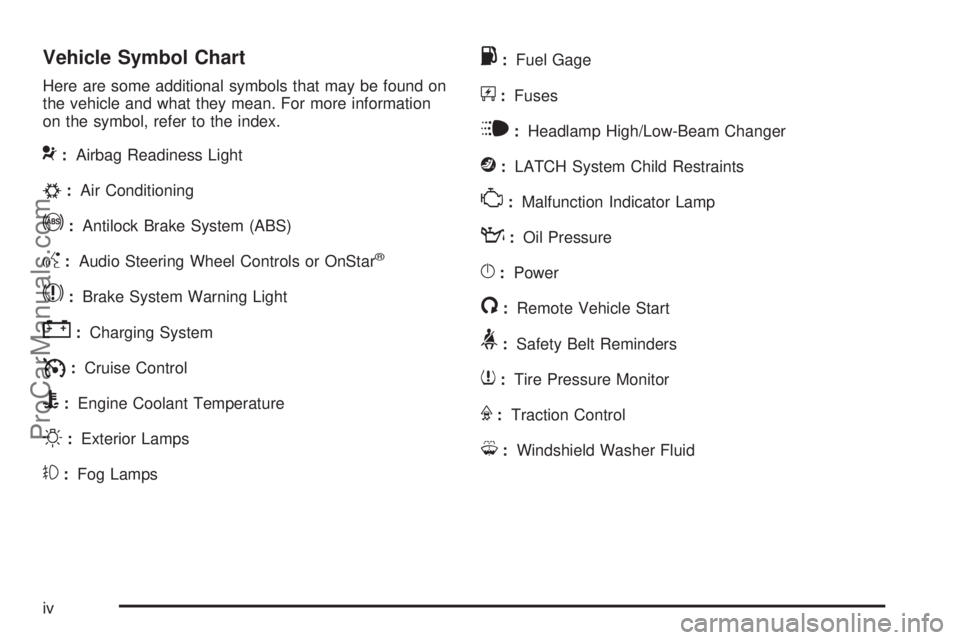
Vehicle Symbol Chart
Here are some additional symbols that may be found on
the vehicle and what they mean. For more information
on the symbol, refer to the index.
9:Airbag Readiness Light
#:Air Conditioning
!:Antilock Brake System (ABS)
g:Audio Steering Wheel Controls or OnStar®
$:Brake System Warning Light
":Charging System
I:Cruise Control
B:Engine Coolant Temperature
O:Exterior Lamps
#:Fog Lamps
.:Fuel Gage
+:Fuses
i:Headlamp High/Low-Beam Changer
j:LATCH System Child Restraints
*:Malfunction Indicator Lamp
::Oil Pressure
}:Power
/:Remote Vehicle Start
>:Safety Belt Reminders
7:Tire Pressure Monitor
F:Traction Control
M:Windshield Washer Fluid
iv
ProCarManuals.com
Page 30 of 400
Note:The Tire Pressure Monitor can alert you about
low tire pressure, but it does not replace normal monthly
tire maintenance. It is the driver’s responsibility to
maintain correct tire pressures.
SeeTire Pressure Monitor System on page 6-51and
Tire Pressure Monitor Operation on page 6-52.
Tire Sealant and Compressor Kit
This vehicle has a tire sealant and compressor kit which
can be used to seal small punctures in the tread area
of the tire.
SeeTire Sealant and Compressor Kit on page 6-66for
complete operating information.
Engine Oil Life System
The engine oil life system calculates engine oil life
based on vehicle use and displays a DIC message when
it is necessary to change the engine oil and filter. The
oil life system should be reset to 100% only following an
oil change.
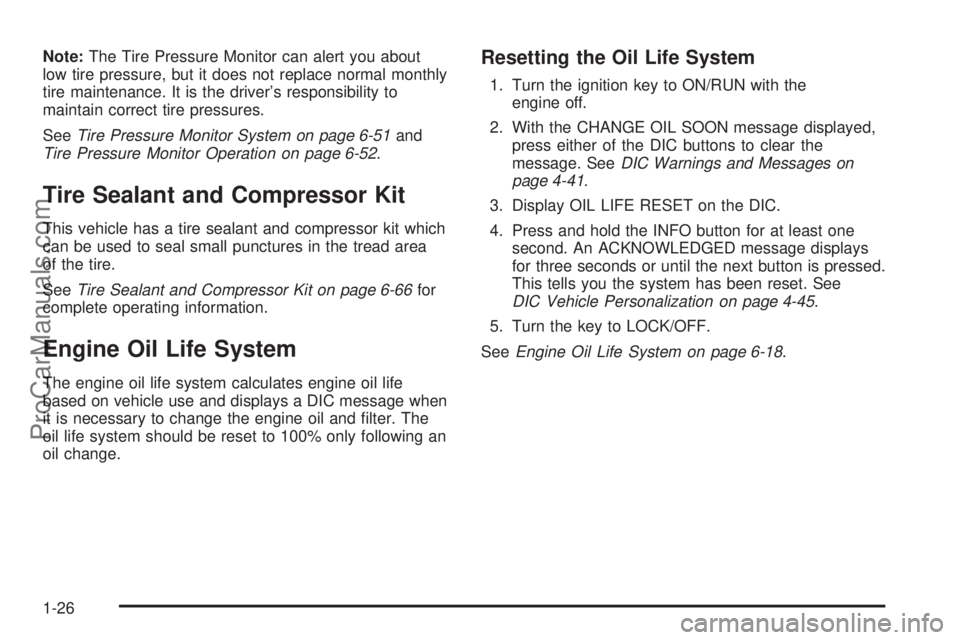
Resetting the Oil Life System
1. Turn the ignition key to ON/RUN with the
engine off.
2. With the CHANGE OIL SOON message displayed,
press either of the DIC buttons to clear the
message. SeeDIC Warnings and Messages on
page 4-41.
3. Display OIL LIFE RESET on the DIC.
4. Press and hold the INFO button for at least one
second. An ACKNOWLEDGED message displays
for three seconds or until the next button is pressed.
This tells you the system has been reset. See
DIC Vehicle Personalization on page 4-45.
5. Turn the key to LOCK/OFF.
SeeEngine Oil Life System on page 6-18.
1-26
ProCarManuals.com
Page 116 of 400
The engine will shut off automatically after 10 minutes,
unless a time extension has been done or the
vehicle’s key is inserted into the ignition switch and
turned to ON/RUN.
To manually shut off a remote start, do any of the
following.
•Aim the RKE transmitter at the vehicle and press
and release the remote start button.
•Turn on the hazard warning flashers.
•Turn the ignition switch out of LOCK/OFF position
and then back to LOCK/OFF.
The parking lamps turn off to indicate the engine is off.
After the engine has been started two times, or one
time with a time extension, the vehicle’s ignition must be
turned to ON/RUN using the key before the remote
start procedure can be used again. SeeIgnition
Positions on page 3-21for information regarding the
ignition positions on your vehicle.The remote vehicle start feature will not operate if any
of the follow occur:
•The remote start system is disabled through
the DIC.
•The vehicle’s key is in the ignition.
•The vehicle’s hood is open.
•The hazard warning flashers are on.
•The check engine light is on. SeeMalfunction
Indicator Lamp on page 4-31.
•The engine coolant temperature is too high.
•The oil pressure is low.
•Two remote vehicle starts, or one start with a time
extension, have already been provided for that
ignition cycle.
Vehicles that have the remote vehicle start feature are
shipped from the factory with the remote start system
enabled. The system may be enabled or disabled
through the DIC. See “REMOTE START” underDIC
Vehicle Personalization on page 4-45for additional
information.
3-8
ProCarManuals.com
Page 147 of 400
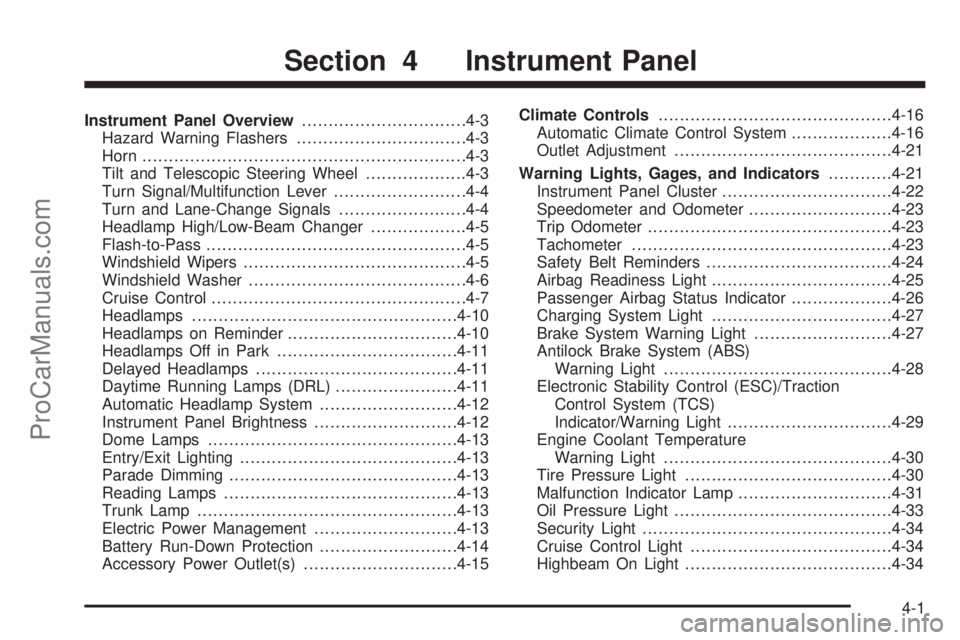
Instrument Panel Overview...............................4-3
Hazard Warning Flashers................................4-3
Horn .............................................................4-3
Tilt and Telescopic Steering Wheel...................4-3
Turn Signal/Multifunction Lever.........................4-4
Turn and Lane-Change Signals........................4-4
Headlamp High/Low-Beam Changer..................4-5
Flash-to-Pass.................................................4-5
Windshield Wipers..........................................4-5
Windshield Washer.........................................4-6
Cruise Control................................................4-7
Headlamps..................................................4-10
Headlamps on Reminder................................4-10
Headlamps Off in Park..................................4-11
Delayed Headlamps......................................4-11
Daytime Running Lamps (DRL).......................4-11
Automatic Headlamp System..........................4-12
Instrument Panel Brightness...........................4-12
Dome Lamps ...............................................4-13
Entry/Exit Lighting.........................................4-13
Parade Dimming...........................................4-13
Reading Lamps............................................4-13
Trunk Lamp.................................................4-13
Electric Power Management...........................4-13
Battery Run-Down Protection..........................4-14
Accessory Power Outlet(s).............................4-15Climate Controls............................................4-16
Automatic Climate Control System...................4-16
Outlet Adjustment.........................................4-21
Warning Lights, Gages, and Indicators............4-21
Instrument Panel Cluster................................4-22
Speedometer and Odometer...........................4-23
Trip Odometer..............................................4-23
Tachometer.................................................4-23
Safety Belt Reminders
...................................4-24
Airbag Readiness Light..................................4-25
Passenger Airbag Status Indicator...................4-26
Charging System Light..................................4-27
Brake System Warning Light..........................4-27
Antilock Brake System (ABS)
Warning Light...........................................4-28
Electronic Stability Control (ESC)/Traction
Control System (TCS)
Indicator/Warning Light...............................4-29
Engine Coolant Temperature
Warning Light...........................................4-30
Tire Pressure Light.......................................4-30
Malfunction Indicator Lamp.............................4-31
Oil Pressure Light.........................................4-33
Security Light...............................................4-34
Cruise Control Light......................................4-34
Highbeam On Light.......................................4-34
Section 4 Instrument Panel
4-1
ProCarManuals.com
Page 179 of 400
Emissions Inspection and Maintenance
Programs
Some state/provincial and local governments have or
might begin programs to inspect the emission control
equipment on the vehicle. Failure to pass this inspection
could prevent getting a vehicle registration.
Here are some things to know to help the vehicle pass
an inspection:
•The vehicle will not pass this inspection if the check
engine light is on with the engine running, or if the
key is in the ON/RUN and the light is not on.
•The vehicle will not pass this inspection if the
OBD II (on-board diagnostic) system determines
that critical emission control systems have not been
completely diagnosed by the system. The vehicle
would be considered not ready for inspection.
This can happen if the battery has recently been
replaced or if the battery has run down. The
diagnostic system is designed to evaluate critical
emission control systems during normal driving. This
can take several days of routine driving. If this
has been done and the vehicle still does not pass
the inspection for lack of OBD II system readiness,
your dealer/retailer can prepare the vehicle for
inspection.
Oil Pressure Light
If the vehicle has low
engine oil pressure, this
light stays on after
the engine is started, or
comes on and a chime
sounds while driving
the vehicle.
{WARNING:
Do not keep driving if the oil pressure is low. The
engine can become so hot that it catches fire.
Someone could be burned. Check the oil as soon
as possible and have the vehicle serviced.
Notice:Lack of proper engine oil maintenance can
damage the engine. The repairs would not be
covered by the vehicle warranty. Always follow the
maintenance schedule in this manual for changing
engine oil.
4-33
ProCarManuals.com
Page 186 of 400
OIL LIFE
Press the information button until OIL LIFE displays.
The engine oil life system shows an estimate of the oil’s
remaining useful life. It shows 100% when the system
is reset after an oil change. It alerts you to change the oil
on a schedule consistent with your driving conditions.
In addition to the engine oil life system monitoring the oil
life, additional maintenance is recommended in the
Maintenance Schedule in this manual. SeeEngine Oil
on page 6-15andScheduled Maintenance on page 7-3.
Always reset the engine oil life system after an oil
change. See “How to Reset the Engine Oil Life System”
underEngine Oil Life System on page 6-18.
COOLANT
Press the information button until COOLANT displays.
This mode shows the temperature of the engine coolant
in either degrees Fahrenheit (°F) or degrees Celsius (°C).
Tire Pressure
On vehicles with the Tire Pressure Monitor System
(TPMS), the pressure for each tire can be viewed in the
DIC. The tire pressure is shown in either pounds per
square inch (psi) or kilopascals (kPa). Press the
information button until LF ## PSI (kPa) ## RF displays
for the front tires. Press the information button again
until LR ## PSI (kPa) ## RR displays for the rear tires.
If a low tire pressure condition is detected by the system
while driving, a message advising you to add air will
appear in the display. SeeIn�ation - Tire Pressure on
page 6-49andDIC Warnings and Messages on
page 4-41for more information.
4-40
ProCarManuals.com
Page 283 of 400

Checking Coolant
The vehicle must be on a level surface when checking
the coolant level.
Check to see if coolant is visible in the coolant recovery
tank. If the coolant inside the coolant recovery tank
is boiling, do not do anything else until it cools down.
If coolant is visible but the coolant level is not at or above
the FULL COLD mark, add a 50/50 mixture of clean,
drinkable water and DEX-COOL
®coolant at the coolant
recovery tank, but be sure the cooling system is cool
before this is done. SeeEngine Coolant on page 6-23
for more information.
The coolant level should be at or above the FULL COLD
mark on the coolant surge tank. If it is not, you may have
a leak at the pressure cap or in the radiator hoses, heater
hoses, radiator, water pump, or somewhere else in the
cooling system.
How to Add Coolant to the
Recovery Tank
{WARNING:
You can be burned if you spill coolant on hot
engine parts. Coolant contains ethylene glycol
and it will burn if the engine parts are hot enough.
Do not spill coolant on a hot engine.
Notice:This vehicle has a speci�c coolant �ll
procedure. Failure to follow this procedure could
cause the engine to overheat and be severely
damaged.
If coolant is needed, add the proper DEX-COOL
®
coolant mixture at the coolant recovery tank.
6-25
ProCarManuals.com
Page 393 of 400

Lamps (cont.)
Malfunction Indicator....................................4-31
Reading.....................................................4-13
Trunk.........................................................4-13
Lap-Shoulder Belt...........................................2-24
LATCH System for Child Restraints...................2-42
Leaving the Vehicle With the Engine Running.....3-31
Lift Seat, Power............................................... 2-9
Light, Auto Stop Mode.....................................4-36
Lighting
Entry/Exit...................................................4-13
Parade Dimming..........................................4-13
Lights............................................................4-10
Airbag Readiness........................................4-25
Antilock Brake System (ABS) Warning............4-28
Brake System Warning.................................4-27
Charging System.........................................4-27
Cruise Control.............................................4-34
Engine Coolant Temperature Warning.............4-30
Flash-to-Pass............................................... 4-5
Fuel Economy.............................................4-37
Highbeam On.............................................4-34
High/Low Beam Changer................................ 4-5
Oil Pressure...............................................4-33
On Reminder..............................................4-10
Passenger Airbag Status Indicator..................4-26
Safety Belt Reminders..................................4-24
Security.....................................................4-34
Tire Pressure..............................................4-30
Loading a CD................................................4-58Loading Your Vehicle.......................................5-20
Locks
Delayed Locking..........................................3-10
Door ........................................................... 3-9
Lockout Protection.......................................3-12
Power Door .................................................. 3-9
Programmable Automatic Door Locks.............3-10
Rear Door Security Locks.............................3-11
Loss of Control...............................................
5-12
Lower Anchors and Tethers for Children.............2-42
Lumbar
Power Controls............................................. 2-5
M
Maintenance Schedule
Maintenance Record....................................7-13
Maintenance Replacement Parts....................7-11
Owner Checks and Services........................... 7-8
Recommended Fluids and Lubricants.............7-10
Scheduled Maintenance................................. 7-3
MaintenanceI.................................................. 7-3
MaintenanceII................................................. 7-4
Making a Call.................................................4-75
Malfunction Indicator Lamp...............................4-31
Managing the Vehicle Damage Repair Process . . . 8-13
Manual Locks.................................................. 1-6
Manual Reclining Seatbacks............................... 2-6
Manual Seat.................................................... 1-7
9
ProCarManuals.com