light SATURN ION 2004 User Guide
[x] Cancel search | Manufacturer: SATURN, Model Year: 2004, Model line: ION, Model: SATURN ION 2004Pages: 380, PDF Size: 2.89 MB
Page 85 of 380
9(LOCK):This position locks your steering column
in a vehicle with a manual transmission. It is a
theft-deterrent feature. You will only be able to remove
your key when the ignition is turned to LOCK.
If you have an automatic transaxle, the ignition switch
can’t be turned to LOCK unless the shift lever is in
PARK (P).
{CAUTION:
If you have a manual transaxle removing the key
from the ignition switch will lock the steering
column and result in a loss of ability to steer the
vehicle. This could cause a collision. If you need
to turn the engine off while the vehicle is moving,
turn the key to ACC.
ACC (ACCESSORY):This position operates some of
your electrical accessories. It unlocks the steering wheel
and ignition.
R(RUN):This is the position the switch returns to
after you start your engine and release the switch.
The switch stays in the RUN position when the engine
is running. But even when the ignition is not running,
you can use RUN to operate your electrical accessories
and to display some warning and indicator lights.
/(START):This position starts the engine. When the
engine starts, release the key. The ignition switch will
return to RUN for normal driving.
A warning tone will sound if you open the driver’s door
when the key has not been removed from the ignition.
Retained Accessory Power (RAP)
Your vehicle has RAP a feature that allows certain
accessories to continue to work for up to 10 minutes
after the ignition has been turned off. The radio, wipers
(high speed only), power windows, sunroof, and rear
accessory power outlet will continue to work until
10 minutes have passed or any door has been opened.
2-19
ProCarManuals.com
Page 95 of 380
Shift Speeds
{CAUTION:
If you skip a gear when you downshift, you
could lose control of your vehicle. You could
injure yourself or others. Don’t shift down more
than one gear at a time when you downshift.
Up-Shift Light
If you have a manual
transaxle, you may have
an up-shift light. This light
will show you when to
shift to the next higher gear
for the best fuel economy.When this light comes on, you can shift to the next
higher gear if weather, road and traffic conditions let you.
For the best fuel economy, accelerate slowly and shift
when the light comes on.
While you accelerate, it is normal for the light to go on
and off if you quickly change the position of the
accelerator. Ignore the light when you downshift.
Notice:If you skip more than one gear when you
downshift, or if you race the engine when you
release the clutch pedal while downshifting,
you could damage the engine, clutch, driveshaft
or the transmission. Do not skip gears or race the
engine when downshifting.
United States Only
2-29
ProCarManuals.com
Page 96 of 380

Parking Brake
The parking brake lever is located between the seats.To set the parking brake, hold the brake pedal down
and pull up on the parking brake lever. If the ignition is
on, the brake system warning light will come on.
To release the parking brake, hold the brake pedal
down. Pull the parking brake lever up until you can press
the release button. Hold the release button in as you
move the brake lever all the way down.
Make sure to release the parking brake before driving
the vehicle.
Notice:Driving with the parking brake on can
overheat the brake system and cause premature
wear or damage to brake system parts. Verify that
the parking brake is fully released and the brake
warning light is off before driving.
2-30
ProCarManuals.com
Page 103 of 380
Automatic Dimming Rearview Mirror
with OnStar
®, Compass and
Temperature Display
Your vehicle may have this feature. When on, an
automatic dimming mirror automatically dims to the
proper level to minimize glare from lights behind
you after dark.
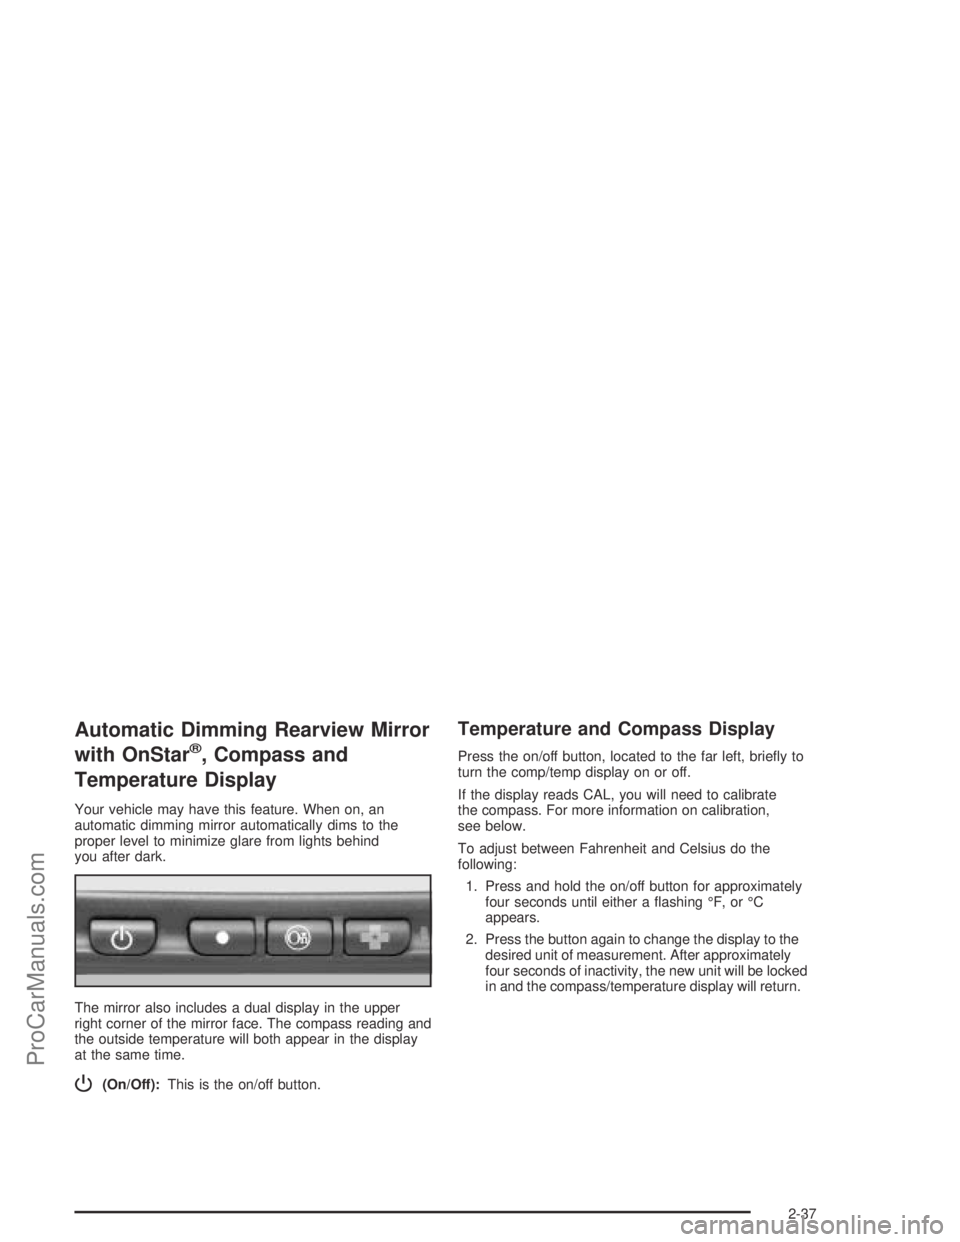
The mirror also includes a dual display in the upper
right corner of the mirror face. The compass reading and
the outside temperature will both appear in the display
at the same time.
P(On/Off):This is the on/off button.
Temperature and Compass Display
Press the on/off button, located to the far left, brie�y to
turn the comp/temp display on or off.
If the display reads CAL, you will need to calibrate
the compass. For more information on calibration,
see below.
To adjust between Fahrenheit and Celsius do the
following:
1. Press and hold the on/off button for approximately
four seconds until either a �ashing °F, or °C
appears.
2. Press the button again to change the display to the
desired unit of measurement. After approximately
four seconds of inactivity, the new unit will be locked
in and the compass/temperature display will return.
2-37
ProCarManuals.com
Page 104 of 380
Automatic Dimming Mirror Operation
The automatic dimming mirror function is turned
on automatically each time the ignition is started.
To operate the automatic dimming mirror do the
following:
1. Make sure the green indicator light, located to the
left of the on/off button, is lit. If it’s not, press and
hold the on/off button for approximately six seconds
until the green light comes on, indicating that the
mirror is in automatic dimming mode.
2. Turn off the automatic dimming mirror function by
pressing and holding the on/off button for
approximately six seconds until the green indicator
light turns off.
Compass Calibration
The compass may need calibration from time to time.
In order to calibrate, CAL must be displayed in the mirror
compass windows. If CAL is not displayed, push in
the on/off button for approximately nine seconds or until
CAL is displayed.
The compass can be calibrated by driving the vehicle in
circles at �ve mph (8 km/h) or less until the display
reads a direction.
Compass Variance
The mirror is set in zone eight upon leaving the factory.
It will be necessary to adjust the compass to
compensate for compass variance if you live outside of
zone eight. Under certain circumstances, as during a
long distance cross-country trip, it will be necessary to
adjust for compass variance. Compass variance is
the difference between earth’s magnetic north and true
geographic north. If not adjusted to account for
compass variance, your compass could give false
readings.
2-38
ProCarManuals.com
Page 106 of 380
Automatic Dimming Rearview Mirror
with Compass and Temperature
Display
If your vehicle is equipped with an automatic dimming
mirror it will automatically dim to the proper level to
minimize glare from lights behind you after dark.
The mirror also includes a display in the upper right
corner of the mirror face. The compass reading and the
outside temperature will both appear in the display at
the same time.
Temperature Display
The temperature can be displayed by pressing the
TEMP button. Pressing the TEMP button once brie�y,
will toggle the temperature reading from Fahrenheit (°F),
Celsius (°C), to off.
Automatic Dimming Mirror Operation
Press the COMP button to turn the automatic dimming
feature on and off. An indicator light on the bottom
of the mirror face will be on when the automatic dimming
feature is on.
Compass Operation
Press the COMP button once brie�y to turn the compass
on or off.
When compass feature is on, the compass will show the
direction the vehicle is traveling, with a maximum of
two characters.
Compass Calibration
The compass may need calibration from time to time.
In order to calibrate, CAL must be displayed in the mirror
compass windows. If CAL is not displayed, push in
the COMP button for approximately six seconds or until
CAL is displayed.
The compass can be calibrated by driving the vehicle in
circles at �ve mph (8 km/h) or less until the display
reads a direction.
Compass Variance
The mirror is set in zone eight upon leaving the factory.
It will be necessary to adjust the compass to compensate
for compass variance if you live outside zone eight.
Under certain circumstances, as during a long distance
cross-country trip, it will be necessary to adjust for
compass variance. Compass variance is the difference
between earth’s magnetic north and true geographic
north. If not adjusted to account for compass variance,
your compass could give false readings.
2-40
ProCarManuals.com
Page 113 of 380
Instrument Panel Overview...............................3-4
Hazard Warning Flashers................................3-6
Other Warning Devices...................................3-7
Horn.............................................................3-7
Tilt Wheel.....................................................3-7
Turn Signal/Multifunction Lever.........................3-8
Windshield Wiper Lever.................................3-11
Cruise Control..............................................3-12
Exterior Lamps.............................................3-15
Interior Lamps..............................................3-17
Accessory Power Outlets...............................3-18
Ashtrays and Cigarette Lighter........................3-19
Climate Controls............................................3-20
Climate Control System
(Without Air Conditioning)...........................3-20
Climate Control System
(With Air Conditioning)...............................3-22
Outlet Adjustment.........................................3-24
Passenger Compartment Air Filter...................3-25Warning Lights, Gages, and Indicators............3-27
Instrument Panel Cluster................................3-28
Speedometer and Odometer...........................3-29
Tachometer.................................................3-29
Safety Belt Reminder Light.............................3-30
Air Bag Readiness Light................................3-30
Battery Warning Light....................................3-31
Up-Shift Light...............................................3-32
Brake System Warning Light..........................3-32
Anti-Lock Brake System Warning Light.............3-34
Engine Coolant Temperature Gage..................3-35
Malfunction Indicator Lamp.............................3-36
Oil Pressure Light.........................................3-39
Passlock
®Warning Light................................3-40
Fuel Gage...................................................3-40
Section 3 Instrument Panel
3-1
ProCarManuals.com
Page 121 of 380

As you signal a turn or a lane change, if the arrows
�ash rapidly, a signal bulb may be burned out and other
drivers won’t see your turn signal.
If a bulb is burned out, replace it to help avoid an
accident. If the arrows don’t go on at all when you signal
a turn, check the fuse, seeFuses and Circuit Breakers
on page 5-95and for burned-out bulbs.
Turn Signal On Chime
If the turn signal is left on for about 1 mile (1.6 km),
a chime will sound to let you know you left the
turn signal on.
Headlamp High/Low-Beam Changer
To change the headlamps from low beam to high or high
beam to low, push the turn signal lever away from
you. Then release it.
When the high beams
are on, this light on the
instrument panel cluster
will also be on.
Flash-to-Pass
This feature lets you use your high-beam headlamps to
signal a driver in front of you that you want to pass.
To use it, pull the turn signal/multifunction lever toward
you until the high-beam headlamps come on, then
release the lever to turn them off.
3-9
ProCarManuals.com
Page 122 of 380
Headlamps
The exterior lamp control is located in the middle of the
turn signal/multifunction lever.
O(Exterior Lamp Control):Turn the control with this
symbol on it to operate the exterior lamps.
The exterior lamp control has the following four positions:
9(Off):Turning the control to this position turns off
all lamps except the Daytime Running Lamps (DRL).
On some vehicles, this position activates the automatic
headlamp system.
AUTO (Automatic):If your turn signal lever has this
position, turning the control to this position puts the
headlamps in automatic mode. AUTO mode will turn the
exterior lamps on and off depending upon how much
light is available outside of the vehicle.
;(Parking Lamps):Turning the control to this
position turns on the parking lamps together with the
following:
Sidemarker Lamps
Taillamps
License Plate Lamps
Instrument Panel Lights
5(Headlamps):Turning the control to this position
turns on the headlamps, together with the previously
listed lamps and lights.
Lamps On Reminder
If you open the driver’s door with the ignition off and the
lamps on, you will hear a warning chime.
3-10
ProCarManuals.com
Page 127 of 380
Using Cruise Control on Hills
How well your cruise control will work on hills depends
upon your speed, load and the steepness of the
hills. When going up steep hills, you may have to step
on the accelerator pedal to maintain your speed.
When going downhill, you may have to brake or shift to
a lower gear to keep your speed down. Applying the
brake or shifting into a lower gear will take you out
of cruise control. If you need to apply the brake or shift
to a lower gear due to the grade of the downhill
slope, you may not want to attempt to use your cruise
control feature.
Ending Cruise Control
To end a cruise control session, step lightly on the
brake pedal. If your vehicle has a manual transmission,
lightly tapping the clutch will end a cruise control
session also.
Stepping on the brake or clutch pedal will end the
current cruise control session only. Press the cruise
control on/off button to turn off the system completely.
Erasing Speed Memory
When you turn off the cruise control or the ignition, your
cruise control set speed memory is erased.
Exterior Lamps
Headlamps
SeeTurn Signal/Multifunction Lever on page 3-8for
more information on the headlamps.
Daytime Running Lamps
Daytime Running Lamps (DRL) can make it easier for
others to see the front of your vehicle during the
day. DRL can be helpful in many different driving
conditions, but they can be especially helpful in the short
periods after dawn and before sunset. Fully functional
daytime running lamps are required on all vehicles
�rst sold in Canada.
The DRL system will make your low-beam headlamps
come on at a reduced brightness in daylight when
the following conditions are met:
The ignition is on,
the exterior lamp band is in the off or AUTO
position, and
the transaxle is not in PARK (P) on models with an
automatic transaxle only.
3-15
ProCarManuals.com