bulb SATURN ION 2006 Owners Manual
[x] Cancel search | Manufacturer: SATURN, Model Year: 2006, Model line: ION, Model: SATURN ION 2006Pages: 392, PDF Size: 2.8 MB
Page 1 of 392

Seats and Restraint Systems........................... 1-1
Front Seats
............................................... 1-2
Rear Seats
............................................... 1-9
Safety Belts
.............................................1-11
Child Restraints
.......................................1-32
Airbag System
.........................................1-54
Restraint System Check
............................1-68
Features and Controls..................................... 2-1
Keys
........................................................ 2-2
Doors and Locks
....................................... 2-7
Windows
.................................................2-13
Theft-Deterrent Systems
............................2-16
Starting and Operating Your Vehicle
...........2-17
Mirrors
....................................................2-32
OnStar
®System
......................................2-38
Storage Areas
.........................................2-40
Sunroof
..................................................2-41
Instrument Panel............................................. 3-1
Instrument Panel Overview
.......................... 3-4
Climate Controls
......................................3-18
Warning Lights, Gages, and Indicators
........3-25
Message Center
.......................................3-43
Audio System(s)
.......................................3-48Driving Your Vehicle....................................... 4-1
Your Driving, the Road, and Your Vehicle
..... 4-2
Towing
...................................................4-36
Service and Appearance Care.......................... 5-1
Service
..................................................... 5-3
Fuel
......................................................... 5-4
Checking Things Under the Hood
...............5-10
Headlamp Aiming
.....................................5-48
Bulb Replacement
....................................5-48
Windshield Wiper Blade Replacement
.........5-56
Tires
......................................................5-57
Appearance Care
.....................................5-90
Vehicle Identi�cation
.................................5-99
Electrical System
......................................5-99
Capacities and Speci�cations
...................5-109
Maintenance Schedule..................................... 6-1
Maintenance Schedule
................................ 6-2
Customer Assistance and Information.............. 7-1
Customer Assistance and Information
........... 7-2
Reporting Safety Defects
...........................7-11
Index................................................................ 1
2006 Saturn ION Owner ManualM
ProCarManuals.com
Page 126 of 392

Turn and Lane-Change Signals
The turn signal has two upward (for right) and
two downward (for left) positions. These positions allow
you to signal a turn or a lane change.
To signal a turn, move the lever all the way up or down.
When the turn is �nished, the lever will return
automatically.
An arrow on the instrument
panel cluster will �ash in
the direction of the turn or
lane change.
To signal a lane change, just raise or lower the lever
until the arrow starts to �ash. Hold it there until you
complete your lane change. The lever will return by
itself when you release it.
As you signal a turn or a lane change, if the arrows
�ash rapidly, a signal bulb may be burned out and other
drivers won’t see your turn signal.
If a bulb is burned out, replace it to help avoid an
accident. If the arrows don’t go on at all when you signal
a turn, check the fuse, seeFuses and Circuit Breakers
on page 5-100and for burned-out bulbs.
Turn Signal On Chime
If the turn signal is left on for about 1 mile (1.6 km),
a chime will sound to let you know you left the turn
signal on.
Headlamp High/Low-Beam Changer
Push the turn signal lever forward to change the
headlamps from low beam to high beam. Pull the turn
signal lever back and then release it to change from high
beam to low beam.
When the high beams
are on, this light on the
instrument panel cluster
will also be on.
Flash-to-Pass
This feature lets you use your high-beam headlamps to
signal a driver in front of you that you want to pass.
To use it, pull the turn signal/multifunction lever toward
you until the high-beam headlamps come on, then
release the lever to turn them off.
3-8
ProCarManuals.com
Page 132 of 392

Daytime Running Lamps (DRL)
Daytime Running Lamps (DRL) can make it easier for
others to see the front of your vehicle during the day.
DRL can be helpful in many different driving conditions,
but they can be especially helpful in the short periods
after dawn and before sunset. Fully functional daytime
running lamps are required on all vehicles �rst sold in
Canada. The vehicle has a light sensor on top of the
instrument panel. Make sure it is not covered or the
headlamps will be on when not needed.
The DRL system will make your amber turn signal bulb
come on in daylight when the following conditions
are met:
The ignition is on.
The exterior lamp band is in the off or AUTO
position.
When the DRL are on, your amber turn signal bulb will
be on. The taillamps, sidemarker and other lamps won’t
be on. Your instrument panel will not be lit up either.
When you turn the exterior lamp band to the headlamp
position, your headlamps will come on. The other lamps
that come on with your headlamps will also come on.
When you turn off the headlamps, the regular lamps will
go off, and your amber turn signal bulb will come on.
Automatic Headlamp System
If you have the automatic headlamps system, the
headlamps will come on automatically when it is dark
enough.
Your vehicle may have a
light sensor located on top
of the instrument panel.
Make sure it is not covered,
or the headlamps will be on
when you don’t need them.
The system may also turn on the headlamps when
driving through a parking garage or tunnel.
3-14
ProCarManuals.com
Page 158 of 392

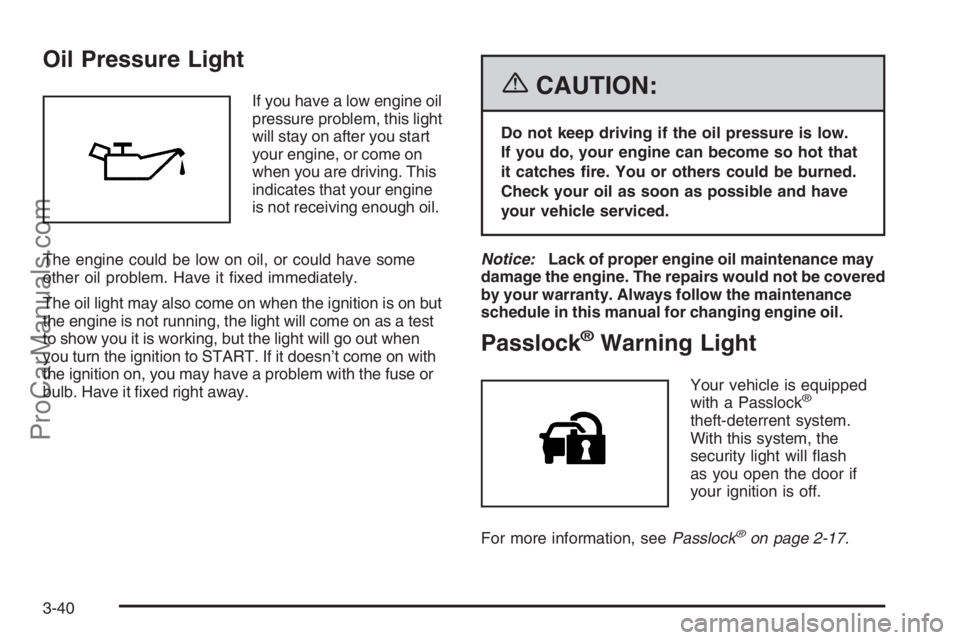
Oil Pressure Light
If you have a low engine oil
pressure problem, this light
will stay on after you start
your engine, or come on
when you are driving. This
indicates that your engine
is not receiving enough oil.
The engine could be low on oil, or could have some
other oil problem. Have it �xed immediately.
The oil light may also come on when the ignition is on but
the engine is not running, the light will come on as a test
to show you it is working, but the light will go out when
you turn the ignition to START. If it doesn’t come on with
the ignition on, you may have a problem with the fuse or
bulb. Have it �xed right away.{CAUTION:
Do not keep driving if the oil pressure is low.
If you do, your engine can become so hot that
it catches �re. You or others could be burned.
Check your oil as soon as possible and have
your vehicle serviced.
Notice:Lack of proper engine oil maintenance may
damage the engine. The repairs would not be covered
by your warranty. Always follow the maintenance
schedule in this manual for changing engine oil.
Passlock®Warning Light
Your vehicle is equipped
with a Passlock®
theft-deterrent system.
With this system, the
security light will �ash
as you open the door if
your ignition is off.
For more information, seePasslock
®on page 2-17.
3-40
ProCarManuals.com
Page 233 of 392

Following Distance
Stay at least twice as far behind the vehicle ahead as
you would when driving your vehicle without a trailer.
This can help you avoid situations that require
heavy braking and sudden turns.
Passing
You’ll need more passing distance up ahead when
you’re towing a trailer. And, because you’re a good deal
longer when towing a trailer, you’ll need to go much
farther beyond the passed vehicle before you can return
to your lane.
Backing Up
Hold the bottom of the steering wheel with one hand.
Then, to move the trailer to the left, just move that hand
to the left. To move the trailer to the right, move your
hand to the right. Always back up slowly and, if possible,
have someone guide you.
Making Turns
Notice:Making very sharp turns while trailering
could cause the trailer to come in contact with the
vehicle. Your vehicle could be damaged. Avoid
making very sharp turns while trailering.
When you’re turning with a trailer, make wider turns
than normal. Do this so your trailer won’t strike
soft shoulders, curbs, road signs, trees or other objects.
Avoid jerky or sudden maneuvers. Signal well in
advance.
Turn Signals When Towing a Trailer
When you tow a trailer, your vehicle may need a
different turn signal �asher and/or extra wiring. See your
retailer if you need information. The arrows on your
instrument panel will �ash whenever you signal a turn or
lane change. Properly hooked up, the trailer lamps
will also �ash, telling other drivers you’re about to turn,
change lanes or stop.
When towing a trailer, the arrows on your instrument
panel will �ash for turns even if the bulbs on the trailer
are burned out. Thus, you may think drivers behind
you are seeing your signal when they are not. It’s
important to check occasionally to be sure the trailer
bulbs are still working.
4-43
ProCarManuals.com
Page 237 of 392

Service............................................................5-3
Accessories and Modi�cations..........................5-3
California Proposition 65 Warning.....................5-3
Doing Your Own Service Work.........................5-4
Adding Equipment to the Outside
of Your Vehicle...........................................5-4
Fuel................................................................5-4
Gasoline Octane............................................5-5
Gasoline Speci�cations....................................5-5
California Fuel...............................................5-5
Additives.......................................................5-6
Fuels in Foreign Countries...............................5-6
Filling the Tank..............................................5-7
Filling a Portable Fuel Container.......................5-9
Checking Things Under the Hood....................5-10
Hood Release..............................................5-10
Engine Compartment Overview.......................5-12
Engine Oil...................................................5-15
Engine Oil Life System..................................5-20
Engine Air Cleaner/Filter................................5-22
Automatic Transaxle Fluid..............................5-24
Manual Transaxle Fluid..................................5-24
Hydraulic Clutch...........................................5-25
Engine Coolant.............................................5-25
Coolant Surge Tank Pressure Cap..................5-29
Engine Overheating.......................................5-29Cooling System............................................5-31
Windshield Washer Fluid................................5-38
Brakes........................................................5-39
Battery........................................................5-42
Jump Starting...............................................5-43
Headlamp Aiming...........................................5-48
Bulb Replacement..........................................5-48
Halogen Bulbs..............................................5-48
Headlamps (Coupe)......................................5-49
Headlamps (Sedan)......................................5-50
Front Turn Signal, Parking and Daytime
Running Lamps (DRL) (Coupe)...................5-52
Front Turn Signal, Parking and Daytime
Running Lamps (DRL) (Sedan)....................5-53
Center High-Mounted Stoplamp (CHMSL).........5-54
Taillamps, Turn Signal, Stoplamps and
Back-up Lamps.........................................5-54
Replacement Bulbs.......................................5-55
Windshield Wiper Blade Replacement..............5-56
Tires..............................................................5-57
Tire Sidewall Labeling...................................5-59
Tire Terminology and De�nitions.....................5-62
In�ation - Tire Pressure.................................5-64
Tire Inspection and Rotation...........................5-66
When It Is Time for New Tires.......................5-68
Buying New Tires.........................................5-68
Section 5 Service and Appearance Care
5-1
ProCarManuals.com
Page 284 of 392

Headlamp Aiming
Headlamp aim has been preset at the factory and
should need no further adjustment.
If your vehicle is damaged in an accident, the headlamp
aim may be affected. Aim adjustment to the low-beam
headlamps may be necessary if it is difficult to see
the lane markers (for horizontal aim), or if oncoming
drivers �ash their high-beam headlamps at you
(for vertical aim). If you believe your headlamps need
to be re-aimed, we recommend that you take your
vehicle to your retailer for service.
Bulb Replacement
For the type of bulb to use, seeReplacement Bulbs
on page 5-55.
For any bulb changing procedure not listed in this
section, contact your retailer.
Halogen Bulbs
{CAUTION:
Halogen bulbs have pressurized gas inside
and can burst if you drop or scratch the bulb.
You or others could be injured. Be sure to
read and follow the instructions on the bulb
package.
5-48
ProCarManuals.com
Page 285 of 392

Headlamps (Coupe)
To change a headlamp bulb on a coupe model, do the
following:
1. Open the hood. SeeHood Release on page 5-10
for more information.
2. Pull up on the headlamp retaining pins to remove
them from the headlamp assembly.
3. Pull the headlamp assembly away from the vehicle
and remove the electrical connector.4. Raise the lock tab and pull the connector from the
base of the bulb to remove the electrical connector
from the headlamp bulb.
5. Remove the retaining nut by turning it
counterclockwise.
6. Remove the bulb and replace it with the
appropriate bulb.
7. Reverse the steps to reinstall the headlamp
assembly.
5-49
ProCarManuals.com
Page 286 of 392

Headlamps (Sedan)
To change a headlamp bulb on a sedan model, do the
following:
1. Open the hood. SeeHood Release on page 5-10
for more information.
2. Pull up on the headlamp retaining pins to remove
them from the headlamp assembly.
3. Pull the headlamp assembly away from the vehicle
and remove the electrical connector.4. Access the bulb by turning the dust cap
counterclockwise to remove it.
5-50
ProCarManuals.com
Page 287 of 392

5. Raise the lock tab and pull the connector (A) from
the base of the bulb to remove the electrical
connector.
6. Remove the bulb retaining nut by turning it
counterclockwise.
7. Remove the bulb and replace it with the
appropriate bulb.
8. Reverse the steps to reinstall the lamp assembly.
5-51
ProCarManuals.com