fuses SATURN ION 2006 Owners Manual
[x] Cancel search | Manufacturer: SATURN, Model Year: 2006, Model line: ION, Model: SATURN ION 2006Pages: 392, PDF Size: 2.8 MB
Page 93 of 392

Passlock®
Your vehicle is equipped with the
Passlock®theft-deterrent system.
Passlock
®is a passive theft-deterrent system.
Passlock®enables fuel if the ignition lock cylinder is
turned with a valid key. If a correct key is not used or the
ignition lock cylinder is tampered with, fuel is disabled.
During normal operation,
the security light will
go off approximately
three seconds after the
key is turned to the
RUN ignition position.
If the engine stalls and the security light �ashes,
wait until the light stops �ashing before trying to
restart the engine. Remember to release the key
from START as soon as the engine starts.
If the engine is running and the security light comes on,
you will be able to restart the engine if you turn the engine
off. However, your Passlock
®system is not working
properly and must be serviced by your retailer. Your
vehicle is not protected by Passlock
®at this time. You
may also want to check the fuses, seeFuses and Circuit
Breakers on page 5-100. See your retailer for service.
Starting and Operating
Your Vehicle
New Vehicle Break-In
Notice:Your vehicle does not need an elaborate
break-in. But it will perform better in the long run if
you follow these guidelines:
Do not drive at any one constant speed, fast
or slow, for the �rst 500 miles (805 km).
Do not make full-throttle starts. Do not exceed
5,000 engine rpm. Avoid downshifting to
brake, or slow, the vehicle.
Avoid making hard stops for the �rst
200 miles (322 km) or so. During this time
your new brake linings are not yet broken in.
Hard stops with new linings can mean
premature wear and earlier replacement.
Follow this breaking-in guideline every time
you get new brake linings.
Do not tow a trailer during the �rst 1,000 miles
(1 600 km). SeeTowing a Trailer on page 4-39
for the trailer towing capabilities of your vehicle
and more information.
Following break-in, engine speed and load can be
gradually increased.
2-17
ProCarManuals.com
Page 126 of 392

Turn and Lane-Change Signals
The turn signal has two upward (for right) and
two downward (for left) positions. These positions allow
you to signal a turn or a lane change.
To signal a turn, move the lever all the way up or down.
When the turn is �nished, the lever will return
automatically.
An arrow on the instrument
panel cluster will �ash in
the direction of the turn or
lane change.
To signal a lane change, just raise or lower the lever
until the arrow starts to �ash. Hold it there until you
complete your lane change. The lever will return by
itself when you release it.
As you signal a turn or a lane change, if the arrows
�ash rapidly, a signal bulb may be burned out and other
drivers won’t see your turn signal.
If a bulb is burned out, replace it to help avoid an
accident. If the arrows don’t go on at all when you signal
a turn, check the fuse, seeFuses and Circuit Breakers
on page 5-100and for burned-out bulbs.
Turn Signal On Chime
If the turn signal is left on for about 1 mile (1.6 km),
a chime will sound to let you know you left the turn
signal on.
Headlamp High/Low-Beam Changer
Push the turn signal lever forward to change the
headlamps from low beam to high beam. Pull the turn
signal lever back and then release it to change from high
beam to low beam.
When the high beams
are on, this light on the
instrument panel cluster
will also be on.
Flash-to-Pass
This feature lets you use your high-beam headlamps to
signal a driver in front of you that you want to pass.
To use it, pull the turn signal/multifunction lever toward
you until the high-beam headlamps come on, then
release the lever to turn them off.
3-8
ProCarManuals.com
Page 135 of 392

Certain electrical accessories may not be compatible
with the accessory power outlet and could result in blown
vehicle or adapter fuses. If you experience a problem,
see your retailer for additional information on the
accessory power outlet.
Notice:Adding any electrical equipment to your
vehicle may damage it or keep other components
from working as they should. The repairs would not
be covered by your warranty. Check with your
retailer before adding electrical equipment.
When adding electrical equipment, be sure to follow the
installation instructions included with the equipment.
Notice:Improper use of the power outlet can cause
damage not covered by your warranty. Do not hang
any type of accessory or accessory bracket from the
plug because the power outlets are designed for
accessory power plugs only.Ashtray(s) and Cigarette Lighter
Your vehicle may have an ashtray and cigarette lighter.
To use the lighter, just push it in all the way and let
go. When it’s ready, it will pop back out by itself.
Notice:Holding a cigarette lighter in while it is
heating will not allow the lighter to back away from
the heating element when it is hot. Damage from
overheating may occur to the lighter or heating
element, or a fuse could be blown. Do not hold a
cigarette lighter in while it is heating.
To remove the ashtray, lift it straight up. To reinstall it,
press the ashtray down �rmly until it is fully seated.
Notice:If you put papers, pins, or other �ammable
items in the ashtray, hot cigarettes or other smoking
materials could ignite them and possibly damage
your vehicle. Never put �ammable items in the
ashtray.
3-17
ProCarManuals.com
Page 238 of 392

Different Size Tires and Wheels......................5-70
Uniform Tire Quality Grading..........................5-70
Wheel Alignment and Tire Balance..................5-72
Wheel Replacement......................................5-72
Tire Chains..................................................5-74
If a Tire Goes Flat........................................5-75
Changing a Flat Tire.....................................5-76
Removing the Spare Tire and Tools................5-77
Removing the Flat Tire and Installing
the Spare Tire..........................................5-82
Storing a Flat or Spare Tire and Tools............5-87
Compact Spare Tire......................................5-90
Appearance Care............................................5-90
Cleaning the Inside of Your Vehicle.................5-90
Fabric/Carpet...............................................5-92
Instrument Panel, Vinyl, and Other
Plastic Surfaces........................................5-93
Care of Safety Belts......................................5-93
Weatherstrips...............................................5-93
Washing Your Vehicle...................................5-94
Cleaning Exterior Lamps/Lenses.....................5-94Finish Care..................................................5-94
Windshield and Wiper Blades.........................5-95
Aluminum Wheels.........................................5-95
Tires...........................................................5-96
Sheet Metal Damage.....................................5-96
Finish Damage.............................................5-96
Underbody Maintenance................................5-97
Chemical Paint Spotting.................................5-97
Vehicle Care/Appearance Materials..................5-98
Vehicle Identi�cation......................................5-99
Vehicle Identi�cation Number (VIN).................5-99
Service Parts Identi�cation Label.....................5-99
Electrical System............................................5-99
Add-On Electrical Equipment..........................5-99
Windshield Wiper Fuses...............................5-100
Power Windows and Other Power Options......5-100
Fuses and Circuit Breakers..........................5-100
Floor Console Fuse Block............................5-100
Engine Compartment Fuse Block...................5-102
Capacities and Speci�cations........................5-109
Section 5 Service and Appearance Care
5-2
ProCarManuals.com
Page 336 of 392

Windshield Wiper Fuses
The windshield wiper motor is protected by a circuit
breaker and a fuse. If the motor overheats due to heavy
snow or ice, the wiper will stop until the motor cools.
If the overload is caused by some electrical problem,
have it �xed.
Power Windows and Other Power
Options
Circuit breakers in the fuse panel protect the power
windows and other power accessories. When the current
load is too heavy, the circuit breaker opens and
closes, protecting the circuit until the problem is �xed.
Fuses and Circuit Breakers
The wiring circuits in your vehicle are protected from
short circuits by a combination of fuses. This greatly
reduces the chance of �res caused by electrical
problems.
Look at the silver-colored band inside the fuse. If the
band is broken or melted, replace the fuse. Be sure you
replace a bad fuse with a new one of the identical
size and rating.
Floor Console Fuse Block
Some fuses are in a fuse block on the driver’s side of
the �oor console. To remove the �oor console cover,
move the driver’s seat back as far as it will go, and pull
the �oor console cover, starting near the front of the
vehicle, away from the �oor console.
Then remove the fuse block cover to access the fuses.
5-100
ProCarManuals.com
Page 337 of 392

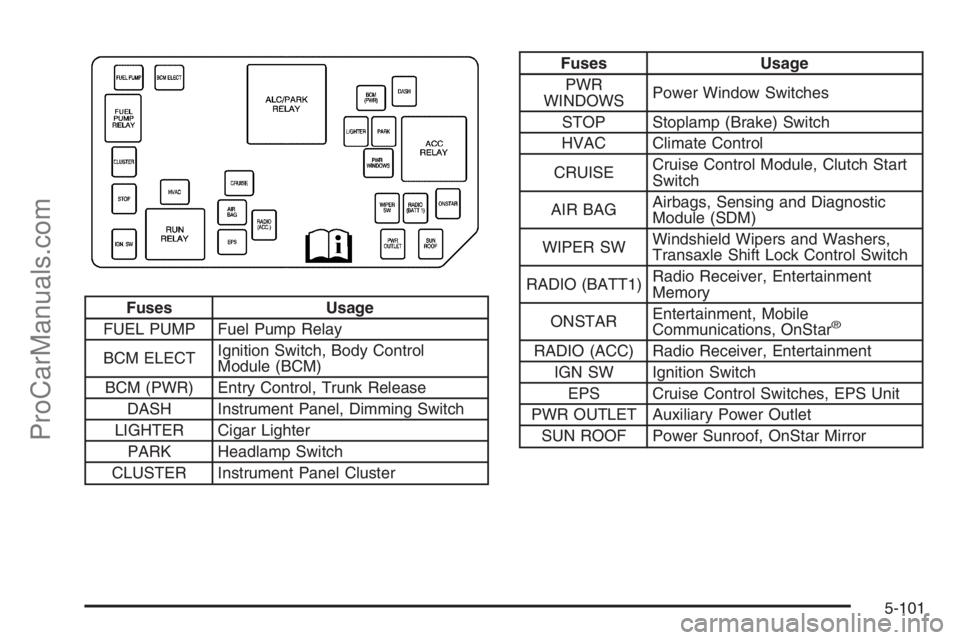
Fuses Usage
FUEL PUMP Fuel Pump Relay
BCM ELECTIgnition Switch, Body Control
Module (BCM)
BCM (PWR) Entry Control, Trunk Release
DASH Instrument Panel, Dimming Switch
LIGHTER Cigar Lighter
PARK Headlamp Switch
CLUSTER Instrument Panel Cluster
Fuses Usage
PWR
WINDOWSPower Window Switches
STOP Stoplamp (Brake) Switch
HVAC Climate Control
CRUISECruise Control Module, Clutch Start
Switch
AIR BAGAirbags, Sensing and Diagnostic
Module (SDM)
WIPER SWWindshield Wipers and Washers,
Transaxle Shift Lock Control Switch
RADIO (BATT1)Radio Receiver, Entertainment
Memory
ONSTAREntertainment, Mobile
Communications, OnStar
®
RADIO (ACC) Radio Receiver, Entertainment
IGN SW Ignition Switch
EPS Cruise Control Switches, EPS Unit
PWR OUTLET Auxiliary Power Outlet
SUN ROOF Power Sunroof, OnStar Mirror
5-101
ProCarManuals.com
Page 338 of 392

Relay Usage
ALC/PARK
RELAYOnStar®, Radio, Instrument Panel
Cluster, Body Control Module (Entry
Control), Cigar Lighter, Headlamp
Switch, License Lamp
FUEL PUMP
RELAYFuel Pump
ACC RELAYPower Windows, Sunroof, Radio,
Wiper/Washer Switch, Accessory
Power Outlet
RUN RELAYClimate Control (HVAC Blower,
Control Heads)
Engine Compartment Fuse Block
The engine compartment fuse block is located in
the engine compartment on the driver’s side of the
vehicle. SeeEngine Compartment Overview on
page 5-12for more information on location.
2.2L L4 Engine
The Engine Control Module (ECM) Inline fuse is located
on the battery cable, near the battery.
Fuses Usage
1 Transaxle Control Module
2 Not Used
3 Not Used
4 Passenger’s Side Headlamp
5 Air Conditioning
6 Not Used
5-102
ProCarManuals.com
Page 339 of 392

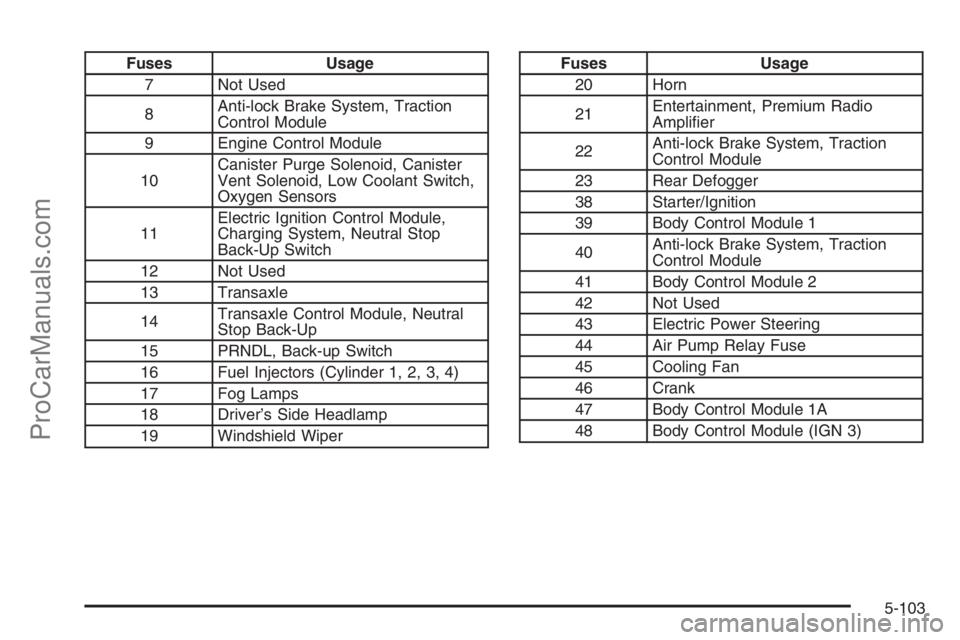
Fuses Usage
7 Not Used
8Anti-lock Brake System, Traction
Control Module
9 Engine Control Module
10Canister Purge Solenoid, Canister
Vent Solenoid, Low Coolant Switch,
Oxygen Sensors
11Electric Ignition Control Module,
Charging System, Neutral Stop
Back-Up Switch
12 Not Used
13 Transaxle
14Transaxle Control Module, Neutral
Stop Back-Up
15 PRNDL, Back-up Switch
16 Fuel Injectors (Cylinder 1, 2, 3, 4)
17 Fog Lamps
18 Driver’s Side Headlamp
19 Windshield WiperFuses Usage
20 Horn
21Entertainment, Premium Radio
Ampli�er
22Anti-lock Brake System, Traction
Control Module
23 Rear Defogger
38 Starter/Ignition
39 Body Control Module 1
40Anti-lock Brake System, Traction
Control Module
41 Body Control Module 2
42 Not Used
43 Electric Power Steering
44 Air Pump Relay Fuse
45 Cooling Fan
46 Crank
47 Body Control Module 1A
48 Body Control Module (IGN 3)
5-103
ProCarManuals.com
Page 340 of 392

Relays Usage
24 Air Conditioning Clutch
25 Horn
26 Fog Lamps
27 Air Solenoid
28 Body Control Module
29 Powertrain
30 Engine Cooling Fan
31 Engine Control Module
32 Wiper System 1
33 Wiper System 2
34 Rear Window Defogger
Diodes Usage
35
§Air Conditioning Diode
36
§Not Used
37
§Wiper Diode
Miscellaneous Usage
49 Fuse Puller
2.0L L4 Supercharged Engine
Fuses Usage
1 Engine Control Module
2 Not Used
3 Not Used
4 Passenger’s Side Headlamp
5 Air Conditioning
6 Not Used
7 Not Used
5-104
ProCarManuals.com
Page 341 of 392

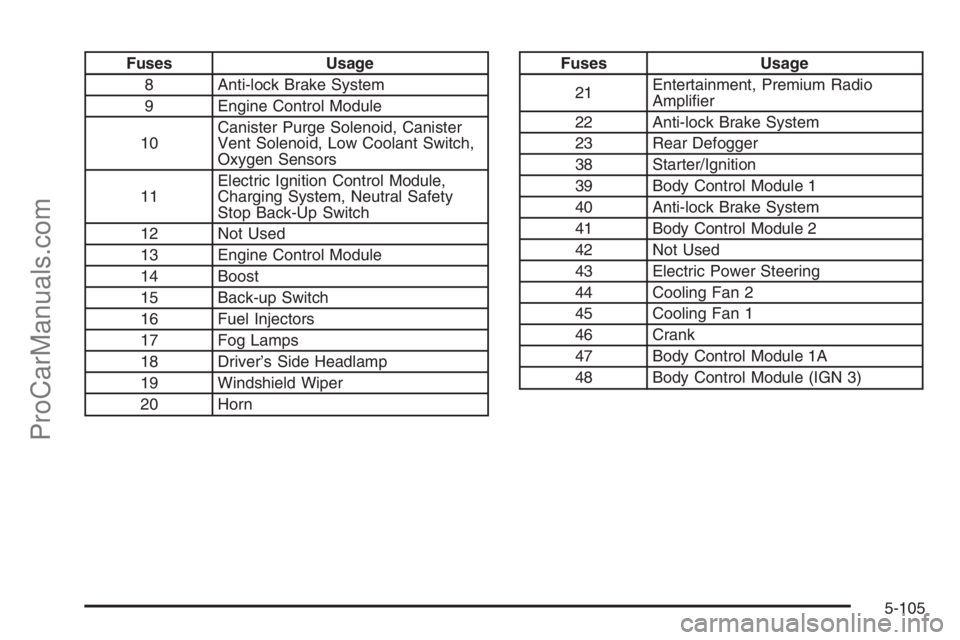
Fuses Usage
8 Anti-lock Brake System
9 Engine Control Module
10Canister Purge Solenoid, Canister
Vent Solenoid, Low Coolant Switch,
Oxygen Sensors
11Electric Ignition Control Module,
Charging System, Neutral Safety
Stop Back-Up Switch
12 Not Used
13 Engine Control Module
14 Boost
15 Back-up Switch
16 Fuel Injectors
17 Fog Lamps
18 Driver’s Side Headlamp
19 Windshield Wiper
20 HornFuses Usage
21Entertainment, Premium Radio
Ampli�er
22 Anti-lock Brake System
23 Rear Defogger
38 Starter/Ignition
39 Body Control Module 1
40 Anti-lock Brake System
41 Body Control Module 2
42 Not Used
43 Electric Power Steering
44 Cooling Fan 2
45 Cooling Fan 1
46 Crank
47 Body Control Module 1A
48 Body Control Module (IGN 3)
5-105
ProCarManuals.com