lock SATURN ION 2007 Workshop Manual
[x] Cancel search | Manufacturer: SATURN, Model Year: 2007, Model line: ION, Model: SATURN ION 2007Pages: 440, PDF Size: 2.93 MB
Page 130 of 440
OnStar®service is provided to you subject to the
OnStar®Terms and Conditions. You may
cancel your OnStar®service at any time by
contacting OnStar®as provided below. A complete
OnStar®Owner’s Guide and the OnStar®Terms
and Conditions are included in the vehicle’s
OnStar
®Subscriber glove box literature. For more
information, visit onstar.com or onstar.ca,
contact OnStar
®at 1-888-4-ONSTAR
(1-888-466-7827) or TTY 1-877-248-2080, or
press the OnStar
®button to speak with an
OnStar®advisor 24 hours a day, 7 days a week.
Not all OnStar
®features are available on all
vehicles. To check if your vehicle is equipped to
provide the services described below, or for a
full description of OnStar
®services and system
limitations, see the OnStar®Owner’s Guide in your
glove box or visit onstar.com.
OnStar®Services
For new vehicles equipped with OnStar®,
the Safe & Sound Plan, or the Directions &
Connections
®Plan is included for one year
from the date of purchase. You can extend
this plan beyond the �rst year, or upgrade
to the Directions & Connections
®Plan.For more information, press the OnStar
®button to
speak with an advisor. Some OnStar®services
(such as Remote Door Unlock or Stolen Vehicle
Location Assistance) may not be available
until you register with OnStar
®.
Available Services with Safe &
Sound®Plan
Automatic Noti�cation of Airbag Deployment
Advanced Automatic Crash Noti�cation (AACN)
(If equipped)
Link to Emergency Services
Roadside Assistance
Stolen Vehicle Location Assistance
AccidentAssist
Remote Door Unlock/Vehicle Alert
OnStar®Vehicle Diagnostics
GM®Goodwrench®On Demand Diagnostics
OnStar®Hands-Free Calling with
30 complimentary minutes
OnStar®Virtual Advisor (U.S. Only)
130
ProCarManuals.com
Page 137 of 440
Instrument Panel Overview........................ 140
Hazard Warning Flashers.......................... 142
Other Warning Devices............................. 142
Horn.......................................................... 142
Tilt Wheel.................................................. 142
Turn Signal/Multifunction Lever.................. 143
Turn and Lane-Change Signals................. 144
Headlamp High/Low-Beam Changer.......... 145
Flash-to-Pass............................................ 145
Windshield Washer.................................... 145
Windshield Wiper Lever............................. 146
Cruise Control........................................... 147
Headlamps................................................ 150
Daytime Running Lamps (DRL)................. 151
Automatic Headlamp System..................... 151
Fog Lamps................................................ 152
Instrument Panel Brightness...................... 152
Dome Lamp.............................................. 153
Entry Lighting............................................ 153
Map Lamps............................................... 153
Battery Run-Down Protection..................... 153
Accessory Power Outlet(s)........................ 153
Ashtray(s) and Cigarette Lighter................ 154Climate Controls......................................... 155
Climate Control System
(Without Air Conditioning)....................... 155
Climate Control System
(With Air Conditioning)........................... 157
Outlet Adjustment...................................... 160
Passenger Compartment Air Filter............. 161
Warning Lights, Gages, and Indicators..... 163
Instrument Panel Cluster........................... 164
Speedometer and Odometer...................... 165
Trip Odometer........................................... 165
Tachometer............................................... 165
Safety Belt Reminder Light........................ 166
Passenger Safety Belt Reminder Light....... 166
Airbag Readiness Light............................. 167
Passenger Airbag Status Indicator............. 168
Battery Warning Light................................ 170
Up-Shift Light............................................ 170
Brake System Warning Light..................... 170
Anti-Lock Brake System Warning Light...... 172
Engine Coolant Temperature Gage............ 173
Malfunction Indicator Lamp........................ 174
Section 3 Instrument Panel
137
ProCarManuals.com
Page 138 of 440
Oil Pressure Light..................................... 177
Passlock®Warning Light............................ 178
Reduced Engine Power Light.................... 178
Highbeam On Light................................... 179
Fuel Gage................................................. 179
Boost Gage............................................... 180
Message Center.......................................... 182
Low Traction Message.............................. 182
Traction Off Message................................ 182
Cruise Control Message............................ 183
Transaxle Fluid Hot Message.................... 183
Change Engine Oil Message..................... 183
Check Gage Message............................... 184
Power Steering Message........................... 184
Trunk Ajar Warning Message.................... 184Check Gas Cap Message......................... 185
Low Fuel Warning Message...................... 185
Error Message........................................... 185
Audio System(s)......................................... 186
Setting the Time (Without Date Display).... 187
Setting the Time (With Date Display)......... 188
Radio with CD (Base)............................... 190
Radio with CD (MP3)................................ 195
Using an MP3........................................... 205
XM Radio Messages................................. 212
Radio Reception........................................ 214
Care of Your CDs..................................... 215
Care of the CD Player.............................. 215
Fixed Mast Antenna.................................. 215
XM™ Satellite Radio Antenna System....... 215
Section 3 Instrument Panel
138
ProCarManuals.com
Page 143 of 440
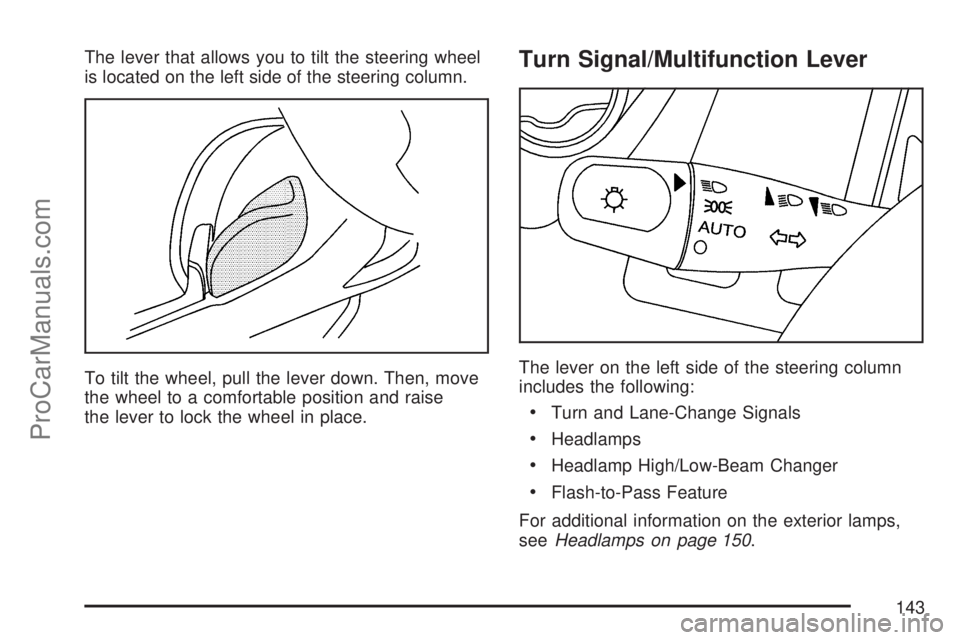
The lever that allows you to tilt the steering wheel
is located on the left side of the steering column.
To tilt the wheel, pull the lever down. Then, move
the wheel to a comfortable position and raise
the lever to lock the wheel in place.Turn Signal/Multifunction Lever
The lever on the left side of the steering column
includes the following:
Turn and Lane-Change Signals
Headlamps
Headlamp High/Low-Beam Changer
Flash-to-Pass Feature
For additional information on the exterior lamps,
seeHeadlamps on page 150.
143
ProCarManuals.com
Page 145 of 440
Headlamp High/Low-Beam Changer
Push the turn signal lever forward to change
the headlamps from low beam to high beam. Pull
the turn signal lever back and then release it
to change from high beam to low beam.
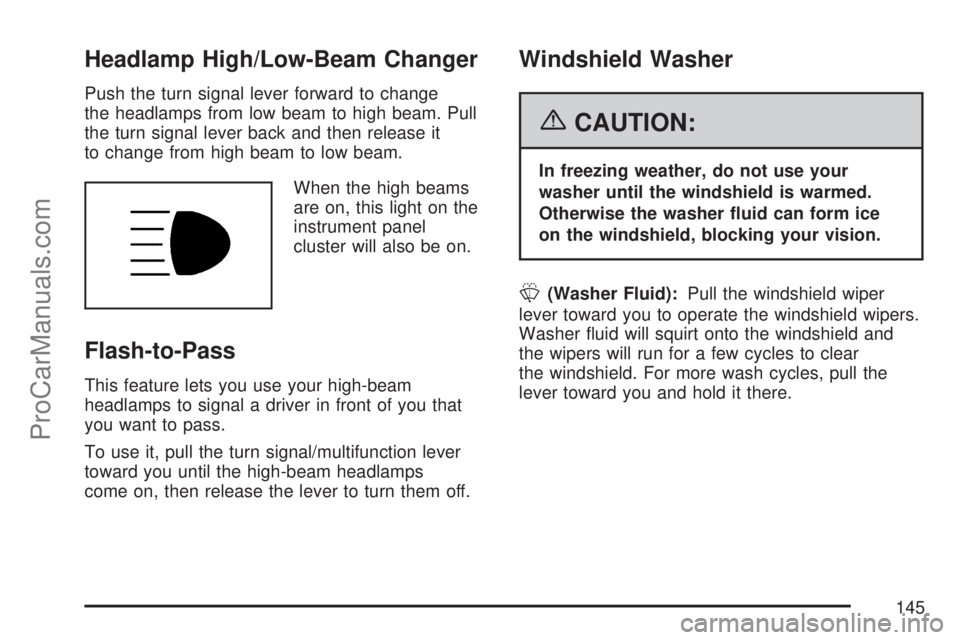
When the high beams
are on, this light on the
instrument panel
cluster will also be on.
Flash-to-Pass
This feature lets you use your high-beam
headlamps to signal a driver in front of you that
you want to pass.
To use it, pull the turn signal/multifunction lever
toward you until the high-beam headlamps
come on, then release the lever to turn them off.
Windshield Washer
{CAUTION:
In freezing weather, do not use your
washer until the windshield is warmed.
Otherwise the washer �uid can form ice
on the windshield, blocking your vision.
L(Washer Fluid):Pull the windshield wiper
lever toward you to operate the windshield wipers.
Washer �uid will squirt onto the windshield and
the wipers will run for a few cycles to clear
the windshield. For more wash cycles, pull the
lever toward you and hold it there.
145
ProCarManuals.com
Page 153 of 440
Dome Lamp
The dome lamp switch has three positions.
ON:The lamp will stay on as long as the switch
is in this position.
DOOR:The lamp will come on when a door is
opened. See “Entry Lighting” for more information.
OFF:The lamp will not come on as long as the
switch is in this position.
Entry Lighting
If the dome lamp is to DOOR, the lamps inside
your vehicle will come on when any door is
opened. In addition, the light will come on when
the Remote Keyless Entry Unlock button is
on. It will stay on for 20 seconds or until a door is
opened. After the door is opened the light will
remain on and stay on for 20 seconds after
the doors are closed, or until you put the key in
the ignition and turn the key to RUN. The light will
then gradually dim until it is no longer lit.
Map Lamps
These lamps are located on the headliner above
the rearview mirror. To turn the lamps on, press the
lens. Press the lens again to turn them off.
Battery Run-Down Protection
Your vehicle has a battery saver feature designed
to protect the vehicle’s battery.
When any interior lamp is left on and the ignition
is turned off, the battery rundown protection
system automatically turns the lamp off after
20 minutes. This prevents draining of the battery.
Accessory Power Outlet(s)
The accessory power outlets can be used to
connect electrical equipment such as a cellular
phone or CB radio.
The accessory power outlets are located in the
middle and rear of the center console.
The front accessory power outlet has electrical
power available to it all the time. The rear
accessory power outlet only has electrical power
when the ignition key is turned on or the vehicle is
operating on Retained Accessory Power (RAP).
SeeRetained Accessory Power (RAP) on
page 108.
153
ProCarManuals.com
Page 155 of 440
Climate Controls
Climate Control System
(Without Air Conditioning)
With this system you can control the heating and
ventilation for your vehicle.
Operation
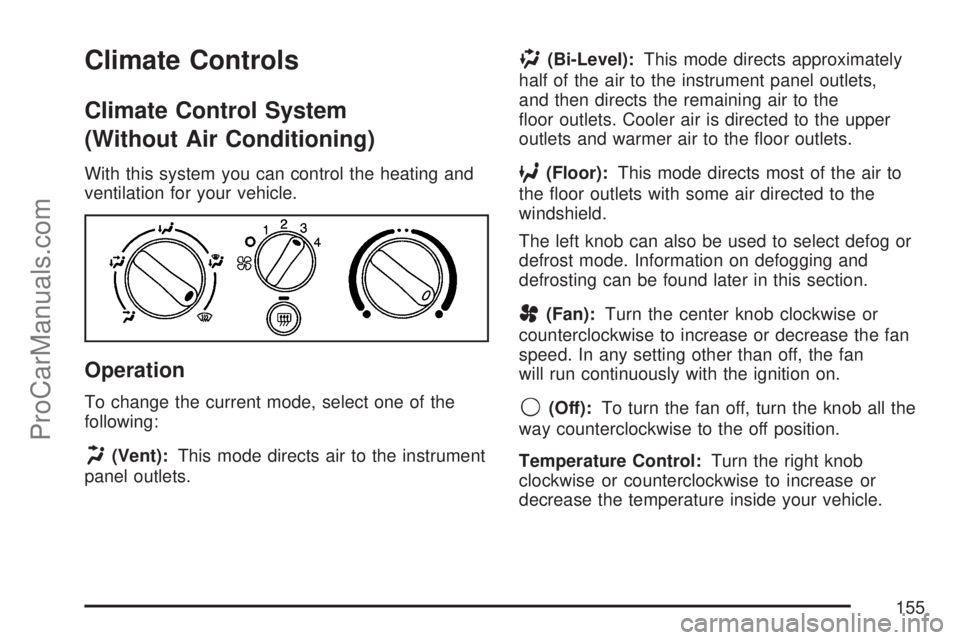
To change the current mode, select one of the
following:
H(Vent):This mode directs air to the instrument
panel outlets.
)(Bi-Level):This mode directs approximately
half of the air to the instrument panel outlets,
and then directs the remaining air to the
�oor outlets. Cooler air is directed to the upper
outlets and warmer air to the �oor outlets.
6(Floor):This mode directs most of the air to
the �oor outlets with some air directed to the
windshield.
The left knob can also be used to select defog or
defrost mode. Information on defogging and
defrosting can be found later in this section.
A(Fan):Turn the center knob clockwise or
counterclockwise to increase or decrease the fan
speed. In any setting other than off, the fan
will run continuously with the ignition on.
9(Off):To turn the fan off, turn the knob all the
way counterclockwise to the off position.
Temperature Control:Turn the right knob
clockwise or counterclockwise to increase or
decrease the temperature inside your vehicle.
155
ProCarManuals.com
Page 156 of 440

Defogging and Defrosting
Fog on the inside of windows is a result of high
humidity (moisture) condensing on the cool window
glass. This can be minimized if the climate
control system is used properly. There are
two modes to clear fog or frost from your
windshield and side windows. Use the defog mode
to clear the windows of fog or moisture and
warm the passengers. Use the defrost mode to
remove fog or frost from the windshield more
quickly. For best results, clear all snow and ice
from the windshield before defrosting.
Turn the left knob to select the defog or
defrost mode.
-(Defog):This mode directs half of the air to
the windshield and the side window outlets
and half to the �oor outlets. To defog the windows
faster, turn the temperature control knob
clockwise to the warmest setting.
0(Defrost):This mode directs most of the air to
the windshield, with some air directed to the
side window outlets and the �oor outlets.
Rear Window Defogger
The rear window defogger uses a warming grid to
remove fog from the rear window.
The rear window defogger will only work when the
ignition is in RUN.
<(Rear):Press the button to turn the rear
window defogger on or off. Be sure to clear as
much snow from the rear window as possible.
An indicator light above the button will come on to
let you know that the rear window defogger is
activated.
The rear window defogger will turn off
approximately 15 minutes after the button is
pressed. If turned on again, the defogger will only
run for approximately �ve minutes before turning
off. The defogger can also be turned off by pressing
the button again or by turning off the engine.
Notice:Do not use anything sharp on the
inside of the rear window. If you do, you could
cut or damage the warming grid, and the
repairs would not be covered by your warranty.
Do not attach a temporary vehicle license,
tape, a decal or anything similar to the
defogger grid.
156
ProCarManuals.com
Page 157 of 440
Climate Control System
(With Air Conditioning)
With this system you can control the heating,
cooling and ventilation for your vehicle.
Operation
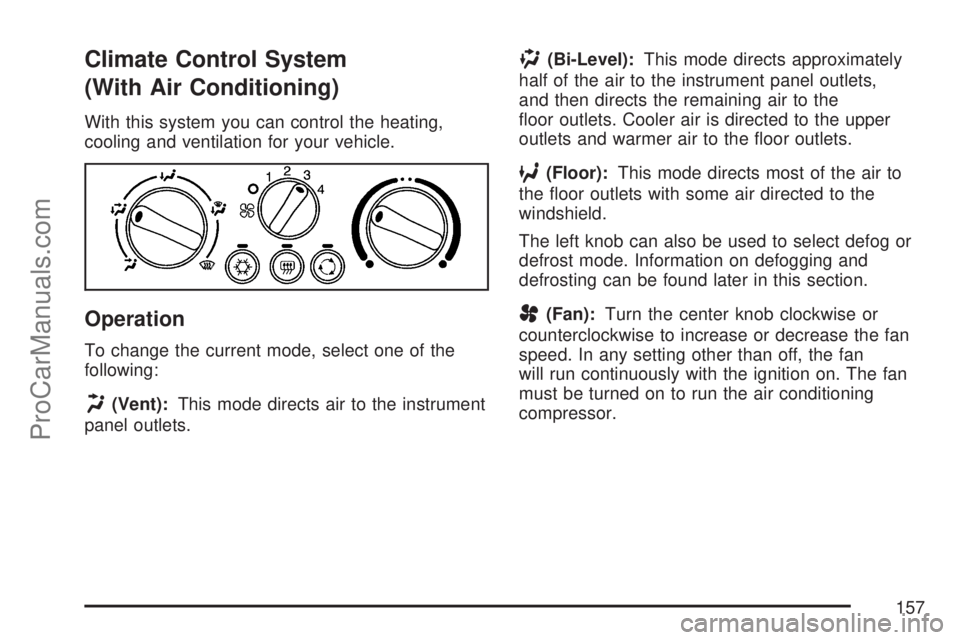
To change the current mode, select one of the
following:
H(Vent):This mode directs air to the instrument
panel outlets.
)(Bi-Level):This mode directs approximately
half of the air to the instrument panel outlets,
and then directs the remaining air to the
�oor outlets. Cooler air is directed to the upper
outlets and warmer air to the �oor outlets.
6(Floor):This mode directs most of the air to
the �oor outlets with some air directed to the
windshield.
The left knob can also be used to select defog or
defrost mode. Information on defogging and
defrosting can be found later in this section.
A(Fan):Turn the center knob clockwise or
counterclockwise to increase or decrease the fan
speed. In any setting other than off, the fan
will run continuously with the ignition on. The fan
must be turned on to run the air conditioning
compressor.
157
ProCarManuals.com
Page 158 of 440
9(Off):To turn the fan off, turn the knob all the
way counterclockwise to the off position.
Temperature Control:Turn the right knob
clockwise or counterclockwise to increase or
decrease the temperature inside your vehicle.
>(Recirculate):This mode keeps outside air
from coming in the vehicle. It can be used to
prevent outside air and odors from entering your
vehicle or to help heat or cool the air inside
your vehicle more quickly. An indicator light will
come on in this mode. The air-conditioning
compressor also comes on. Operation in this mode
during periods of high humidity and cool outside
temperatures may result in increased window
fogging. If window fogging is experienced, select
the defrost mode.
#(Air Conditioning):Press this button to turn
the air-conditioning system on or off. When
this button is pressed, an indicator light above the
button will come on to let you know the air
conditioning is activated.
On hot days, open the windows to let hot inside
air escape; then close them. This helps to reduce
the time it takes for your vehicle to cool down.
It also helps the system to operate more efficiently.
For quick cool down on hot days:
1. Select the recirculation mode.
2. Select air conditioning.
3. Select the coolest temperature.
4. Select the highest fan speed.
Using these settings together for long periods of
time may cause the air inside of your vehicle to
become too dry. To prevent this from happening,
after the air in your vehicle has cooled, turn off the
recirculation by pressing the button again.
158
ProCarManuals.com