clock SATURN OUTLOOK 2007 User Guide
[x] Cancel search | Manufacturer: SATURN, Model Year: 2007, Model line: OUTLOOK, Model: SATURN OUTLOOK 2007Pages: 538, PDF Size: 3.2 MB
Page 267 of 538
Setting the Tone (Bass/Treble)
BASS/MID/TREB (Bass, Midrange, or
Treble):To adjust bass, midrange, or treble,
press the tune knob until the tone control labels
display. Continue pressing to highlight the desired
label, or press the pushbutton positioned under
the desired label. Turn the tune knob clockwise or
counterclockwise to adjust the highlighted
setting. You can also adjust the highlighted setting
by pressing either the SEEK, FWD or REV
button until the desired levels are obtained. If a
station’s frequency is weak or if there is static,
decrease the treble.
To quickly adjust bass, midrange, or treble to the
middle position, press the pushbutton positioned
under the BASS, MID, or TREB label for more than
two seconds. A beep sounds and the level
adjusts to the middle position.
To quickly adjust all tone and speaker controls to
the middle position, press the tune knob for
more than two seconds until a beep sounds.
EQ (Equalization):Press this button to select
preset equalization settings.To return to the manual mode, press the EQ
button until Manual displays or start to manually
adjust the bass, midrange, or treble by pressing
the tune knob.
Adjusting the Speakers (Balance/Fade)
BAL/FADE (Balance/Fade):To adjust balance
or fade, press the tune knob until the speaker
control labels display. Continue pressing to
highlight the desired label, or press the pushbutton
positioned under the desired label. Turn the
tune knob clockwise or counterclockwise to adjust
the highlighted setting. You can also adjust the
highlighted setting by pressing either the SEEK,
FWD (forward), or REV (reverse) button until
the desired levels are obtained.
To quickly adjust balance or fade to the middle
position, press the pushbutton positioned under the
BAL or FADE label for more than two seconds.
A beep sounds and the level adjusts to the middle
position.
To quickly adjust all speaker and tone controls to
the middle position, press the tune knob for
more than two seconds until a beep sounds.
267
ProCarManuals.com
Page 273 of 538
To use a portable audio player, connect a 3.5 mm
(1/8 inch) cable to the radio’s front auxiliary
input jack. When a device is connected, press the
radio CD/AUX button to begin playing audio
from the device over the vehicle speakers.
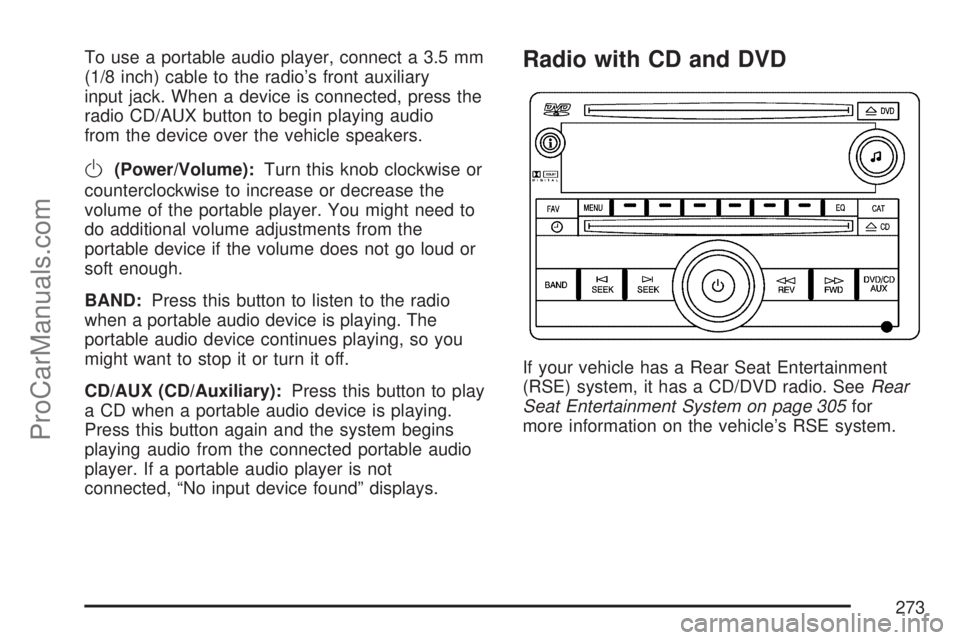
O(Power/Volume):Turn this knob clockwise or
counterclockwise to increase or decrease the
volume of the portable player. You might need to
do additional volume adjustments from the
portable device if the volume does not go loud or
soft enough.
BAND:Press this button to listen to the radio
when a portable audio device is playing. The
portable audio device continues playing, so you
might want to stop it or turn it off.
CD/AUX (CD/Auxiliary):Press this button to play
a CD when a portable audio device is playing.
Press this button again and the system begins
playing audio from the connected portable audio
player. If a portable audio player is not
connected, “No input device found” displays.
Radio with CD and DVD
If your vehicle has a Rear Seat Entertainment
(RSE) system, it has a CD/DVD radio. SeeRear
Seat Entertainment System on page 305for
more information on the vehicle’s RSE system.
273
ProCarManuals.com
Page 274 of 538
The DVD player is the top slot on the radio
faceplate. The player is capable of reading the DTS
programmed DVD Audio or DVD Video media (DTS
and DTS Digital Surround are registered
trademarks of Digital Theater Systems, Inc.).
Manufactured under license from
Dolby
®Laboratories. Dolby®and the double-D
symbol are trademarks of Dolby®Laboratories.
Radio Data System (RDS)
The audio system has a Radio Data System
(RDS). The RDS feature is available for use only
on FM stations that broadcast RDS information.
This system relies upon receiving speci�c
information from these stations and only works
when the information is available. While the radio
is tuned to an FM-RDS station, the station
name or call letters display. In rare cases, a radio
station can broadcast incorrect information that
causes the radio features to work improperly. If this
happens, contact the radio station.
XM™ Satellite Radio Service
XM™ is a satellite radio service that is based in
the 48 contiguous United States and Canada.
XM™ offers a large variety of coast-to-coast
channels including music, news, sports, talk,
traffic/weather (U.S. subscribers), and children’s
programming. XM™ provides digital quality
audio and text information that includes song title
and artist name. A service fee is required in
order to receive the XM™ service. For more
information, contact XM™; In the U.S. at
www.xmradio.com or call 1-800-852-XMXM (9696)
or in Canada at www.xmradio.ca or call
1-877-GET-XMSR (438-9677).
Playing the Radio
O
(Power/Volume):Press this knob to turn the
system on and off.
Turn this knob clockwise or counterclockwise to
increase or decrease the volume.
274
ProCarManuals.com
Page 277 of 538
3. Select the desired number of favorites pages
by pressing the pushbutton located below the
displayed page numbers.
4. Press the FAV button, or let the menu time
out, to return to the original main radio
screen showing the radio station frequency
labels and to begin the process of
programming your favorites for the chosen
amount of numbered pages.
Setting the Tone (Bass/Treble)
BASS/MID/TREB (Bass, Midrange, or
Treble):To adjust bass, midrange, or treble,
press the tune knob until the tone control labels
display. Continue pressing to highlight the desired
label, or press the pushbutton positioned under
the desired label. Turn the tune knob clockwise or
counterclockwise to adjust the highlighted
setting. If a station’s frequency is weak or if there
is static, decrease the treble.
To quickly adjust bass, midrange, or treble to the
middle position, press the pushbutton positioned
under the BASS, MID, or TREB label for more than
two seconds. A beep sounds and the level
adjusts to the middle position.To quickly adjust all tone and speaker controls to
the middle position, press the tune knob for
more than two seconds until a beep sounds.
EQ (Equalization):Press this button to choose
bass and treble equalization settings designed for
different types of music. The choices are pop,
rock, country, talk, jazz, and classical. Selecting
MANUAL or changing bass or treble, returns
the EQ to the manual bass and treble settings.
Unique EQ settings can be saved for each source.
If your radio has a Bose®audio system, the EQ
settings are either MANUAL or TALK.
Adjusting the Speakers (Balance/Fade)
BAL/FADE (Balance/Fade):To adjust balance
or fade, press the tune knob until the speaker
control labels display. Press the pushbutton
positioned under the desired label. Turn the tune
knob clockwise or counterclockwise to adjust
the highlighted setting. You can also adjust the
highlighted setting by pressing either the SEEK,
FWD, or REV button until the desired levels
are obtained.
277
ProCarManuals.com
Page 284 of 538
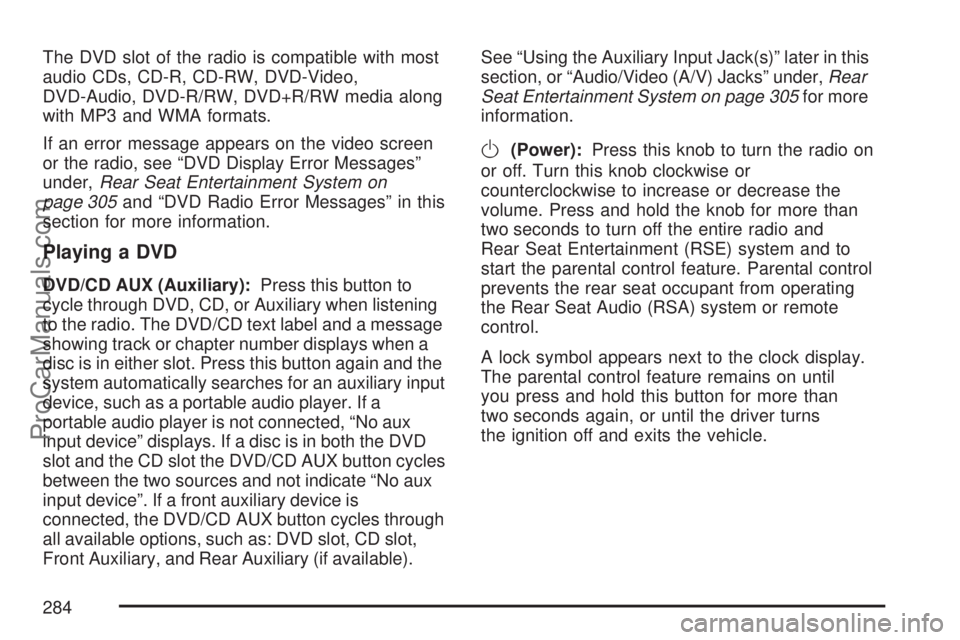
The DVD slot of the radio is compatible with most
audio CDs, CD-R, CD-RW, DVD-Video,
DVD-Audio, DVD-R/RW, DVD+R/RW media along
with MP3 and WMA formats.
If an error message appears on the video screen
or the radio, see “DVD Display Error Messages”
under,Rear Seat Entertainment System on
page 305and “DVD Radio Error Messages” in this
section for more information.
Playing a DVD
DVD/CD AUX (Auxiliary):Press this button to
cycle through DVD, CD, or Auxiliary when listening
to the radio. The DVD/CD text label and a message
showing track or chapter number displays when a
disc is in either slot. Press this button again and the
system automatically searches for an auxiliary input
device, such as a portable audio player. If a
portable audio player is not connected, “No aux
input device” displays. If a disc is in both the DVD
slot and the CD slot the DVD/CD AUX button cycles
between the two sources and not indicate “No aux
input device”. If a front auxiliary device is
connected, the DVD/CD AUX button cycles through
all available options, such as: DVD slot, CD slot,
Front Auxiliary, and Rear Auxiliary (if available).See “Using the Auxiliary Input Jack(s)” later in this
section, or “Audio/Video (A/V) Jacks” under,Rear
Seat Entertainment System on page 305for more
information.
O(Power):Press this knob to turn the radio on
or off. Turn this knob clockwise or
counterclockwise to increase or decrease the
volume. Press and hold the knob for more than
two seconds to turn off the entire radio and
Rear Seat Entertainment (RSE) system and to
start the parental control feature. Parental control
prevents the rear seat occupant from operating
the Rear Seat Audio (RSA) system or remote
control.
A lock symbol appears next to the clock display.
The parental control feature remains on until
you press and hold this button for more than
two seconds again, or until the driver turns
the ignition off and exits the vehicle.
284
ProCarManuals.com
Page 285 of 538
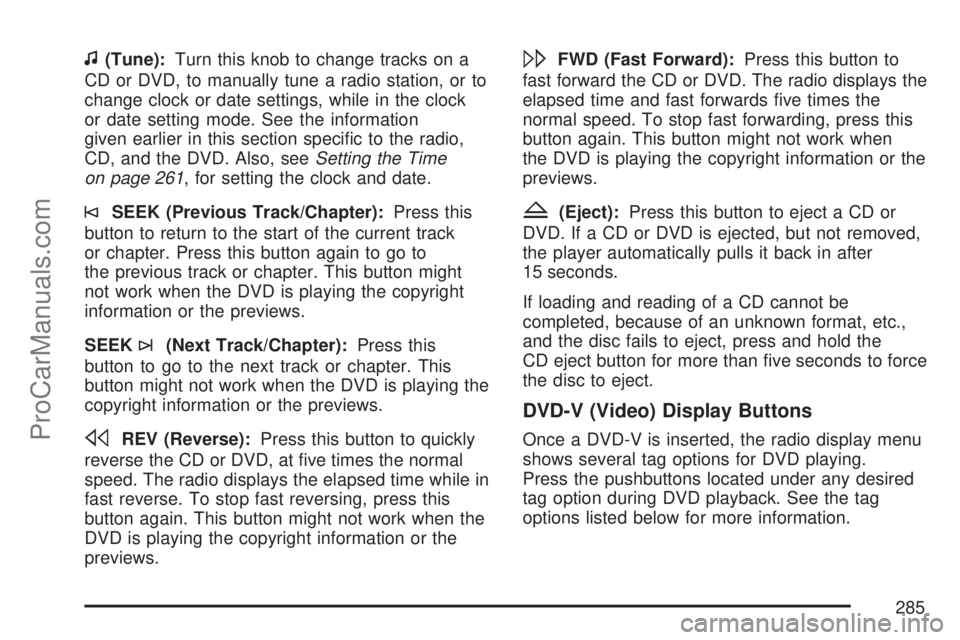
f(Tune):Turn this knob to change tracks on a
CD or DVD, to manually tune a radio station, or to
change clock or date settings, while in the clock
or date setting mode. See the information
given earlier in this section speci�c to the radio,
CD, and the DVD. Also, seeSetting the Time
on page 261, for setting the clock and date.
©SEEK (Previous Track/Chapter):Press this
button to return to the start of the current track
or chapter. Press this button again to go to
the previous track or chapter. This button might
not work when the DVD is playing the copyright
information or the previews.
SEEK
¨(Next Track/Chapter):Press this
button to go to the next track or chapter. This
button might not work when the DVD is playing the
copyright information or the previews.
sREV (Reverse):Press this button to quickly
reverse the CD or DVD, at �ve times the normal
speed. The radio displays the elapsed time while in
fast reverse. To stop fast reversing, press this
button again. This button might not work when the
DVD is playing the copyright information or the
previews.
\FWD (Fast Forward):Press this button to
fast forward the CD or DVD. The radio displays the
elapsed time and fast forwards �ve times the
normal speed. To stop fast forwarding, press this
button again. This button might not work when
the DVD is playing the copyright information or the
previews.
Z(Eject):Press this button to eject a CD or
DVD. If a CD or DVD is ejected, but not removed,
the player automatically pulls it back in after
15 seconds.
If loading and reading of a CD cannot be
completed, because of an unknown format, etc.,
and the disc fails to eject, press and hold the
CD eject button for more than �ve seconds to force
the disc to eject.
DVD-V (Video) Display Buttons
Once a DVD-V is inserted, the radio display menu
shows several tag options for DVD playing.
Press the pushbuttons located under any desired
tag option during DVD playback. See the tag
options listed below for more information.
285
ProCarManuals.com
Page 289 of 538
device such as an iPod, laptop computer, MP3
player, CD player, or cassette tape player, etc. to
the auxiliary input jack for use as another
source for audio listening.
Drivers are encouraged to set up any auxiliary
device while the vehicle is in PARK (P). See
Defensive Driving on page 322for more
information on driver distraction.
To use a portable audio player, connect a 1/8 inch
(3.5 mm) cable to the radio’s front auxiliary
input jack. When a device is connected, the radio
automatically begins playing audio from the
device over the vehicle speakers.
To listen to a device through the rear auxiliary input
over the speakers, cycle the DVD/CD Aux button
on the radio faceplate until “Rear Aux Input”
displays on the radio. The RSA or DVD Screen
must be on in order for the radio to source to rear
auxiliary.
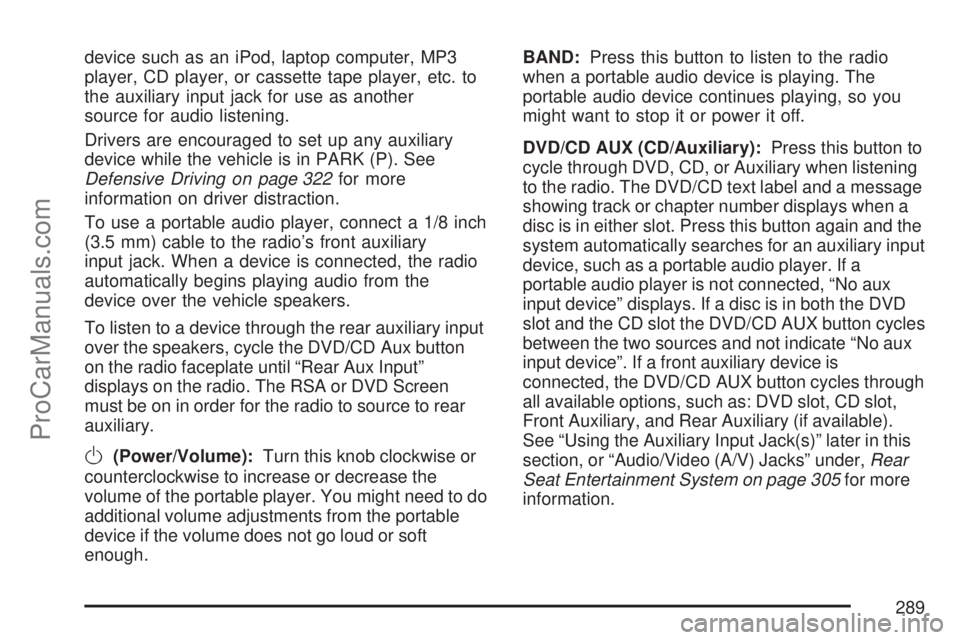
O(Power/Volume):Turn this knob clockwise or
counterclockwise to increase or decrease the
volume of the portable player. You might need to do
additional volume adjustments from the portable
device if the volume does not go loud or soft
enough.BAND:Press this button to listen to the radio
when a portable audio device is playing. The
portable audio device continues playing, so you
might want to stop it or power it off.
DVD/CD AUX (CD/Auxiliary):Press this button to
cycle through DVD, CD, or Auxiliary when listening
to the radio. The DVD/CD text label and a message
showing track or chapter number displays when a
disc is in either slot. Press this button again and the
system automatically searches for an auxiliary input
device, such as a portable audio player. If a
portable audio player is not connected, “No aux
input device” displays. If a disc is in both the DVD
slot and the CD slot the DVD/CD AUX button cycles
between the two sources and not indicate “No aux
input device”. If a front auxiliary device is
connected, the DVD/CD AUX button cycles through
all available options, such as: DVD slot, CD slot,
Front Auxiliary, and Rear Auxiliary (if available).
See “Using the Auxiliary Input Jack(s)” later in this
section, or “Audio/Video (A/V) Jacks” under,Rear
Seat Entertainment System on page 305for more
information.
289
ProCarManuals.com
Page 334 of 538
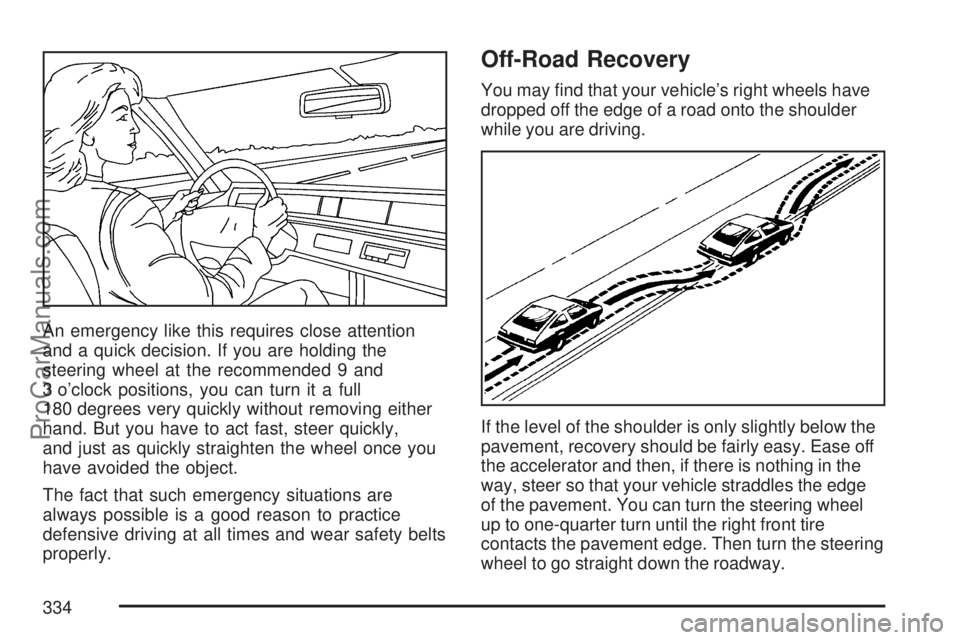
An emergency like this requires close attention
and a quick decision. If you are holding the
steering wheel at the recommended 9 and
3 o’clock positions, you can turn it a full
180 degrees very quickly without removing either
hand. But you have to act fast, steer quickly,
and just as quickly straighten the wheel once you
have avoided the object.
The fact that such emergency situations are
always possible is a good reason to practice
defensive driving at all times and wear safety belts
properly.
Off-Road Recovery
You may �nd that your vehicle’s right wheels have
dropped off the edge of a road onto the shoulder
while you are driving.
If the level of the shoulder is only slightly below the
pavement, recovery should be fairly easy. Ease off
the accelerator and then, if there is nothing in the
way, steer so that your vehicle straddles the edge
of the pavement. You can turn the steering wheel
up to one-quarter turn until the right front tire
contacts the pavement edge. Then turn the steering
wheel to go straight down the roadway.
334
ProCarManuals.com
Page 382 of 538
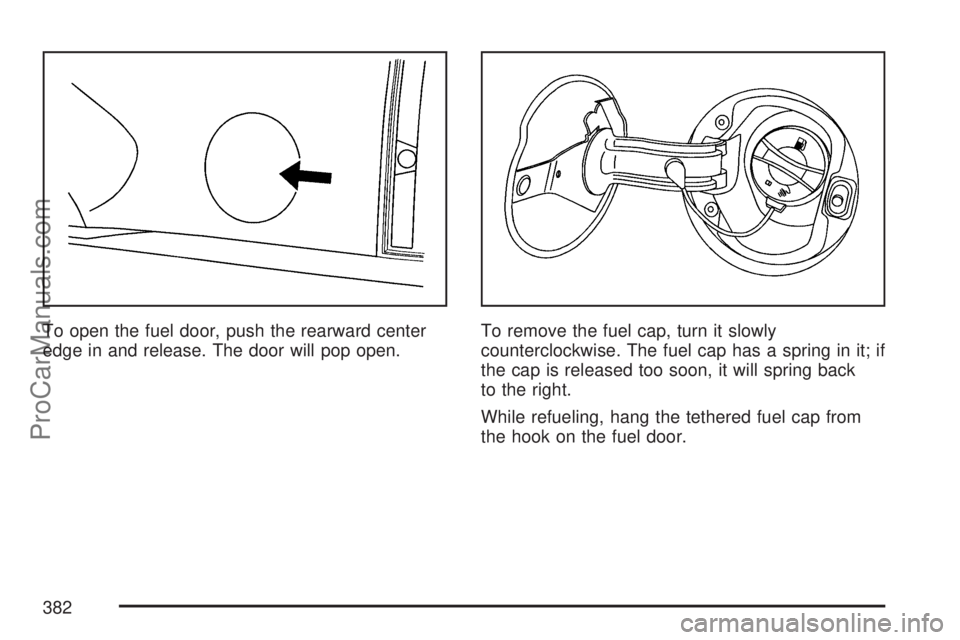
To open the fuel door, push the rearward center
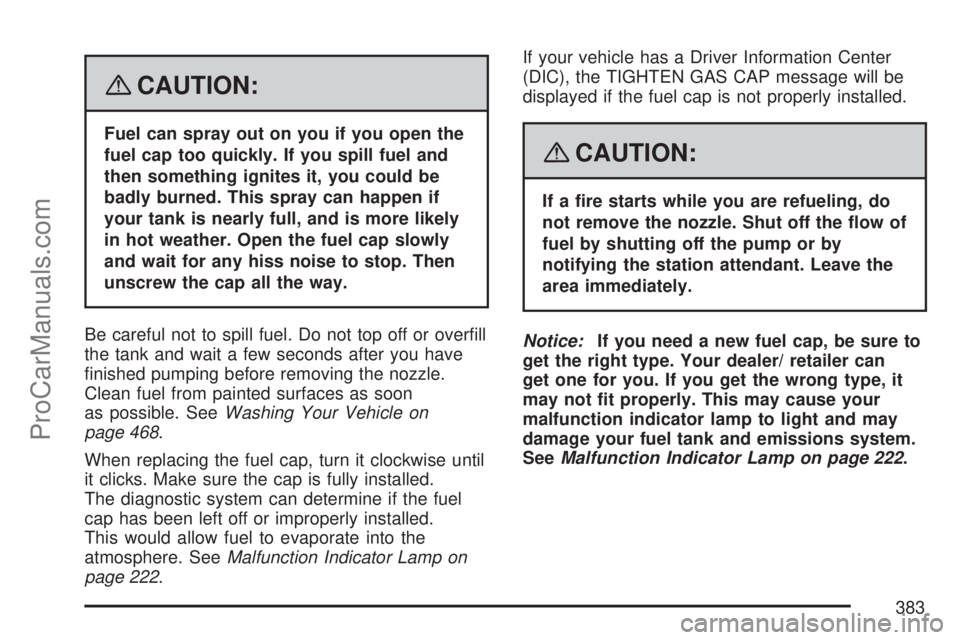
edge in and release. The door will pop open.To remove the fuel cap, turn it slowly
counterclockwise. The fuel cap has a spring in it; if
the cap is released too soon, it will spring back
to the right.
While refueling, hang the tethered fuel cap from
the hook on the fuel door.
382
ProCarManuals.com
Page 383 of 538
{CAUTION:
Fuel can spray out on you if you open the
fuel cap too quickly. If you spill fuel and
then something ignites it, you could be
badly burned. This spray can happen if
your tank is nearly full, and is more likely
in hot weather. Open the fuel cap slowly
and wait for any hiss noise to stop. Then
unscrew the cap all the way.
Be careful not to spill fuel. Do not top off or over�ll
the tank and wait a few seconds after you have
�nished pumping before removing the nozzle.
Clean fuel from painted surfaces as soon
as possible. SeeWashing Your Vehicle on
page 468.
When replacing the fuel cap, turn it clockwise until
it clicks. Make sure the cap is fully installed.
The diagnostic system can determine if the fuel
cap has been left off or improperly installed.
This would allow fuel to evaporate into the
atmosphere. SeeMalfunction Indicator Lamp on
page 222.If your vehicle has a Driver Information Center
(DIC), the TIGHTEN GAS CAP message will be
displayed if the fuel cap is not properly installed.
{CAUTION:
If a �re starts while you are refueling, do
not remove the nozzle. Shut off the �ow of
fuel by shutting off the pump or by
notifying the station attendant. Leave the
area immediately.
Notice:If you need a new fuel cap, be sure to
get the right type. Your dealer/ retailer can
get one for you. If you get the wrong type, it
may not �t properly. This may cause your
malfunction indicator lamp to light and may
damage your fuel tank and emissions system.
SeeMalfunction Indicator Lamp on page 222.
383
ProCarManuals.com