ignition SATURN OUTLOOK 2010 Owner's Manual
[x] Cancel search | Manufacturer: SATURN, Model Year: 2010, Model line: OUTLOOK, Model: SATURN OUTLOOK 2010Pages: 444, PDF Size: 4.43 MB
Page 63 of 444

Seats and Restraints 3-9
On vehicles with the heated and
ventilated seat feature, the controls
are located on the front doors near
the door handle.
H(Ventilated Seat):Press to
ventilate the entire seat.
This symbol appears on the climate
control display to indicate that the
feature is on.
z(Heated Seat and Seatback):
Press to heat the entire seat.
This symbol appears on the climate
control display to indicate that the
feature is on. For either feature press the button
once for the highest setting. With
each press of the switch, the seat
changes to the next lower setting,
and then the off setting. The lights
indicate three for the highest setting
and one for the lowest.
The heated and ventilated seats are
canceled after the ignition is turned
off. To use the heated and ventilated
seat feature after the vehicle is
started, you will need to press the
appropriate seat button again.
Rear Seats
A. Seat Adjustment Handle
B. Reclining Seatback Strap
C. Sliding Seat Lever
ProCarManuals.com
Page 96 of 444

3-42 Seats and Restraints
Your dealer/retailer and the service
manual have information about
servicing the vehicle and the airbag
system. To purchase a service
manual, seeService Publications
Ordering Information on page 13‑11.
{WARNING
For up to 10 seconds after the
ignition is turned off and the
battery is disconnected, an airbag
can still inflate during improper
service. You can be injured if you
are close to an airbag when it
inflates. Avoid yellow connectors.
They are probably part of the
airbag system. Be sure to follow
proper service procedures, and
make sure the person performing
work for you is qualified to do so.
Adding Equipment to the
Airbag-Equipped Vehicle
Q: Is there anything I might add
to or change about the vehicle
that could keep the airbags
from working properly?
A: Yes. If you add things that
change the vehicle's frame,
bumper system, height, front end
or side sheet metal, they may
keep the airbag system from
working properly. Changing or
moving any parts of the front
seats, safety belts, the airbag
sensing and diagnostic module,
steering wheel, instrument
panel, roof-rail airbag modules,
ceiling headliner or pillar garnish
trim, overhead console, front
sensors, side impact sensors,
rollover sensor module, or airbag
wiring can affect the operation of
the airbag system.
In addition, the vehicle has a
passenger sensing system for
the right front passenger
position, which includes sensors that are part of the passenger
seat. The passenger sensing
system may not operate properly
if the original seat trim is
replaced with non-GM covers,
upholstery or trim, or with GM
covers, upholstery or trim
designed for a different vehicle.
Any object, such as an
aftermarket seat heater or a
comfort enhancing pad or
device, installed under or on top
of the seat fabric, could also
interfere with the operation of
the passenger sensing system.
This could either prevent proper
deployment of the passenger
airbag(s) or prevent the
passenger sensing system from
properly turning off the
passenger airbag(s). See
Passenger Sensing System
on
page 3‑37.
If you have questions, call
Customer Assistance. The
phone numbers and addresses
for Customer Assistance are in
ProCarManuals.com
Page 128 of 444
5-6 Instruments and Controls
ignition key must be in ACC/
ACCESSORY or ON/RUN for this to
work. SeeWasher Fluid
on
page 10‑21Windshield Washer
Fluid .
{WARNING
In freezing weather, do not use
your washer until the windshield
is warmed. Otherwise the washer
fluid can form ice on the
windshield, blocking your vision.
WASHER FLUID LOW ADD FLUID
is displayed on the Driver
Information Center (DIC) when the
washer fluid is low. See Washer
Fluid Messages on page 5‑41.
Rear Window Wiper/
Washer
The rear wiper and rear wash button
is located on the instrument panel
below the climate control system.
Z (Rear Wiper): Press to turn the
rear wiper on and off. The wiper
speed cannot be changed.
Y (Wash): Press to spray washer
fluid on the rear window. The
window wiper will also come on.
Release the button when enough
fluid has been sprayed on the
window. The rear wiper will run a
few more cycles after it is released.
If the rear wiper function was
already on, prior to pressing the
wash button, it stays on until the
wiper button is pressed again.
The rear window washer uses the
same fluid that is in the windshield
washer reservoir. See Washer Fluid
on page 10‑21.
Compass
Your vehicle may have a compass
in the Driver Information Center
(DIC). SeeDriver Information
Center (DIC) (With DIC Buttons)
on
page 5‑24or Driver Information
Center (DIC) (Without DIC Buttons)
on page 5‑30for more information
about the DIC.
Compass Zone
The zone is set to zone eight upon
leaving the factory. Your dealer/
retailer will set the correct zone for
your location.
Under certain circumstances, such
as during a long distance
cross-country trip or moving to a
new state or province, it will be
necessary to compensate for
compass variance by resetting the
zone through the DIC if the zone is
not set correctly.
ProCarManuals.com
Page 130 of 444
5-8 Instruments and Controls
If the DIC display does not show a
heading, for example, N for North,
or the heading does not change
after making turns, there may be a
strong magnetic field interfering with
the compass. Such interference
may be caused by a magnetic CB or
cell phone antenna mount, a
magnetic emergency light, magnetic
note pad holder, or any other
magnetic item. Turn off the vehicle,
move the magnetic item, then turn
on the vehicle and calibrate the
compass.
To calibrate the compass, use the
following procedure:
Compass Calibration Procedure
1. Before calibrating the compass,make sure the compass zone is
set to the variance zone in which
the vehicle is located. See
“Compass Variance (Zone)
Procedure” earlier in this
section. Do not operate any switches
such as window, sunroof,
climate controls, seats, etc.
during the calibration procedure.
2. Press the vehicle information button until PRESS
VTO
CALIBRATE COMPASS
displays.
3. Press the set/reset button to start the compass calibration.
4. The DIC will display CALIBRATING: DRIVE IN
CIRCLES. Drive the vehicle in
tight circles at less than 5 mph
(8 km/h) to complete the
calibration. The DIC will display
CALIBRATION COMPLETE for a
few seconds when the
calibration is complete. The DIC
display will then return to the
previous menu.
Clock
To adjust the time and date:
1. Turn the ignition key to ACC/ACCESSORY or ON/RUN, then
press
O, to turn the radio on.
2. Press
Gto display HR, MIN,
MM, DD, YYYY (hour, minute,
month, day, and year).
3. Press the pushbutton located under any one of the labels to be
changed.
4. To increase the time or date, do one of the following:
.Press the pushbutton below
the selected label.
.Press¨SEEK.
.Press\FWD.
.Turnfclockwise.
ProCarManuals.com
Page 132 of 444
5-10 Instruments and Controls
When adding electrical equipment,
be sure to follow the proper
installation instructions included with
the equipment.
Notice:Improper use of the
power outlet can cause damage
not covered by the vehicle
warranty. Do not hang any type of
accessory or accessory bracket
from the plug because the power
outlets are designed for
accessory power plugs only.
Power Outlet 120 Volt
Alternative Current
The vehicle may have a power
outlet that can be used to plug in
electrical equipment that uses a
maximum limit of 150 watts.
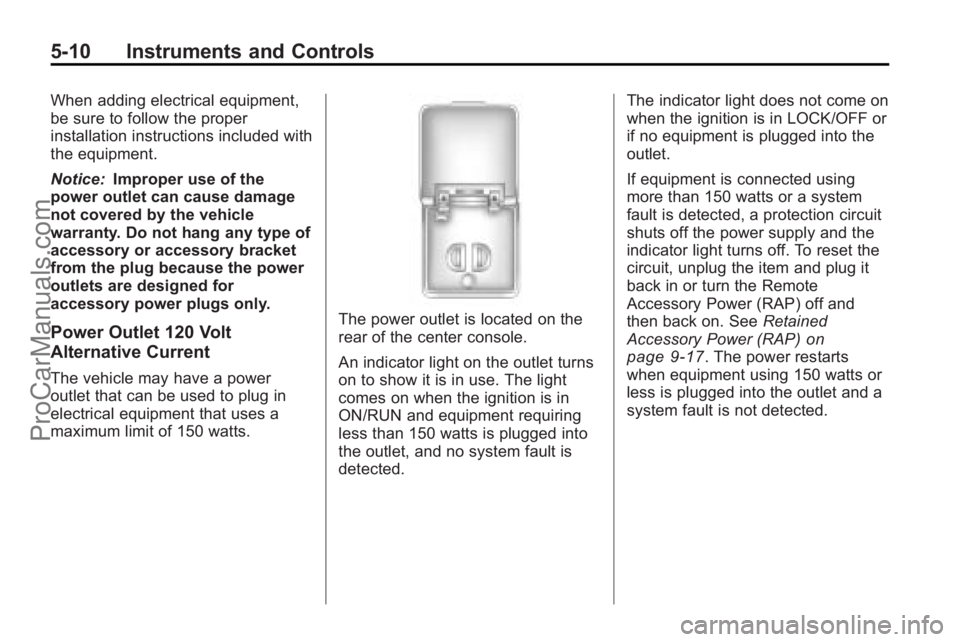
The power outlet is located on the
rear of the center console.
An indicator light on the outlet turns
on to show it is in use. The light
comes on when the ignition is in
ON/RUN and equipment requiring
less than 150 watts is plugged into
the outlet, and no system fault is
detected. The indicator light does not come on
when the ignition is in LOCK/OFF or
if no equipment is plugged into the
outlet.
If equipment is connected using
more than 150 watts or a system
fault is detected, a protection circuit
shuts off the power supply and the
indicator light turns off. To reset the
circuit, unplug the item and plug it
back in or turn the Remote
Accessory Power (RAP) off and
then back on. See
Retained
Accessory Power (RAP)
on
page 9‑17. The power restarts
when equipment using 150 watts or
less is plugged into the outlet and a
system fault is not detected.
ProCarManuals.com
Page 135 of 444

Instruments and Controls 5-13
Speedometer
The speedometer shows the
vehicle's speed in both kilometers
per hour (km/h) and miles per
hour (mph).
Odometer
The odometer shows how far the
vehicle has been driven, in either
kilometers or miles.
This vehicle has a tamper-resistant
odometer. If the vehicle needs a
new odometer installed, the new
one is set to the mileage of the old
odometer. If this is not possible, it is
set at zero and a label is put on the
driver's door to show the old
mileage reading.
Tachometer
The tachometer displays the engine
speed in revolutions per
minute (rpm).
Fuel Gage
United StatesCanada
When the ignition is on, the fuel
gage shows how much fuel the
vehicle has left in the tank.
An arrow on the fuel gage indicates
the side of the vehicle the fuel door
is on.
The gage will first indicate empty
before the vehicle is out of fuel, the
vehicles fuel tank should be
filled soon. When the fuel tank is low on fuel,
the FUEL LEVEL LOW message will
appear on the Driver Information
Center (DIC). For more information
see
Fuel System Messages
on
page 5‑36.
Here are some situations that may
occur with the fuel gage. None of
these indicate a problem with the
fuel gage.
.At the gas station, the fuel pump
shuts off before the gage
reads full.
.It takes a little more or less fuel
to fill up than the fuel gage
indicated. For example, the gage
may have indicated the tank was
half full, but it actually took a
little more or less than half the
tank's capacity to fill the tank.
.The gage goes back to empty
when the ignition is turned off.
ProCarManuals.com
Page 136 of 444

5-14 Instruments and Controls
Engine Coolant
Temperature Gage
United StatesCanada
This gage shows the engine coolant
temperature. Under normal driving
conditions the gage will read 210°F
(100 °C) or less. If the gage pointer
is near 260°F (125 °C), the engine
is too hot.
It means that the engine coolant has
overheated. If the vehicle has been
operating under normal driving
conditions, pull off the road, stop the
vehicle and turn off the engine as
soon as possible.
See Engine Overheating
on
page 10‑18for more information.
Voltmeter Gage
When the engine is not running, but
the ignition is on, this gage shows
the battery's state of charge in
DC volts.
When the engine is running, this
gage shows the condition of the
charging system. The vehicle's
charging system regulates voltage
based on the state of charge of the
battery. The voltmeter may fluctuate.
This is normal. Readings between
the low and high warning zones
indicate the normal operating range. Readings in the low warning zone
may occur when a large number of
electrical accessories are operating
in the vehicle and the engine is left
idling for an extended period.
If there is a problem with the battery
charging system, a SERVICE
BATTERY CHARGING SYSTEM
message will appear in the Driver
Information Center (DIC) and/or the
charging system light will come on.
See
Battery Voltage and Charging
Messages
on page 5‑33for more
information.
However, readings in either warning
zone may indicate a possible
problem in the electrical system.
Have the vehicle serviced as soon
as possible.
ProCarManuals.com
Page 139 of 444
Instruments and Controls 5-17
If, after several seconds, both status
indicator lights remain on, or if there
are no lights at all, there may be a
problem with the lights or the
passenger sensing system. See
your dealer/retailer for service.
{WARNING
If the airbag readiness light ever
comes on and stays on, it means
that something may be wrong
with the airbag system. To help
avoid injury to yourself or others,
have the vehicle serviced right
away. SeeAirbag Readiness
Light
on page 5‑15for more
information, including important
safety information.
Charging System Light
The charging system light comes on
briefly when the ignition is turned
on, but the engine is not running, as
a check to show the light is working.
It should go out when the engine is
started.
If the light stays on, or comes on
while driving, there may be a
problem with the electrical charging
system. Have it checked by your
dealer/retailer. Driving while this
light is on could drain the battery.
When this light comes on, the Driver
Information Center (DIC) also
displays the SERVICE BATTERY
CHARGING SYSTEM message.
See Vehicle Messages
on
page 5‑33for more information. If a short distance must be driven
with the light on, be sure to turn off
all accessories, such as the radio
and air conditioner.
Malfunction
Indicator Lamp
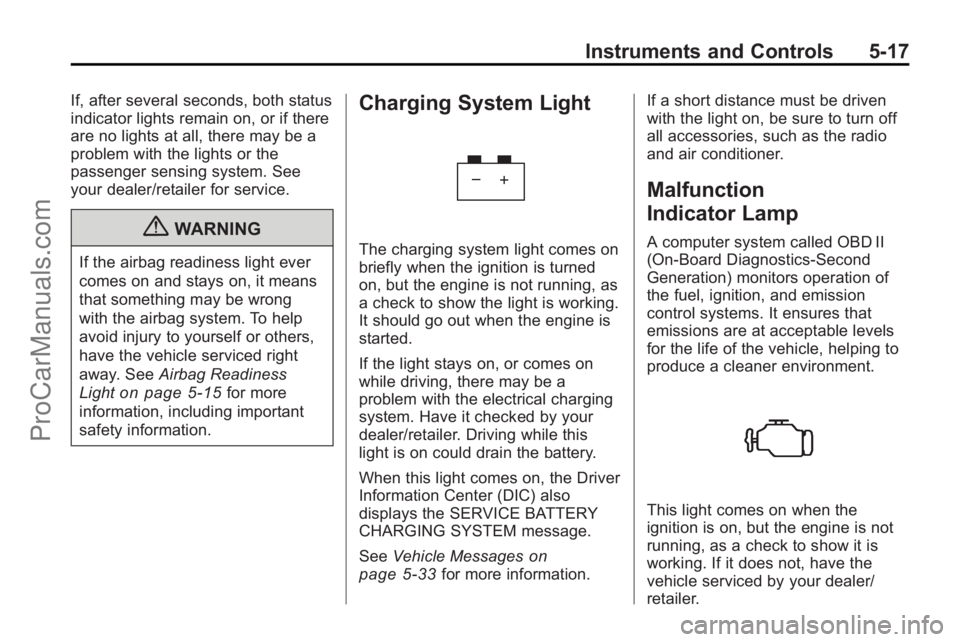
A computer system called OBD II
(On-Board Diagnostics-Second
Generation) monitors operation of
the fuel, ignition, and emission
control systems. It ensures that
emissions are at acceptable levels
for the life of the vehicle, helping to
produce a cleaner environment.
This light comes on when the
ignition is on, but the engine is not
running, as a check to show it is
working. If it does not, have the
vehicle serviced by your dealer/
retailer.
ProCarManuals.com
Page 142 of 444

5-20 Instruments and Controls
the battery has recently been
replaced or if the battery has run
down. The diagnostic system is
designed to evaluate critical
emission control systems during
normal driving. This can take
several days of routine driving.
If this has been done and the
vehicle still does not pass the
inspection for lack of OBD II
system readiness, your dealer/
retailer can prepare the vehicle
for inspection.
Brake System Warning
Light
This vehicle's hydraulic brake
system is divided into two parts.
If one part is not working, the other
part can still work and stop the
vehicle. For good braking both parts
need to be working.
If the warning light comes on, there
is a brake problem. Have the brake
system inspected right away.
United StatesCanada
This light should come on briefly
when the ignition key is turned to
ON/RUN. If it does not come on
then, have it fixed so it will be ready
to warn if there is a problem.
This light may also come on due to
low brake fluid. See Brakes
on
page 10‑22for more information.
When the ignition is on, the brake
system warning light will also come
on when the parking brake is set.
The light will stay on if the parking
brake does not release fully. If it
stays on after the parking brake is
fully released, it means there is a
brake problem. If the light comes on while driving,
pull off the road and stop carefully.
Make sure the parking brake is fully
released. The pedal may be harder
to push or, the pedal may go closer
to the floor. It may take longer to
stop. If the light is still on, have the
vehicle towed for service. See
Towing the Vehicle on page 10‑83.
{WARNING
The brake system might not be
working properly if the brake
system warning light is on.
Driving with the brake system
warning light on can lead to a
crash. If the light is still on after
the vehicle has been pulled off
the road and carefully stopped,
have the vehicle towed for
service.
ProCarManuals.com
Page 143 of 444
Instruments and Controls 5-21
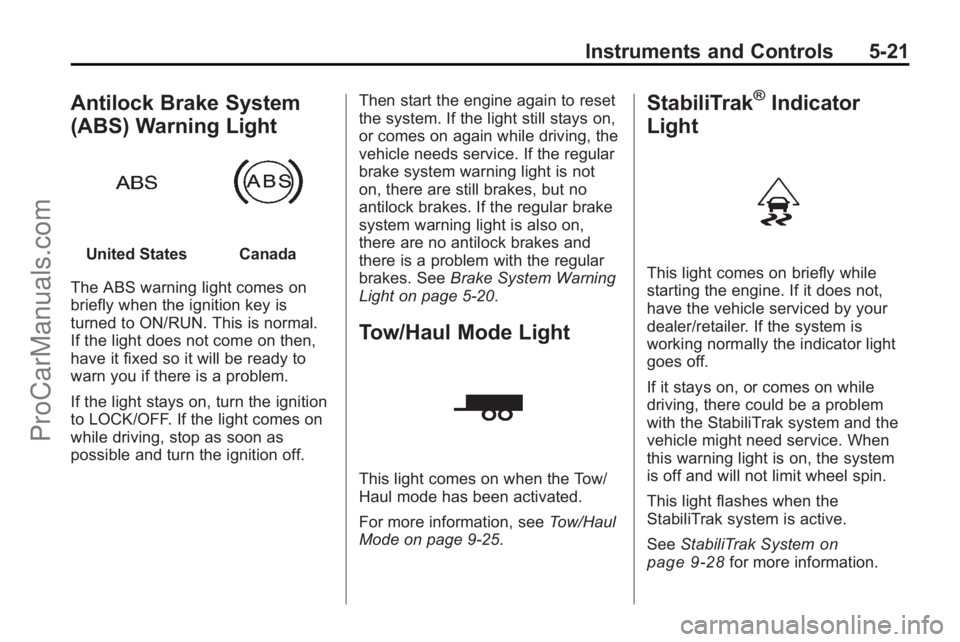
Antilock Brake System
(ABS) Warning Light
United StatesCanada
The ABS warning light comes on
briefly when the ignition key is
turned to ON/RUN. This is normal.
If the light does not come on then,
have it fixed so it will be ready to
warn you if there is a problem.
If the light stays on, turn the ignition
to LOCK/OFF. If the light comes on
while driving, stop as soon as
possible and turn the ignition off. Then start the engine again to reset
the system. If the light still stays on,
or comes on again while driving, the
vehicle needs service. If the regular
brake system warning light is not
on, there are still brakes, but no
antilock brakes. If the regular brake
system warning light is also on,
there are no antilock brakes and
there is a problem with the regular
brakes. See
Brake System Warning
Light on page 5‑20.
Tow/Haul Mode Light
This light comes on when the Tow/
Haul mode has been activated.
For more information, see Tow/Haul
Mode on page 9‑25.
StabiliTrak®Indicator
Light
This light comes on briefly while
starting the engine. If it does not,
have the vehicle serviced by your
dealer/retailer. If the system is
working normally the indicator light
goes off.
If it stays on, or comes on while
driving, there could be a problem
with the StabiliTrak system and the
vehicle might need service. When
this warning light is on, the system
is off and will not limit wheel spin.
This light flashes when the
StabiliTrak system is active.
See StabiliTrak System
on
page 9‑28for more information.
ProCarManuals.com