radio SATURN OUTLOOK 2010 Repair Manual
[x] Cancel search | Manufacturer: SATURN, Model Year: 2010, Model line: OUTLOOK, Model: SATURN OUTLOOK 2010Pages: 444, PDF Size: 4.43 MB
Page 269 of 444

Driving and Operating 9-17
Retained Accessory
Power (RAP)
These vehicle accessories can be
used for up to 10 minutes after the
ignition key is turned off:
.Audio System
.Power Windows
.Sunroof (if equipped)
Power to the windows and sunroof
will work up to 10 minutes or until a
door is opened.
The radio continues to work for
10 minutes or until the driver's door
is opened.
For an additional 10 minutes of
operation, close all the doors and
turn the key to ON/RUN and then
back to LOCK/OFF.
All these features will work when the
key is in the ON/RUN or ACC/
ACCESSORY positions.
Starting the Engine
Move the shift lever to P (Park) or
N (Neutral). The engine will not start
in any other position. To restart the
engine when the vehicle is already
moving, use N (Neutral) only.
Notice: Do not try to shift to
P (Park) if the vehicle is moving.
If you do, you could damage the
transmission. Shift to P (Park)
only when the vehicle is stopped.
Starting Procedure
1. With your foot off the accelerator
pedal, turn the ignition to START.
When the engine starts, let go of
the key. The idle speed will slow
down as the engine warms. Do
not race the engine immediately
after starting it. Operate the
engine and transmission gently
to allow the oil to warm up and
lubricate all moving parts.
The vehicle has a
Computer-Controlled Cranking
System. This feature assists in
starting the engine and protects components. If the ignition key is
turned to the START position,
and then released when the
engine begins cranking, the
engine will continue cranking for
a few seconds or until the
vehicle starts. If the engine does
not start and the key is held in
START, cranking will be stopped
after 15 seconds to prevent
cranking motor damage. To
prevent gear damage, this
system also prevents cranking if
the engine is already running.
Engine cranking can be stopped
by turning the ignition switch to
the ACC/ACCESSORY or
LOCK/OFF position.
Notice: Cranking the engine for
long periods of time, by returning
the key to the START position
immediately after cranking has
ended, can overheat and damage
the cranking motor, and drain the
battery. Wait at least 15 seconds
between each try, to let the
cranking motor cool down.
ProCarManuals.com
Page 341 of 444

Vehicle Care 10-35
Fuse SideFuses
Usage
AIRBAG Airbag AMP Amplifier
BCK/
UP/STOP Back-up Lamp/
Stoplamp
BCM Body Control
Module
CNSTR/ VENT Canister Vent
CTSY Courtesy
DR/LCK Door Locks
DRL Daytime Running
Lamps
DRL 2 GMC HID Only/
Rear Fog
Lamps-China Only
DSPLY Display
FRT/WSW Front Windshield
Washer
HTD/
COOL SEAT Heated/Cooling
Seats Fuses
Usage
HVAC Heating, Ventilation
and Air
Conditioning
INADV/
PWR/LED Inadvertent
Power LED
INFOTMNT Infotainment
LT/TRN/SIG Driver Side Turn
Signal
MSM Memory Seat
Module
PDM Power Mirrors,
Liftgate Release
PWR MODE Power Mode
PWR/MIR Power Mirrors RDO Radio
REAR WPR Rear Wiper
RT/TRN/SIG Passenger Side
Turn Signal
SPARE Spare
STR/WHL/ ILLUM Steering Wheel
Illumination
ProCarManuals.com
Page 350 of 444

10-44 Vehicle Care
For additional information
regarding how much weight your
vehicle can carry, and an
example of the Tire and Loading
Information label, seeVehicle
Load Limits
on page 9‑10. How
you load your vehicle affects
vehicle handling and ride
comfort. Never load your vehicle
with more weight than it was
designed to carry.
When to Check
Check your tires once a month
or more. Do not forget to check
the compact spare tire, if the
vehicle has one. The compact
spare should be at 60 psi
(420 kPa). For additional
information regarding the
compact spare tire, see
Compact Spare Tire
on
page 10‑77
. How to Check
Use a good quality pocket-type
gage to check tire pressure.
You cannot tell if your tires are
properly inflated simply by
looking at them. Radial tires may
look properly inflated even when
they are under-inflated. Check
the tire's inflation pressure when
the tires are cold. Cold means
your vehicle has been sitting for
at least three hours or driven no
more than 1.6 km (1 mile).
Remove the valve cap from the
tire valve stem. Press the tire
gage firmly onto the valve to get
a pressure measurement. If the
cold tire inflation pressure
matches the recommended
pressure on the Tire and
Loading Information label, no
further adjustment is necessary.
If the inflation pressure is low,
add air until you reach the
recommended amount.
If you overfill the tire, release air
by pushing on the metal stem in
the center of the tire valve.
Re-check the tire pressure with
the tire gage.
Be sure to put the valve caps
back on the valve stems. They
help prevent leaks by keeping
out dirt and moisture.
Tire Pressure Monitor
System
The Tire Pressure Monitor System
(TPMS) uses radio and sensor
technology to check tire pressure
levels. The TPMS sensors monitor
the air pressure in your vehicle's
tires and transmit tire pressure
readings to a receiver located in the
vehicle.
ProCarManuals.com
Page 351 of 444

Vehicle Care 10-45
Each tire, including the spare
(if provided), should be checked
monthly when cold and inflated to
the inflation pressure recommended
by the vehicle manufacturer on the
vehicle placard or tire inflation
pressure label. (If your vehicle has
tires of a different size than the size
indicated on the vehicle placard or
tire inflation pressure label, you
should determine the proper tire
inflation pressure for those tires.)
As an added safety feature, your
vehicle has been equipped with a
tire pressure monitoring system
(TPMS) that illuminates a low tire
pressure telltale when one or more
of your tires is significantly
under-inflated.
Accordingly, when the low tire
pressure telltale illuminates, you
should stop and check your tires as
soon as possible, and inflate them
to the proper pressure. Driving on a
significantly under-inflated tire
causes the tire to overheat and can
lead to tire failure. Under-inflation
also reduces fuel efficiency and tiretread life, and may affect the
vehicle's handling and stopping
ability.
Please note that the TPMS is
not a substitute for proper tire
maintenance, and it is the driver's
responsibility to maintain correct tire
pressure, even if under-inflation has
not reached the level to trigger
illumination of the TPMS low tire
pressure telltale.
Your vehicle has also been
equipped with a TPMS malfunction
indicator to indicate when the
system is not operating properly.
The TPMS malfunction indicator is
combined with the low tire pressure
telltale. When the system detects a
malfunction, the telltale will flash for
approximately one minute and then
remain continuously illuminated.
This sequence will continue upon
subsequent vehicle start-ups as
long as the malfunction exists.
When the malfunction indicator is
illuminated, the system may not be
able to detect or signal low tire
pressure as intended. TPMS
malfunctions may occur for a variety
of reasons, including the installation
of replacement or alternate tires or
wheels on the vehicle that prevent
the TPMS from functioning properly.
Always check the TPMS malfunction
telltale after replacing one or more
tires or wheels on your vehicle to
ensure that the replacement or
alternate tires and wheels allow the
TPMS to continue to function
properly.
See
Tire Pressure Monitor
Operation
on page 10‑46for
additional information.
Federal Communications
Commission (FCC) and
Industry and Science Canada
See Radio Frequency Statementon
page 13‑16for information
regarding Part 15 of the Federal
Communications Commission (FCC)
Rules and RSS-210/211 of Industry
and Science Canada.
ProCarManuals.com
Page 354 of 444
10-48 Vehicle Care
.Replacement tires or wheels do
not match your vehicle's original
equipment tires or wheels. Tires
and wheels other than those
recommended for your vehicle
could prevent the TPMS from
functioning properly. SeeBuying
New Tires on page 10‑51.
.Operating electronic devices or
being near facilities using radio
wave frequencies similar to the
TPMS could cause the TPMS
sensors to malfunction.
If the TPMS is not functioning it
cannot detect or signal a low tire
condition. See your dealer/retailer
for service if the TPMS malfunction
light and DIC message comes on
and stays on.
TPMS Sensor Matching
Process
Each TPMS sensor has a unique
identification code. Any time you
rotate your vehicle's tires or replace
one or more of the TPMS sensors,
the identification codes will need to
be matched to the new tire/wheel
position. The sensors are matched
to the tire/wheel positions in the
following order: driver side front tire,
passenger side front tire, passenger
side rear tire, and driver side rear
tire using a TPMS diagnostic tool.
See your dealer/retailer for service.
The TPMS sensors can also be
matched to each tire/wheel position
by increasing or decreasing the
tire's air pressure. If increasing the
tire's air pressure, do not exceed
the maximum inflation pressure
indicated on the tire's sidewall.
To decrease air-pressure out of a
tire you can use the pointed end of
the valve cap, a pencil-style air
pressure gage, or a key. You have two minutes to match the
first tire/wheel position, and
five minutes overall to match all four
tire/wheel positions. If it takes longer
than two minutes, to match the first
tire and wheel, or more than
five minutes to match all four tire
and wheel positions the matching
process stops and you need to
start over.
The TPMS sensor matching process
is outlined below:
1. Set the parking brake.
2. Turn the ignition switch to
ON/RUN with the engine off.
3. Press the Remote Keyless Entry (RKE) transmitter's LOCK and
UNLOCK buttons at the same
time for approximately
five seconds. The horn sounds
twice to signal the receiver is
in relearn mode and TIRE
LEARNING ACTIVE message
displays on the DIC screen.
4. Start with the driver side front tire.
ProCarManuals.com
Page 385 of 444
Vehicle Care 10-79
Notice:Ignoring these steps
could result in costly damage to
the vehicle that would not be
covered by the warranty.
Trying to start the vehicle by
pushing or pulling it will not
work, and it could damage the
vehicle.
1. Check the other vehicle. It must
have a 12-volt battery with a
negative ground system.
Notice: If the other vehicle's
system is not a 12-volt system
with a negative ground, both
vehicles can be damaged. Only
use vehicles with 12-volt systems
with negative grounds to jump
start your vehicle.
2. Get the vehicles close enough so the jumper cables can reach,
but be sure the vehicles are not
touching each other. If they are,
it could cause a ground
connection you do not want.
You would not be able to start your vehicle, and the bad
grounding could damage the
electrical systems.
To avoid the possibility of the
vehicles rolling, set the parking
brake firmly on both vehicles
involved in the jump start
procedure. Put an automatic
transmission in P (Park) or a
manual transmission in Neutral
before setting the parking brake.
If one of the vehicles is a
four-wheel-drive vehicle, be sure
the transfer case is not in
Neutral.
Notice: If you leave the radio or
other accessories on during the
jump starting procedure, they
could be damaged. The repairs
would not be covered by the
warranty. Always turn off the
radio and other accessories when
jump starting the vehicle. 3. Turn off the ignition on both
vehicles. Unplug unnecessary
accessories plugged into the
cigarette lighter or the accessory
power outlets. Turn off the radio
and all lamps that are not
needed. This will avoid sparks
and help save both batteries.
And it could save the radio!
4. Open the hoods and locate the positive (+) and negative (−)
terminal locations on the other
vehicle. Your vehicle has a
remote positive (+) and a remote
negative (−) jump starting
terminal. See Engine
Compartment Overview
on
page 10‑6for more information
on the terminal locations.
ProCarManuals.com
Page 417 of 444

Customer Information 13-1
Customer
Information
Customer Information
Customer SatisfactionProcedure . . . . . . . . . . . . . . . . . . 13-1
Customer Assistance Offices . . . . . . . . . . . . . . . . . . . . . 13-4
Customer Assistance for Text Telephone (TTY) Users . . . . . 13-4
Online Owner Center . . . . . . . . 13-5
GM Mobility Reimbursement Program . . . . . . . . . . . . . . . . . . . . 13-5
Roadside Assistance Program . . . . . . . . . . . . . . . . . . . . 13-5
Scheduling Service Appointments . . . . . . . . . . . . . . 13-7
Courtesy Transportation Program . . . . . . . . . . . . . . . . . . . . 13-8
Collision Damage Repair . . . . 13-9
Service Publications Ordering Information . . . . . . 13-11
Reporting Safety Defects
Reporting Safety Defects tothe United States
Government . . . . . . . . . . . . . . . 13-13
Reporting Safety Defects to the Canadian
Government . . . . . . . . . . . . . . . 13-13
Reporting Safety Defects to General Motors . . . . . . . . . . . 13-14
Vehicle Data Recording and
Privacy
Vehicle Data Recording andPrivacy . . . . . . . . . . . . . . . . . . . . 13-14
Event Data Recorders . . . . . . 13-14
Navigation System . . . . . . . . . 13-15
Radio Frequency Identification (RFID) . . . . . . . 13-16
Radio Frequency Statement . . . . . . . . . . . . . . . . . 13-16
Customer Information
Customer Satisfaction
Procedure
Your satisfaction and goodwill are
important to your retailer and to
Saturn. Together we are committed
to providing our customers with
unparalleled service, before, during,
and after the purchase of a Saturn
vehicle, for total customer
satisfaction. We call this the Saturn
Difference. Normally, any concerns
with the sales transaction or the
operation of the vehicle are resolved
by the retailer's sales or service
departments. If, for any reason, your
ownership experience falls below
your expectations, we suggest you
take the following action:
STEP ONE: Contact the Retail
Customer Assistance Liaison. Any
member of the retail management
team has the authority and the
desire to resolve your concerns.
Normally, concerns can be quickly
resolved at this level.
ProCarManuals.com
Page 430 of 444
13-14 Customer Information
Reporting Safety Defects
to General Motors
In addition to notifying NHTSA (or
Transport Canada) in a situation like
this, please notify Saturn.
Call 1-800-553-6000, or write:
Saturn Customer Assistance Center
P. O. Box 33173
Detroit, MI 48232-5173
In Canada, call 1-800-263-1999,
or write:
Saturn Customer Communication
Centre
General Motors of Canada Limited
CA1-163-005
1908 Colonel Sam Drive
Oshawa, Ontario L1H 8P7
Vehicle Data
Recording and
Privacy
Your GM vehicle has a number of
sophisticated computers that record
information about the vehicle’s
performance and how it is driven.
For example, your vehicle uses
computer modules to monitor and
control engine and transmission
performance, to monitor the
conditions for airbag deployment
and deploy airbags in a crash and,
if so equipped, to provide antilock
braking to help the driver control the
vehicle. These modules may store
data to help your dealer/retailer
technician service your vehicle.
Some modules may also store data
about how you operate the vehicle,
such as rate of fuel consumption or
average speed. These modules may
also retain the owner’s personal
preferences, such as radio pre-sets,
seat positions, and temperature
settings.
Event Data Recorders
This vehicle has an Event Data
Recorder (EDR). The main purpose
of an EDR is to record, in certain
crash or near crash-like situations,
such as an airbag deployment or
hitting a road obstacle, data that will
assist in understanding how a
vehicle's systems performed. The
EDR is designed to record data
related to vehicle dynamics and
safety systems for a short period of
time, typically 30 seconds or less.
The EDR in this vehicle is designed
to record such data as:
.How various systems in your
vehicle were operating
.Whether or not the driver and
passenger safety belts were
buckled/fastened
.How far, if at all, the driver was
pressing the accelerator and/or
brake pedal
.How fast the vehicle was
traveling
ProCarManuals.com
Page 432 of 444
13-16 Customer Information
Radio Frequency
Identification (RFID)
RFID technology is used in some
vehicles for functions such as tire
pressure monitoring and ignition
system security, as well as in
connection with conveniences such
as key fobs for remote door locking/
unlocking and starting, and
in-vehicle transmitters for garage
door openers. RFID technology in
GM vehicles does not use or record
personal information or link with any
other GM system containing
personal information.
Radio Frequency
Statement
This vehicle has systems that
operate on a radio frequency that
comply with Part 15 of the Federal
Communications Commission (FCC)
Rules and with RSS-210/211 of
Industry and Science Canada.
Operation is subject to the following
two conditions:
1. The device may not causeinterference.
2. The device must accept any interference received, including
interference that may cause
undesired operation of the
device.
Changes or modifications to any of
these systems by other than an
authorized service facility could void
authorization to use this equipment.
ProCarManuals.com
Page 433 of 444
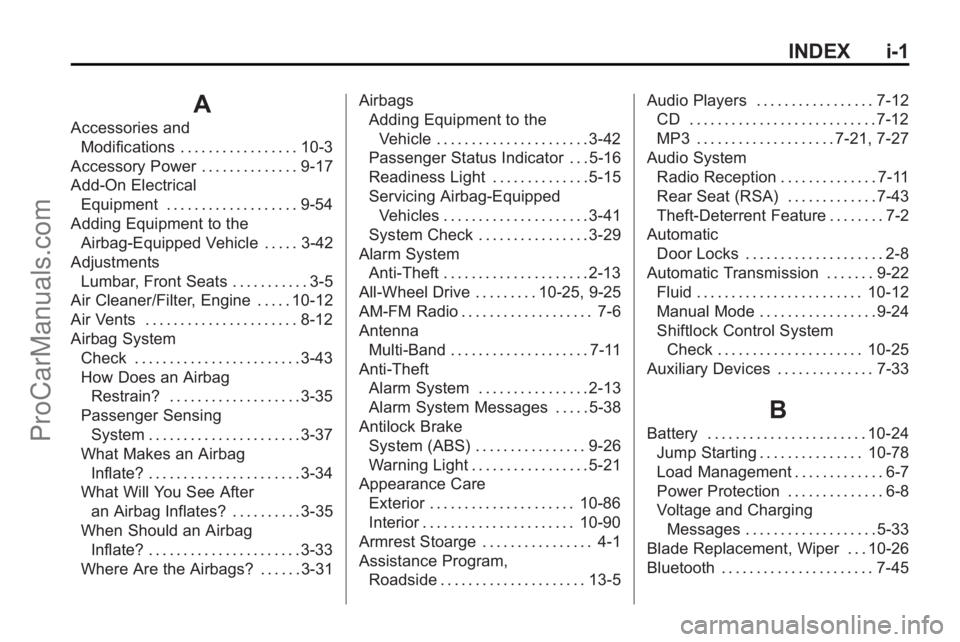
INDEX i-1
A
Accessories andModifications . . . . . . . . . . . . . . . . . 10-3
Accessory Power . . . . . . . . . . . . . . 9-17
Add-On Electrical Equipment . . . . . . . . . . . . . . . . . . . 9-54
Adding Equipment to the
Airbag-Equipped Vehicle . . . . . 3-42
Adjustments Lumbar, Front Seats . . . . . . . . . . . 3-5
Air Cleaner/Filter, Engine . . . . . 10-12
Air Vents . . . . . . . . . . . . . . . . . . . . . . 8-12
Airbag System
Check . . . . . . . . . . . . . . . . . . . . . . . . 3-43
How Does an AirbagRestrain? . . . . . . . . . . . . . . . . . . . 3-35
Passenger Sensing System . . . . . . . . . . . . . . . . . . . . . . 3-37
What Makes an Airbag Inflate? . . . . . . . . . . . . . . . . . . . . . . 3-34
What Will You See After an Airbag Inflates? . . . . . . . . . . 3-35
When Should an Airbag Inflate? . . . . . . . . . . . . . . . . . . . . . . 3-33
Where Are the Airbags? . . . . . . 3-31 Airbags
Adding Equipment to the
Vehicle . . . . . . . . . . . . . . . . . . . . . . 3-42
Passenger Status Indicator . . . 5-16
Readiness Light . . . . . . . . . . . . . . 5-15
Servicing Airbag-Equipped Vehicles . . . . . . . . . . . . . . . . . . . . . 3-41
System Check . . . . . . . . . . . . . . . . 3-29
Alarm System Anti-Theft . . . . . . . . . . . . . . . . . . . . . 2-13
All-Wheel Drive . . . . . . . . . 10-25, 9-25
AM-FM Radio . . . . . . . . . . . . . . . . . . . 7-6
Antenna
Multi-Band . . . . . . . . . . . . . . . . . . . . 7-11
Anti-Theft Alarm System . . . . . . . . . . . . . . . . 2-13
Alarm System Messages . . . . . 5-38
Antilock Brake System (ABS) . . . . . . . . . . . . . . . . 9-26
Warning Light . . . . . . . . . . . . . . . . . 5-21
Appearance Care
Exterior . . . . . . . . . . . . . . . . . . . . . 10-86
Interior . . . . . . . . . . . . . . . . . . . . . . 10-90
Armrest Stoarge . . . . . . . . . . . . . . . . 4-1
Assistance Program, Roadside . . . . . . . . . . . . . . . . . . . . . 13-5 Audio Players . . . . . . . . . . . . . . . . . 7-12
CD . . . . . . . . . . . . . . . . . . . . . . . . . . . 7-12
MP3 . . . . . . . . . . . . . . . . . . . . 7-21, 7-27
Audio System Radio Reception . . . . . . . . . . . . . . 7-11
Rear Seat (RSA) . . . . . . . . . . . . . 7-43
Theft-Deterrent Feature . . . . . . . . 7-2
Automatic Door Locks . . . . . . . . . . . . . . . . . . . . 2-8
Automatic Transmission . . . . . . . 9-22 Fluid . . . . . . . . . . . . . . . . . . . . . . . . 10-12
Manual Mode . . . . . . . . . . . . . . . . . 9-24
Shiftlock Control System
Check . . . . . . . . . . . . . . . . . . . . . 10-25
Auxiliary Devices . . . . . . . . . . . . . . 7-33
B
Battery . . . . . . . . . . . . . . . . . . . . . . . 10-24 Jump Starting . . . . . . . . . . . . . . . 10-78
Load Management . . . . . . . . . . . . . 6-7
Power Protection . . . . . . . . . . . . . . 6-8
Voltage and ChargingMessages . . . . . . . . . . . . . . . . . . . 5-33
Blade Replacement, Wiper . . . 10-26
Bluetooth . . . . . . . . . . . . . . . . . . . . . . 7-45
ProCarManuals.com