belt SATURN OUTLOOK 2010 Owners Manual
[x] Cancel search | Manufacturer: SATURN, Model Year: 2010, Model line: OUTLOOK, Model: SATURN OUTLOOK 2010Pages: 444, PDF Size: 4.43 MB
Page 1 of 444
2010 Saturn OUTLOOK Owner ManualM
In Brief. . . . . . . . . . . . . . . . . . . . . . . . 1-1
Instrument Panel . . . . . . . . . . . . . . 1-2
Initial Drive Information . . . . . . . . 1-3
Vehicle Features . . . . . . . . . . . . . 1-14
Performance and Maintenance . . . . . . . . . . . . . . . . 1-19
Keys, Doors and Windows . . . 2-1
Keys and Locks . . . . . . . . . . . . . . . 2-2
Doors . . . . . . . . . . . . . . . . . . . . . . . . . . 2-9
Vehicle Security . . . . . . . . . . . . . . 2-13
Exterior Mirrors . . . . . . . . . . . . . . . 2-16
Interior Mirrors . . . . . . . . . . . . . . . . 2-18
Windows . . . . . . . . . . . . . . . . . . . . . 2-19
Roof . . . . . . . . . . . . . . . . . . . . . . . . . . 2-22
Seats and Restraints . . . . . . . . . 3-1
Head Restraints . . . . . . . . . . . . . . . 3-2
Front Seats . . . . . . . . . . . . . . . . . . . . 3-3
Rear Seats . . . . . . . . . . . . . . . . . . . . 3-9
Safety Belts . . . . . . . . . . . . . . . . . . 3-14
Airbag System . . . . . . . . . . . . . . . . 3-29
Child Restraints . . . . . . . . . . . . . . 3-44 Storage
. . . . . . . . . . . . . . . . . . . . . . . 4-1
Storage Compartments . . . . . . . . 4-1
Additional Storage Features . . . 4-3
Roof Rack System . . . . . . . . . . . . . 4-4
Instruments and Controls . . . . 5-1
Controls . . . . . . . . . . . . . . . . . . . . . . . 5-2
Warning Lights, Gages, and
Indicators . . . . . . . . . . . . . . . . . . . 5-11
Information Displays . . . . . . . . . . 5-24
Vehicle Messages . . . . . . . . . . . . 5-33
Vehicle Personalization . . . . . . . 5-42
Universal Remote System . . . . 5-49
Lighting . . . . . . . . . . . . . . . . . . . . . . . 6-1
Exterior Lighting . . . . . . . . . . . . . . . 6-1
Interior Lighting . . . . . . . . . . . . . . . . 6-5
Lighting Features . . . . . . . . . . . . . . 6-6
Infotainment System . . . . . . . . . 7-1
Introduction . . . . . . . . . . . . . . . . . . . . 7-1
Radio . . . . . . . . . . . . . . . . . . . . . . . . . . 7-6
Audio Players . . . . . . . . . . . . . . . . 7-12
Rear Seat Infotainment . . . . . . . 7-35
Phone . . . . . . . . . . . . . . . . . . . . . . . . 7-45 Climate Controls
. . . . . . . . . . . . . 8-1
Climate Control Systems . . . . . . 8-1
Air Vents . . . . . . . . . . . . . . . . . . . . . 8-12
Driving and Operating . . . . . . . . 9-1
Driving Information . . . . . . . . . . . . . 9-2
Starting and Operating . . . . . . . 9-15
Engine Exhaust . . . . . . . . . . . . . . 9-21
Automatic Transmission . . . . . . 9-22
Drive Systems . . . . . . . . . . . . . . . . 9-25
Brakes . . . . . . . . . . . . . . . . . . . . . . . 9-26
Ride Control Systems . . . . . . . . 9-28
Cruise Control . . . . . . . . . . . . . . . . 9-30
Object Detection Systems . . . . 9-32
Fuel . . . . . . . . . . . . . . . . . . . . . . . . . . 9-38
Towing . . . . . . . . . . . . . . . . . . . . . . . 9-43
Conversions and Add-Ons . . . 9-54
Vehicle Care . . . . . . . . . . . . . . . . . 10-1
General Information . . . . . . . . . . 10-2
Vehicle Checks . . . . . . . . . . . . . . . 10-4
Headlamp Aiming . . . . . . . . . . . 10-27
Bulb Replacement . . . . . . . . . . 10-28
Electrical System . . . . . . . . . . . . 10-30
Wheels and Tires . . . . . . . . . . . 10-37
ProCarManuals.com
Page 5 of 444
Introduction v
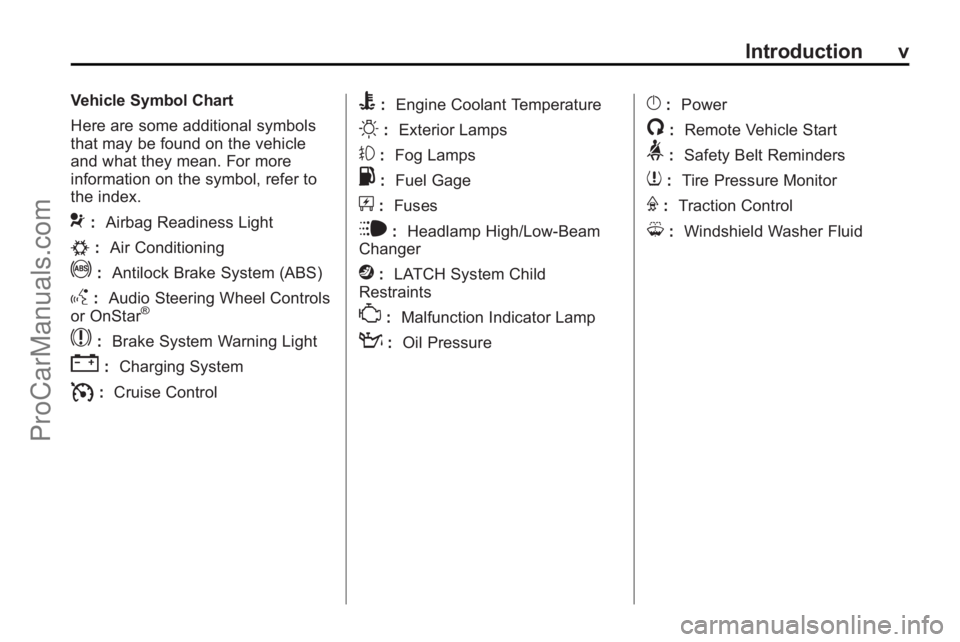
Vehicle Symbol Chart
Here are some additional symbols
that may be found on the vehicle
and what they mean. For more
information on the symbol, refer to
the index.
9:Airbag Readiness Light
#:Air Conditioning
!:Antilock Brake System (ABS)
g:Audio Steering Wheel Controls
or OnStar®
$: Brake System Warning Light
":Charging System
I:Cruise Control
B: Engine Coolant Temperature
O:Exterior Lamps
#:Fog Lamps
.: Fuel Gage
+:Fuses
i: Headlamp High/Low-Beam
Changer
j: LATCH System Child
Restraints
*: Malfunction Indicator Lamp
::Oil Pressure
}:Power
/:Remote Vehicle Start
>:Safety Belt Reminders
7:Tire Pressure Monitor
F:Traction Control
M:Windshield Washer Fluid
ProCarManuals.com
Page 7 of 444
In Brief 1-1
In Brief
Instrument Panel
Instrument Panel . . . . . . . . . . . . . . 1-2
Initial Drive Information
Initial Drive Information . . . . . . . . 1-3
Remote Keyless Entry (RKE)System . . . . . . . . . . . . . . . . . . . . . . 1-4
Remote Vehicle Start . . . . . . . . . 1-4
Door Locks . . . . . . . . . . . . . . . . . . . 1-5
Liftgate . . . . . . . . . . . . . . . . . . . . . . . . 1-5
Windows . . . . . . . . . . . . . . . . . . . . . . 1-6
Seat Adjustment . . . . . . . . . . . . . . 1-6
Second Row Seats . . . . . . . . . . . 1-7
Third Row Seats . . . . . . . . . . . . . . 1-7
Heated Seats . . . . . . . . . . . . . . . . . 1-7
Heated and Ventilated Seats . . . . . . . . . . . . . . . . . . . . . . . . 1-8
Head Restraint Adjustment . . . . 1-8
Safety Belt . . . . . . . . . . . . . . . . . . . . 1-8
Sensing System for Passenger Airbag . . . . . . . . . . . . . . . . . . . . . . . 1-8
Mirror Adjustment . . . . . . . . . . . . . 1-9
Steering Wheel Adjustment . . . . . . . . . . . . . . . . . 1-10
Interior Lighting . . . . . . . . . . . . . . 1-10 Exterior Lighting . . . . . . . . . . . . . 1-11
Windshield Wiper/Washer . . . . 1-11
Climate Controls . . . . . . . . . . . . . 1-12
Vehicle Features
Radio(s) . . . . . . . . . . . . . . . . . . . . . 1-14
Satellite Radio . . . . . . . . . . . . . . . 1-15
Portable Audio Devices . . . . . . 1-15
Bluetooth
®. . . . . . . . . . . . . . . . . . . 1-15
Steering Wheel Controls . . . . . 1-16
Navigation System . . . . . . . . . . . 1-16
Driver Information Center (DIC) . . . . . . . . . . . . . . . 1-16
Cruise Control . . . . . . . . . . . . . . . 1-17
Storage Compartments . . . . . . 1-17
Power Outlets . . . . . . . . . . . . . . . 1-18
Sunroof . . . . . . . . . . . . . . . . . . . . . . 1-18
Performance and Maintenance
StabiliTrak®. . . . . . . . . . . . . . . . . . 1-19
Tire Pressure Monitor . . . . . . . . 1-19
Tire Sealant and Compressor Kit . . . . . . . . . . . . . 1-19
Engine Oil Life System . . . . . . 1-20
Driving for Better Fuel Economy . . . . . . . . . . . . . . . . . . . 1-20
Roadside Assistance Program . . . . . . . . . . . . . . . . . . . . 1-21
OnStar
®. . . . . . . . . . . . . . . . . . . . . 1-21
ProCarManuals.com
Page 14 of 444
1-8 In Brief
Heated and Ventilated
Seats
On vehicles with this feature, the
controls are on the front doors near
the handle.
H:Press to ventilate the seat.
z:Press to heat the seat.
For more information see Heated
and Ventilated Front Seats
on
page 3‑8.
Head Restraint
Adjustment
Do not drive until the head restraints
for all occupants are installed and
adjusted properly.
For more information see Head
Restraints on page 3‑2.
Safety Belt
Refer to the following sections for
important information on how to use
safety belts properly.
.Safety Belts on page 3‑14.
.How to Wear Safety Belts
Properly on page 3‑18.
.Lap-Shoulder Belt on page 3‑23.
.Lower Anchors and Tethers for
Children (LATCH System)on
page 3‑52.
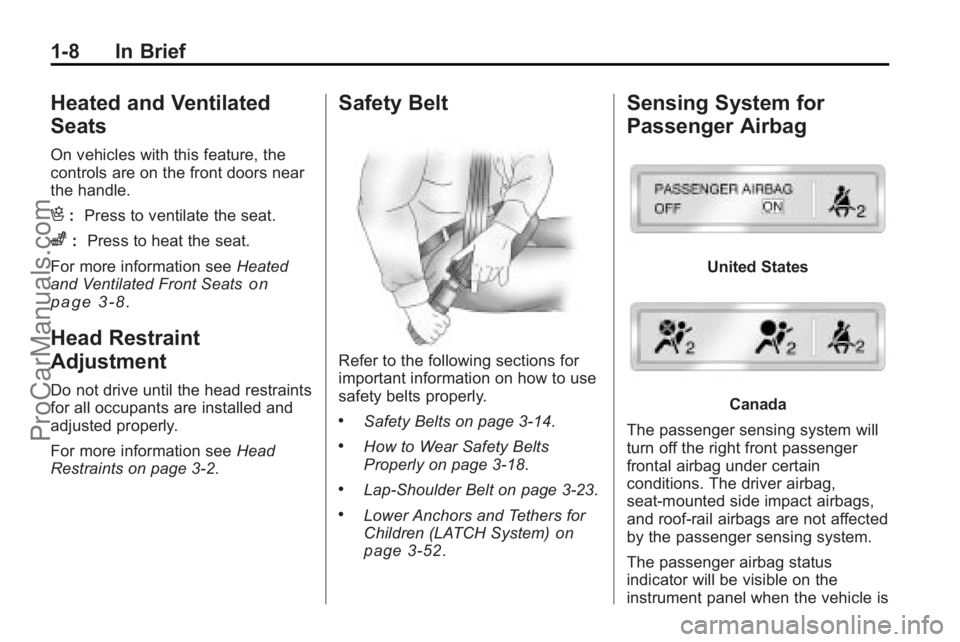
Sensing System for
Passenger Airbag
United States
Canada
The passenger sensing system will
turn off the right front passenger
frontal airbag under certain
conditions. The driver airbag,
seat-mounted side impact airbags,
and roof-rail airbags are not affected
by the passenger sensing system.
The passenger airbag status
indicator will be visible on the
instrument panel when the vehicle is
ProCarManuals.com
Page 37 of 444

Keys, Doors and Windows 2-7
Door Locks
{WARNING
Unlocked doors can be
dangerous.
.Passengers, especially
children, can easily open the
doors and fall out of a moving
vehicle. When a door is
locked, the handle will not
open it. The chance of being
thrown out of the vehicle in a
crash is increased if the
doors are not locked. So, all
passengers should wear
safety belts properly and the
doors should be locked
whenever the vehicle is
driven.
.Young children who get into
unlocked vehicles may be
unable to get out. A child can
be overcome by extreme heat
and can suffer permanent
(Continued)
WARNING (Continued)
injuries or even death from
heat stroke. Always lock the
vehicle whenever leaving it.
.Outsiders can easily enter
through an unlocked door
when you slow down or stop
your vehicle. Locking your
doors can help prevent this
from happening.
To lock or unlock a door, use the
key from the outside or the door
lock from the inside.
Power Door Locks
The power door lock switches are
located on the front doors.
"(Unlock): Press to unlock the
doors.
Q(Lock): Remove the key from
the ignition and press to lock the
doors.
Delayed Locking
When locking the doors with the
power lock switch and a door or the
liftgate is open, the doors will lock
five seconds after the last door is
closed. You will hear three chimes
to signal that the delayed locking
feature is in use.
Pressing the power lock switch
twice or the lock button on the RKE
transmitter twice will override the
delayed locking feature and
immediately lock all the doors.
This feature will not operate if the
key is in the ignition.
This feature can be programmed by
using the Driver Information Center
(DIC). See “DELAY DOOR LOCK”
under Vehicle Personalization (With
DIC Buttons) on page 5‑42.
ProCarManuals.com
Page 55 of 444

Seats and Restraints 3-1
Seats and
Restraints
Head Restraints
Head Restraints . . . . . . . . . . . . . . . 3-2
Front Seats
Seat Adjustment . . . . . . . . . . . . . . 3-3
Power Seat Adjustment . . . . . . . 3-3
Lumbar Adjustment . . . . . . . . . . . 3-5
Reclining Seatbacks . . . . . . . . . . 3-6
Heated Front Seats . . . . . . . . . . . 3-8
Heated and Ventilated FrontSeats . . . . . . . . . . . . . . . . . . . . . . . . 3-8
Rear Seats
Rear Seats . . . . . . . . . . . . . . . . . . . . 3-9
Third Row Seats . . . . . . . . . . . . . 3-11
Safety Belts
Safety Belts . . . . . . . . . . . . . . . . . . 3-14
How to Wear Safety BeltsProperly . . . . . . . . . . . . . . . . . . . . 3-18
Lap-Shoulder Belt . . . . . . . . . . . 3-23
Safety Belt Use During Pregnancy . . . . . . . . . . . . . . . . . . 3-28
Safety Belt Extender . . . . . . . . . 3-28 Safety System Check . . . . . . . . 3-28
Safety Belt Care . . . . . . . . . . . . . 3-28
Replacing Safety Belt System
Parts After a Crash . . . . . . . . . 3-29
Airbag System
Airbag System . . . . . . . . . . . . . . . 3-29
Where Are the Airbags? . . . . . 3-31
When Should an AirbagInflate? . . . . . . . . . . . . . . . . . . . . . 3-33
What Makes an Airbag Inflate? . . . . . . . . . . . . . . . . . . . . . 3-34
How Does an Airbag Restrain? . . . . . . . . . . . . . . . . . . . 3-35
What Will You See After an Airbag Inflates? . . . . . . . . . . . . 3-35
Passenger Sensing
System . . . . . . . . . . . . . . . . . . . . . 3-37
Servicing the Airbag-Equipped Vehicle . . . . . . . . . . . . . . . . . . . . . 3-41
Adding Equipment to the Airbag-Equipped Vehicle . . . 3-42
Airbag System Check . . . . . . . . 3-43
Replacing Airbag System Parts After a Crash . . . . . . . . . 3-43
Child Restraints
Older Children . . . . . . . . . . . . . . . 3-44
Infants and YoungChildren . . . . . . . . . . . . . . . . . . . . 3-46
Child Restraint Systems . . . . . 3-49
Where to Put the Restraint . . . 3-50
Lower Anchors and Tethers for Children (LATCH
System) . . . . . . . . . . . . . . . . . . . . 3-52
Replacing LATCH System Parts After a Crash . . . . . . . . . 3-58
Securing Child Restraints (Rear Seat ) . . . . . . . . . . . . . . . . 3-58
Securing Child Restraints (Right Front
Passenger Seat) . . . . . . . . . . . 3-60
ProCarManuals.com
Page 61 of 444
Seats and Restraints 3-7
Power Reclining Seatbacks
In vehicles with seats that have
power reclining seatbacks, the
control used to recline them is
located on the outboard side of the
seat. SeePower Seat Adjustment
on page 3‑3for more information.
To recline the seatback:
.Tilt the top of the control (B)
rearward.
.To bring the seatback forward,
tilt the top of the control forward.
{WARNING
Sitting in a reclined position when
the vehicle is in motion can be
dangerous. Even when buckled
up, the safety belts cannot do
their job when reclined like this.
The shoulder belt cannot do its
job because it will not be against
your body. Instead, it will be in
front of you. In a crash, you could
go into it, receiving neck or other
injuries.
The lap belt cannot do its job
either. In a crash, the belt could
go up over your abdomen. The
belt forces would be there, not at
your pelvic bones. This could
cause serious internal injuries.
For proper protection when the
vehicle is in motion, have the
seatback upright. Then sit well
back in the seat and wear the
safety belt properly.
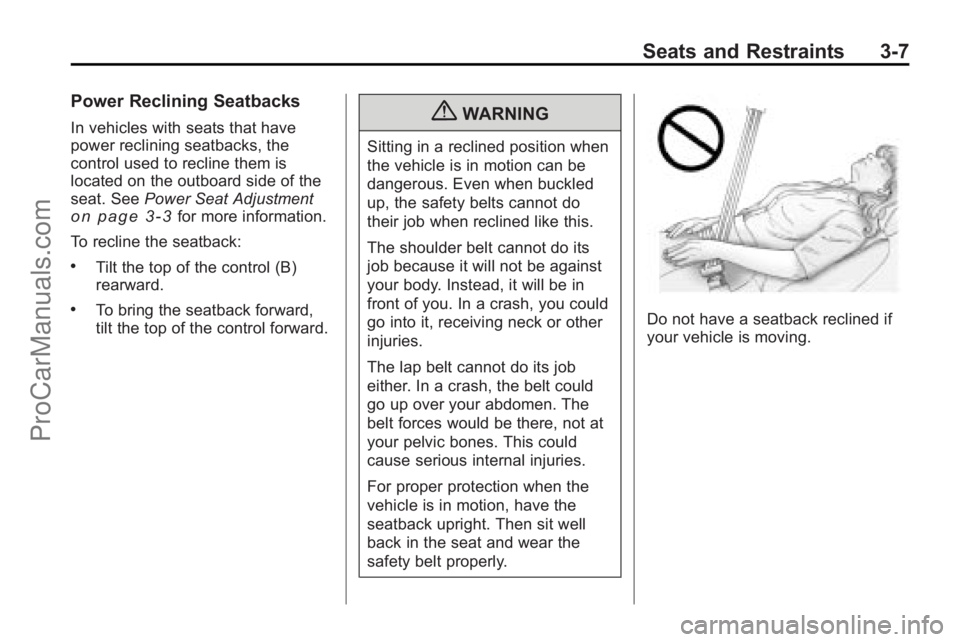
Do not have a seatback reclined if
your vehicle is moving.
ProCarManuals.com
Page 64 of 444

3-10 Seats and Restraints
Entering and Exiting the
Third Row
{WARNING
Using the third row seating
position while the second row is
folded, or folded and tumbled,
could cause injury in a sudden
stop or crash. Be sure to return
the seat to the passenger seating
position. Push and pull on the
seat to make sure it is locked into
place.
Notice: Folding a rear seat with
the safety belts still fastened may
cause damage to the seat or the
safety belts. Always unbuckle the
safety belts and return them to
their normal stowed position
before folding a rear seat.
To access the third row:
1. Remove objects on the floor in front of or on the second row
seat, or in the seat tracks on the
floor.
2. Move the front center console armrest completely forward. See
Center Console Storage
on
page 4‑1.
3. Place folding armrests in the upright position.
4. Ensure that the safety belt is unfastened and in the stowed
position. 5. Pull the sliding seat lever (C)
forward and move the seatback
forward. The seat cushion will
fold, and the entire seat will slide
forward.
Returning the Seat to the
Seating Position
To return the second row seat to its
normal seating position:
1. Remove objects on the floor
behind the second row seat or in
the seat tracks on the floor.
2. Pull the seatback rearward until it is locked in place.
3. Slide the seat rearward by pushing on the seatback until it
is locked into place.
4. Push down on the rear of the seat cushion until it is locked in
place.
5. Push and pull on the seatback and seat cushion to make sure
they are locked in place.
6. Check that the safety belt is not under the seat cushion.
ProCarManuals.com
Page 65 of 444

Seats and Restraints 3-11
Reclining the Seatbacks
To recline the seatback:
1. Leaning forward in the seat, pullthe reclining seatback strap (B).
2. Move the seatback to the desired position, then release
the strap to lock the seatback in
place.
3. Push and pull on the seatback to make sure it is locked.
Folding the Rear Seat
To fold the second row seats:
1. Remove anything on or underthe seat.
2. Place the armrest in the upright position, and unfasten the
safety belt.
3. Pull forward on the reclining seatback strap (B) and push
down on the seatback.
If the headrest touches the front
seat, slide the second row seat
rearward. To return the seatback to the
seating position, lift the upper corner
of the seatback and push it
rearward until it locks into place.
Push and pull on the seatback to
make sure it is locked.
Adjusting the Seats
To adjust the second row seats, pull
outward on the seat adjustment
handle (A). Slide the seat forward or
rearward to the desired position.
Release the handle and push and
pull on the seat to make sure it is
locked.
Third Row Seats
{WARNING
Using the third row seating
position while the second row is
folded, or pushed forward in the
entry position, could cause injury
in a sudden stop or crash. Be
sure to return the seat to the
passenger seating position. Push
and pull on the seat to make sure
it is locked into place.
The third row seats can be folded
forward or removed.
Notice: Folding a rear seat with
the safety belts still fastened may
cause damage to the seat or the
safety belts. Always unbuckle the
safety belts and return them to
their normal stowed position
before folding a rear seat.
To fold the seatback:
1. Remove anything on or under the seat.
ProCarManuals.com
Page 66 of 444

3-12 Seats and Restraints
2. Disconnect the rear safety beltmini-latch, using a key in the slot
on the mini-buckle, let the belt
retract into the headliner. Stow
the mini-latch in the holder
located in the headliner.3. Pull up on the release leverlocated on the back of the seat.
The headrest moves forward
automatically.
4. Push the seatback forward to lay flat. To return the seatback to the
seating position:
1. Raise the seatback into place by
using the pullstrap from the rear
of the vehicle, or by pushing it
into place from inside the
vehicle.
2. The headrest must be locked into place before sitting in
the seat.{WARNING
If either seatback is not locked, it
could move forward in a sudden
stop or crash. That could cause
injury to the person sitting there.
Always push and pull on the
seatbacks to be sure they are
locked.
3. Push and pull on the seatback to make sure it is locked in place.
ProCarManuals.com