change wheel SATURN OUTLOOK 2010 Owners Manual
[x] Cancel search | Manufacturer: SATURN, Model Year: 2010, Model line: OUTLOOK, Model: SATURN OUTLOOK 2010Pages: 444, PDF Size: 4.43 MB
Page 5 of 444
Introduction v
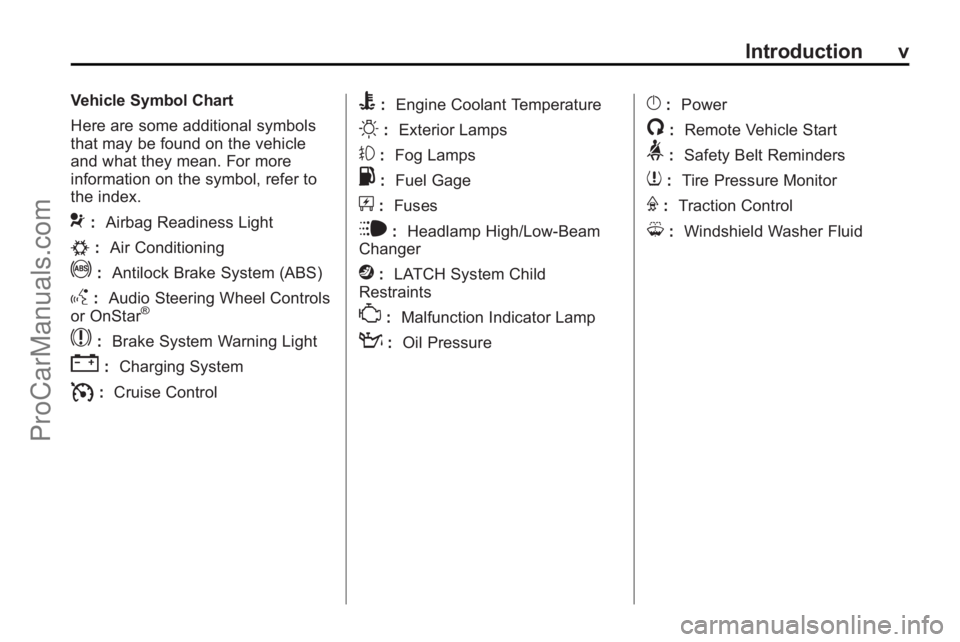
Vehicle Symbol Chart
Here are some additional symbols
that may be found on the vehicle
and what they mean. For more
information on the symbol, refer to
the index.
9:Airbag Readiness Light
#:Air Conditioning
!:Antilock Brake System (ABS)
g:Audio Steering Wheel Controls
or OnStar®
$: Brake System Warning Light
":Charging System
I:Cruise Control
B: Engine Coolant Temperature
O:Exterior Lamps
#:Fog Lamps
.: Fuel Gage
+:Fuses
i: Headlamp High/Low-Beam
Changer
j: LATCH System Child
Restraints
*: Malfunction Indicator Lamp
::Oil Pressure
}:Power
/:Remote Vehicle Start
>:Safety Belt Reminders
7:Tire Pressure Monitor
F:Traction Control
M:Windshield Washer Fluid
ProCarManuals.com
Page 9 of 444
In Brief 1-3
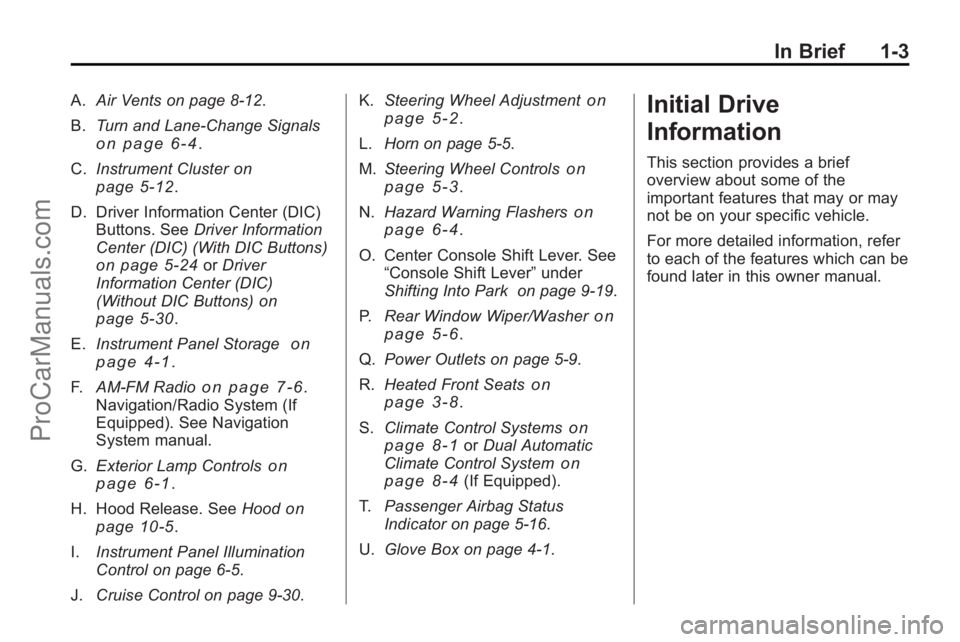
A.Air Vents on page 8‑12.
B. Turn and Lane-Change Signals
on page 6‑4.
C. Instrument Cluster
on
page 5‑12.
D. Driver Information Center (DIC) Buttons. See Driver Information
Center (DIC) (With DIC Buttons)
on page 5‑24or Driver
Information Center (DIC)
(Without DIC Buttons)
on
page 5‑30.
E. Instrument Panel Storage
on
page 4‑1.
F. AM-FM Radio
on page 7‑6.
Navigation/Radio System (If
Equipped). See Navigation
System manual.
G. Exterior Lamp Controls
on
page 6‑1.
H. Hood Release. See Hood
on
page 10‑5.
I. Instrument Panel Illumination
Control on page 6‑5.
J. Cruise Control on page 9‑30. K.
Steering Wheel Adjustment
on
page 5‑2.
L. Horn on page 5‑5.
M. Steering Wheel Controls
on
page 5‑3.
N. Hazard Warning Flashers
on
page 6‑4.
O. Center Console Shift Lever. See “Console Shift Lever” under
Shifting Into Park on page 9‑19.
P. Rear Window Wiper/Washer
on
page 5‑6.
Q. Power Outlets on page 5‑9.
R. Heated Front Seats
on
page 3‑8.
S. Climate Control Systems
on
page 8‑1or Dual Automatic
Climate Control Systemon
page 8‑4(If Equipped).
T. Passenger Airbag Status
Indicator on page 5‑16.
U. Glove Box on page 4‑1.
Initial Drive
Information
This section provides a brief
overview about some of the
important features that may or may
not be on your specific vehicle.
For more detailed information, refer
to each of the features which can be
found later in this owner manual.
ProCarManuals.com
Page 22 of 444
1-16 In Brief
The Bluetooth-enabled cell phone
must be paired with the in-vehicle
Bluetooth system before it can be
used in the vehicle. Not all phones
will support all functions.
SeeBluetooth on page 7‑45.
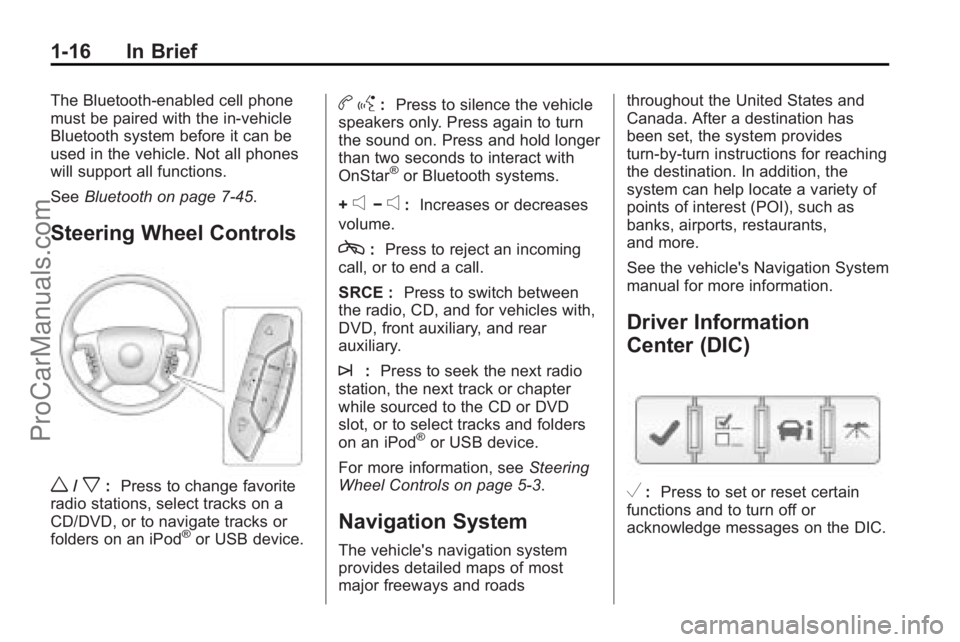
Steering Wheel Controls
w/x:Press to change favorite
radio stations, select tracks on a
CD/DVD, or to navigate tracks or
folders on an iPod
®or USB device.
b g: Press to silence the vehicle
speakers only. Press again to turn
the sound on. Press and hold longer
than two seconds to interact with
OnStar
®or Bluetooth systems.
+
e−e: Increases or decreases
volume.
c: Press to reject an incoming
call, or to end a call.
SRCE : Press to switch between
the radio, CD, and for vehicles with,
DVD, front auxiliary, and rear
auxiliary.
¨: Press to seek the next radio
station, the next track or chapter
while sourced to the CD or DVD
slot, or to select tracks and folders
on an iPod
®or USB device.
For more information, see Steering
Wheel Controls on page 5‑3.
Navigation System
The vehicle's navigation system
provides detailed maps of most
major freeways and roads throughout the United States and
Canada. After a destination has
been set, the system provides
turn-by-turn instructions for reaching
the destination. In addition, the
system can help locate a variety of
points of interest (POI), such as
banks, airports, restaurants,
and more.
See the vehicle's Navigation System
manual for more information.
Driver Information
Center (DIC)
V:
Press to set or reset certain
functions and to turn off or
acknowledge messages on the DIC.
ProCarManuals.com
Page 96 of 444

3-42 Seats and Restraints
Your dealer/retailer and the service
manual have information about
servicing the vehicle and the airbag
system. To purchase a service
manual, seeService Publications
Ordering Information on page 13‑11.
{WARNING
For up to 10 seconds after the
ignition is turned off and the
battery is disconnected, an airbag
can still inflate during improper
service. You can be injured if you
are close to an airbag when it
inflates. Avoid yellow connectors.
They are probably part of the
airbag system. Be sure to follow
proper service procedures, and
make sure the person performing
work for you is qualified to do so.
Adding Equipment to the
Airbag-Equipped Vehicle
Q: Is there anything I might add
to or change about the vehicle
that could keep the airbags
from working properly?
A: Yes. If you add things that
change the vehicle's frame,
bumper system, height, front end
or side sheet metal, they may
keep the airbag system from
working properly. Changing or
moving any parts of the front
seats, safety belts, the airbag
sensing and diagnostic module,
steering wheel, instrument
panel, roof-rail airbag modules,
ceiling headliner or pillar garnish
trim, overhead console, front
sensors, side impact sensors,
rollover sensor module, or airbag
wiring can affect the operation of
the airbag system.
In addition, the vehicle has a
passenger sensing system for
the right front passenger
position, which includes sensors that are part of the passenger
seat. The passenger sensing
system may not operate properly
if the original seat trim is
replaced with non-GM covers,
upholstery or trim, or with GM
covers, upholstery or trim
designed for a different vehicle.
Any object, such as an
aftermarket seat heater or a
comfort enhancing pad or
device, installed under or on top
of the seat fabric, could also
interfere with the operation of
the passenger sensing system.
This could either prevent proper
deployment of the passenger
airbag(s) or prevent the
passenger sensing system from
properly turning off the
passenger airbag(s). See
Passenger Sensing System
on
page 3‑37.
If you have questions, call
Customer Assistance. The
phone numbers and addresses
for Customer Assistance are in
ProCarManuals.com
Page 127 of 444
Instruments and Controls 5-5
Press¨to select a track or a
folder when navigating folders on an
iPod or USB device.
For vehicles with a navigation
system:
1. Press and hold
¨until a beep
is heard, to place the radio into
SCAN mode, a station will play
for five seconds before moving
to the next station.
2. To stop the SCAN function, press
¨again.
3. In CD/DVD, iPod, or AUX USB, press and hold to quickly move
forward through the tracks.
Release to stop on the desired
track.
+
e−e(Volume): Press to
increase or to decrease the volume.
Horn
Press near or on the horn symbols
on the steering wheel pad to sound
the horn.
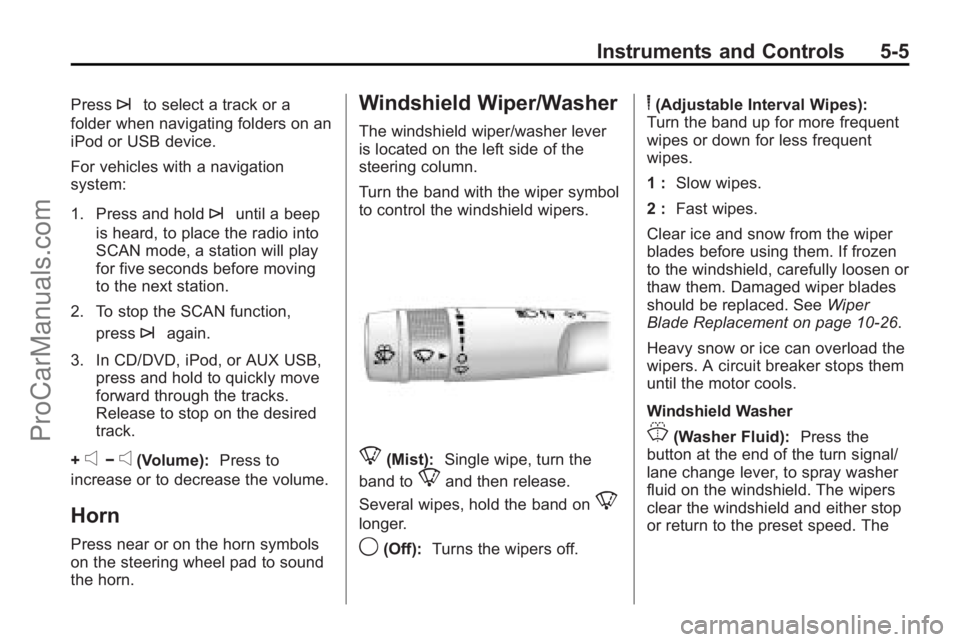
Windshield Wiper/Washer
The windshield wiper/washer lever
is located on the left side of the
steering column.
Turn the band with the wiper symbol
to control the windshield wipers.
8(Mist): Single wipe, turn the
band to
8and then release.
Several wipes, hold the band on
8
longer.
9(Off): Turns the wipers off.
6(Adjustable Interval Wipes):
Turn the band up for more frequent
wipes or down for less frequent
wipes.
1 : Slow wipes.
2 : Fast wipes.
Clear ice and snow from the wiper
blades before using them. If frozen
to the windshield, carefully loosen or
thaw them. Damaged wiper blades
should be replaced. See Wiper
Blade Replacement on page 10‑26.
Heavy snow or ice can overload the
wipers. A circuit breaker stops them
until the motor cools.
Windshield Washer
J(Washer Fluid): Press the
button at the end of the turn signal/
lane change lever, to spray washer
fluid on the windshield. The wipers
clear the windshield and either stop
or return to the preset speed. The
ProCarManuals.com
Page 177 of 444

Lighting 6-1
Lighting
Exterior Lighting
Exterior Lamp Controls . . . . . . . . 6-1
Headlamp High/Low-BeamChanger . . . . . . . . . . . . . . . . . . . . . 6-2
Flash-to-Pass . . . . . . . . . . . . . . . . . 6-3
Daytime Running Lamps (DRL)/Automatic Headlamp
System . . . . . . . . . . . . . . . . . . . . . . 6-3
Delayed Headlamps . . . . . . . . . . 6-3
Hazard Warning Flashers . . . . . 6-4
Turn and Lane-Change Signals . . . . . . . . . . . . . . . . . . . . . . 6-4
Fog Lamps . . . . . . . . . . . . . . . . . . . . 6-5
Interior Lighting
Instrument Panel Illumination Control . . . . . . . . . . . . . . . . . . . . . . 6-5
Courtesy Lamps . . . . . . . . . . . . . . 6-5
Dome Lamps . . . . . . . . . . . . . . . . . 6-5
Reading Lamps . . . . . . . . . . . . . . . 6-6
Lighting Features
Entry Lighting . . . . . . . . . . . . . . . . . 6-6
Delayed Entry Lighting . . . . . . . . 6-6
Delayed Exit Lighting . . . . . . . . . 6-7
Parade Dimming . . . . . . . . . . . . . . 6-7
Battery Load Management . . . . 6-7
Battery Power Protection . . . . . . 6-8
Exterior Lighting
Exterior Lamp Controls
The exterior lamps control is on the
instrument panel to the left of the
steering wheel.
ProCarManuals.com
Page 181 of 444

Lighting 6-5
Fog Lamps
#
(Fog Lamps):For vehicles with
fog lamps, the button is located on
the exterior lamps control. The
exterior lamps control is on the
instrument panel to the left of the
steering column.
The ignition must be in the ON/RUN
position for the fog lamps to
come on.
Press
#to turn the fog lamps on or
off. A light will come on in the
instrument panel cluster.
When the headlamps are changed
to high-beam, the fog lamps also
go off.
Some localities have laws that
require the headlamps to be on
along with the fog lamps.
Interior Lighting
Instrument Panel
Illumination Control
D
(Instrument Panel
Brightness): The knob with this
symbol on it is next to the exterior
lamps control to the left of the
steering wheel. Push the knob in all
the way until it extends out and then
turn the knob clockwise or
counterclockwise to brighten or dim
the lights. Push the knob back in
when finished.
Courtesy Lamps
The courtesy lamps automatically
come on when a door is opened.
The lamps can also be turned on
manually by fully turning the
instrument panel brightness control
clockwise.
The reading lamps, located on the
headliner above the rearview mirror,
can be turned on or off independent
of the automatic courtesy lamps,
when the doors are closed.
Dome Lamps
The dome lamps are located in the
overhead console and above the
rear seat passengers.
The dome lamps automatically
come on when a door is opened,
unless the dome lamp override
button is pressed in.
ProCarManuals.com
Page 230 of 444
7-46 Infotainment System
Bluetooth Controls
Use the buttons located on the
steering wheel to operate the
in-vehicle Bluetooth system. See
Steering Wheel Controls
on
page 5‑3for more information.
b g(Push To Talk) : Press to
answer incoming calls, to confirm
system information, and to start
speech recognition.
c x(Phone On Hook): Press to
end a call, reject a call, or to cancel
an operation.
Pairing
A Bluetooth enabled cell phone
must be paired to the in-vehicle
Bluetooth system first and then
connected to the vehicle before it
can be used. See the cell phone
manufacturers user guide for
Bluetooth functions before pairing
the cell phone. If a Bluetooth phone
is not connected, calls will be made
using OnStar
®Hands-Free Calling,
if available. Refer to the OnStar
owner's guide for more information. Pairing Information:
.Up to five cell phones can be
paired to the in-vehicle Bluetooth
system.
.The pairing process is disabled
when the vehicle is moving.
.The in-vehicle Bluetooth system
automatically links with the first
available paired cell phone in the
order the phone was paired.
.Only one paired cell phone can
be connected to the in-vehicle
Bluetooth system at a time.
.Pairing should only need to be
completed once, unless changes
to the pairing information have
been made or the phone is
deleted.
To link to a different paired phone,
see Linking to a Different Phone
later in this section. Pairing a Phone
1. Press and hold
b
gfor
two seconds. The system
responds with “Ready”followed
by a tone.
2. Say “Bluetooth”. The system
responds with “Bluetooth ready”
followed by a tone.
3. Say “Pair”. The system responds
with instructions and a four digit
PIN number. The PIN number
will be used in Step 4.
4. Start the Pairing process on the cell phone that will be paired to
the vehicle. Reference the cell
phone manufacturers user guide
for information on this process.
Locate the device named
“General Motors” in the list on
the cellular phone and follow the
instructions on the cell phone to
enter the four digit PIN number
that was provided in Step 3.
ProCarManuals.com
Page 252 of 444

8-12 Climate Controls
N(Air Delivery Mode Control):
Press to manually change the
direction of the airflow. Repeatedly
press the button until the desired
mode appears on the display.
H(Vent): Air is directed through
the overhead outlets.
)(Bi-Level): Air is directed
through the rear floor outlets, as
well as the overhead outlets.
6(Floor): Air is directed through
the floor outlets. The rear system
floor outlets are located under the
third row seats.
Air Vents
Use the slider switch in the center of
the outlet, to change the direction of
the air flow. Use the thumbwheel
near the outlet to control the amount
of air flow or to shut off the airflow.
Keep all outlets open whenever
possible for best system
performance.
Operation Tips
.Clear away any ice, snow,
or leaves from the air inlets at
the base of the windshield that
can block the flow of air into the
vehicle.
.Use of non-GM approved hood
deflectors can adversely affect
the performance of the system.
.Keep the path under all seats
clear of objects to help circulate
the air inside the vehicle more
effectively.
.If fogging reoccurs while in vent
or bi-level modes with mild
temperature throughout the
vehicle, turn on the air
conditioner to reduce windshield
fogging.
ProCarManuals.com
Page 258 of 444

9-6 Driving and Operating
The three types of skids correspond
to the vehicle's three control
systems. In the braking skid, the
wheels are not rolling. In the
steering or cornering skid, too much
speed or steering in a curve causes
tires to slip and lose cornering force.
And in the acceleration skid, too
much throttle causes the driving
wheels to spin.
If the vehicle starts to slide, ease
your foot off the accelerator pedal
and quickly steer the way you want
the vehicle to go. If you start
steering quickly enough, the vehicle
may straighten out. Always be ready
for a second skid if it occurs.
Of course, traction is reduced when
water, snow, ice, gravel, or other
material is on the road. For safety,
slow down and adjust your driving to
these conditions. It is important to
slow down on slippery surfaces
because stopping distance is longer
and vehicle control more limited.While driving on a surface with
reduced traction, try your best to
avoid sudden steering, acceleration,
or braking, including reducing
vehicle speed by shifting to a lower
gear. Any sudden changes could
cause the tires to slide. You might
not realize the surface is slippery
until the vehicle is skidding. Learn to
recognize warning clues
—such as
enough water, ice, or packed snow
on the road to make a mirrored
surface —and slow down when you
have any doubt.
Remember: Any Antilock Brake
System (ABS) helps avoid only the
braking skid.
Driving on Wet Roads
Rain and wet roads can reduce
vehicle traction and affect your
ability to stop and accelerate.
Always drive slower in these types
of driving conditions and avoid
driving through large puddles and
deep-standing or flowing water.
{WARNING
Wet brakes can cause crashes.
They might not work as well in a
quick stop and could cause
pulling to one side. You could
lose control of the vehicle.
After driving through a large
puddle of water or a car/vehicle
wash, lightly apply the brake
pedal until the brakes work
normally.
Flowing or rushing water creates
strong forces. Driving through
flowing water could cause your
vehicle to be carried away. If this
happens, you and other vehicle
occupants could drown. Do not
ignore police warnings and be
very cautious about trying to drive
through flowing water.
ProCarManuals.com