manual radio set SATURN OUTLOOK 2010 Owners Manual
[x] Cancel search | Manufacturer: SATURN, Model Year: 2010, Model line: OUTLOOK, Model: SATURN OUTLOOK 2010Pages: 444, PDF Size: 4.43 MB
Page 21 of 444
In Brief 1-15
Setting the Clock
To set the time and date for the
radio with CD, DVD, and USB Port:
1. Turn the ignition key to ACC/ACCESSORY or ON/RUN, then
press
O, to turn the radio on.
2. Press
Gto display HR, MIN,
MM, DD, YYYY (hour, minute,
month, day, and year).
3. Press the pushbutton located under any one of the labels to be
changed.
4. To increase or decrease the time or date, turn
fclockwise or
counter-clockwise.
For detailed instructions on setting
the clock for the vehicles specific
audio system, see Clock
on
page 5‑8.
Satellite Radio
Vehicles with an XM™ Satellite
Radio tuner and a valid XM Satellite
Radio subscription can receive XM
programming.
XM Satellite Radio Service
XM is a satellite radio service that is
based in the 48 contiguous United
States and 10 Canadian provinces.
XM Satellite Radio has a wide
variety of programming and
commercial-free music,
coast-to-coast, and in digital-quality
sound. A fee is required to receive
the XM service. For more
information, contact XM at in the
U.S. and Canada.
For more information refer to:
.www.xmradio.com or call
1-800-929-2100 (U.S.).
.www.xmradio.ca or call
1-877-438-9677 (Canada).
See Satellite Radio on page 7‑7.
Portable Audio Devices
This vehicle may have an auxiliary
input located on the radio faceplate
and a USB port located in the center
console. External devices such as
iPod
®, laptop computers, MP3
players, CD changers, USB storage
device, etc. can be connected to the
auxiliary port using a 3.5 mm (1/8 in)
input jack or the USB port
depending on the audio system.
See Auxiliary Devices
on
page 7‑33.
Bluetooth®
The in-vehicle Bluetooth system
allows users with a
Bluetooth-enabled cell phone to
make and receive hands-free calls
using the vehicle’ s audio system,
microphone and controls.
ProCarManuals.com
Page 22 of 444
1-16 In Brief
The Bluetooth-enabled cell phone
must be paired with the in-vehicle
Bluetooth system before it can be
used in the vehicle. Not all phones
will support all functions.
SeeBluetooth on page 7‑45.
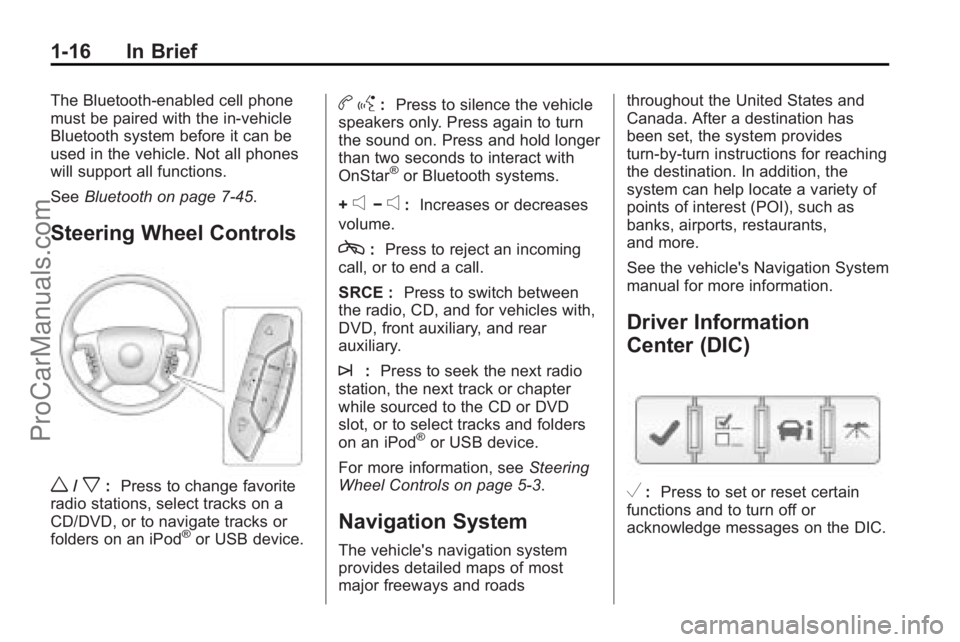
Steering Wheel Controls
w/x:Press to change favorite
radio stations, select tracks on a
CD/DVD, or to navigate tracks or
folders on an iPod
®or USB device.
b g: Press to silence the vehicle
speakers only. Press again to turn
the sound on. Press and hold longer
than two seconds to interact with
OnStar
®or Bluetooth systems.
+
e−e: Increases or decreases
volume.
c: Press to reject an incoming
call, or to end a call.
SRCE : Press to switch between
the radio, CD, and for vehicles with,
DVD, front auxiliary, and rear
auxiliary.
¨: Press to seek the next radio
station, the next track or chapter
while sourced to the CD or DVD
slot, or to select tracks and folders
on an iPod
®or USB device.
For more information, see Steering
Wheel Controls on page 5‑3.
Navigation System
The vehicle's navigation system
provides detailed maps of most
major freeways and roads throughout the United States and
Canada. After a destination has
been set, the system provides
turn-by-turn instructions for reaching
the destination. In addition, the
system can help locate a variety of
points of interest (POI), such as
banks, airports, restaurants,
and more.
See the vehicle's Navigation System
manual for more information.
Driver Information
Center (DIC)
V:
Press to set or reset certain
functions and to turn off or
acknowledge messages on the DIC.
ProCarManuals.com
Page 44 of 444

2-14 Keys, Doors and Windows
3. Get out of the vehicle, close thedoor and wait for the security
light to go out.
4. Then reach in through the window, unlock the door with the
manual door lock and open the
door. This should set off the
alarm.
If the alarm does not sound when it
should, but the vehicle's headlamps
flash, check to see if the horn
works. The horn fuse may be blown.
To replace the fuse, see Fuses and
Circuit Breakers on page 10‑31.
If the alarm does not sound or the
vehicle's headlamps do not flash,
see your dealer/retailer for service.
Immobilizer
See Radio Frequency Statementon
page 13‑16for information regarding
Part 15 of the Federal
Communications Commission (FCC)
Rules and RSS-210/211 of Industry
and Science Canada.
Immobilizer Operation
This vehicle has PASS-Key®III+
(Personalized Automotive Security
System) theft-deterrent system.
PASS-Key
®III+ is a passive
theft-deterrent system.
The system is automatically armed
when the key is removed from the
ignition.
The system is automatically
disarmed when the key is turned to
ON/RUN, ACC/ACCESSORY or
START from the LOCK/OFF
position.
You do not have to manually arm or
disarm the system.
The security light comes on if there
is a problem with arming or
disarming the theft-deterrent
system.
When the PASS-Key
®III+ system
senses an incorrect key, the vehicle
does not start. Anyone using a
trial-and-error method to start the vehicle will be discouraged because
of the high number of electrical key
codes.
If the engine does not start and the
security light on the instrument
panel comes on when trying to start
the vehicle, there may be a problem
with your theft-deterrent system.
Turn the ignition off and try again.
If the engine still does not start, and
the key appears to be undamaged,
try another ignition key and check
the fuses. See
Fuses and Circuit
Breakers
on page 10‑31for
additional information. If the engine
still does not start with the other key,
the vehicle needs service. If the
vehicle does start, the first key may
be faulty. See your dealer/retailer
who can service the PASS-Key
®III+
to have a new key made. In an
emergency, contact Roadside
Assistance. See Roadside
Assistance Program on page 13‑5.
It is possible for the PASS-Key
®III+
decoder to learn the transponder
value of a new or replacement key.
ProCarManuals.com
Page 125 of 444
Instruments and Controls 5-3
Push the control forward or
rearward to move the steering wheel
toward the front or rear of the
vehicle. To set the memory position,
seeVehicle Personalization (With
DIC Buttons) on page 5‑42.
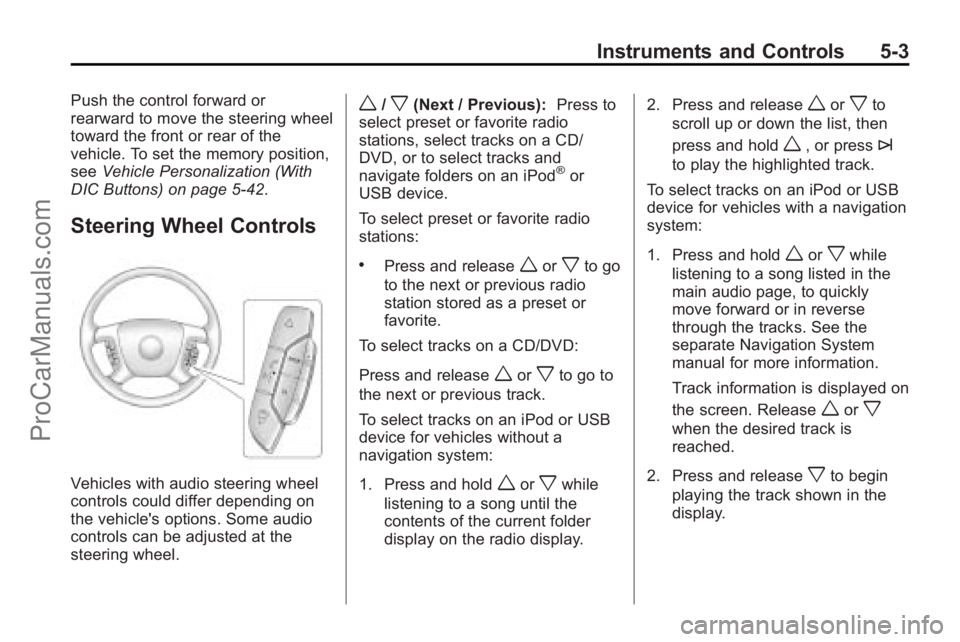
Steering Wheel Controls
Vehicles with audio steering wheel
controls could differ depending on
the vehicle's options. Some audio
controls can be adjusted at the
steering wheel.
w/x(Next / Previous): Press to
select preset or favorite radio
stations, select tracks on a CD/
DVD, or to select tracks and
navigate folders on an iPod
®or
USB device.
To select preset or favorite radio
stations:
.Press and releaseworxto go
to the next or previous radio
station stored as a preset or
favorite.
To select tracks on a CD/DVD:
Press and release
worxto go to
the next or previous track.
To select tracks on an iPod or USB
device for vehicles without a
navigation system:
1. Press and hold
worxwhile
listening to a song until the
contents of the current folder
display on the radio display. 2. Press and release
worxto
scroll up or down the list, then
press and hold
w, or press¨
to play the highlighted track.
To select tracks on an iPod or USB
device for vehicles with a navigation
system:
1. Press and hold
worxwhile
listening to a song listed in the
main audio page, to quickly
move forward or in reverse
through the tracks. See the
separate Navigation System
manual for more information.
Track information is displayed on
the screen. Release
worx
when the desired track is
reached.
2. Press and release
xto begin
playing the track shown in the
display.
ProCarManuals.com
Page 127 of 444
Instruments and Controls 5-5
Press¨to select a track or a
folder when navigating folders on an
iPod or USB device.
For vehicles with a navigation
system:
1. Press and hold
¨until a beep
is heard, to place the radio into
SCAN mode, a station will play
for five seconds before moving
to the next station.
2. To stop the SCAN function, press
¨again.
3. In CD/DVD, iPod, or AUX USB, press and hold to quickly move
forward through the tracks.
Release to stop on the desired
track.
+
e−e(Volume): Press to
increase or to decrease the volume.
Horn
Press near or on the horn symbols
on the steering wheel pad to sound
the horn.
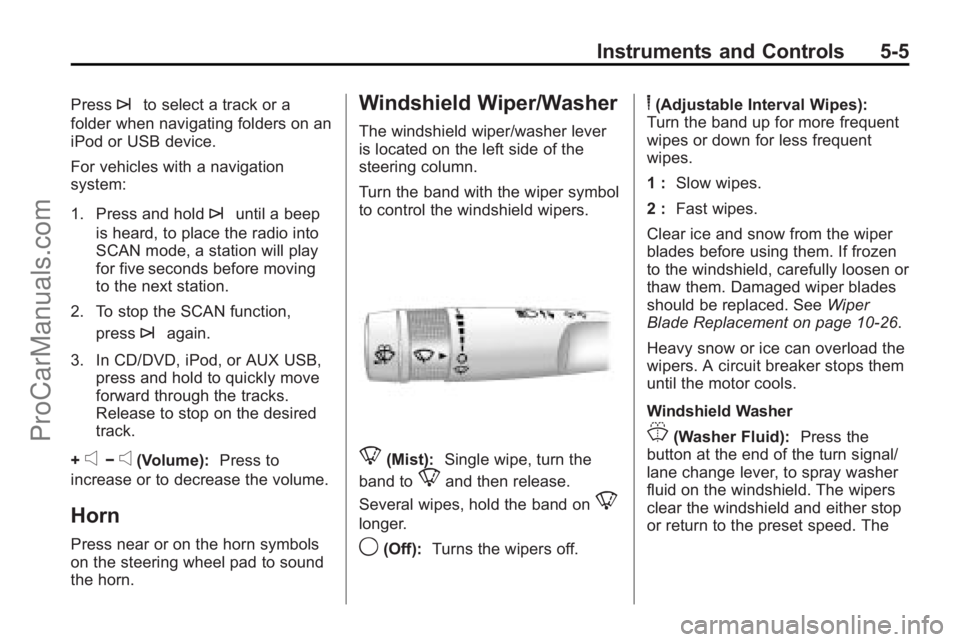
Windshield Wiper/Washer
The windshield wiper/washer lever
is located on the left side of the
steering column.
Turn the band with the wiper symbol
to control the windshield wipers.
8(Mist): Single wipe, turn the
band to
8and then release.
Several wipes, hold the band on
8
longer.
9(Off): Turns the wipers off.
6(Adjustable Interval Wipes):
Turn the band up for more frequent
wipes or down for less frequent
wipes.
1 : Slow wipes.
2 : Fast wipes.
Clear ice and snow from the wiper
blades before using them. If frozen
to the windshield, carefully loosen or
thaw them. Damaged wiper blades
should be replaced. See Wiper
Blade Replacement on page 10‑26.
Heavy snow or ice can overload the
wipers. A circuit breaker stops them
until the motor cools.
Windshield Washer
J(Washer Fluid): Press the
button at the end of the turn signal/
lane change lever, to spray washer
fluid on the windshield. The wipers
clear the windshield and either stop
or return to the preset speed. The
ProCarManuals.com
Page 130 of 444
5-8 Instruments and Controls
If the DIC display does not show a
heading, for example, N for North,
or the heading does not change
after making turns, there may be a
strong magnetic field interfering with
the compass. Such interference
may be caused by a magnetic CB or
cell phone antenna mount, a
magnetic emergency light, magnetic
note pad holder, or any other
magnetic item. Turn off the vehicle,
move the magnetic item, then turn
on the vehicle and calibrate the
compass.
To calibrate the compass, use the
following procedure:
Compass Calibration Procedure
1. Before calibrating the compass,make sure the compass zone is
set to the variance zone in which
the vehicle is located. See
“Compass Variance (Zone)
Procedure” earlier in this
section. Do not operate any switches
such as window, sunroof,
climate controls, seats, etc.
during the calibration procedure.
2. Press the vehicle information button until PRESS
VTO
CALIBRATE COMPASS
displays.
3. Press the set/reset button to start the compass calibration.
4. The DIC will display CALIBRATING: DRIVE IN
CIRCLES. Drive the vehicle in
tight circles at less than 5 mph
(8 km/h) to complete the
calibration. The DIC will display
CALIBRATION COMPLETE for a
few seconds when the
calibration is complete. The DIC
display will then return to the
previous menu.
Clock
To adjust the time and date:
1. Turn the ignition key to ACC/ACCESSORY or ON/RUN, then
press
O, to turn the radio on.
2. Press
Gto display HR, MIN,
MM, DD, YYYY (hour, minute,
month, day, and year).
3. Press the pushbutton located under any one of the labels to be
changed.
4. To increase the time or date, do one of the following:
.Press the pushbutton below
the selected label.
.Press¨SEEK.
.Press\FWD.
.Turnfclockwise.
ProCarManuals.com
Page 131 of 444
Instruments and Controls 5-9
5. To decrease the time or date, doone of the following:
.Press©SEEK.
.PresssREV.
.Turnfcounter-clockwise.
To change the time default setting
from 12 hour to 24 hour or to
change the date default setting from
month/day/year to day/month/year:
1. Press
Gand then the
pushbutton located under the
forward arrow that displays on
the radio screen until the time
12H (hour) and 24H (hour), and
the date MM/DD (month and
day) and DD/MM (day and
month) displays.
2. Press the pushbutton located under the desired option.
3. Press
Gagain to apply the
selected default, or let the
screen time out.
Power Outlets
The vehicle has three 12-volt outlets
which can be used to plug in
electrical equipment, such as a
cellular telephone, a compact disc
player, etc.
The power outlets are located on
the instrument panel below the
climate controls, at the rear of the
center console, and in the rear
cargo area. Lift the cover to access
the outlet. Close the cover when not
using the outlet.
Notice: Leaving electrical
equipment plugged in for an
extended period of time while the
vehicle is off will drain the
battery. Power is always supplied
to the outlets. Always unplug
electrical equipment when not in
use and do not plug in equipment
that exceeds the maximum
20 ampere rating. Certain accessory plugs may not be
compatible to the accessory power
outlet and could result in blown
vehicle and adapter fuses. If a
problem is experienced, see your
dealer/retailer for additional
information on the power accessory
outlets.
Notice:
Adding any electrical
equipment to the vehicle can
damage it or keep other
components from working as
they should. The repairs would
not be covered by the vehicle
warranty. Do not use equipment
exceeding maximum amperage
rating of 20 amperes. Check with
your dealer/retailer before adding
electrical equipment.
ProCarManuals.com
Page 171 of 444
Instruments and Controls 5-49
To select a setting, press the set/
reset button while the desired
setting is displayed on the DIC.
EXIT FEATURE SETTINGS
This feature allows you to exit the
feature settings menu.
Press the customization button until
FEATURE SETTINGS PRESS
V
TO EXIT appears in the DIC display.
Press the set/reset button once to
exit the menu.
If you do not exit, pressing the
customization button again will
return you to the beginning of the
feature settings menu.
Exiting the Feature
Settings Menu
The feature settings menu will be
exited when any of the following
occurs:
.The vehicle is shifted out of
P (Park).
.The vehicle is no longer in
ON/RUN.
.The trip/fuel or vehicle
information DIC buttons are
pressed.
.The end of the feature settings
menu is reached and exited.
.A 40 second time period has
elapsed with no selection made.
Universal Remote
System
SeeRadio Frequency Statementon
page 13‑16for information regarding
Part 15 of the Federal
Communications Commission (FCC)
Rules and RSS-210/211 of Industry
and Science Canada.
Universal Remote System
Programming
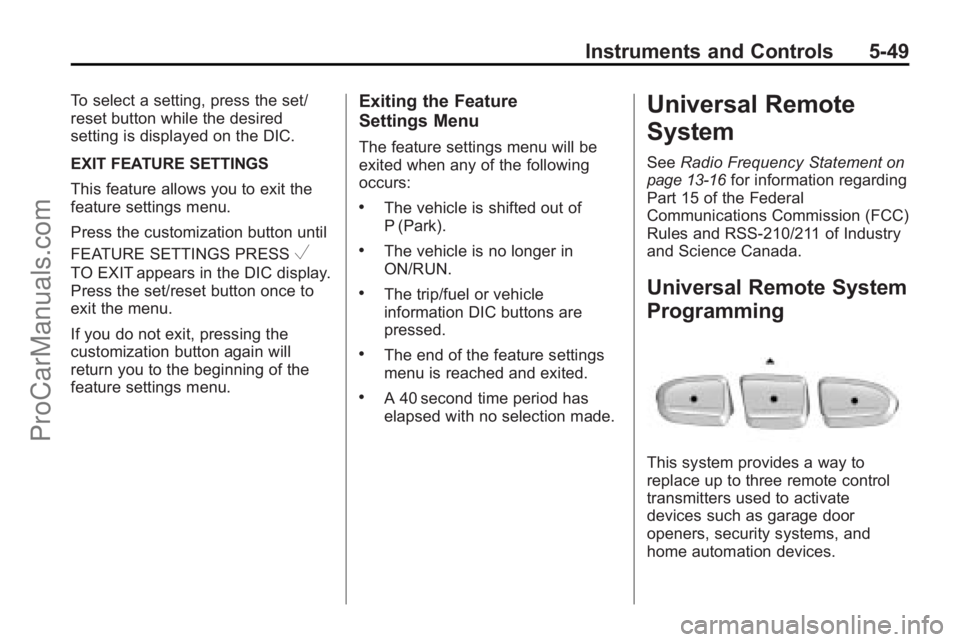
This system provides a way to
replace up to three remote control
transmitters used to activate
devices such as garage door
openers, security systems, and
home automation devices.
ProCarManuals.com
Page 172 of 444
5-50 Instruments and Controls
Do not use the Universal Home
Remote with any garage door
opener that does not have the stop
and reverse feature. This includes
any garage door opener model
manufactured before April 1, 1982.
Read the instructions completely
before attempting to program the
Universal Home Remote. Because
of the steps involved, it may be
helpful to have another person
available to assist you with
programming the Universal Home
Remote.
Keep the original hand-held
transmitter for use in other vehicles
as well as for future Universal Home
Remote programming. It is also
recommended that upon the sale of
the vehicle, the programmed
Universal Home Remote buttons
should be erased for security
purposes. See“Erasing Universal
Home Remote Buttons” later in this
section. When programming a garage door,
park outside of the garage. Park
directly in line with and facing the
garage door opener motor-head or
gate motor-head. Be sure that
people and objects are clear of the
garage door or gate that is being
programmed.
It is recommended that a new
battery be installed in your
hand-held transmitter for quicker
and more accurate transmission of
the radio-frequency signal.
Programming the Universal
Home Remote System
For questions or help programming
the Universal Home Remote
System, call 1-800-355-3515 or go
to www.homelink.com.
Programming a garage door opener
involves time-sensitive actions, so
read the entire procedure before
starting. Otherwise, the device will
time out and the procedure will have
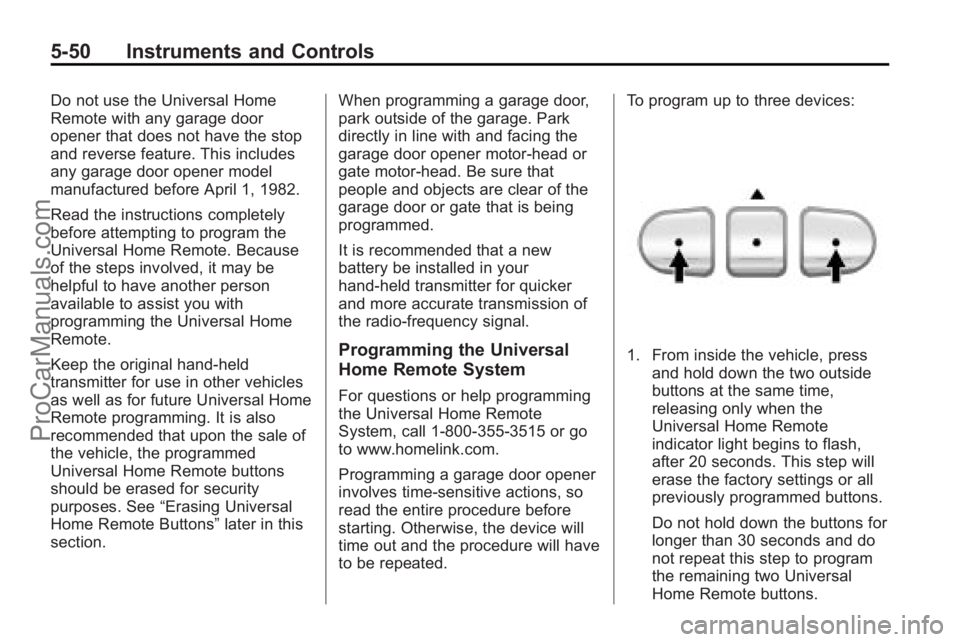
to be repeated.To program up to three devices:
1. From inside the vehicle, press
and hold down the two outside
buttons at the same time,
releasing only when the
Universal Home Remote
indicator light begins to flash,
after 20 seconds. This step will
erase the factory settings or all
previously programmed buttons.
Do not hold down the buttons for
longer than 30 seconds and do
not repeat this step to program
the remaining two Universal
Home Remote buttons.
ProCarManuals.com
Page 186 of 444
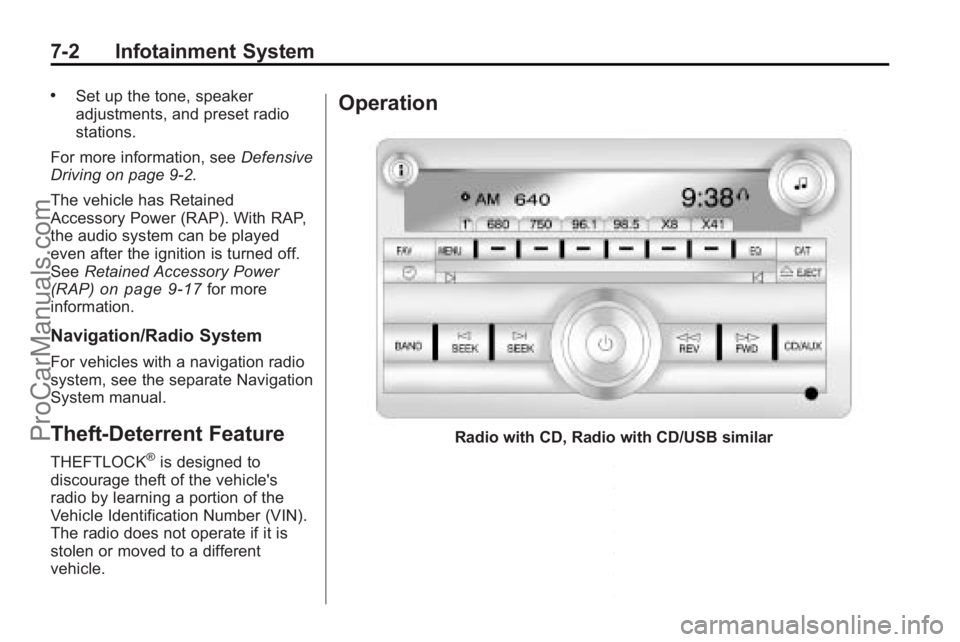
7-2 Infotainment System
.Set up the tone, speaker
adjustments, and preset radio
stations.
For more information, see Defensive
Driving on page 9‑2.
The vehicle has Retained
Accessory Power (RAP). With RAP,
the audio system can be played
even after the ignition is turned off.
See Retained Accessory Power
(RAP)
on page 9‑17for more
information.
Navigation/Radio System
For vehicles with a navigation radio
system, see the separate Navigation
System manual.
Theft-Deterrent Feature
THEFTLOCK®is designed to
discourage theft of the vehicle's
radio by learning a portion of the
Vehicle Identification Number (VIN).
The radio does not operate if it is
stolen or moved to a different
vehicle.
Operation
Radio with CD, Radio with CD/USB similar
ProCarManuals.com