service SATURN OUTLOOK 2010 Owners Manual
[x] Cancel search | Manufacturer: SATURN, Model Year: 2010, Model line: OUTLOOK, Model: SATURN OUTLOOK 2010Pages: 444, PDF Size: 4.43 MB
Page 2 of 444
2010 Saturn OUTLOOK Owner ManualM
Jump Starting . . . . . . . . . . . . . . . 10-78
Towing . . . . . . . . . . . . . . . . . . . . . . 10-83
Appearance Care . . . . . . . . . . . 10-86
Service and Maintenance . . . 11-1
General Information . . . . . . . . . . 11-1
Scheduled Maintenance . . . . . . 11-2
Recommended Fluids, Lubricants, and Parts . . . . . . . 11-7
Maintenance Records . . . . . . . . 11-9
Technical Data . . . . . . . . . . . . . . . 12-1
Vehicle Identification . . . . . . . . . 12-1
Vehicle Data . . . . . . . . . . . . . . . . . . 12-2
Customer Information . . . . . . . 13-1
Customer Information . . . . . . . . 13-1
Reporting Safety Defects . . . . 13-13
Vehicle Data Recording and
Privacy . . . . . . . . . . . . . . . . . . . . 13-14
Index . . . . . . . . . . . . . . . . . . . . . i-1
ProCarManuals.com
Page 4 of 444
iv Introduction
Using this Manual
To quickly locate information about
the vehicle, use the Index in the
back of the manual. It is an
alphabetical list of what is in the
manual and the page number where
it can be found.
Danger, Warnings, and
Cautions
Warning messages found on vehicle
labels and in this manual describe
hazards and what to do to avoid or
reduce them.
Dangerindicates a hazard with a
high level of risk which will result in
serious injury or death.
Warning orCaution indicates a
hazard that could result in injury or
death.
{WARNING
These mean there is something
that could hurt you or other
people.
Notice: This means there is
something that could result in
property or vehicle damage. This
would not be covered by the
vehicle's warranty.
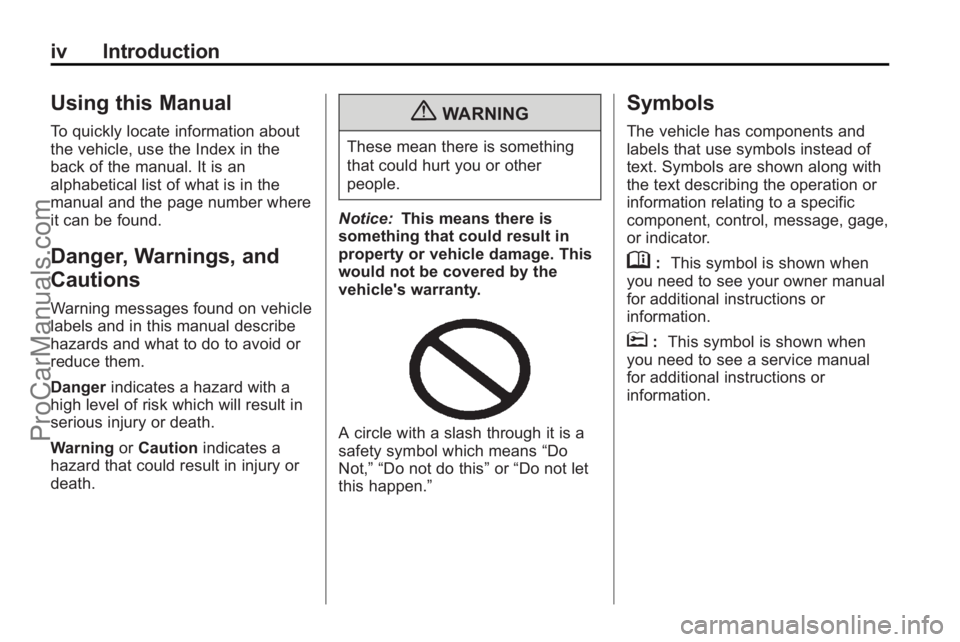
A circle with a slash through it is a
safety symbol which means “Do
Not,” “Do not do this” or“Do not let
this happen.”
Symbols
The vehicle has components and
labels that use symbols instead of
text. Symbols are shown along with
the text describing the operation or
information relating to a specific
component, control, message, gage,
or indicator.
M: This symbol is shown when
you need to see your owner manual
for additional instructions or
information.
*: This symbol is shown when
you need to see a service manual
for additional instructions or
information.
ProCarManuals.com
Page 21 of 444
In Brief 1-15
Setting the Clock
To set the time and date for the
radio with CD, DVD, and USB Port:
1. Turn the ignition key to ACC/ACCESSORY or ON/RUN, then
press
O, to turn the radio on.
2. Press
Gto display HR, MIN,
MM, DD, YYYY (hour, minute,
month, day, and year).
3. Press the pushbutton located under any one of the labels to be
changed.
4. To increase or decrease the time or date, turn
fclockwise or
counter-clockwise.
For detailed instructions on setting
the clock for the vehicles specific
audio system, see Clock
on
page 5‑8.
Satellite Radio
Vehicles with an XM™ Satellite
Radio tuner and a valid XM Satellite
Radio subscription can receive XM
programming.
XM Satellite Radio Service
XM is a satellite radio service that is
based in the 48 contiguous United
States and 10 Canadian provinces.
XM Satellite Radio has a wide
variety of programming and
commercial-free music,
coast-to-coast, and in digital-quality
sound. A fee is required to receive
the XM service. For more
information, contact XM at in the
U.S. and Canada.
For more information refer to:
.www.xmradio.com or call
1-800-929-2100 (U.S.).
.www.xmradio.ca or call
1-877-438-9677 (Canada).
See Satellite Radio on page 7‑7.
Portable Audio Devices
This vehicle may have an auxiliary
input located on the radio faceplate
and a USB port located in the center
console. External devices such as
iPod
®, laptop computers, MP3
players, CD changers, USB storage
device, etc. can be connected to the
auxiliary port using a 3.5 mm (1/8 in)
input jack or the USB port
depending on the audio system.
See Auxiliary Devices
on
page 7‑33.
Bluetooth®
The in-vehicle Bluetooth system
allows users with a
Bluetooth-enabled cell phone to
make and receive hands-free calls
using the vehicle’ s audio system,
microphone and controls.
ProCarManuals.com
Page 27 of 444
In Brief 1-21
.Replace the vehicle's tires with
the same TPC Spec number
molded into the tire's sidewall
near the size.
.Follow recommended scheduled
maintenance.
Roadside Assistance
Program
U.S.:1-800-553-6000
TTY Users: 1-888-889-2438
Canada: 1-800-268-6800
As the owner of a new Saturn, you
are automatically enrolled in the
Roadside Assistance program. This
program provides technically trained
advisors who are available 24 hours
a day, 365 days a year, minor repair
information or towing arrangements.
Roadside Assistance and OnStar
If you have a current OnStar
subscription, press the OnStar
button and the current GPS location
will be sent to an OnStar Advisor
who will assess your problem, contact Roadside Assistance, and
relay exact location to get you the
help you need.
Online Owner Center
The Online Owner Center is a
complimentary service that includes
online service reminders, vehicle
maintenance tips, online owner
manual, special privileges
and more.
Sign up today at:
www.gmownercenter.com/saturn
(U.S.) or
www.gm.ca (Canada).
OnStar®
OnStar®uses several innovative
technologies and live advisors to
provide a wide range of safety,
security, navigation, diagnostics,
and calling services. Automatic Crash Response
In a crash, built in sensors can
automatically alert an OnStar
advisor who is immediately
connected to the vehicle to see if
you need help.
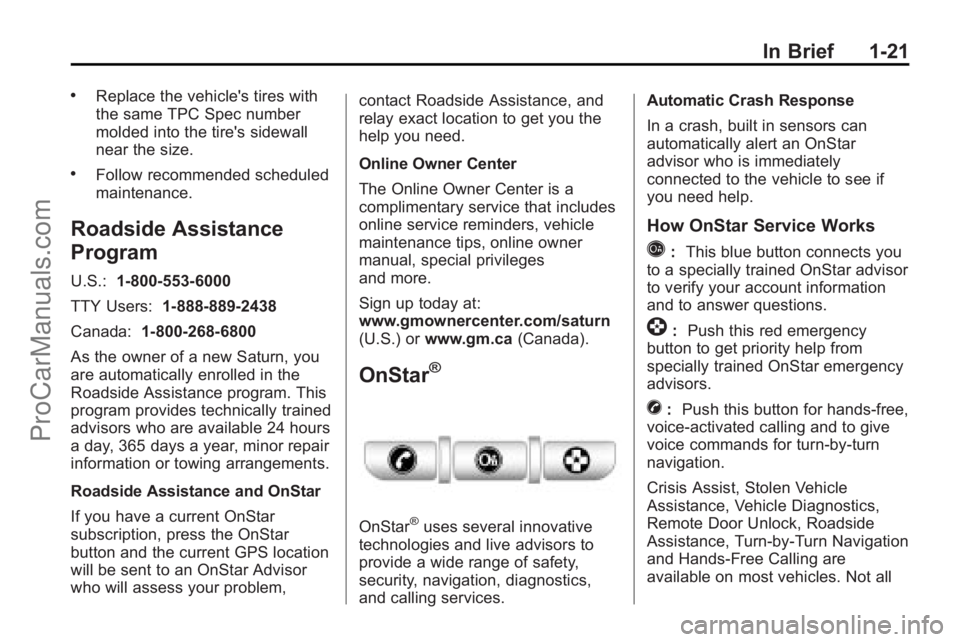
How OnStar Service Works
Q:
This blue button connects you
to a specially trained OnStar advisor
to verify your account information
and to answer questions.
]: Push this red emergency
button to get priority help from
specially trained OnStar emergency
advisors.
X: Push this button for hands-free,
voice-activated calling and to give
voice commands for turn-by-turn
navigation.
Crisis Assist, Stolen Vehicle
Assistance, Vehicle Diagnostics,
Remote Door Unlock, Roadside
Assistance, Turn-by-Turn Navigation
and Hands-Free Calling are
available on most vehicles. Not all
ProCarManuals.com
Page 28 of 444

1-22 In Brief
OnStar services are available on all
vehicles. For more information see
the OnStar Owner's Guide or visit
www.onstar.com (U.S.) or
www.onstar.ca (Canada), contact
OnStar at 1-888-4-ONSTAR
(1-888-466-7827) or TTY
1-877-248-2080, or press
Qto
speak with an OnStar advisor
24 hours a day, 7 days a week.
For a full description of OnStar
services and system limitations, see
the OnStar Owner's Guide in the
glove box.
OnStar service is subject to the
OnStar terms and conditions
included in the OnStar Subscriber
Information.
OnStar service cannot work unless
the vehicle is in a place where
OnStar has an agreement with a
wireless service provider for service
in that area. OnStar service also
cannot work unless the vehicle is in
a place where the wireless service
provider OnStar has hired for that area has coverage, network
capacity and reception when the
service is needed, and technology
that is compatible with the OnStar
service. Not all services are
available everywhere, particularly in
remote or enclosed areas, or at all
times.
The OnStar system can record and
transmit vehicle information. This
information is automatically sent to
an OnStar call center when
Qis
pressed,
]is pressed, or if the
airbags or ACR system deploy. This
information usually includes the
vehicle's GPS location and, in the
event of a crash, additional
information regarding the crash that
the vehicle was involved in (e.g. the
direction from which the vehicle was
hit). When the virtual advisor feature
of OnStar hands-free calling is
used, the vehicle also sends OnStar
the vehicle's GPS location so they
can provide services where it is
located. Location information about the
vehicle is only available if the GPS
satellite signals are unobstructed
and available.
The vehicle must have a working
electrical system, including
adequate battery power, for the
OnStar equipment to operate. There
are other problems OnStar cannot
control that may prevent OnStar
from providing OnStar service at
any particular time or place. Some
examples are damage to important
parts of the vehicle in a crash, hills,
tall buildings, tunnels, weather or
wireless phone network congestion.
OnStar Steering Wheel
Controls
This vehicle may have a Talk/Mute
button that can be used to interact
with OnStar hands-free calling. See
Steering Wheel Controls
on
page 5‑3for more information.
ProCarManuals.com
Page 29 of 444

In Brief 1-23
On some vehicles, the mute button
can be used to dial numbers into
voice mail systems, or to dial phone
extensions. See the OnStar Owner's
Guide for more information.
Your Responsibility
Increase the volume of the radio if
the OnStar advisor cannot be heard.
If the light next to the OnStar
buttons is red, the system may not
be functioning properly. Press
Q
and request a vehicle diagnostic.
If the light appears clear (no light is
appearing), your OnStar
subscription has expired and all
services have been deactivated.
Press
Qto confirm that the OnStar
equipment is active.
ProCarManuals.com
Page 32 of 444
2-2 Keys, Doors and Windows
Keys and Locks
Keys
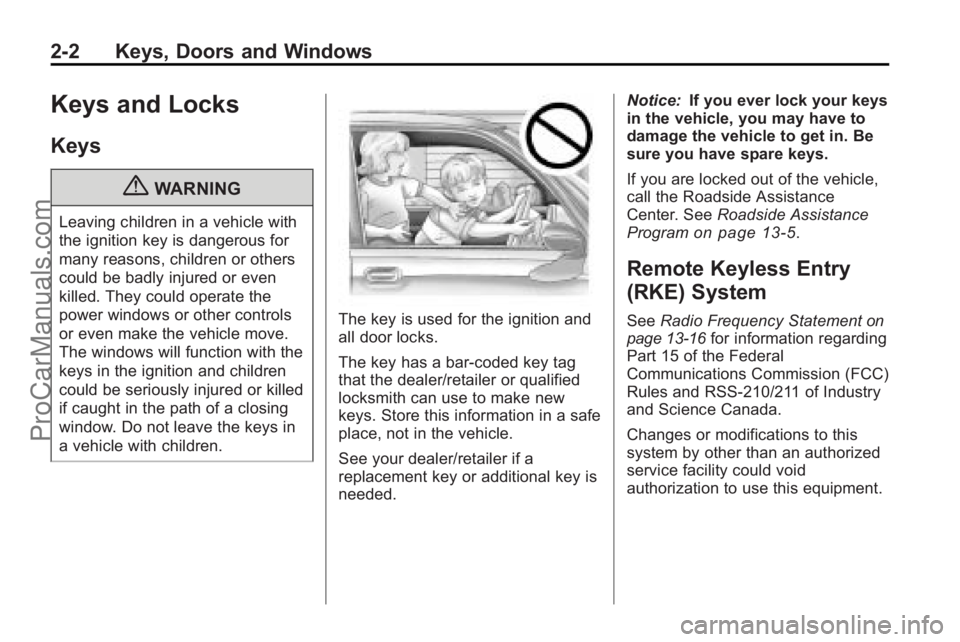
{WARNING
Leaving children in a vehicle with
the ignition key is dangerous for
many reasons, children or others
could be badly injured or even
killed. They could operate the
power windows or other controls
or even make the vehicle move.
The windows will function with the
keys in the ignition and children
could be seriously injured or killed
if caught in the path of a closing
window. Do not leave the keys in
a vehicle with children.
The key is used for the ignition and
all door locks.
The key has a bar-coded key tag
that the dealer/retailer or qualified
locksmith can use to make new
keys. Store this information in a safe
place, not in the vehicle.
See your dealer/retailer if a
replacement key or additional key is
needed.Notice:
If you ever lock your keys
in the vehicle, you may have to
damage the vehicle to get in. Be
sure you have spare keys.
If you are locked out of the vehicle,
call the Roadside Assistance
Center. See Roadside Assistance
Program
on page 13‑5.
Remote Keyless Entry
(RKE) System
See Radio Frequency Statementon
page 13‑16for information regarding
Part 15 of the Federal
Communications Commission (FCC)
Rules and RSS-210/211 of Industry
and Science Canada.
Changes or modifications to this
system by other than an authorized
service facility could void
authorization to use this equipment.
ProCarManuals.com
Page 33 of 444
Keys, Doors and Windows 2-3
If there is a decrease in the RKE
operating range:
.Check the distance. The
transmitter may be too far from
the vehicle.
.Check the location. Other
vehicles or objects may be
blocking the signal.
.Check the transmitter's battery.
See“Battery Replacement” later
in this section.
.If the transmitter is still not
working correctly, see your
dealer/retailer or a qualified
technician for service.
Remote Keyless Entry
(RKE) System Operation
The Remote Keyless Entry (RKE)
transmitter functions work up to
60 m (195 feet) away from the
vehicle. There are other conditions which
can affect the performance of the
transmitter. See
Remote Keyless
Entry (RKE) System on page 2‑2.
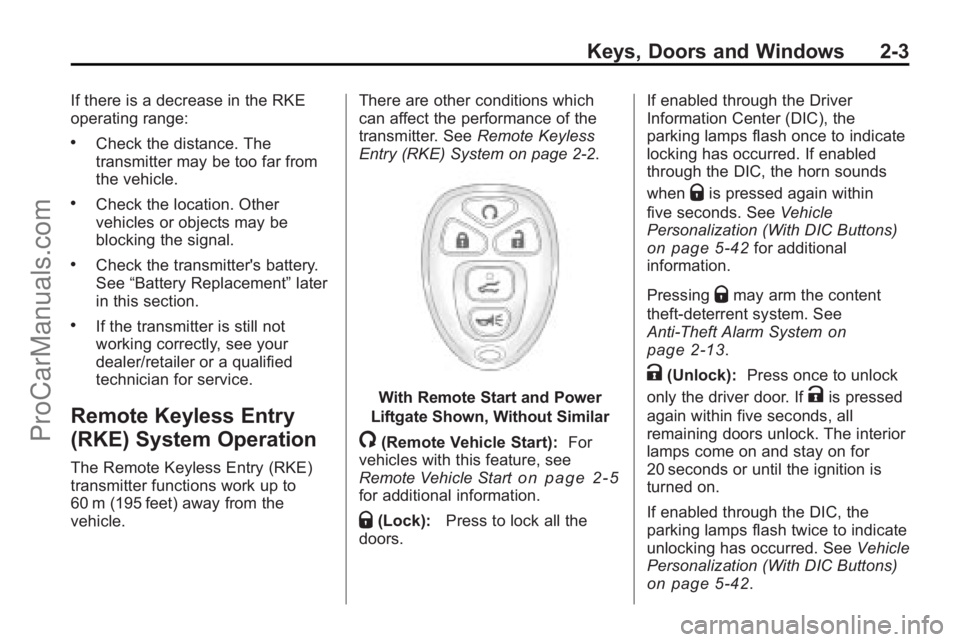
With Remote Start and Power
Liftgate Shown, Without Similar
/(Remote Vehicle Start): For
vehicles with this feature, see
Remote Vehicle Start
on page 2‑5for additional information.
Q(Lock): Press to lock all the
doors. If enabled through the Driver
Information Center (DIC), the
parking lamps flash once to indicate
locking has occurred. If enabled
through the DIC, the horn sounds
when
Qis pressed again within
five seconds. See Vehicle
Personalization (With DIC Buttons)
on page 5‑42for additional
information.
Pressing
Qmay arm the content
theft-deterrent system. See
Anti-Theft Alarm System
on
page 2‑13.
K(Unlock): Press once to unlock
only the driver door. If
Kis pressed
again within five seconds, all
remaining doors unlock. The interior
lamps come on and stay on for
20 seconds or until the ignition is
turned on.
If enabled through the DIC, the
parking lamps flash twice to indicate
unlocking has occurred. See Vehicle
Personalization (With DIC Buttons)
on page 5‑42.
ProCarManuals.com
Page 39 of 444

Keys, Doors and Windows 2-9
Doors
Liftgate
Manual Liftgate Operation
{WARNING
Exhaust gases can enter the
vehicle if it is driven with the
liftgate, trunk/hatch open, or with
any objects that pass through the
seal between the body and the
trunk/hatch or liftgate. Engine
exhaust contains Carbon
Monoxide (CO) which cannot be
seen or smelled. It can cause
unconsciousness and even death.
If the vehicle must be driven with
the liftgate, or trunk/hatch open:
.Close all of the windows.
.Fully open the air outlets on
or under the instrument
panel.(Continued)
WARNING (Continued)
.Adjust the Climate Control
system to a setting that
brings in only outside air and
set the fan speed to the
highest setting. See Climate
Control System in the Index.
.If the vehicle is equipped with
a power liftgate, disable the
power liftgate function.
For more information about
carbon monoxide, see Engine
Exhaust on page 9‑21.
To unlock the liftgate, use the power
door lock switch or press the door
unlock button on the Remote
Keyless Entry (RKE) transmitter
twice. See Remote Keyless Entry
(RKE) System Operation
on
page 2‑3. To open the liftgate, press the
touchpad on the underside of the
liftgate handle. The vehicle must be
in P (Park) to open the liftgate. To
close the liftgate, use the pull cup or
strap.
The liftgate has an electric latch.
If the battery is disconnected or has
low voltage, the liftgate will not
open. The liftgate will resume
operation when the battery is
reconnected and charged.
If the battery is properly connected
and has adequate voltage, and the
liftgate still will not function, the
vehicle should be taken to a dealer/
retailer for service.
ProCarManuals.com
Page 41 of 444

Keys, Doors and Windows 2-11
Power Liftgate Button on CenterConsole
.Press the liftgate button on the
center console.
.Press the touchpad switch on
the outside liftgate handle.
Pressing the buttons or touchpad
switch a second time while the
liftgate is moving reverses the
direction.
Power Liftgate Button near Liftgate Latch
The liftgate can also be closed by
pressing the power liftgate button
next to the liftgate latch. Press the
button a second time during liftgate
operation to reverse the operation.
The power liftgate may be
temporarily disabled under extreme
temperatures or under low battery
conditions. If this occurs, the liftgate
can still be operated manually.
If the vehicle is shifted out of
P (Park) while the power function is
in progress, the liftgate power function will continue to completion.
If the vehicle is shifted out of
P (Park) and the vehicle accelerates
before the power liftgate latches
closed, the liftgate may reverse to
the open position. Cargo could fall
out of the vehicle. The power liftgate
must be closed and latched before
driving.
If the liftgate is power opened and
the support struts have lost
pressure, the lights will flash and a
chime will sound. The liftgate will
stay open temporarily, then slowly
close. See your dealer/retailer for
service before using the liftgate if
this occurs.
Obstacle Detection Features
A warning chime will sound and the
liftgate will automatically reverse
direction to the full closed or open
position if the liftgate encounters an
obstacle during a power open or
close cycle. After removing the
obstruction, the power liftgate
operation can be used again.
ProCarManuals.com