ignition SATURN RELAY 2005 Owners Manual
[x] Cancel search | Manufacturer: SATURN, Model Year: 2005, Model line: RELAY, Model: SATURN RELAY 2005Pages: 446, PDF Size: 3.03 MB
Page 10 of 446
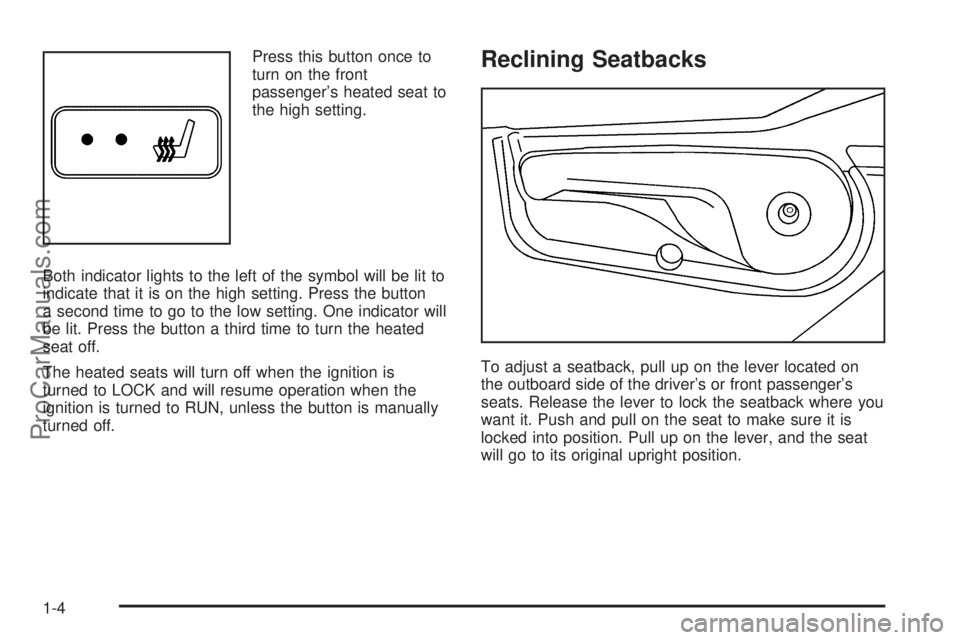
Press this button once to
turn on the front
passenger’s heated seat to
the high setting.
Both indicator lights to the left of the symbol will be lit to
indicate that it is on the high setting. Press the button
a second time to go to the low setting. One indicator will
be lit. Press the button a third time to turn the heated
seat off.
The heated seats will turn off when the ignition is
turned to LOCK and will resume operation when the
ignition is turned to RUN, unless the button is manually
turned off.Reclining Seatbacks
To adjust a seatback, pull up on the lever located on
the outboard side of the driver’s or front passenger’s
seats. Release the lever to lock the seatback where you
want it. Push and pull on the seat to make sure it is
locked into position. Pull up on the lever, and the seat
will go to its original upright position.
1-4
ProCarManuals.com
Page 68 of 446
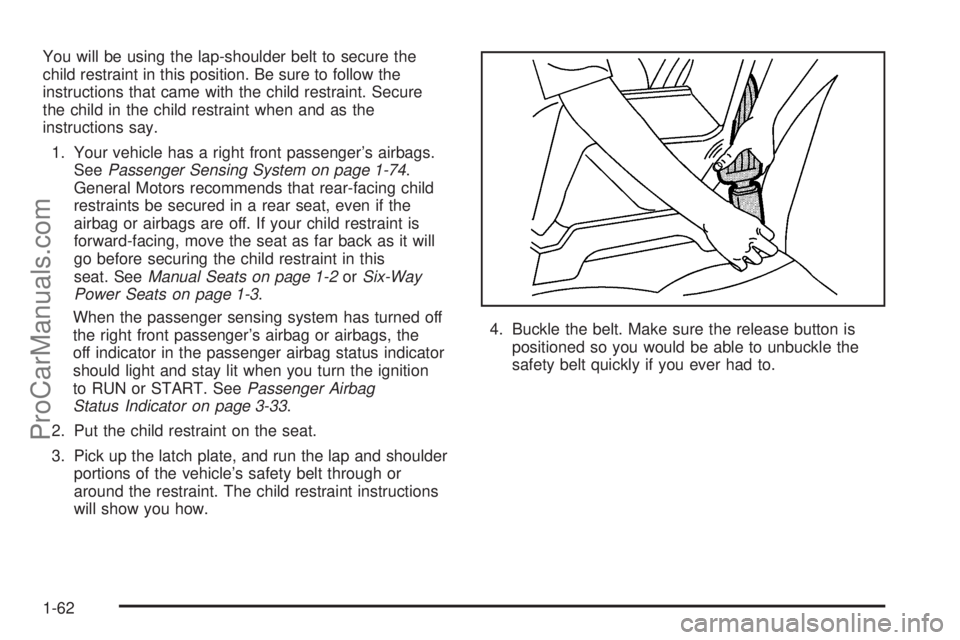
You will be using the lap-shoulder belt to secure the
child restraint in this position. Be sure to follow the
instructions that came with the child restraint. Secure
the child in the child restraint when and as the
instructions say.
1. Your vehicle has a right front passenger’s airbags.
SeePassenger Sensing System on page 1-74.
General Motors recommends that rear-facing child
restraints be secured in a rear seat, even if the
airbag or airbags are off. If your child restraint is
forward-facing, move the seat as far back as it will
go before securing the child restraint in this
seat. SeeManual Seats on page 1-2orSix-Way
Power Seats on page 1-3.
When the passenger sensing system has turned off
the right front passenger’s airbag or airbags, the
off indicator in the passenger airbag status indicator
should light and stay lit when you turn the ignition
to RUN or START. SeePassenger Airbag
Status Indicator on page 3-33.
2. Put the child restraint on the seat.
3. Pick up the latch plate, and run the lap and shoulder
portions of the vehicle’s safety belt through or
around the restraint. The child restraint instructions
will show you how.4. Buckle the belt. Make sure the release button is
positioned so you would be able to unbuckle the
safety belt quickly if you ever had to.
1-62
ProCarManuals.com
Page 80 of 446
Passenger Sensing System
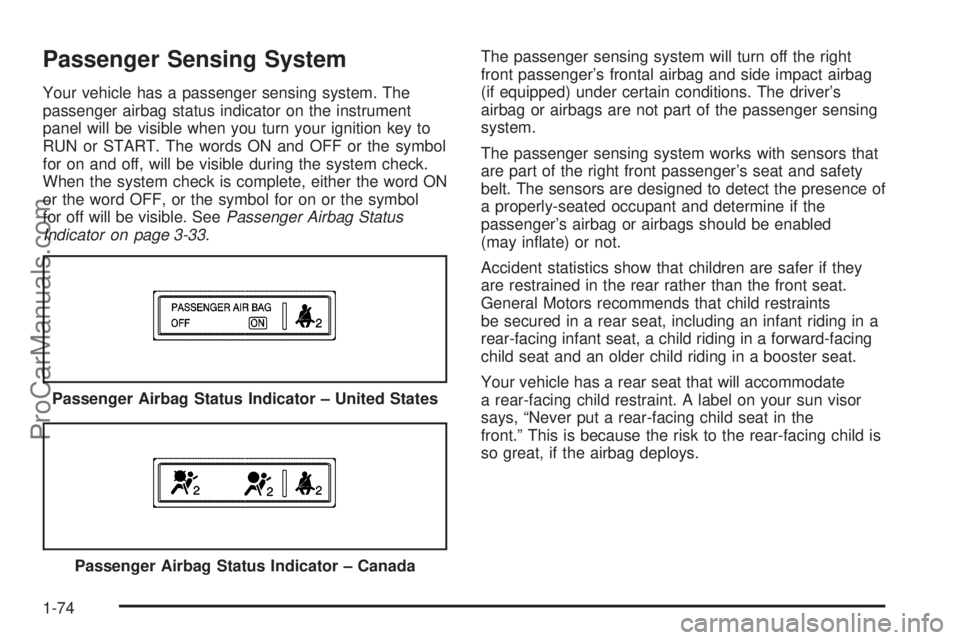
Your vehicle has a passenger sensing system. The
passenger airbag status indicator on the instrument
panel will be visible when you turn your ignition key to
RUN or START. The words ON and OFF or the symbol
for on and off, will be visible during the system check.
When the system check is complete, either the word ON
or the word OFF, or the symbol for on or the symbol
for off will be visible. SeePassenger Airbag Status
Indicator on page 3-33.The passenger sensing system will turn off the right
front passenger’s frontal airbag and side impact airbag
(if equipped) under certain conditions. The driver’s
airbag or airbags are not part of the passenger sensing
system.
The passenger sensing system works with sensors that
are part of the right front passenger’s seat and safety
belt. The sensors are designed to detect the presence of
a properly-seated occupant and determine if the
passenger’s airbag or airbags should be enabled
(may in�ate) or not.
Accident statistics show that children are safer if they
are restrained in the rear rather than the front seat.
General Motors recommends that child restraints
be secured in a rear seat, including an infant riding in a
rear-facing infant seat, a child riding in a forward-facing
child seat and an older child riding in a booster seat.
Your vehicle has a rear seat that will accommodate
a rear-facing child restraint. A label on your sun visor
says, “Never put a rear-facing child seat in the
front.” This is because the risk to the rear-facing child is
so great, if the airbag deploys. Passenger Airbag Status Indicator – United States
Passenger Airbag Status Indicator – Canada
1-74
ProCarManuals.com
Page 84 of 446
Servicing Your Airbag-Equipped
Vehicle
Airbags affect how your vehicle should be serviced.
There are parts of the airbag system in several places
around your vehicle. Your retailer and the service
manual have information about servicing your vehicle
and the airbag system. To purchase a service manual,
seeService Publications Ordering Information on
page 7-9.
{CAUTION:
For up to 10 seconds after the ignition key is
turned off and the battery is disconnected, an
airbag can still in�ate during improper service.
You can be injured if you are close to an
airbag when it in�ates. Avoid yellow
connectors. They are probably part of the
airbag system. Be sure to follow proper
service procedures, and make sure the person
performing work for you is quali�ed to do so.
The airbag system does not need regular maintenance.
Adding Equipment to Your
Airbag-Equipped Vehicle
Q:Is there anything I might add to the front or
sides of the vehicle that could keep the
airbags from working properly?
A:Yes. If you add things that change your vehicle’s
frame, bumper system, front end or side sheet
metal or height, they may keep the airbag system
from working properly. Also, the airbag system may
not work properly if you relocate any of the airbag
sensors. If you have any questions about this,
you should contact Customer Assistance before you
modify your vehicle. The phone numbers and
addresses for Customer Assistance are in Step Two
of the Customer Satisfaction Procedure in this
manual. SeeCustomer Satisfaction Procedure on
page 7-2
1-78
ProCarManuals.com
Page 87 of 446
Keys...............................................................2-3
Remote Keyless Entry System.........................2-4
Remote Keyless Entry System Operation...........2-5
Doors and Locks............................................2-10
Door Locks..................................................2-10
Power Door Locks........................................2-11
Delayed Locking...........................................2-12
Automatic Door Locks...................................2-13
Programmable Automatic Door Unlock.............2-13
Lockout Protection........................................2-13
Dual Sliding Doors........................................2-13
Power Sliding Door (PSD)..............................2-16
Liftgate........................................................2-21
Windows........................................................2-23
Power Windows............................................2-24
Manual Rear Quarter Windows.......................2-24
Power Rear Quarter Windows........................2-25
Sun Visors...................................................2-25
Theft-Deterrent Systems..................................2-25
Content Theft-Deterrent.................................2-26
PASS-Key
®III ..............................................2-28
PASS-Key®III Operation...............................2-28Starting and Operating Your Vehicle................2-30
New Vehicle Break-In....................................2-30
Ignition Positions..........................................2-30
Retained Accessory Power (RAP)...................2-31
Starting the Engine.......................................2-31
Engine Coolant Heater..................................2-32
Automatic Transaxle Operation.......................2-33
All-Wheel Drive............................................2-36
Parking Brake..............................................2-37
Shifting Into Park (P).....................................2-38
Shifting Out of Park (P).................................2-39
Parking Over Things That Burn.......................2-39
Engine Exhaust............................................2-40
Running the Engine While Parked...................2-40
Mirrors...........................................................2-41
Manual Rearview Mirror.................................2-41
Outside Power Mirrors...................................2-42
Outside Convex Mirror...................................2-42
Outside Heated Mirrors..................................2-42
OnStar
®System.............................................2-43
HomeLink®Wireless Control System...............2-44
HomeLink®Wireless Control System
Operation.................................................2-45
Section 2 Features and Controls
2-1
ProCarManuals.com
Page 89 of 446
Keys
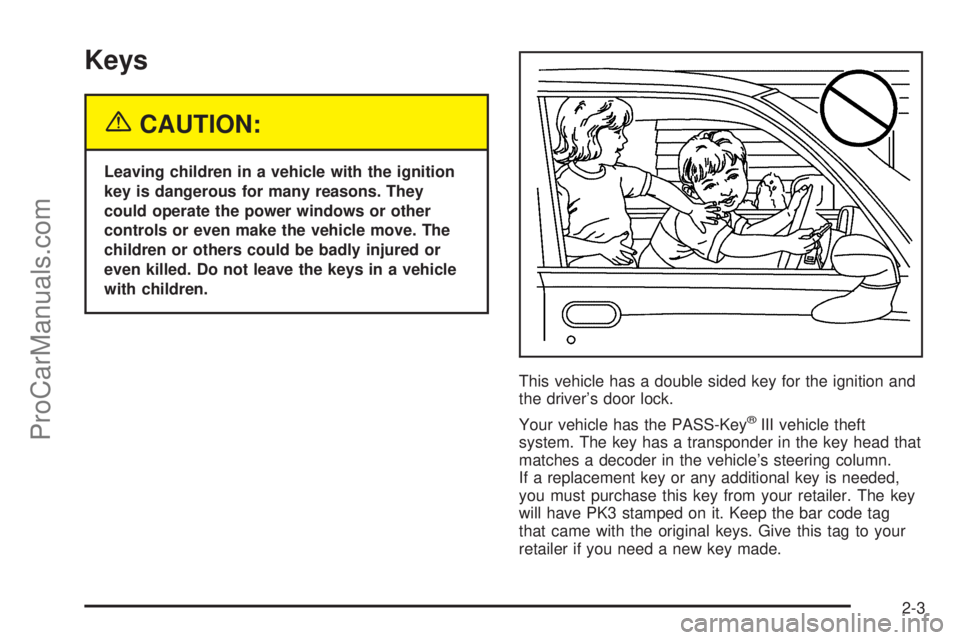
{CAUTION:
Leaving children in a vehicle with the ignition
key is dangerous for many reasons. They
could operate the power windows or other
controls or even make the vehicle move. The
children or others could be badly injured or
even killed. Do not leave the keys in a vehicle
with children.
This vehicle has a double sided key for the ignition and
the driver’s door lock.
Your vehicle has the PASS-Key
®III vehicle theft
system. The key has a transponder in the key head that
matches a decoder in the vehicle’s steering column.
If a replacement key or any additional key is needed,
you must purchase this key from your retailer. The key
will have PK3 stamped on it. Keep the bar code tag
that came with the original keys. Give this tag to your
retailer if you need a new key made.
2-3
ProCarManuals.com
Page 94 of 446

Remote Vehicle Start
This feature allows you to start the engine from outside
the vehicle. It may also turn the rear window defogger
if the outside temperature is below 45°F (7°C).
Laws in some local communities may restrict the use of
remote starters. For example, some laws may require
a person using remote start to have the vehicle in view
when doing so. Check local regulations for any
requirements on remote starting of vehicles.
/(Remote Vehicle Start):If your vehicle has the
remote vehicle start feature, the remote keyless entry
transmitter will have a button with this symbol on it.
An increased range of operation is provided with the
remote keyless entry transmitter that has the remote
vehicle start button.
Do not use the remote start feature if your vehicle is low
on fuel. Your vehicle may run out of fuel.To start the engine using the remote start feature, do the
following:
1. Aim the remote keyless entry transmitter, if
equipped with the remote vehicle start button,
at the vehicle.
2. Press and release the transmitter’s lock button,
then immediately press and hold the remote
vehicle start button until the vehicle’s turn signal
lamps �ash, or for at least two seconds, if the
vehicle’s lights are not visible. The vehicle’s doors
will be locked.
3. When the vehicle’s engine starts, the parking lamps
will turn on and remain on while the engine is
running.
After a remote start, the engine will automatically shut
off after 10 minutes unless a time extension has
been done or the vehicle’s key is inserted into the
ignition switch and turned to RUN.
The maximum number of remote starts or remote start
attempts between ignition cycles with the key is two.
If it is the vehicle’s �rst remote start, and the engine is
still running, repeat Steps 1 and 2 for a 10 minute time
extension. Ten minutes will be added to the remaining
minutes of the �rst remote start. The 10 minute time
extension is considered a second remote start.
2-8
ProCarManuals.com
Page 95 of 446
After two remote starts have been provided, the
vehicle’s ignition switch must be turned to RUN and
then back to LOCK using the key before the remote start
procedure can be used again.
If you enter the vehicle after a remote start, and the
engine is running, insert the key into the ignition switch
and turn it to the RUN position to drive the vehicle.
To manually shut off the engine after a remote start, do
any of the following:
Aim the remote keyless entry transmitter at the
vehicle and press the remote start button until
the parking lamps turn off.
Turn on the hazard warning �ashers.
Insert the vehicle’s key into the ignition switch and
turn the switch to RUN and then back to LOCK.The remote vehicle start feature will not operate if:
The remote start system is disabled. See “REMOTE
START” underDIC Vehicle Personalization (Uplevel
Only) on page 3-64.
The vehicle’s key is in the ignition.
The vehicle’s hood, liftgate or doors are not closed.
The hazard warning �ashers are on.
There is an emission control system malfunction.
The engine coolant temperature is too high.
The oil pressure is low.
Two remote vehicle starts have already been
provided. The maximum number of remote starts or
remote start attempts between ignition cycles
with the key is two.
2-9
ProCarManuals.com
Page 98 of 446

If the liftgate has been unlocked with the power door
locks, you will not need the key to open it. Squeeze the
handle located above the license plate to open the
liftgate. This is also true if you use the remote keyless
entry transmitter. SeeRemote Keyless Entry System on
page 2-4.
Delayed Locking
This feature allows the locking of the vehicle to be
delayed until all doors have been closed for
approximately �ve seconds.
To activate the delayed locking feature, do one of the
following:
Press the driver’s door power lock switch one time
while the driver’s door is open.
Press the passenger’s door power lock switch one
time while the passenger’s door is open.
Press the lock button on the remote keyless entry
transmitter one time while any door is open.
Two chimes will sound to signal that delayed locking is
active.The doors may be locked immediately by repeating any
of the above actions more than one time.
If a door remains open, without any other door being
opened or closed, the vehicle will lock after
approximately 45 seconds.
If the key is in the ignition, this feature will not lock
the doors.
To turn the delayed locking feature off or on, seeDIC
Vehicle Personalization (Uplevel Only) on page 3-64.
Sliding Door Delayed Locking
If either sliding door is open when you use the power
door locks to lock the vehicle, the sliding door that
is open will not lock. Normally the delayed locking
feature will be used to lock the sliding door after it has
been closed.
The sliding door delayed locking feature will lock your
sliding door(s) in situations where the delayed
locking feature does not apply or was overridden or
programmed to be off. See “Delayed Locking” earlier in
this section. Shortly after the last sliding door is
closed, all the doors will lock.
2-12
ProCarManuals.com
Page 99 of 446

Automatic Door Locks
All of the doors will lock automatically when you move
the shift lever out of PARK (P). This feature cannot
be disabled.
If someone needs to get out of the vehicle while it is not
in PARK (P), shift into PARK (P), or, have that person
use the manual lever or the power door lock switch.
When the door is closed again, it will lock when
the vehicle exceeds 5 mph (8 km/h).
With automatic door locks, you can lock or unlock the
doors at any time, either manually or by using the power
door lock switches.
Programmable Automatic Door
Unlock
Your vehicle was programmed so that all doors will
unlock automatically when the shift lever is moved into
PARK (P).
To change the way the automatic door unlocking
operates, seeDIC Vehicle Personalization (Uplevel
Only) on page 3-64.
Lockout Protection
The lockout protection feature makes it more difficult to
lock the key in the vehicle. If the driver’s door is
open while the key is in the ignition, the door cannot be
locked with the power door lock switch.
This feature cannot guarantee that you will never be
locked out of the vehicle. If the key is not left in
the ignition, or, if the manual door lock is used, the key
could still be locked inside the vehicle. Always
remember to take the key with you.
Dual Sliding Doors
To open either sliding door from outside the vehicle, pull
the handle out and then pull the door toward the rear.
If you slide the door all the way back, the door will rest in
a detent position.
To move the door forward, you must �rst pull the door
past the open detent position.
The driver’s side sliding door is designed to open only a
little if the fuel door is open. If this ever happens, do
not try to force the sliding door. Just close the driver’s
side sliding door. Then when the fuel �ller door is
closed, the driver’s side sliding door can be opened
normally.
2-13
ProCarManuals.com