low beam SATURN RELAY 2005 Owners Manual
[x] Cancel search | Manufacturer: SATURN, Model Year: 2005, Model line: RELAY, Model: SATURN RELAY 2005Pages: 446, PDF Size: 3.03 MB
Page 143 of 446
Instrument Panel Overview...............................3-4
Hazard Warning Flashers................................3-6
Other Warning Devices...................................3-6
Horn.............................................................3-6
Tilt Wheel.....................................................3-6
Turn Signal/Multifunction Lever.........................3-7
Turn and Lane-Change Signals........................3-8
Headlamp High/Low-Beam Changer..................3-8
Flash-to-Pass.................................................3-9
Windshield Wipers..........................................3-9
Windshield Washer.........................................3-9
Cruise Control..............................................3-10
Exterior Lamps.............................................3-14
Wiper Activated Headlamps............................3-14
Headlamps on Reminder................................3-15
Daytime Running Lamps (DRL)/Automatic
Headlamp System.....................................3-15
Instrument Panel Brightness...........................3-16
Interior Lamps Control...................................3-16
Dome Lamp.................................................3-17
Entry Lighting...............................................3-17
Delayed Lighting...........................................3-17
Exit Lighting.................................................3-18
Front Reading Lamps....................................3-18
Rear Reading Lamps....................................3-18
Cargo Lamp.................................................3-19Battery Run-Down Protection..........................3-19
Overhead Console Switchbank.......................3-19
Ultrasonic Rear Parking Assist (URPA)............3-20
Accessory Power Outlets...............................3-22
Power Outlet 115 Volt Alternating Current........3-23
Climate Controls............................................3-24
Climate Control System.................................3-24
Outlet Adjustment.........................................3-27
Rear Climate Control System.........................3-27
Warning Lights, Gages, and Indicators............3-29
Instrument Panel Cluster................................3-30
Speedometer and Odometer...........................3-31
Trip Odometer..............................................3-31
Tachometer.................................................3-31
Safety Belt Reminder Light.............................3-31
Passenger Safety Belt Reminder Light.............3-32
Airbag Readiness Light..................................3-32
Passenger Airbag Status Indicator...................3-33
Charging System Light..................................3-35
Brake System Warning Light..........................3-35
Anti-Lock Brake System Warning Light.............3-36
Traction Control System (TCS) Warning Light . . .3-37
Engine Coolant Temperature Gage..................3-37
Malfunction Indicator Lamp.............................3-38
Section 3 Instrument Panel
3-1
ProCarManuals.com
Page 144 of 446
Oil Pressure Light.........................................3-40
Security Light...............................................3-41
Cruise Control Light......................................3-41
Highbeam On Light.......................................3-41
Fuel Gage...................................................3-42
Low Fuel Warning Light.................................3-42
Driver Information Center (DIC).......................3-43
DIC Operation and Displays...........................3-43
DIC Warnings and Messages.........................3-49
DIC Vehicle Personalization (Uplevel Only).......3-64Audio System(s).............................................3-72
Setting the Time...........................................3-72
Radio with CD..............................................3-73
Rear Seat Entertainment System....................3-91
Rear Seat Audio (RSA)................................3-106
Theft-Deterrent Feature................................3-109
Audio Steering Wheel Controls......................3-109
Radio Reception.........................................3-110
Care of Your CDs and DVDs........................3-111
Care of the CD and DVD Player...................3-111
Fixed Mast Antenna....................................3-111
XM™ Satellite Radio Antenna System............3-111
Chime Level Adjustment...............................3-111
Section 3 Instrument Panel
3-2
ProCarManuals.com
Page 149 of 446
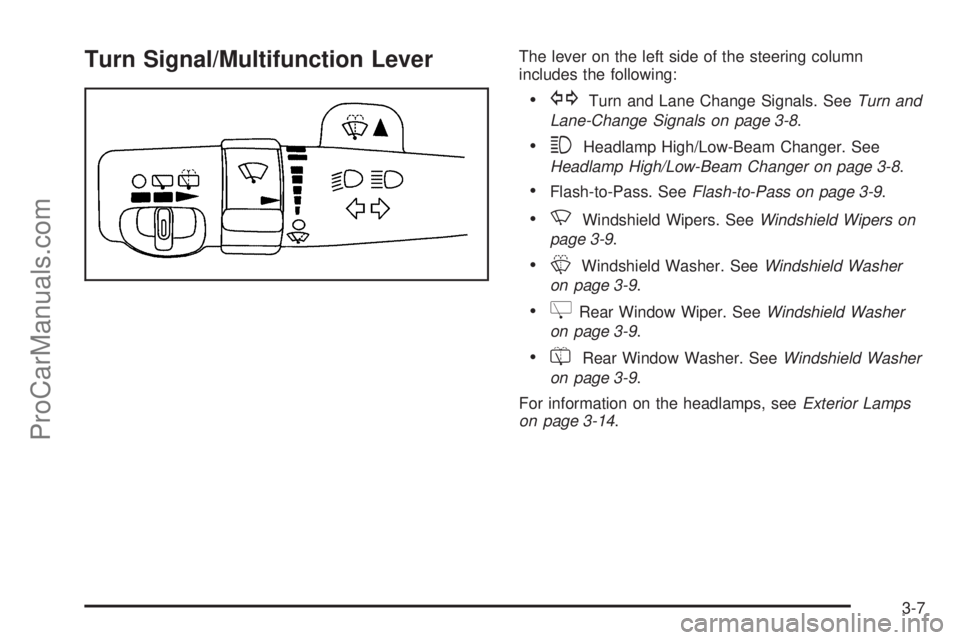
Turn Signal/Multifunction LeverThe lever on the left side of the steering column
includes the following:
GTurn and Lane Change Signals. SeeTurn and
Lane-Change Signals on page 3-8.
3Headlamp High/Low-Beam Changer. See
Headlamp High/Low-Beam Changer on page 3-8.
Flash-to-Pass. SeeFlash-to-Pass on page 3-9.
NWindshield Wipers. SeeWindshield Wipers on
page 3-9.
LWindshield Washer. SeeWindshield Washer
on page 3-9.
ZRear Window Wiper. SeeWindshield Washer
on page 3-9.
=Rear Window Washer. SeeWindshield Washer
on page 3-9.
For information on the headlamps, seeExterior Lamps
on page 3-14.
3-7
ProCarManuals.com
Page 150 of 446
Turn and Lane-Change Signals
The turn signal has two upward (for right) and two
downward (for left) positions. These positions allow you
to signal a turn or a lane change.
To signal a turn, move the lever all the way up
or down. When the turn is �nished, the lever will return
automatically.
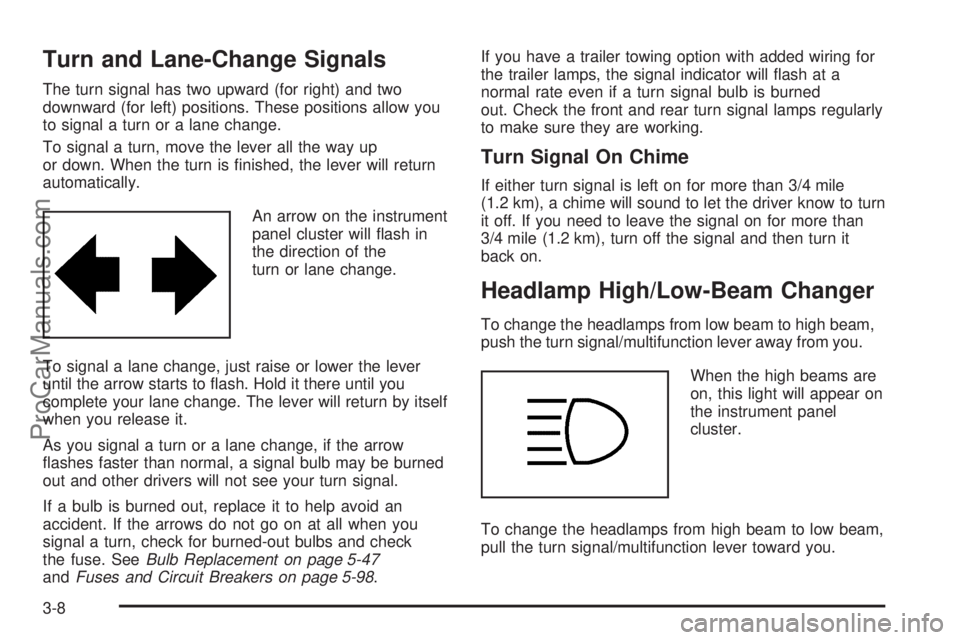
An arrow on the instrument
panel cluster will �ash in
the direction of the
turn or lane change.
To signal a lane change, just raise or lower the lever
until the arrow starts to �ash. Hold it there until you
complete your lane change. The lever will return by itself
when you release it.
As you signal a turn or a lane change, if the arrow
�ashes faster than normal, a signal bulb may be burned
out and other drivers will not see your turn signal.
If a bulb is burned out, replace it to help avoid an
accident. If the arrows do not go on at all when you
signal a turn, check for burned-out bulbs and check
the fuse. SeeBulb Replacement on page 5-47
andFuses and Circuit Breakers on page 5-98.If you have a trailer towing option with added wiring for
the trailer lamps, the signal indicator will �ash at a
normal rate even if a turn signal bulb is burned
out. Check the front and rear turn signal lamps regularly
to make sure they are working.
Turn Signal On Chime
If either turn signal is left on for more than 3/4 mile
(1.2 km), a chime will sound to let the driver know to turn
it off. If you need to leave the signal on for more than
3/4 mile (1.2 km), turn off the signal and then turn it
back on.
Headlamp High/Low-Beam Changer
To change the headlamps from low beam to high beam,
push the turn signal/multifunction lever away from you.
When the high beams are
on, this light will appear on
the instrument panel
cluster.
To change the headlamps from high beam to low beam,
pull the turn signal/multifunction lever toward you.
3-8
ProCarManuals.com
Page 151 of 446
Flash-to-Pass
When the headlamps are off, pull the lever toward you
to momentarily turn on the high beams. This will
signal that you are going to pass. When you release the
lever, they will turn off.
Windshield Wipers
You control the windshield wipers by turning the band
with the wiper symbol on it.
8(Mist):For a single wiping cycle, turn the band to
mist. Hold it there until the wipers start. Then let go. The
wipers will stop after one wipe. If you want more
wipes, hold the band on mist longer.
9(Off):To stop the wipers, move the band to off.
N(Delay):You can set the wiper speed for a long or
short delay between wipes. This can be very useful
in light rain or snow. Turn the band to choose the delay
time. The closer to the top of the lever, the shorter
the delay.
6(Low Speed):For steady wiping at low speed,
turn the band away from you to the �rst solid band past
the delay settings. For high-speed wiping, turn the
band further, to the second solid band past the delay
settings. To stop the wipers, move the band to off.
1(High Speed):For high-speed wiping, turn the
band further, to the second solid band past the
delay settings.
Be sure to clear ice and snow from the wiper blades
before using them. If they are frozen to the windshield,
carefully loosen or thaw them. If your blades do become
worn or damaged, get new blades or blade inserts.
Windshield Washer
LQ(Windshield Washer):Press and hold the
windshield washer paddle with this symbol on it to wash
your windshield. The washers and wipers will operate.
When you release the paddle, the washers will stop, and
the wipers will continue to operate for two cycles, unless
your wipers had already been on. In that case, the wipers
will resume the wiper speed you had selected earlier.
{CAUTION:
In freezing weather, do not use your washer
until the windshield is warmed. Otherwise the
washer �uid can form ice on the windshield,
blocking your vision.
3-9
ProCarManuals.com
Page 183 of 446
{CAUTION:
Do not keep driving if the oil pressure is low. If
you do, your engine can become so hot that it
catches �re. You or others could be burned.
Check your oil as soon as possible and have
your vehicle serviced.
Notice:Lack of proper engine oil maintenance may
damage the engine. The repairs would not be
covered by your warranty. Always follow the
maintenance schedule in this manual for changing
engine oil.
Security Light
For information regarding
this light, see
Theft-Deterrent Systems
on page 2-25.
Cruise Control Light
This light comes on
whenever you set your
cruise control.
The light will go out when the cruise control is turned
off. SeeCruise Control on page 3-10for more
information.
Highbeam On Light
This light will come on
when the high-beam
headlamps or the
Flash-to-Pass feature
is in use.
SeeHeadlamp High/Low-Beam Changer on page 3-8.
3-41
ProCarManuals.com
Page 272 of 446
You can be temporarily blinded by approaching
headlamps. It can take a second or two, or even several
seconds, for your eyes to re-adjust to the dark. When
you are faced with severe glare, as from a driver
who does not lower the high beams, or a vehicle with
misaimed headlamps, slow down a little. Avoid
staring directly into the approaching headlamps.
Keep your windshield and all the glass on your vehicle
clean — inside and out. Glare at night is made much
worse by dirt on the glass. Even the inside of the glass
can build up a �lm caused by dust. Dirty glass makes
lights dazzle and �ash more than clean glass would,
making the pupils of your eyes contract repeatedly.
Remember that your headlamps light up far less of a
roadway when you are in a turn or curve. Keep
your eyes moving; that way, it is easier to pick out dimly
lighted objects. Just as your headlamps should be
checked regularly for proper aim, so should your eyes
be examined regularly. Some drivers suffer from
night blindness — the inability to see in dim light — and
are not even aware of it.Driving in Rain and on Wet Roads
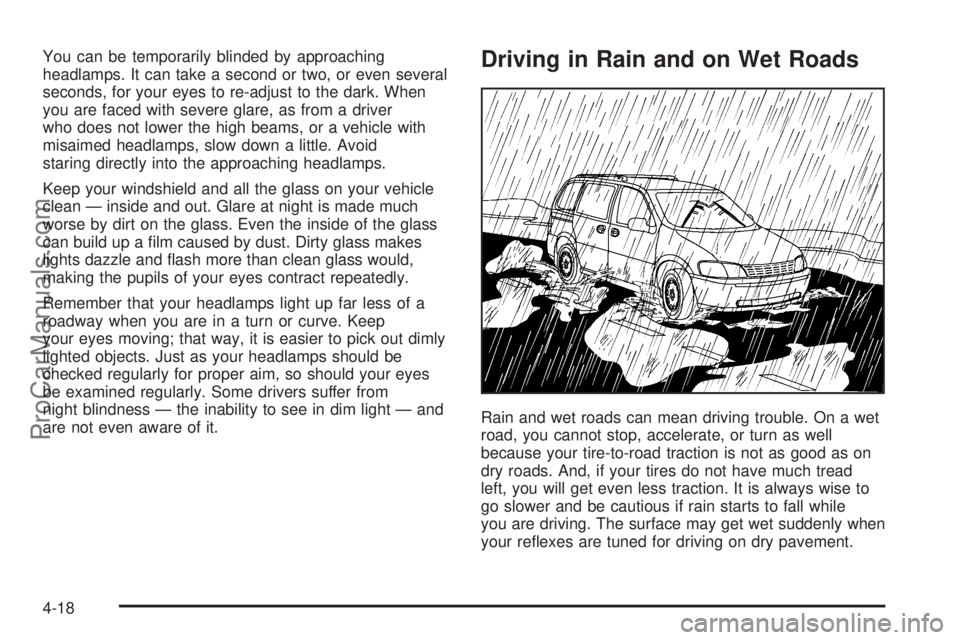
Rain and wet roads can mean driving trouble. On a wet
road, you cannot stop, accelerate, or turn as well
because your tire-to-road traction is not as good as on
dry roads. And, if your tires do not have much tread
left, you will get even less traction. It is always wise to
go slower and be cautious if rain starts to fall while
you are driving. The surface may get wet suddenly when
your re�exes are tuned for driving on dry pavement.
4-18
ProCarManuals.com
Page 274 of 446
Driving Through Deep Standing Water
Notice:If you drive too quickly through deep
puddles or standing water, water can come in
through your engine’s air intake and badly damage
your engine. Never drive through water that is
slightly lower than the underbody of your vehicle. If
you cannot avoid deep puddles or standing water,
drive through them very slowly.
Driving Through Flowing Water
{CAUTION:
Flowing or rushing water creates strong forces.
If you try to drive through �owing water, as you
might at a low water crossing, your vehicle can
be carried away. As little as six inches of
�owing water can carry away a smaller vehicle.
If this happens, you and other vehicle
occupants could drown. Do not ignore police
warning signs, and otherwise be very cautious
about trying to drive through �owing water.
Some Other Rainy Weather Tips
Turn on your low-beam headlamps — not just your
parking lamps — to help make you more visible
to others.
Besides slowing down, allow some extra following
distance. And be especially careful when you
pass another vehicle. Allow yourself more clear
room ahead, and be prepared to have your
view restricted by road spray.
Have good tires with proper tread depth. SeeTires
on page 5-52.
4-20
ProCarManuals.com
Page 347 of 446
Bulb Replacement
For the type of bulb to use, seeReplacement Bulbs on
page 5-50.
For any bulb changing procedure not listed in this
section, contact your retailer.
Halogen Bulbs
{CAUTION:
Halogen bulbs have pressurized gas inside
and can burst if you drop or scratch the bulb.
You or others could be injured. Be sure to read
and follow the instructions on the bulb
package.
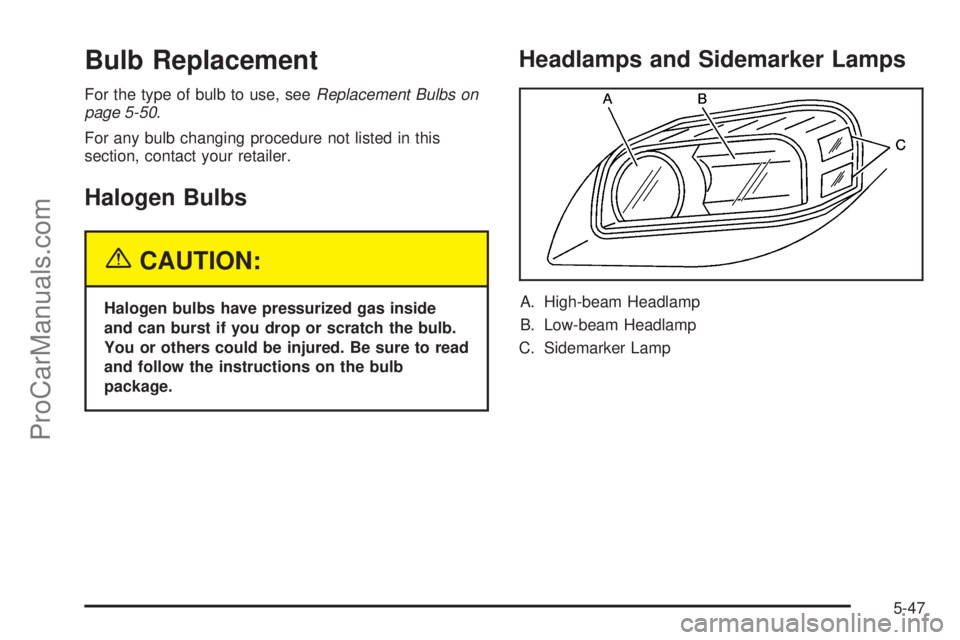
Headlamps and Sidemarker Lamps
A. High-beam Headlamp
B. Low-beam Headlamp
C. Sidemarker Lamp
5-47
ProCarManuals.com
Page 350 of 446
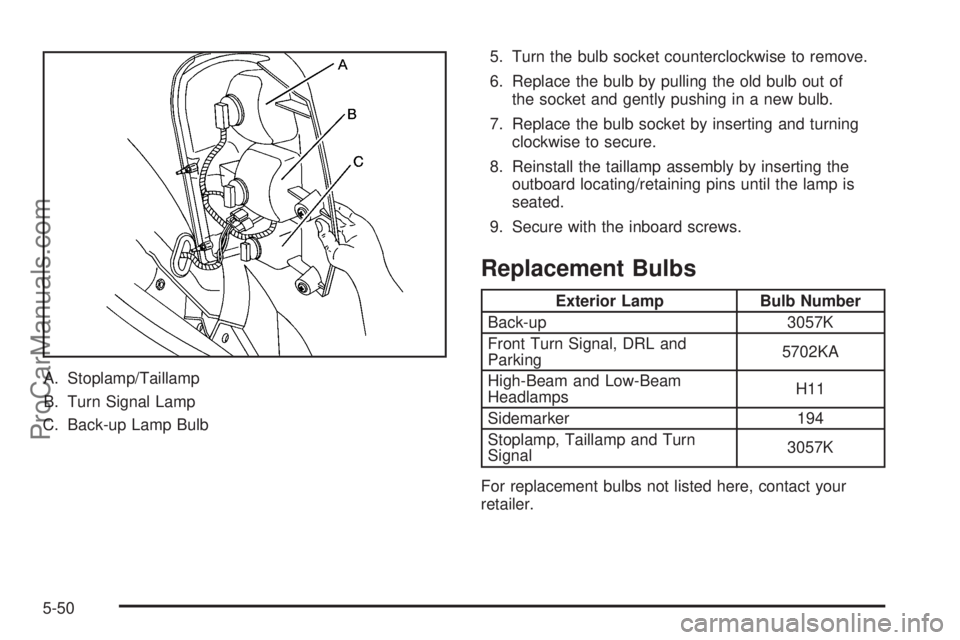
A. Stoplamp/Taillamp
B. Turn Signal Lamp
C. Back-up Lamp Bulb5. Turn the bulb socket counterclockwise to remove.
6. Replace the bulb by pulling the old bulb out of
the socket and gently pushing in a new bulb.
7. Replace the bulb socket by inserting and turning
clockwise to secure.
8. Reinstall the taillamp assembly by inserting the
outboard locating/retaining pins until the lamp is
seated.
9. Secure with the inboard screws.
Replacement Bulbs
Exterior Lamp Bulb Number
Back-up 3057K
Front Turn Signal, DRL and
Parking5702KA
High-Beam and Low-Beam
HeadlampsH11
Sidemarker 194
Stoplamp, Taillamp and Turn
Signal3057K
For replacement bulbs not listed here, contact your
retailer.
5-50
ProCarManuals.com