turn signal SATURN RELAY 2007 Owner's Manual
[x] Cancel search | Manufacturer: SATURN, Model Year: 2007, Model line: RELAY, Model: SATURN RELAY 2007Pages: 570, PDF Size: 3.41 MB
Page 271 of 570
Here are some ways in which you can help avoid
distraction while driving.
While your vehicle is parked:
Familiarize yourself with all of its controls.
Familiarize yourself with its operation.
Set up your audio system by presetting your
favorite radio stations, setting the tone, and
adjusting the speakers. Then, when driving
conditions permit, you can tune to your favorite
radio stations using the presets and steering
wheel controls if the vehicle has them.
Notice:Before adding any sound equipment
to your vehicle, such as an audio system,
CD player, CB radio, mobile telephone,
or two-way radio, make sure that it can be
added by checking with your retailer. Also,
check federal rules covering mobile radio and
telephone units. If sound equipment can be
added, it is very important to do it properly.
Added sound equipment may interfere with the
operation of your vehicle’s engine, radio, or
other systems, and even damage them.
Your vehicle’s systems may interfere with the
operation of sound equipment that has
been added.Notice:The chime signals related to safety
belts, parking brake, and other functions
of your vehicle operate through the radio/
entertainment system. If that equipment
is replaced or additional equipment is added to
your vehicle, the chimes may not work. Make
sure that replacement or additional equipment
is compatible with your vehicle before
installing it. SeeAccessories and Modifications
on page 412.
Your vehicle has a feature called Retained
Accessory Power (RAP). With RAP, the audio
system can be played even after the ignition
is turned off. SeeRetained Accessory Power
(RAP) on page 139for more information.
271
ProCarManuals.com
Page 274 of 570
For XM™ (if equipped), press the information
button while in XM™ mode to retrieve four different
categories of information related to the current
song or channel: Artist, Song Title, Category
or PTY, Channel Number/Channel Name.
To change the default on the display, press the
information button until you see the display
you want, then hold the button for two seconds.
The radio produces one beep and the selected
display becomes the default.
AUTO
n(Automatic Volume):With automatic
volume, the audio system adjusts automatically to
make up for road and wind noise as you drive, by
increasing the volume as vehicle speed increases.
Set the volume at the desired level. Press this
button to select AUTO VOLUME MIN, AUTO
VOLUME MED, or AUTO VOLUME MAX. Each
higher setting provides more volume compensation
at faster vehicle speeds. To turn automatic volume
off, press this button until AUTO VOLUME OFF
appears on the display.
MUTE:Press this button to silence the system.
Press this button again to turn the sound on.
This button is not available on the Radio
with Six-Disc CD.
Finding a Station
BAND:Press this button to switch between FM1,
FM2, AM, or XM1 or XM2 (if equipped). The
display shows the selection.
O/e(Tune):Turn this knob to select radio
stations.
tSEEKu:Press the right or the left arrow to go
to the next or to the previous station and stay there.
The radio only seeks stations with a strong signal
that are in the selected band.
tSCANu:Press and hold either arrow for
two seconds until FREQUENCY SCAN appears on
the display. The radio goes to a station, plays
for a few seconds, then goes to the next station.
Press either arrow again to stop scanning.
To scan preset stations, press and hold either arrow
for four seconds until PRESET SCAN appears on
the display. The radio goes to the next preset
station, plays for a few seconds, then goes to the
next preset station. Press either scan arrow again
or one of the pushbuttons to stop scanning presets.
The radio only scans stations with a strong signal
that are in the selected band.
274
ProCarManuals.com
Page 293 of 570
XM Radio Messages
Radio Display Message Condition Action Required
XL (Explicit Language
Channels)XL on the radio display,
after the channel name,
indicates content with
explicit language.These channels, or any others, can be blocked at a
customer’s request, by calling 1-800-852-XMXM (9696).
Updating Updating encryption code The encryption code in the receiver is being updated, and
no action is required. This process should take no longer
than 30 seconds.
No Signal Loss of signal The system is functioning correctly, but the vehicle is in a
location that is blocking the XM™ signal. When you move
into an open area, the signal should return.
Loading XM Acquiring channel audio
(after 4 second delay)The audio system is acquiring and processing audio and
text data. No action is needed. This message should
disappear shortly.
CH Off Air Channel not in service This channel is not currently in service. Tune to another
channel.
CH Unavail Channel no longer
availableThis previously assigned channel is no longer assigned.
Tune to another station. If this station was one of the
presets, choose another station for that preset button.
No Info Artist Name/Feature
not availableNo artist information is available at this time on this channel.
The system is working properly.
No Info Song/Program Title
not availableNo song title information is available at this time on this
channel. The system is working properly.
No Info Category Name
not availableNo category information is available at this time on this
channel. The system is working properly.
No Info No Text/Informational
message availableNo text or informational messages are available at this time
on this channel. The system is working properly.
293
ProCarManuals.com
Page 302 of 570
Remote Control
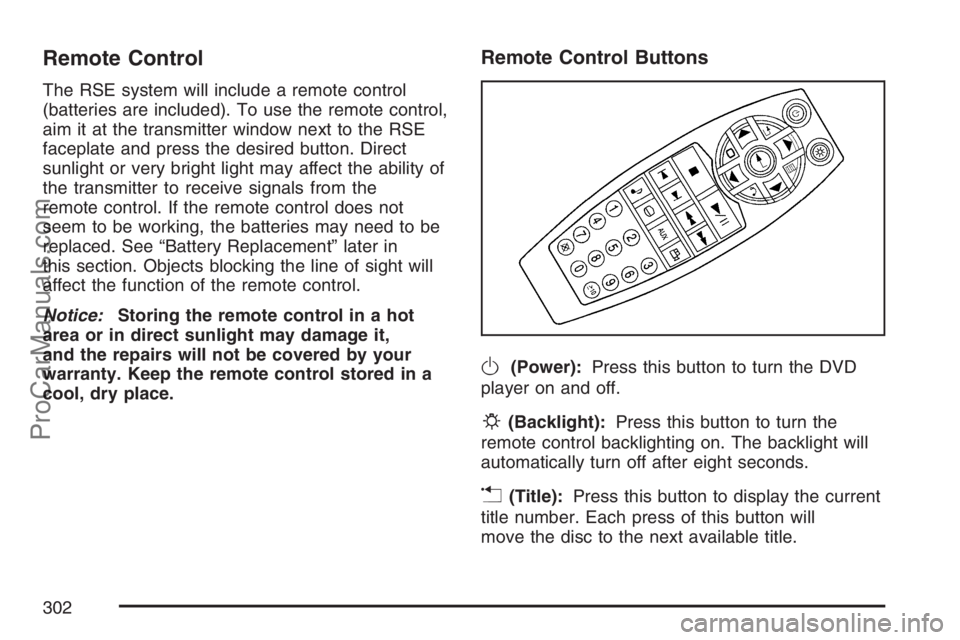
The RSE system will include a remote control
(batteries are included). To use the remote control,
aim it at the transmitter window next to the RSE
faceplate and press the desired button. Direct
sunlight or very bright light may affect the ability of
the transmitter to receive signals from the
remote control. If the remote control does not
seem to be working, the batteries may need to be
replaced. See “Battery Replacement” later in
this section. Objects blocking the line of sight will
affect the function of the remote control.
Notice:Storing the remote control in a hot
area or in direct sunlight may damage it,
and the repairs will not be covered by your
warranty. Keep the remote control stored in a
cool, dry place.
Remote Control Buttons
O(Power):Press this button to turn the DVD
player on and off.
P(Backlight):Press this button to turn the
remote control backlighting on. The backlight will
automatically turn off after eight seconds.
v(Title):Press this button to display the current
title number. Each press of this button will
move the disc to the next available title.
302
ProCarManuals.com
Page 310 of 570
Before You Drive
The RSE is designed for rear seat passengers
only. The driver cannot safely view the video
screen while driving and should not try to do so.
The RSE system can play DVD, CD, and MP3
discs. You can also connect an auxiliary device to
the RSE system to play games, watch videos,
look at pictures, etc.
Normal operation may be limited under extremely
low or high temperatures, in order to protect
the system from damage. Operate the RSE system
under normal or comfortable cabin temperature
ranges.
Headphones
Notice:Do not store the headphones in heat
or direct sunlight. This could damage the
headphones and repairs will not be covered by
your warranty. Keep the headphones stored
in a cool, dry place.
Wireless Headphones
The RSE system may include two sets of wireless
headphones (batteries may be included with
the headphone sets).
The wireless headphones have an ON/OFF
switch, a channel select switch, and a volume
control. To use the headphones, turn the ON/OFF
switch to ON. An indicator light on the headphones
will come on. If the light does not come on, the
batteries may need to be replaced. See “Battery
Replacement” later in this section for more
information. Switch the headphones to OFF when
not in use.
The headphones will shut off automatically to save
the battery power if the RSE system is off or if
the headphones are out of range of the
transmitters for more than three minutes. The
transmitters are located next to the DVD faceplate.
If you move too far forward or step out of the
vehicle, the headphones will lose the audio signal.
DVD and auxiliary audio will always be found
on channel (CHA or CH1) of the wireless
headphones. RSA audio is dedicated to CHB or
CH2 of the wireless headphones.
310
ProCarManuals.com
Page 346 of 570
The wireless game controller transmits radio
frequency signals to the overhead monitor.
Wireless means, there are no cords to hinder your
movement while playing games.
The key pad as shown above has six buttons
located on the upper right side of the game
controller.
Wireless Game Controller Synchronization
In the event that your GM Mobile Digital Media
game controller needs to be re-synchronized with
your vehicle, open the battery compartment
and remove a battery. As soon as the battery is
replaced, the game controller will synchronize with
the vehicle during the next ignition cycle.
Wireless Game Controller Play Mode
The functionality of your GM Mobile Digital Media
Game Controller is dependant upon the game
being played. In cases where there are two player
options for a game, you may desire to have a
second controller in your vehicle which may
be purchased through your retailer.
Wireless Game Controller Power
Saving Mode
Your GM Mobile Digital Media Game Controller
has a built-in power saving mode to conserve
battery life. When not in use, the game controller
will automatically go into “Sleep” mode. The
game controller can be awakened at any time by
pressing the “Start” button.
Important Safety and Handling
Instructions
This equipment has been tested and found to
comply with the limits for a Class B digital device,
pursuant to Part 15 of the FCC Rules. These limits
are designed to provide reasonable protection
against harmful interference in a residential
installation. This equipment may cause harmful
interference to radio communications, if it is not
installed and used in accordance with the
instructions provided. However, there is no
guarantee that interference will not occur in a
particular installation. If this equipment does cause
harmful interference to radio or television reception,
which can be determined by turning the equipment
off and on, consult the retailer for help.
346
ProCarManuals.com
Page 353 of 570
Audio Steering Wheel Controls
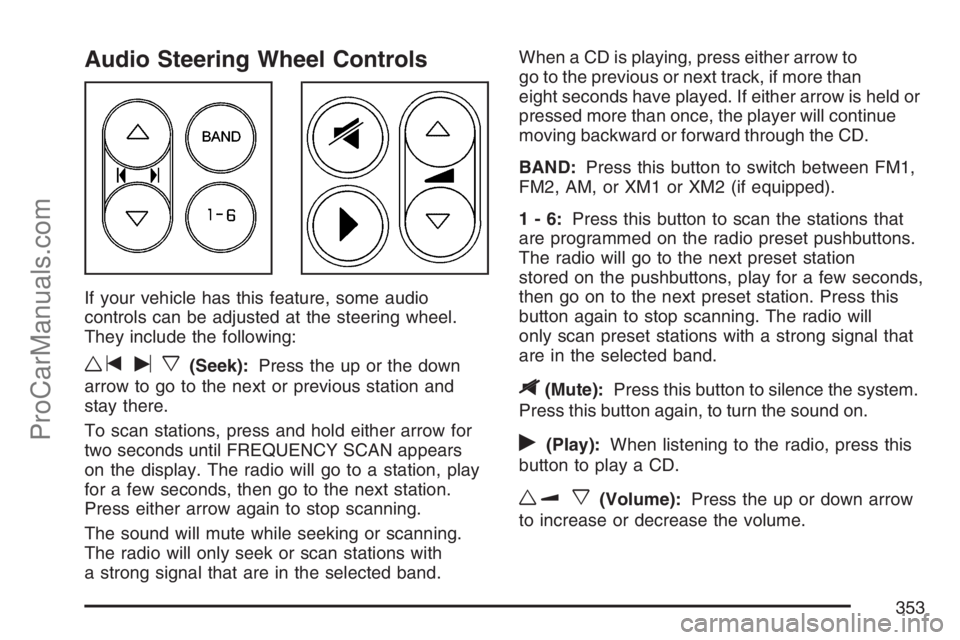
If your vehicle has this feature, some audio
controls can be adjusted at the steering wheel.
They include the following:
wtux(Seek):Press the up or the down
arrow to go to the next or previous station and
stay there.
To scan stations, press and hold either arrow for
two seconds until FREQUENCY SCAN appears
on the display. The radio will go to a station, play
for a few seconds, then go to the next station.
Press either arrow again to stop scanning.
The sound will mute while seeking or scanning.
The radio will only seek or scan stations with
a strong signal that are in the selected band.When a CD is playing, press either arrow to
go to the previous or next track, if more than
eight seconds have played. If either arrow is held or
pressed more than once, the player will continue
moving backward or forward through the CD.
BAND:Press this button to switch between FM1,
FM2, AM, or XM1 or XM2 (if equipped).
1-6:Press this button to scan the stations that
are programmed on the radio preset pushbuttons.
The radio will go to the next preset station
stored on the pushbuttons, play for a few seconds,
then go on to the next preset station. Press this
button again to stop scanning. The radio will
only scan preset stations with a strong signal that
are in the selected band.
$(Mute):Press this button to silence the system.
Press this button again, to turn the sound on.
r(Play):When listening to the radio, press this
button to play a CD.
wux(Volume):Press the up or down arrow
to increase or decrease the volume.
353
ProCarManuals.com
Page 373 of 570
Watch for traffic signs, pavement markings, and
lines. If you can see a sign up ahead that might
indicate a turn or an intersection, delay your
pass. A broken center line usually indicates it is
all right to pass, providing the road ahead is
clear. Never cross a solid line on your side of
the lane or a double solid line, even if the road
seems empty of approaching traffic.
Do not get too close to the vehicle you want to
pass while you are awaiting an opportunity. For
one thing, following too closely reduces your
area of vision, especially if you are following a
larger vehicle. Also, you will not have adequate
space if the vehicle ahead suddenly slows or
stops. Keep back a reasonable distance.
When it looks like a chance to pass is coming
up, start to accelerate but stay in the right lane
and do not get too close. Time your move so
you will be increasing speed as the time comes
to move into the other lane. If the way is clear to
pass, you will have a running start that more
than makes up for the distance you would lose
by dropping back. And if something happens to
cause you to cancel your pass, you need only
slow down and drop back again and wait for
another opportunity.
If other vehicles are lined up to pass a slow
vehicle, wait your turn. But take care that
someone is not trying to pass you as you pull
out to pass the slow vehicle. Remember to
glance over your shoulder and check the
blind spot.
Check your vehicle’s mirrors, glance over your
shoulder, and start your left lane change signal
before moving out of the right lane to pass.
When you are far enough ahead of the passed
vehicle to see its front in your vehicle’s inside
mirror, activate the right lane change signal and
move back into the right lane. Remember that
your vehicle’s passenger side outside mirror is
convex. The vehicle you just passed may seem
to be farther away from you than it really is.
Try not to pass more than one vehicle at a time
on two-lane roads. Reconsider before passing
the next vehicle.
Do not overtake a slowly moving vehicle too
rapidly. Even though the brake lamps are not
�ashing, it may be slowing down or starting
to turn.
If you are being passed, make it easy for the
following driver to get ahead of you. Perhaps
you can ease a little to the right.
373
ProCarManuals.com
Page 380 of 570
City Driving
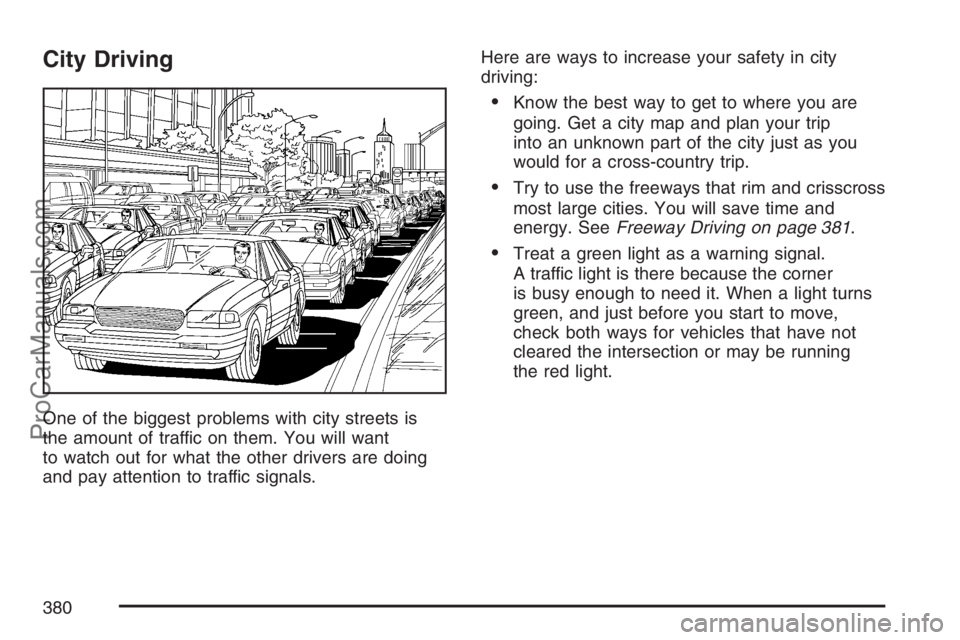
One of the biggest problems with city streets is
the amount of traffic on them. You will want
to watch out for what the other drivers are doing
and pay attention to traffic signals.Here are ways to increase your safety in city
driving:
Know the best way to get to where you are
going. Get a city map and plan your trip
into an unknown part of the city just as you
would for a cross-country trip.
Try to use the freeways that rim and crisscross
most large cities. You will save time and
energy. SeeFreeway Driving on page 381.
Treat a green light as a warning signal.
A traffic light is there because the corner
is busy enough to need it. When a light turns
green, and just before you start to move,
check both ways for vehicles that have not
cleared the intersection or may be running
the red light.
380
ProCarManuals.com
Page 381 of 570
Freeway Driving
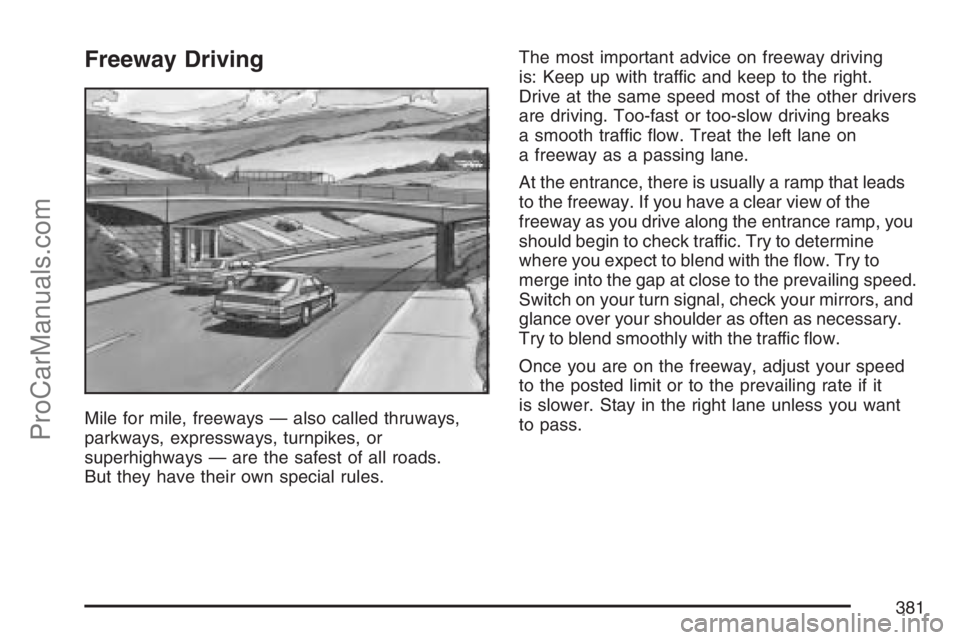
Mile for mile, freeways — also called thruways,
parkways, expressways, turnpikes, or
superhighways — are the safest of all roads.
But they have their own special rules.The most important advice on freeway driving
is: Keep up with traffic and keep to the right.
Drive at the same speed most of the other drivers
are driving. Too-fast or too-slow driving breaks
a smooth traffic �ow. Treat the left lane on
a freeway as a passing lane.
At the entrance, there is usually a ramp that leads
to the freeway. If you have a clear view of the
freeway as you drive along the entrance ramp, you
should begin to check traffic. Try to determine
where you expect to blend with the �ow. Try to
merge into the gap at close to the prevailing speed.
Switch on your turn signal, check your mirrors, and
glance over your shoulder as often as necessary.
Try to blend smoothly with the traffic �ow.
Once you are on the freeway, adjust your speed
to the posted limit or to the prevailing rate if it
is slower. Stay in the right lane unless you want
to pass.
381
ProCarManuals.com