lock SATURN VUE 2007 Owners Manual
[x] Cancel search | Manufacturer: SATURN, Model Year: 2007, Model line: VUE, Model: SATURN VUE 2007Pages: 470, PDF Size: 3.1 MB
Page 353 of 470

Notice:If the jumper cables are connected or
removed in the wrong order, electrical shorting
may occur and damage the vehicle. The repairs
would not be covered by your warranty. Always
connect and remove the jumper cables in the
correct order, making sure that the cables do
not touch each other or other metal.
A. Heavy, Unpainted Metal Engine Part or
Remote Negative (−) Terminal
B. Good Battery or Remote Positive (+) and
Remote Negative (−) Terminals
C. Dead Battery or Remote Positive (+) TerminalTo disconnect the jumper cables from both
vehicles, do the following:
1. Disconnect the black negative (−) cable from
the vehicle that had the dead battery.
2. Disconnect the black negative (−) cable from
the vehicle with the good battery.
3. Disconnect the red positive (+) cable from the
vehicle with the good battery.
4. Disconnect the red positive (+) cable from the
other vehicle.
5. Return the underhood fuse block cover to its
original position, if applicable.
All-Wheel Drive
If you have an all-wheel-drive vehicle, be sure to
perform the lubricant checks described in this
section. There are two additional systems
that need lubrication.
Jumper Cable Removal
353
ProCarManuals.com
Page 357 of 470
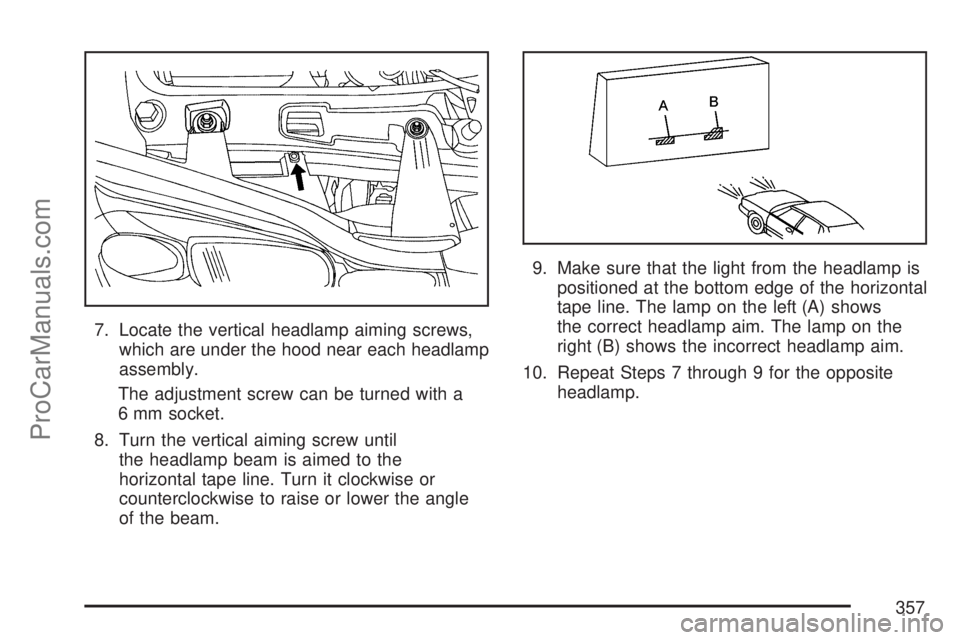
7. Locate the vertical headlamp aiming screws,
which are under the hood near each headlamp
assembly.
The adjustment screw can be turned with a
6 mm socket.
8. Turn the vertical aiming screw until
the headlamp beam is aimed to the
horizontal tape line. Turn it clockwise or
counterclockwise to raise or lower the angle
of the beam.9. Make sure that the light from the headlamp is
positioned at the bottom edge of the horizontal
tape line. The lamp on the left (A) shows
the correct headlamp aim. The lamp on the
right (B) shows the incorrect headlamp aim.
10. Repeat Steps 7 through 9 for the opposite
headlamp.
357
ProCarManuals.com
Page 360 of 470
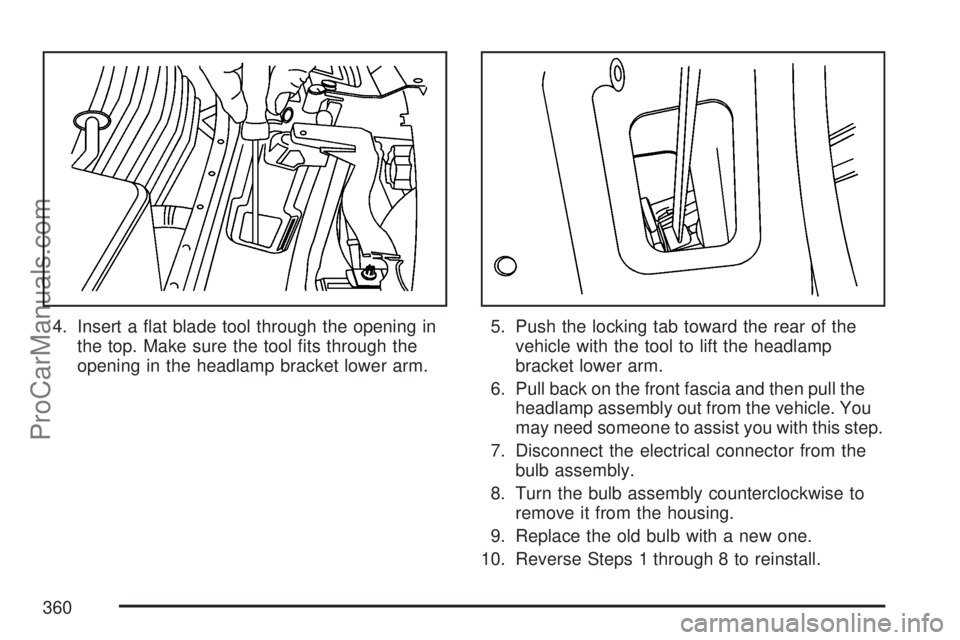
4. Insert a �at blade tool through the opening in
the top. Make sure the tool �ts through the
opening in the headlamp bracket lower arm.5. Push the locking tab toward the rear of the
vehicle with the tool to lift the headlamp
bracket lower arm.
6. Pull back on the front fascia and then pull the
headlamp assembly out from the vehicle. You
may need someone to assist you with this step.
7. Disconnect the electrical connector from the
bulb assembly.
8. Turn the bulb assembly counterclockwise to
remove it from the housing.
9. Replace the old bulb with a new one.
10. Reverse Steps 1 through 8 to reinstall.
360
ProCarManuals.com
Page 361 of 470
Front Turn Signal and
Parking Lamps
To replace a front turn signal or parking lamp
bulb, do the following:
1. Follow Steps 1 through 6 underHeadlamps
on page 358to access the front turn signal
or parking lamp.
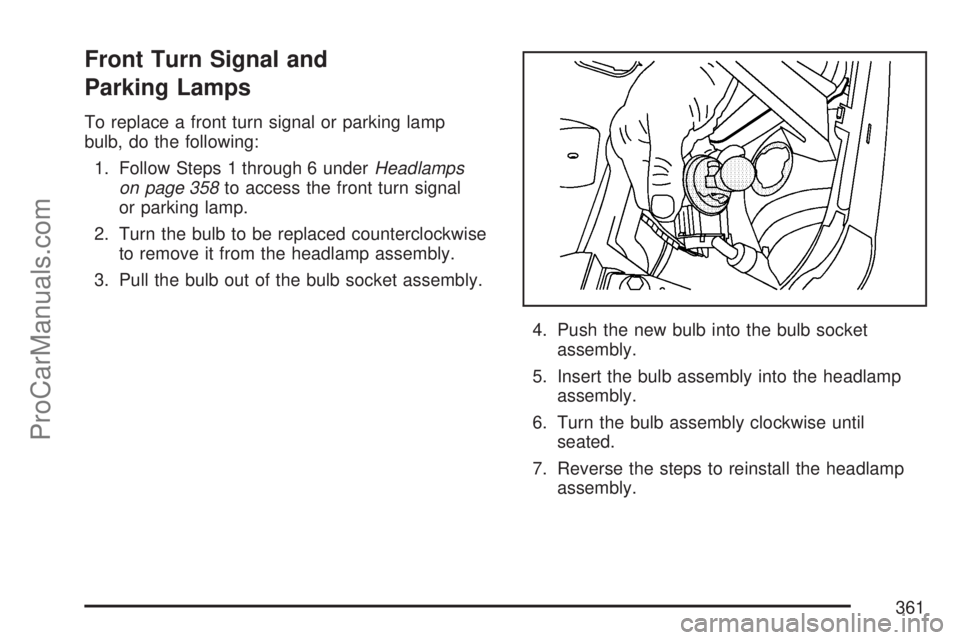
2. Turn the bulb to be replaced counterclockwise
to remove it from the headlamp assembly.
3. Pull the bulb out of the bulb socket assembly.
4. Push the new bulb into the bulb socket
assembly.
5. Insert the bulb assembly into the headlamp
assembly.
6. Turn the bulb assembly clockwise until
seated.
7. Reverse the steps to reinstall the headlamp
assembly.
361
ProCarManuals.com
Page 363 of 470

Taillamps, Turn Signal, Stoplamps
and Back-up Lamps
To replace one of these bulbs, do the following:
1. Open the liftgate. SeeLiftgate on page 103for
more information.
2. Remove the two screws retaining the taillamp
assembly.
3. Slide the taillamp
assembly rearward
and away from
the vehicle.
4. Disconnect the electrical connector and
remove it from the taillamp assembly.5. Turn the bulb socket being replaced
counterclockwise to disconnect it.
6. Pull the bulb out of the bulb socket.
7. Push the new bulb into the bulb socket.
8. Reverse Steps 2 through 4 to reinstall the
taillamp assembly.
363
ProCarManuals.com
Page 364 of 470
License Plate Lamp
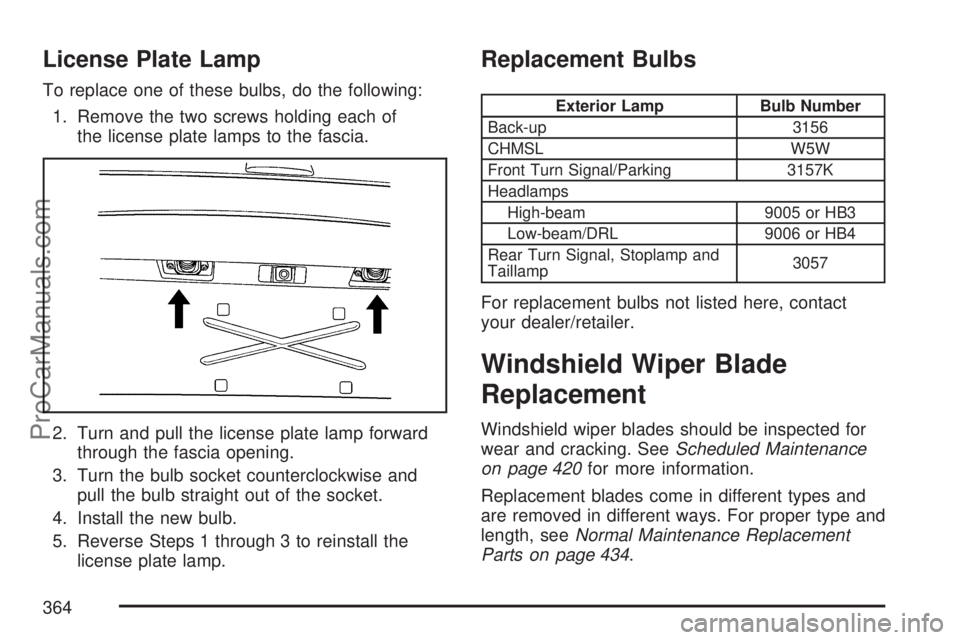
To replace one of these bulbs, do the following:
1. Remove the two screws holding each of
the license plate lamps to the fascia.
2. Turn and pull the license plate lamp forward
through the fascia opening.
3. Turn the bulb socket counterclockwise and
pull the bulb straight out of the socket.
4. Install the new bulb.
5. Reverse Steps 1 through 3 to reinstall the
license plate lamp.
Replacement Bulbs
Exterior Lamp Bulb Number
Back-up 3156
CHMSL W5W
Front Turn Signal/Parking 3157K
Headlamps
High-beam 9005 or HB3
Low-beam/DRL 9006 or HB4
Rear Turn Signal, Stoplamp and
Taillamp3057
For replacement bulbs not listed here, contact
your dealer/retailer.
Windshield Wiper Blade
Replacement
Windshield wiper blades should be inspected for
wear and cracking. SeeScheduled Maintenance
on page 420for more information.
Replacement blades come in different types and
are removed in different ways. For proper type and
length, seeNormal Maintenance Replacement
Parts on page 434.
364
ProCarManuals.com
Page 379 of 470

If you must replace your vehicle’s tires with those
that do not have a TPC Spec number, make
sure they are the same size, load range, speed
rating, and construction type (radial and
bias-belted tires) as your vehicle’s original tires.
Your vehicle’s original equipment tires are listed
on the Tire and Loading Information label.
This label is attached to the vehicle’s center pillar
(B-pillar). SeeLoading Your Vehicle on page 279,
for more information about the Tire and Loading
Information label and its location on your vehicle.
Different Size Tires and Wheels
If you add wheels or tires that are a different size
than your original equipment wheels and tires, this
may affect the way your vehicle performs, including
its braking, ride and handling characteristics,
stability, and resistance to rollover. Additionally,
if your vehicle has electronic systems such as,
anti-lock brakes, traction control, and stability
control, the performance of these systems can
be affected.
{CAUTION:
If you add different sized wheels, your
vehicle may not provide an acceptable
level of performance and safety if tires
not recommended for those wheels are
selected. You may increase the chance
that you will crash and suffer serious
injury. Only use Saturn speci�c wheel and
tire systems developed for your vehicle,
and have them properly installed by a
Saturn certi�ed technician.
SeeBuying New Tires on page 377and
Accessories and Modi�cations on page 304for
additional information.
379
ProCarManuals.com
Page 386 of 470

Changing a Flat Tire
If a tire goes �at, avoid further tire and wheel
damage by driving slowly to a level place. Turn on
your hazard warning �ashers.
{CAUTION:
Changing a tire can be dangerous. The
vehicle can slip off the jack and roll over
or fall on you or other people. You and
they could be badly injured or even killed.
Find a level place to change your tire. To
help prevent the vehicle from moving:
1. Set the parking brake �rmly.
2. Put an automatic transaxle shift lever
in PARK (P), or shift a manual
transaxle to FIRST (1) or REVERSE (R).
CAUTION: (Continued)
CAUTION: (Continued)
3. Turn off the engine and do not restart
while the vehicle is raised.
4. Do not allow passengers to remain in
the vehicle.
To be even more certain the vehicle will
not move, you should put blocks at the
front and rear of the tire farthest away
from the one being changed. That would
be the tire on the other side, at the
opposite end of the vehicle.
When you have a �at tire, use the following
example as a guide to assist you in the placement
of wheel blocks.
386
ProCarManuals.com
Page 389 of 470
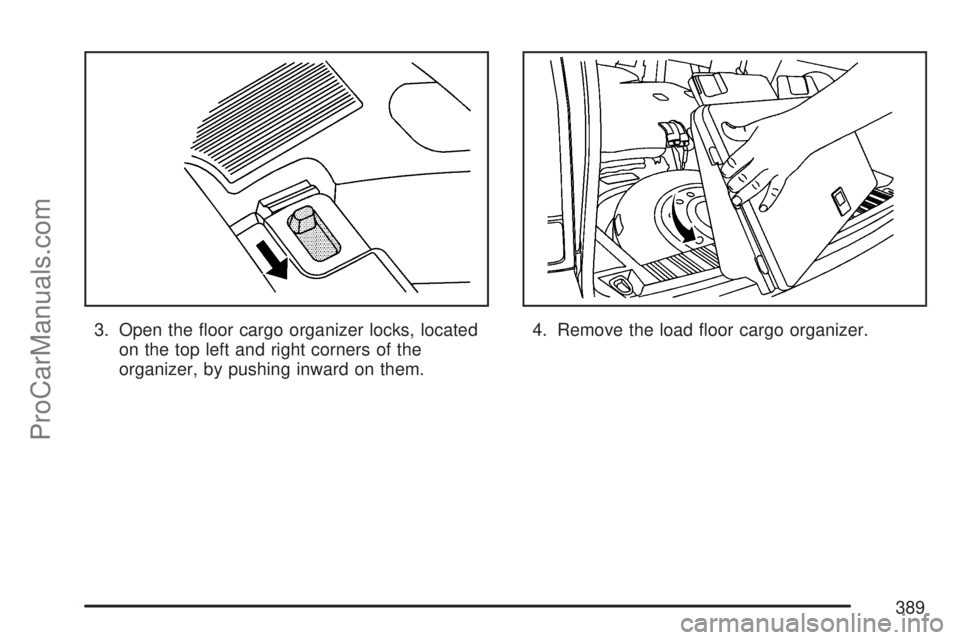
3. Open the �oor cargo organizer locks, located
on the top left and right corners of the
organizer, by pushing inward on them.4. Remove the load �oor cargo organizer.
389
ProCarManuals.com
Page 390 of 470

5. Remove the wheel retainer bolt holding down
the spare tire by turning it counterclockwise.
6. Remove the compact spare tire. SeeCompact
Spare Tire on page 398for more information.The tools you will be using include the jack (A)
and wheel wrench (B).
390
ProCarManuals.com