key SATURN VUE 2010 Owner's Guide
[x] Cancel search | Manufacturer: SATURN, Model Year: 2010, Model line: VUE, Model: SATURN VUE 2010Pages: 398, PDF Size: 4.02 MB
Page 127 of 398

Instruments and Controls 5-17
Light On Steady:An emission
control system malfunction has
been detected on the vehicle.
Diagnosis and service might be
required.
An emission system malfunction
might be corrected.
.Make sure the fuel cap is fully
installed. See Filling the Tankon
page 9‑50. The diagnostic
system can determine if the fuel
cap has been left off or
improperly installed. A loose or
missing fuel cap allows fuel to
evaporate into the atmosphere.
A few driving trips with the cap
properly installed should turn the
light off.
.If the vehicle has been driven
through a deep puddle of water,
the vehicle's electrical system
might be wet. The condition is
usually corrected when the
electrical system dries out. A few
driving trips should turn the
light off.
.Make sure to fuel the vehicle
with quality fuel. Poor fuel quality
causes the engine not to run as
efficiently as designed and may
cause: stalling after start-up,
stalling when the vehicle is
changed into gear, misfiring,
hesitation on acceleration,
or stumbling on acceleration.
These conditions might go away
once the engine is warmed up.
If one or more of these
conditions occurs, change the
fuel brand used. It will require at
least one full tank of the proper
fuel to turn the light off.
See Gasoline Specifications
on
page 9‑48.
If none of the above have made the
light turn off, your dealer/retailer can
check the vehicle. The dealer/
retailer has the proper test
equipment and diagnostic tools to
fix any mechanical or electrical
problems that might have
developed.
Emissions Inspection and
Maintenance Programs
Some state/provincial and local
governments have or might begin
programs to inspect the emission
control equipment on the vehicle.
Failure to pass this inspection could
prevent getting a vehicle
registration.
Here are some things to know to
help the vehicle pass an inspection:
.The vehicle will not pass this
inspection if the check engine
light is on with the engine
running, or if the key is in ON/
RUN and the light is not on.
ProCarManuals.com
Page 136 of 398
5-26 Instruments and Controls
dashes. If this occurs, have the
vehicle serviced by your dealer/
retailer. If an abnormal temperature
reading is displayed for an extended
period of time, consult your
dealer/retailer. Under certain
circumstances, especially when the
engine is idling, a delay updating
the temperature display is normal.
SeeCompass
on page 5‑5and
Automatic Transmissionon
page 9‑35for more information.
The DIC has different displays
which can be accessed by pressing
the DIC buttons located on the
instrument panel, below the
headlamp switch.
The DIC displays trip, fuel, and
vehicle system information, and
warning messages if a system
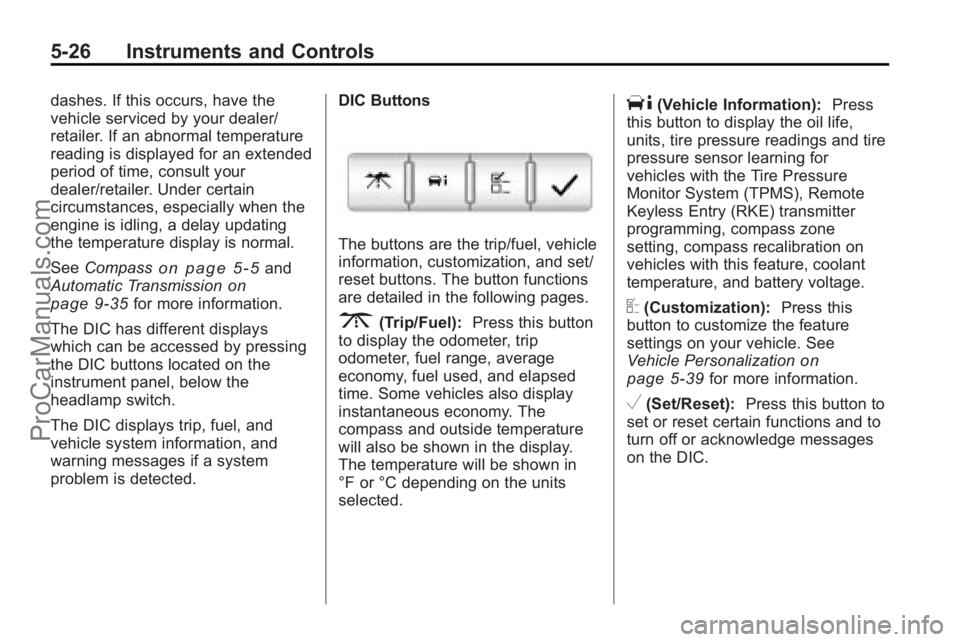
problem is detected. DIC Buttons
The buttons are the trip/fuel, vehicle
information, customization, and set/
reset buttons. The button functions
are detailed in the following pages.
3(Trip/Fuel):
Press this button
to display the odometer, trip
odometer, fuel range, average
economy, fuel used, and elapsed
time. Some vehicles also display
instantaneous economy. The
compass and outside temperature
will also be shown in the display.
The temperature will be shown in
°F or °C depending on the units
selected.
T(Vehicle Information): Press
this button to display the oil life,
units, tire pressure readings and tire
pressure sensor learning for
vehicles with the Tire Pressure
Monitor System (TPMS), Remote
Keyless Entry (RKE) transmitter
programming, compass zone
setting, compass recalibration on
vehicles with this feature, coolant
temperature, and battery voltage.
U(Customization): Press this
button to customize the feature
settings on your vehicle. See
Vehicle Personalization
on
page 5‑39for more information.
V(Set/Reset): Press this button to
set or reset certain functions and to
turn off or acknowledge messages
on the DIC.
ProCarManuals.com
Page 140 of 398

5-30 Instruments and Controls
Relearn Remote Key
This display allows you to program
Remote Keyless Entry (RKE)
transmitters to your vehicle. When a
new transmitter is programmed to
the vehicle, all remaining
transmitters must also be
programmed. Any lost or stolen
transmitters no longer work once the
new transmitter is programmed.
To program an RKE transmitter to
your vehicle:
1. Press the vehicle informationbutton until PRESS
VTO
RELEARN REMOTE KEY
displays.
2. Press the set/reset button until REMOTE KEY LEARNING
ACTIVE is displayed.
3. Press and hold the lock and unlock buttons on the first
transmitter at the same time for
about 15 seconds. A chime will sound indicating
that the transmitter is matched
and REMOTE KEY LEARNING
COMPLETE will be shown on
the display.
4. To program additional transmitters at this time, repeat
Step 3.
Each vehicle can have a
maximum of eight transmitters
programmed to it.
5. To exit the programming mode, you must cycle the key to
LOCK/OFF.
Compass Zone Setting
This display allows for setting the
compass zone. See Compass
on
page 5‑5for more information.
Compass Recalibration
This display allows for calibrating
the compass. See Compass
on
page 5‑5for more information. Coolant Temperature
Press the vehicle info button until
the coolant temperature is
displayed. The temperature will be
shown in °F or °C depending on the
units selected.
If the coolant temperature display
shows dashes instead of a value,
there may be a problem with the
vehicle. If this happens often, see
your dealer/retailer for service.
Battery Voltage
Press the vehicle info button until
the battery voltage is displayed.
If the battery voltage display shows
dashes instead of a value, there
may be a problem with the vehicle.
If this happens often, see your
dealer/retailer for service.
Blank Display
This display shows no information.
ProCarManuals.com
Page 145 of 398

Instruments and Controls 5-35
Key and Lock Messages
REMOTE KEY LEARNING
ACTIVE
This message displays while
matching a Remote Keyless Entry
(RKE) transmitter to your vehicle.
See“MATCHING TRANSMITTERS
TO YOUR VEHICLE” underRemote
Keyless Entry (RKE) System
Operation
on page 2‑3and Driver
Information Center (DIC)on
page 5‑25for more information.
REMOTE KEY LEARNING
COMPLETE
This message displays while
matching a Remote Keyless Entry
(RKE) transmitter to your vehicle.
See “MATCHING TRANSMITTERS
TO YOUR VEHICLE” underRemote
Keyless Entry (RKE) System
Operation
on page 2‑3and Driver
Information Center (DIC)on
page 5‑25for more information.
REPLACE REMOTE KEY FOB
BATTERY
This message displays if a Remote
Keyless Entry (RKE) transmitter
battery is low. The battery needs to
be replaced in the transmitter. See
“Battery Replacement” under
Remote Keyless Entry (RKE)
System Operation
on page 2‑3.
Ride Control System
Messages
SERVICE STABILITRAK
This message displays if there is a
problem with the StabiliTrak®
system. A warning light also
appears on the instrument panel
cluster. See StabiliTrak
®Indicator
Lighton page 5‑20. See StabiliTrak
Systemon page 9‑41for more
information. If this message turns on while you
are driving, pull off the road as soon
as possible and stop carefully. Try
resetting the system by turning the
ignition off and then back on. If this
message still stays on or turns back
on again while you are driving, your
vehicle needs service. Have the
system inspected by your dealer/
retailer as soon as possible.
SERVICE TRACTION
CONTROL
This message displays when the
Traction Control System (TCS) is
not functioning properly. A warning
light also appears on the instrument
panel cluster. See
Traction Control
System (TCS) Warning Light
on
page 5‑20and Traction Control
System (TCS)on page 9‑40for
more information. Have the TCS
serviced by your dealer/retailer as
soon as possible.
ProCarManuals.com
Page 151 of 398
Instruments and Controls 5-41
Press the customization button until
PRESS
VTO SET AUTO DOOR
UNLOCK appears on the DIC
display. Press the set/reset button
once to access the settings for this
feature. Then press the
customization button to scroll
through the following settings:
OFF: None of the doors will
automatically unlock.
DRIVER DOOR AT KEY OUT:
Only the driver's door will unlock
when the key is taken out of the
ignition.
DRIVER DOOR IN PARK: Only the
driver's door will unlock when the
vehicle is shifted into P (Park) .
ALL DOORS AT KEY OUT: All of
the doors will unlock when the key
is taken out of the ignition.
ALL DOORS IN PARK (default):
All of the doors will unlock when the
vehicle is shifted into P (Park).
NO CHANGE: No change will be
made to this feature. The current
setting will remain. To select a setting, press the set/
reset button while the desired
setting is displayed on the DIC.
REMOTE DOOR LOCK
This feature allows you to select the
type of feedback you will receive
when locking the vehicle with the
Remote Keyless Entry (RKE)
transmitter. You will not receive
feedback when locking the vehicle
with the RKE transmitter if the doors
are open. See
Remote Keyless
Entry (RKE) System Operation
on
page 2‑3for more information.
Press the customization button until
PRESS
VTO SET REMOTE
DOOR LOCK appears on the DIC
display. Press the set/reset button
once to access the settings for this
feature. Then press the
customization button to scroll
through the following settings:
VERIFICATION OFF: There will be
no feedback when you press the
lock button on the RKE transmitter. VERIFICATION LIGHTS ONLY:
The exterior lamps will flash when
you press the lock button on the
RKE transmitter.
VERIFICATION HORN ONLY:
The
horn will sound on the second press
of the lock button on the RKE
transmitter.
VERIFICATION HORN & LIGHTS
(default): The exterior lamps will
flash when you press the lock
button on the RKE transmitter, and
the horn will sound when the lock
button is pressed again within
five seconds of the previous
command.
VERIFICATION NO CHANGE: No
change will be made to this feature.
The current setting will remain.
To select a setting, press the set/
reset button while the desired
setting is displayed on the DIC.
ProCarManuals.com
Page 152 of 398
5-42 Instruments and Controls
REMOTE DOOR UNLOCK
This feature allows you to select the
type of feedback you will receive
when unlocking the vehicle with the
Remote Keyless Entry (RKE)
transmitter. You will not receive
feedback when unlocking the
vehicle with the RKE transmitter if
the doors are open. SeeRemote
Keyless Entry (RKE) System
Operation
on page 2‑3for more
information.
Press the customization button until
PRESS
VTO SET REMOTE
DOOR UNLOCK appears on the
DIC display. Press the set/reset
button once to access the settings
for this feature. Then press the
customization button to scroll
through the following settings:
VERIF LIGHTS OFF: The exterior
lamps will not flash when you press
the unlock button on the RKE
transmitter. VERIF LIGHTS ON (default):
The
exterior lamps will flash when you
press the unlock button on the RKE
transmitter.
VERIF NO CHANGE: No change
will be made to this feature. The
current setting will remain.
To select a setting, press the set/
reset button while the desired
setting is displayed on the DIC.
DELAY DOOR LOCK
This feature allows you to select
whether or not the locking of the
vehicle's doors will be delayed.
When locking the doors with the
power door lock switch and a door
is open, this feature will delay
locking the doors until five seconds
after the last door is closed. You will
hear three chimes to signal that the
delayed locking feature is in use.
The key must be out of the ignition
for this feature to work. You can
temporarily override delayed locking
by pressing the power door lock
switch twice or the lock button on the RKE transmitter twice. See
Delayed Locking
on page 2‑7for
more information.
Press the customization button until
PRESS
VTO SET DELAY DOOR
LOCK appears on the DIC display.
Press the set/reset button once to
access the settings for this feature.
Then press the customization button
to scroll through the following
settings:
OFF: There will be no delayed
locking of the vehicle's doors.
ON (default): The doors will not
lock until five seconds after the last
door is closed.
NO CHANGE: No change will be
made to this feature. The current
setting will remain.
To select a setting, press the set/
reset button while the desired
setting is displayed on the DIC.
ProCarManuals.com
Page 153 of 398
Instruments and Controls 5-43
EXIT LIGHTING
This feature allows you to select the
amount of time you want the
exterior lamps to remain on when it
is dark enough outside. This
happens after the key is turned from
ON/RUN to LOCK/OFF.
Press the customization button until
PRESS
VTO SET EXIT LIGHTING
appears on the DIC display. Press
the set/reset button once to access
the settings for this feature. Then
press the customization button to
scroll through the following settings:
OFF: The exterior lamps will not
turn on.
10 SECONDS (default): The
exterior lamps will stay on for
10 seconds.
30 SECONDS: The exterior lamps
will stay on for 30 seconds.
2 MINUTES: The exterior lamps will
stay on for two minutes. NO CHANGE:
No change will be
made to this feature. The current
setting will remain.
To select a setting, press the set/
reset button while the desired
setting is displayed on the DIC.
APPROACH LIGHTING
This feature allows you to select
whether or not to have the exterior
lights turn on briefly during low light
periods after unlocking the vehicle
using the Remote Keyless Entry
(RKE) transmitter.
Press the customization button until
PRESS
VTO SET APPROACH
LIGHTING appears on the DIC
display. Press the set/reset button
once to access the settings for this
feature. Then press the
customization button to scroll
through the following settings:
OFF: The exterior lights will not
turn on when you unlock the vehicle
with the RKE transmitter. ON (default):
If it is dark enough
outside, the exterior lights will turn
on briefly when you unlock the
vehicle with the RKE transmitter.
The lights will remain on for
20 seconds or until the lock button
on the RKE transmitter is pressed,
or the vehicle is no longer off. See
Remote Keyless Entry (RKE)
System Operation
on page 2‑3for
more information.
NO CHANGE : No change will be
made to this feature. The current
setting will remain.
To select a setting, press the set/
reset button while the desired
setting is displayed on the DIC.
ProCarManuals.com
Page 154 of 398
5-44 Instruments and Controls
CHIME VOLUME
This feature allows you to select the
volume level of the chime.
Press the customization button until
PRESS
VTO SET CHIME
VOLUME appears on the DIC
display. Press the set/reset button
once to access the settings for this
feature. Then press the
customization button to scroll
through the following settings:
NORMAL: The chime volume will
be set to a normal level.
LOUD: The chime volume will be
set to a loud level.
NO CHANGE: No change will be
made to this feature. The current
setting will remain.
There is no default for chime
volume. The volume will stay at the
last known setting.
To select a setting, press the set/
reset button while the desired
setting is displayed on the DIC. REMOTE START
If your vehicle has this feature, it
allows you to turn the remote start
off or on. The remote start feature
allows you to start the engine from
outside of the vehicle using the
Remote Keyless Entry (RKE)
transmitter. See
Remote Vehicle
Start
on page 2‑4for more
information.
Press the customization button until
PRESS
VTO SET REMOTE
START appears on the DIC display.
Press the set/reset button once to
access the settings for this feature.
Then press the customization button
to scroll through the following
settings:
OFF: The remote start feature will
be disabled.
ON (default): The remote start
feature will be enabled.
NO CHANGE: No change will be
made to this feature. The current
setting will remain. To select a setting, press the set/
reset button while the desired
setting is displayed on the DIC.
FACTORY SETTINGS
This feature allows you to set all of
the customization features back to
their factory default settings.
Press the customization button until
PRESS
VTO RESTORE
DEFAULTS appears on the DIC
display. Press the set/reset button
once to access the settings for this
feature. Then press the
customization button to scroll
through the following settings:
RESTORE (default): The
customization features will be set to
their factory default settings.
NO CHANGE: The customization
features will not be set to their
factory default settings.
To select a setting, press the set/
reset button while the desired
setting is displayed on the DIC.
ProCarManuals.com
Page 165 of 398
Lighting 6-5
Interior Lighting
Instrument Panel
Illumination Control
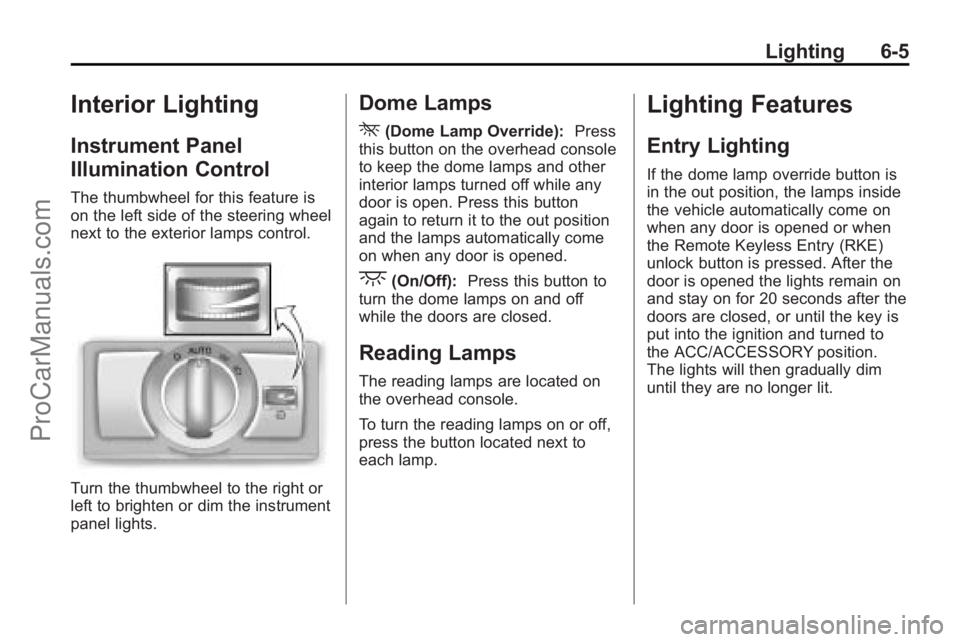
The thumbwheel for this feature is
on the left side of the steering wheel
next to the exterior lamps control.
Turn the thumbwheel to the right or
left to brighten or dim the instrument
panel lights.
Dome Lamps
*
(Dome Lamp Override):Press
this button on the overhead console
to keep the dome lamps and other
interior lamps turned off while any
door is open. Press this button
again to return it to the out position
and the lamps automatically come
on when any door is opened.
+(On/Off): Press this button to
turn the dome lamps on and off
while the doors are closed.
Reading Lamps
The reading lamps are located on
the overhead console.
To turn the reading lamps on or off,
press the button located next to
each lamp.
Lighting Features
Entry Lighting
If the dome lamp override button is
in the out position, the lamps inside
the vehicle automatically come on
when any door is opened or when
the Remote Keyless Entry (RKE)
unlock button is pressed. After the
door is opened the lights remain on
and stay on for 20 seconds after the
doors are closed, or until the key is
put into the ignition and turned to
the ACC/ACCESSORY position.
The lights will then gradually dim
until they are no longer lit.
ProCarManuals.com
Page 184 of 398

7-18 Infotainment System
Phone
Bluetooth
Vehicles with a Bluetooth system
can use a Bluetooth capable cell
phone with a Hands Free Profile to
make and receive phone calls. The
system can be used while the key is
in ON/RUN or ACC/ACCESSORY
position. The range of the Bluetooth
system can be up to 9.1 m (30 ft.).
Not all phones support all functions,
and not all phones are guaranteed
to work with the in-vehicle Bluetooth
system. See www.gm.com/bluetooth
for more information on compatible
phones.
Voice Recognition
The Bluetooth system uses voice
recognition to interpret voice
commands to dial phone numbers
and name tags.
Noise:Keep interior noise levels to
a minimum. The system may not
recognize voice commands if there
is too much background noise. When to Speak:
A short tone
sounds after the system responds
indicating when it is waiting for a
voice command. Wait until the tone
and then speak.
How to Speak: Speak clearly in a
calm and natural voice.
Audio System
When using the in‐vehicle Bluetooth
system, sound comes through the
vehicle's front audio system
speakers and overrides the audio
system. Use the audio system
volume knob, during a call, to
change the volume level. The
adjusted volume level remains in
memory for later calls. To prevent
missed calls, a minimum volume
level is used if the volume is turned
down too low.
Bluetooth Controls
Use the buttons located on the
steering wheel to operate the
in‐vehicle Bluetooth system. See
Steering Wheel Controls
on
page 5‑3for more information.
J/0(Push To Talk) : Press to
answer incoming calls, confirm
system information, and to start
speech recognition.
− /
K(Phone On Hook): Press to
end a call and to cancel an
operation.
Pairing
A Bluetooth enabled cell phone
must be paired to the in‐vehicle
Bluetooth system first and then
connected to the vehicle before it
can be used. See the cell phone
manufacturers user guide for
Bluetooth functions before pairing
the cell phone. If a Bluetooth phone
is not connected, calls will be made
using OnStar
®Hands‐Free Calling,
if available. Refer to the OnStar
owner's guide for more information.
ProCarManuals.com