ECO mode SATURN VUE 2010 Owners Manual
[x] Cancel search | Manufacturer: SATURN, Model Year: 2010, Model line: VUE, Model: SATURN VUE 2010Pages: 398, PDF Size: 4.02 MB
Page 75 of 398

Seats and Restraints 3-31
What Makes an Airbag
Inflate?
In a deployment event, the sensing
system sends an electrical signal
triggering a release of gas from the
inflator. Gas from the inflator fills the
airbag causing the bag to break out
of the cover and deploy. The inflator,
the airbag, and related hardware are
all part of the airbag module.
Frontal airbag modules are located
inside the steering wheel and
instrument panel. For vehicles with
seat-mounted side impact airbags,
there are airbag modules in the side
of the front seatbacks closest to the
door. For vehicles with roof-rail
airbags, there are airbag modules in
the ceiling of the vehicle, near the
side windows that have occupant
seating positions.
How Does an Airbag
Restrain?
In moderate to severe frontal or
near frontal collisions, even belted
occupants can contact the steering
wheel or the instrument panel. In
moderate to severe side collisions,
even belted occupants can contact
the inside of the vehicle.
Airbags supplement the protection
provided by safety belts. Frontal
airbags distribute the force of
the impact more evenly over the
occupant's upper body, stopping
the occupant more gradually.
Seat‐mounted side impact and
roof-rail airbags distribute the force
of the impact more evenly over the
occupant's upper body.Rollover capable roof-rail airbags
are designed to help contain the
head and chest of occupants in the
outboard seating positions in the
first and second rows. The rollover
capable roof-rail airbags are
designed to help reduce the risk of
full or partial ejection in rollover
events, although no system can
prevent all such ejections.
But airbags would not help in many
types of collisions, primarily
because the occupant's motion is
not toward those airbags. See
When
Should an Airbag Inflate?
on
page 3‑29for more information.
Airbags should never be regarded
as anything more than a supplement
to safety belts.
ProCarManuals.com
Page 77 of 398

Seats and Restraints 3-33
You can lock the doors, turn off the
interior lamps and hazard warning
flashers by using the controls for
those features. You must first,
however, turn the ignition key to the
following ignition switch positions:
1. Turn the ignition key toLOCK/OFF.
2. Turn the ignition key to ON/RUN.
{WARNING
A crash severe enough to inflate
the airbags may have also
damaged important functions in
the vehicle, such as the fuel
system, brake and steering
systems, etc. Even if the vehicle
appears to be drivable after a
moderate crash, there may be
concealed damage that could
make it difficult to safely operate
the vehicle.
Use caution if you should attempt
to restart the engine after a crash
has occurred. In many crashes severe enough to
inflate the airbag, windshields are
broken by vehicle deformation.
Additional windshield breakage may
also occur from the right front
passenger airbag.
.Airbags are designed to inflate
only once. After an airbag
inflates, you will need some new
parts for the airbag system.
If you do not get them, the
airbag system will not be there
to help protect you in another
crash. A new system will include
airbag modules and possibly
other parts. The service manual
for your vehicle covers the need
to replace other parts.
.The vehicle has a crash sensing
and diagnostic module which
records information after a
crash. See
Vehicle Data
Recording and Privacy
on
page 13‑15and Event Data
Recorders on page 13‑15.
.Let only qualified technicians
work on the airbag systems.
Improper service can mean that
an airbag system will not work
properly. See your dealer/retailer
for service.
ProCarManuals.com
Page 114 of 398

5-4 Instruments and Controls
&(Adjustable Interval Wipes):
Sets a delay between wipes. Move
the switch on top of the lever left for
less frequent wipes or right for more
frequent wipes.
a(Low): Slow wipes.
1(High): Fast wipes.
Clear ice and snow from the wiper
blades before using them. If frozen
to the windshield, carefully loosen or
thaw them. Damaged wiper blades
should be replaced. See Wiper
Blade Replacement on page 10‑29.
Heavy snow or ice can overload the
wiper motor. A circuit breaker will
stop the motor until it cools down.
Rainsense™
Notice: Going through an
automatic car wash with the
wipers on can damage them. Turn
the wipers off when going
through an automatic car wash.
For vehicles with Rainsense™
windshield wipers, the moisture
sensor is located next to the inside
rearview mirror and is mounted on
the windshield. When active, these
sensors are able to detect moisture
on the windshield and automatically
turn on the wipers.
To turn on the Rainsense feature,
the wipers must be set to one
of the five delay settings on the
multifunction lever. Each of the five
settings adjusts the sensitivity of the
sensor. Since different drivers have
different setting preferences, it is
recommended that the mid-range
setting (position 3) be used initially.
For more wipes, select the higher
settings; for fewer wipes, select the
lower settings located closer to the
off position on the turn signal/lane
change lever.
The sensor automatically controls
the frequency of the wipes from the
off setting to the high speed setting
according to the weather conditions.
The wipers can be left in a
rainsense mode even when it is not
raining.
When Rainsense is active, the
headlamps turn on automatically if
the exterior lamp control is in the
AUTO position and the wipers are
active.
ProCarManuals.com
Page 140 of 398

5-30 Instruments and Controls
Relearn Remote Key
This display allows you to program
Remote Keyless Entry (RKE)
transmitters to your vehicle. When a
new transmitter is programmed to
the vehicle, all remaining
transmitters must also be
programmed. Any lost or stolen
transmitters no longer work once the
new transmitter is programmed.
To program an RKE transmitter to
your vehicle:
1. Press the vehicle informationbutton until PRESS
VTO
RELEARN REMOTE KEY
displays.
2. Press the set/reset button until REMOTE KEY LEARNING
ACTIVE is displayed.
3. Press and hold the lock and unlock buttons on the first
transmitter at the same time for
about 15 seconds. A chime will sound indicating
that the transmitter is matched
and REMOTE KEY LEARNING
COMPLETE will be shown on
the display.
4. To program additional transmitters at this time, repeat
Step 3.
Each vehicle can have a
maximum of eight transmitters
programmed to it.
5. To exit the programming mode, you must cycle the key to
LOCK/OFF.
Compass Zone Setting
This display allows for setting the
compass zone. See Compass
on
page 5‑5for more information.
Compass Recalibration
This display allows for calibrating
the compass. See Compass
on
page 5‑5for more information. Coolant Temperature
Press the vehicle info button until
the coolant temperature is
displayed. The temperature will be
shown in °F or °C depending on the
units selected.
If the coolant temperature display
shows dashes instead of a value,
there may be a problem with the
vehicle. If this happens often, see
your dealer/retailer for service.
Battery Voltage
Press the vehicle info button until
the battery voltage is displayed.
If the battery voltage display shows
dashes instead of a value, there
may be a problem with the vehicle.
If this happens often, see your
dealer/retailer for service.
Blank Display
This display shows no information.
ProCarManuals.com
Page 156 of 398

5-46 Instruments and Controls
Universal Remote System
Programming
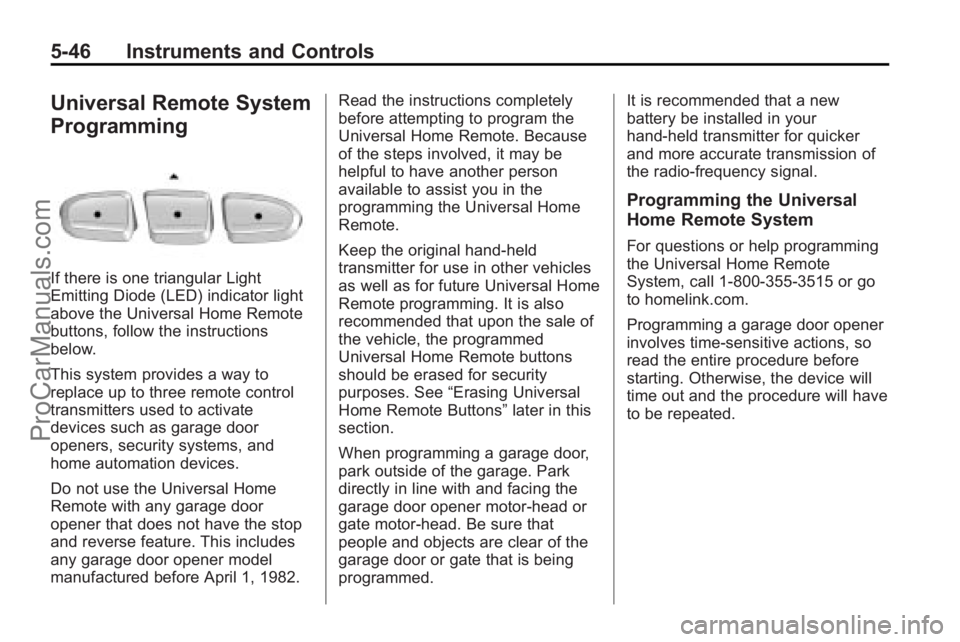
If there is one triangular Light
Emitting Diode (LED) indicator light
above the Universal Home Remote
buttons, follow the instructions
below.
This system provides a way to
replace up to three remote control
transmitters used to activate
devices such as garage door
openers, security systems, and
home automation devices.
Do not use the Universal Home
Remote with any garage door
opener that does not have the stop
and reverse feature. This includes
any garage door opener model
manufactured before April 1, 1982.Read the instructions completely
before attempting to program the
Universal Home Remote. Because
of the steps involved, it may be
helpful to have another person
available to assist you in the
programming the Universal Home
Remote.
Keep the original hand-held
transmitter for use in other vehicles
as well as for future Universal Home
Remote programming. It is also
recommended that upon the sale of
the vehicle, the programmed
Universal Home Remote buttons
should be erased for security
purposes. See
“Erasing Universal
Home Remote Buttons” later in this
section.
When programming a garage door,
park outside of the garage. Park
directly in line with and facing the
garage door opener motor-head or
gate motor-head. Be sure that
people and objects are clear of the
garage door or gate that is being
programmed. It is recommended that a new
battery be installed in your
hand-held transmitter for quicker
and more accurate transmission of
the radio-frequency signal.
Programming the Universal
Home Remote System
For questions or help programming
the Universal Home Remote
System, call 1‐800‐355‐3515 or go
to homelink.com.
Programming a garage door opener
involves time-sensitive actions, so
read the entire procedure before
starting. Otherwise, the device will
time out and the procedure will have
to be repeated.
ProCarManuals.com
Page 169 of 398

Infotainment System 7-3
If information is available during XM,
CD, MP3 or WMA playback, the
song title information displays on
the top line of the display and artist
information displays on the bottom
line. When information is not
available, "NO INFO" displays.
Setting the Tone (Bass/
Midrange/Treble)
BASS/MID/TREB (Bass, Midrange,
or Treble):To adjust bass,
midrange, or treble:
1. Press the
fknob until the tone
control labels display.
2. Continue pressing the
fknob to
highlight the desired label,
or press the pushbutton under
the desired label.
3. To adjust the highlighted setting, do one of the following:
.Turn thefknob clockwise
or counterclockwise.
.Press the\FWD, or
sREV button. If a station's frequency is weak or if
there is static, decrease the treble.
To quickly adjust bass, midrange,
or treble to the middle position,
press the pushbutton positioned
under the BASS, MID, or TREB
label for more than two seconds.
A beep sounds and the level adjusts
to the middle position.
To quickly adjust all speaker and
tone controls to the middle position,
press the
fknob for more than
two seconds until a beep sounds.
EQ (Equalization): Press to select
preset equalization settings.
To return to the manual mode, press
the EQ button until Manual displays
or manually adjust the bass,
midrange, or treble by pressing the
fknob.
Adjusting the Speakers
(Balance/Fade)
BAL/FADE (Balance/Fade): To
adjust the balance or fade:
1. Press the
fknob until the
speaker control labels display.
2. Continue pressing the
fknob to
highlight the desired label,
or press the pushbutton under
the desired label.
3. To adjust the highlighted setting, do one of the following until the
desired levels are obtained.
.Turn thefknob clockwise
or counterclockwise.
.Press the\FWD, or
sREV button.
To quickly adjust balance or fade to
the middle position, press the
pushbutton positioned under the
BAL or FADE label for more than
two seconds. A beep sounds and
the level adjusts to the middle
position.
ProCarManuals.com
Page 181 of 398

Infotainment System 7-15
No Folder
When the CD contains only
compressed files, the files are
located under the root folder. The
next and previous folder functions
do not display on a CD that was
recorded without folders or playlists.
When displaying the name of the
folder the radio displays ROOT.
When the CD contains only playlists
and compressed audio files, but no
folders, all files are located under
the root folder. The folder down and
up buttons searches playlists (Px)
first and then go to the root folder.
When the radio displays the name
of the folder the radio
displays ROOT.Order of Play
Tracks recorded to the CD-R or
CD-RW are played in the following
order:
.Play begins from the first track in
the first playlist and continues
sequentially through all tracks in
each playlist. When the last
track of the last playlist has
played, play continues from the
first track of the first playlist.
.Play begins from the first track in
the first folder and continues
sequentially through all tracks in
each folder. When the last track
of the last folder has been
played, play continues from the
first track of the first folder.
When play enters a new folder, the
display does not automatically show
the new folder name unless the
folder mode is chosen as the default
display. The new track name
displays. File System and Naming
The song name that is displayed is
the song name that is contained in
the ID3 tag. If the song name is not
present in the ID3 tag, then the
radio displays the file name without
the extension (such as .mp3) as the
track name.
Track names longer than
32 characters or four pages are
shortened. Parts of words on the
last page of text and the extension
of the filename does not display.
Preprogrammed Playlists
Preprogrammed playlists that
were created by WinAmp™,
MusicMatch™, or Real Jukebox™
software can be accessed, however,
they cannot be edited using the
radio. These playlists are treated as
special folders containing
compressed audio song files.
ProCarManuals.com
Page 183 of 398

Infotainment System 7-17
located below either arrow button.
The disc goes to the next or
previous artist in alphabetical order.
Continue pressing either button until
the desired artist is displayed.
To change from playback by artist to
playback by album, press the
pushbutton located below the Sort
By label. From the sort screen, push
one of the buttons below the album
button. Press the pushbutton below
the back label to return to the main
music navigator screen. Now the
album name is displayed on the
second line between the arrows and
songs from the current album
begins to play. Once all songs from
that album are played, the player
moves to the next album in
alphabetical order on the CD-R/
CD-RW and begins playing MP3
files from that album.
To exit music navigator mode, press
the pushbutton below the Back label
to return to normal MP3 playback.Auxiliary Devices
The radio system has an auxiliary
input jack located on the lower right
side of the faceplate. This is not an
audio output; do not plug the
headphone set into the front
auxiliary input jack. An external
audio device such as an iPod™,
laptop computer, MP3 player, CD
changer, etc. can be connected to
the auxiliary input jack for use as
another audio source.
Drivers are encouraged to set up
any auxiliary device while the
vehicle is in P (Park). seeDefensive
Driving
on page 9‑3for more
information on driver distraction.
To use a portable audio player,
connect a 3.5 mm (1/8 inch) cable
to the radio's front auxiliary input
jack. When a device is connected,
press the radio CD/AUX button to
begin playing audio from the device
over the vehicle speakers.
O(Power/Volume): Turn to
increase or decrease the volume of
the portable player. Additional
volume adjustments might have to
be made from the portable device if
the volume is not loud or soft
enough.
BAND: Press to listen to the radio
when a portable audio device is
playing. The portable audio device
continues playing.
CD/AUX (CD/Auxiliary): Press to
play a CD when a portable audio
device is playing. Press again and
the system begins playing audio
from the connected portable audio
player. If a portable audio player is
not connected, “No Input Device
Found” displays.
ProCarManuals.com
Page 197 of 398

Climate Controls 8-3
On hot days, open the windows to
let hot inside air escape; then close
them. This helps reduce the time it
takes for the vehicle to cool down
and helps the system to operate
more efficiently.
For quick cool down on hot days,
select the following settings
together:
1. Select
Hmode.
2. Select
;.
3. Turn the
#on.
4. Select the coolest temperature and highest fan speed.
5. Once the vehicle's interior temperature is below the outside
temperature, select recirculation
mode for enhanced cooling. Using these settings together for
long periods of time may cause the
air inside the vehicle to become too
dry. To prevent this from happening,
after the air inside of the vehicle has
cooled, turn the recirculation
mode off.
The air conditioning system
removes moisture from the air, so a
small amount of water might drip
under the vehicle while idling or
after turning off the engine. This is
normal.;(Outside Air):
Press to turn the
outside air mode on. An indicator
light comes on to show that outside
air is on. Air from outside the vehicle
will circulate throughout the vehicle.
The outside air mode can be used
with all modes, but it cannot be
used with the recirculation mode.
Pressing this button will cancel the
recirculation mode. @
(Recirculation): Press to turn
on the recirculation mode. An
indicator light comes on to show
that recirculation is on. This mode
recirculates and helps to quickly
cool or heat the air inside the
vehicle. It can be used to prevent
outside air and odors from entering
the vehicle. Avoid using the
recirculation mode during high
periods of humidity and cool outside
temperatures since this may result
in increased window fogging.
If window fogging is experienced,
select the defrost mode.
Recirculation mode is not available
in floor, defog or defrost modes and
will shut off automatically and
change to outside air. The indicator
will flash if the button is selected in
any of these modes. This helps
prevent window fogging and
moisture building up inside the
vehicle.
ProCarManuals.com
Page 205 of 398

Driving and Operating 9-1
Driving and
Operating
Driving Information
Driver Behavior . . . . . . . . . . . . . . . 9-2
Driving Environment . . . . . . . . . . 9-2
Vehicle Design . . . . . . . . . . . . . . . . 9-2
Defensive Driving . . . . . . . . . . . . . 9-3
Drunk Driving . . . . . . . . . . . . . . . . . 9-3
Control of a Vehicle . . . . . . . . . . . 9-4
Braking . . . . . . . . . . . . . . . . . . . . . . . 9-4
Steering . . . . . . . . . . . . . . . . . . . . . . . 9-5
Off-Road Recovery . . . . . . . . . . . . 9-6
Loss of Control . . . . . . . . . . . . . . . . 9-7
Off-Road Driving . . . . . . . . . . . . . . 9-8
Driving on Wet Roads . . . . . . . 9-18
Highway Hypnosis . . . . . . . . . . . 9-18
Hill and Mountain Roads . . . . . 9-19
Winter Driving . . . . . . . . . . . . . . . 9-20
If the Vehicle is Stuck . . . . . . . . 9-22
Vehicle Load Limits . . . . . . . . . . 9-22
Starting and Operating
New Vehicle Break-In . . . . . . . . 9-27
Ignition Positions . . . . . . . . . . . . 9-28
Retained AccessoryPower (RAP) . . . . . . . . . . . . . . . 9-29 Starting the Engine . . . . . . . . . . 9-29
Engine Coolant Heater . . . . . . . 9-30
Shifting Into Park . . . . . . . . . . . . 9-31
Shifting Out of Park . . . . . . . . . . 9-33
Parking Over Things
That Burn . . . . . . . . . . . . . . . . . . 9-33
Engine Exhaust
Engine Exhaust . . . . . . . . . . . . . . 9-34
Running the Vehicle WhileParked . . . . . . . . . . . . . . . . . . . . . 9-34
Automatic Transmission
Automatic Transmission . . . . . 9-35
Manual Mode . . . . . . . . . . . . . . . . 9-37
Drive Systems
All-Wheel Drive . . . . . . . . . . . . . . 9-38
Brakes
Antilock BrakeSystem (ABS) . . . . . . . . . . . . . . 9-38
Parking Brake . . . . . . . . . . . . . . . 9-39
Ride Control Systems
Traction Control System (TCS) . . . . . . . . . . . . . . 9-40
StabiliTrak System . . . . . . . . . . . 9-41
Cruise Control
Cruise Control . . . . . . . . . . . . . . . 9-42
Object Detection Systems
Rear Vision Camera (RVC) . . . . . . . . . . . . . 9-44
Fuel
Fuel . . . . . . . . . . . . . . . . . . . . . . . . . 9-47
Recommended Fuel . . . . . . . . . 9-48
Gasoline Specifications . . . . . . 9-48
California FuelRequirements . . . . . . . . . . . . . . 9-48
Fuels in Foreign Countries . . . 9-49
Fuel Additives . . . . . . . . . . . . . . . 9-49
Filling the Tank . . . . . . . . . . . . . . 9-50
Filling a Portable Fuel Container . . . . . . . . . . . . . . . . . . . 9-52
Towing
General TowingInformation . . . . . . . . . . . . . . . . . 9-52
Driving Characteristics and Towing Tips . . . . . . . . . . . . . . . . 9-53
Trailer Towing . . . . . . . . . . . . . . . . 9-56
Towing Equipment . . . . . . . . . . . 9-60
Trailer Sway Control (TSC) . . . . . . . . . . . . . . 9-60
Conversions and Add-Ons
Add-On ElectricalEquipment . . . . . . . . . . . . . . . . . 9-61
ProCarManuals.com