rear view mirror SATURN VUE 2010 Owners Manual
[x] Cancel search | Manufacturer: SATURN, Model Year: 2010, Model line: VUE, Model: SATURN VUE 2010Pages: 398, PDF Size: 4.02 MB
Page 16 of 398

1-10 In Brief
Mirror Adjustment
Exterior Mirrors
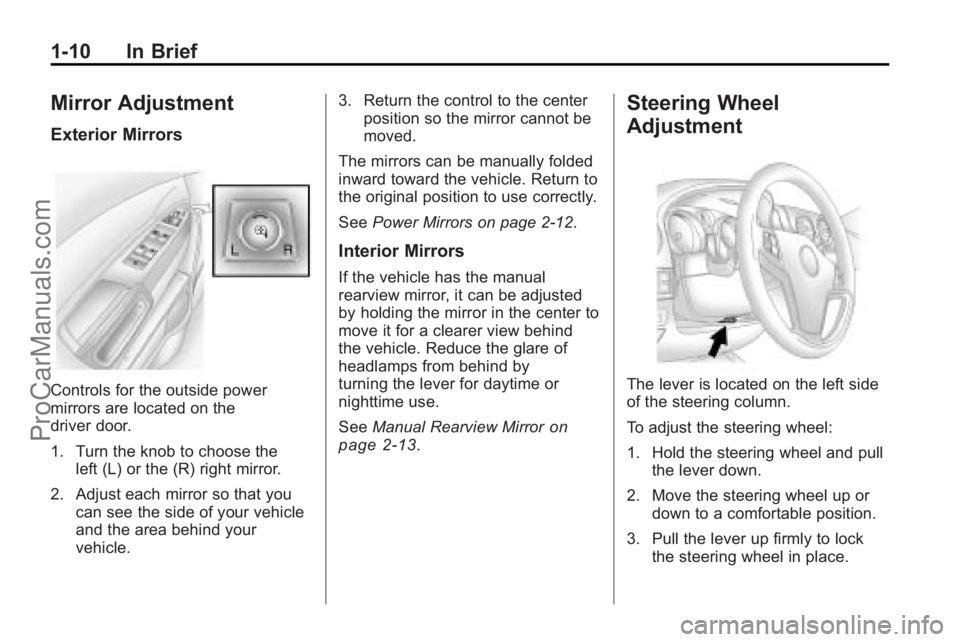
Controls for the outside power
mirrors are located on the
driver door.
1. Turn the knob to choose theleft (L) or the (R) right mirror.
2. Adjust each mirror so that you can see the side of your vehicle
and the area behind your
vehicle. 3. Return the control to the center
position so the mirror cannot be
moved.
The mirrors can be manually folded
inward toward the vehicle. Return to
the original position to use correctly.
See Power Mirrors on page 2‑12.
Interior Mirrors
If the vehicle has the manual
rearview mirror, it can be adjusted
by holding the mirror in the center to
move it for a clearer view behind
the vehicle. Reduce the glare of
headlamps from behind by
turning the lever for daytime or
nighttime use.
SeeManual Rearview Mirror
on
page 2‑13.
Steering Wheel
Adjustment
The lever is located on the left side
of the steering column.
To adjust the steering wheel:
1. Hold the steering wheel and pull the lever down.
2. Move the steering wheel up or down to a comfortable position.
3. Pull the lever up firmly to lock the steering wheel in place.
ProCarManuals.com
Page 29 of 398

Keys, Doors and Windows 2-1
Keys, Doors and
Windows
Keys and Locks
Keys . . . . . . . . . . . . . . . . . . . . . . . . . . 2-2
Remote Keyless Entry (RKE)System . . . . . . . . . . . . . . . . . . . . . . 2-2
Remote Keyless Entry (RKE) System Operation . . . . . . . . . . . 2-3
Remote Vehicle Start . . . . . . . . . 2-4
Door Locks . . . . . . . . . . . . . . . . . . . 2-6
Power Door Locks . . . . . . . . . . . . 2-6
Delayed Locking . . . . . . . . . . . . . . 2-7
Automatic Door Locks . . . . . . . . . 2-7
Lockout Protection . . . . . . . . . . . . 2-7
Safety Locks . . . . . . . . . . . . . . . . . . 2-7
Doors
Liftgate . . . . . . . . . . . . . . . . . . . . . . . . 2-8
Vehicle Security
Vehicle Security . . . . . . . . . . . . . . . 2-9
Anti-Theft Alarm System . . . . . . 2-9
Immobilizer . . . . . . . . . . . . . . . . . . 2-10
Immobilizer Operation . . . . . . . 2-10
Exterior Mirrors
Convex Mirrors . . . . . . . . . . . . . . 2-12
Power Mirrors . . . . . . . . . . . . . . . . 2-12
Heated Mirrors . . . . . . . . . . . . . . . 2-12
Interior Mirrors
Manual Rearview Mirror . . . . . . 2-13
Windows
Windows . . . . . . . . . . . . . . . . . . . . . 2-13
Power Windows . . . . . . . . . . . . . 2-14
Sun Visors . . . . . . . . . . . . . . . . . . . 2-15
Roof
Sunroof . . . . . . . . . . . . . . . . . . . . . . 2-15
ProCarManuals.com
Page 33 of 398

Keys, Doors and Windows 2-5
If the vehicle has the remote start
feature, the RKE transmitter
functions have an increased range
of operation. However, the range
may be less while the vehicle is
running.
There are other conditions which
can affect the performance of the
transmitter, seeRemote Keyless
Entry (RKE) System
on page 2‑2for additional information.
Starting the Engine Using
Remote Start
To start the vehicle:
1. Aim the RKE transmitter at the vehicle.
2. Press
Qon the RKE transmitter.
3. Immediately after completing Step 2, press and hold
/until
the parking lamps flash. If the
vehicle's lights can not be seen,
press and hold
/for at least
four seconds. When the vehicle starts the parking
lamps will turn on and remain on as
long as the engine is running. The
doors will be locked and the climate
control system will operate at the
same setting as when the vehicle
was last turned off.
After entering the vehicle during a
remote start, insert and turn the key
to the ON/RUN position to drive the
vehicle. If the vehicle has the Rear
Vision Camera (RVC), the display
located on the inside rearview mirror
will remain on for about
four seconds. See
Rear Vision
Camera (RVC)
on page 9‑44for
more information.
If the vehicle is left running it
automatically shuts off after
10 minutes unless a time extension
has been done.
Extending Engine Run Time
To extend the engine run time by
10 minutes, repeat Steps 1 though 3
while the engine is still running.
The engine run time can only be
extended if it is the first remote start since the vehicle has been driven.
Remote start can be extended
one time.
If the remote start procedure is used
again before the first 10 minute
time frame has ended, the first
10 minutes will immediately expire
and the second 10 minute time
frame will start.
For example, if the lock button and
then the remote start buttons are
pressed again after the vehicle has
been running for five minutes,
10 minutes are added, allowing
the engine to run for a total of
15 minutes.
A maximum of two remote starts or
remote start attempts are allowed
between ignition cycles.
After the vehicle's engine has been
started two times using the remote
start button, the ignition must be
turned on and then back off before
the remote start procedure can be
used again.
ProCarManuals.com
Page 40 of 398

2-12 Keys, Doors and Windows
Exterior Mirrors
Convex Mirrors
{WARNING
A convex mirror can make things,
like other vehicles, look farther
away than they really are. If you
cut too sharply into the right lane,
you could hit a vehicle on the
right. Check the inside mirror or
glance over your shoulder before
changing lanes.
The passenger side mirror is convex
shaped. A convex mirror's surface is
curved so more can be seen from
the driver seat.
Power Mirrors
Controls for the outside power
mirrors are located on the
driver door. To adjust the power mirrors:
1. Turn the knob to choose the
left (L) or the (R) right mirror.
2. Adjust each mirror so that you can see the side of your vehicle
and the area behind your
vehicle.
3. Return the control to the center position so the mirror cannot be
moved.
Heated Mirrors
For vehicles with outside heated
mirrors:
=(Rear Window Defogger):
Press to heat the outside rearview
mirrors. See “Rear Window
Defogger” underAutomatic Climate
Control System
on page 8‑5for
more information.
ProCarManuals.com
Page 41 of 398

Keys, Doors and Windows 2-13
Interior Mirrors
Manual Rearview Mirror
If the vehicle has the manual
rearview mirror, it can be adjusted
by holding the mirror in the center to
move it for a clearer view behind the
vehicle. Reduce the glare of
headlamps from behind by turning
the lever for daytime or
nighttime use.
Vehicles with OnStar
®have three
additional control buttons for the
OnStar
®system. See your dealer/
retailer for more information about
OnStar
®and how to subscribe to it.
See the OnStar®owner guide for
more information about the services
OnStar
®provides.
Your vehicle may also have a Rear
Vision Camera. See Rear Vision
Camera (RVC)
on page 9‑44for
more information.
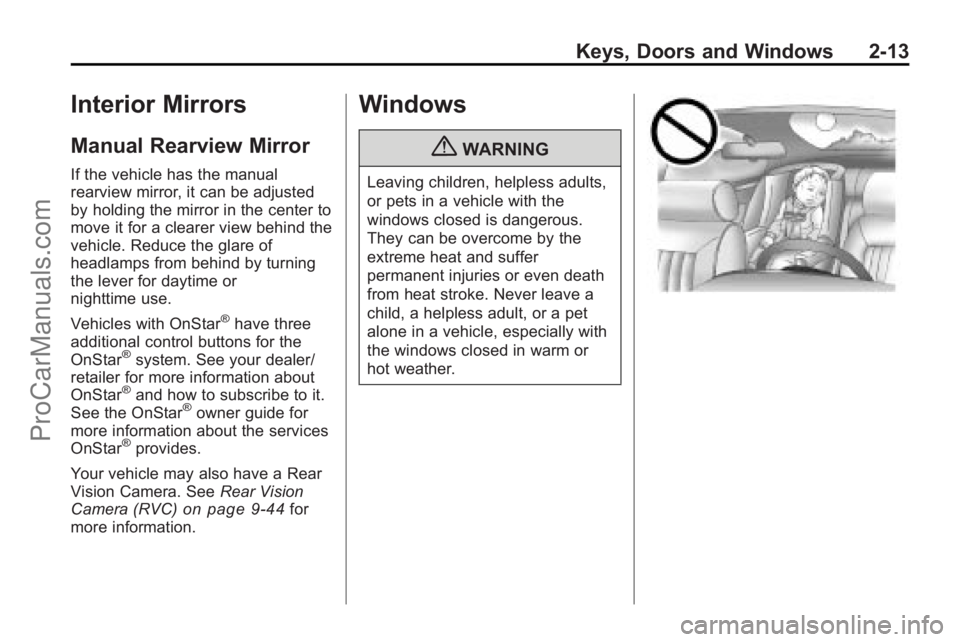
Windows
{WARNING
Leaving children, helpless adults,
or pets in a vehicle with the
windows closed is dangerous.
They can be overcome by the
extreme heat and suffer
permanent injuries or even death
from heat stroke. Never leave a
child, a helpless adult, or a pet
alone in a vehicle, especially with
the windows closed in warm or
hot weather.
ProCarManuals.com
Page 106 of 398

4-2 Storage
Front Storage
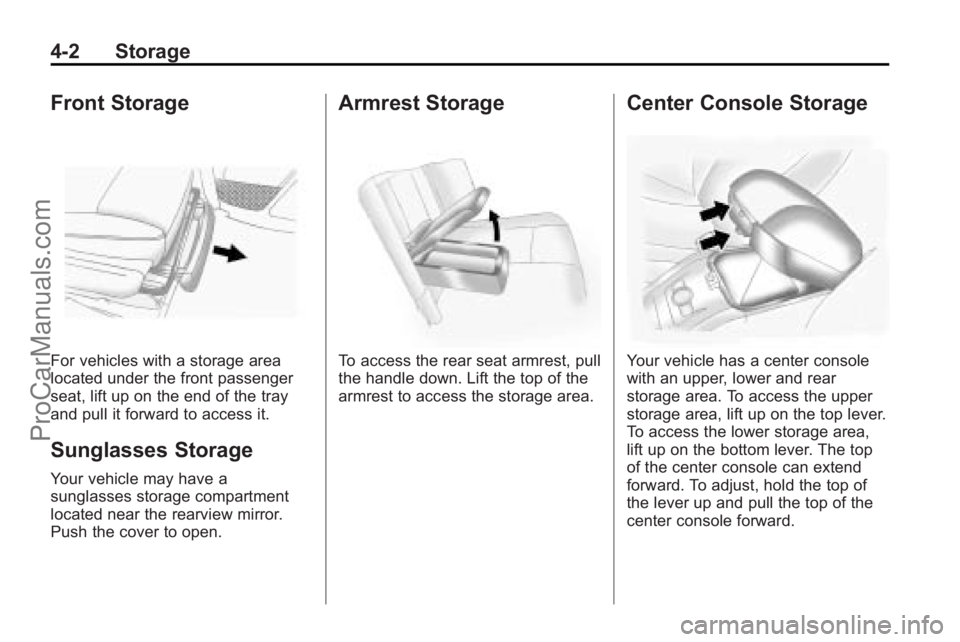
For vehicles with a storage area
located under the front passenger
seat, lift up on the end of the tray
and pull it forward to access it.
Sunglasses Storage
Your vehicle may have a
sunglasses storage compartment
located near the rearview mirror.
Push the cover to open.
Armrest Storage
To access the rear seat armrest, pull
the handle down. Lift the top of the
armrest to access the storage area.
Center Console Storage
Your vehicle has a center console
with an upper, lower and rear
storage area. To access the upper
storage area, lift up on the top lever.
To access the lower storage area,
lift up on the bottom lever. The top
of the center console can extend
forward. To adjust, hold the top of
the lever up and pull the top of the
center console forward.
ProCarManuals.com
Page 114 of 398

5-4 Instruments and Controls
&(Adjustable Interval Wipes):
Sets a delay between wipes. Move
the switch on top of the lever left for
less frequent wipes or right for more
frequent wipes.
a(Low): Slow wipes.
1(High): Fast wipes.
Clear ice and snow from the wiper
blades before using them. If frozen
to the windshield, carefully loosen or
thaw them. Damaged wiper blades
should be replaced. See Wiper
Blade Replacement on page 10‑29.
Heavy snow or ice can overload the
wiper motor. A circuit breaker will
stop the motor until it cools down.
Rainsense™
Notice: Going through an
automatic car wash with the
wipers on can damage them. Turn
the wipers off when going
through an automatic car wash.
For vehicles with Rainsense™
windshield wipers, the moisture
sensor is located next to the inside
rearview mirror and is mounted on
the windshield. When active, these
sensors are able to detect moisture
on the windshield and automatically
turn on the wipers.
To turn on the Rainsense feature,
the wipers must be set to one
of the five delay settings on the
multifunction lever. Each of the five
settings adjusts the sensitivity of the
sensor. Since different drivers have
different setting preferences, it is
recommended that the mid-range
setting (position 3) be used initially.
For more wipes, select the higher
settings; for fewer wipes, select the
lower settings located closer to the
off position on the turn signal/lane
change lever.
The sensor automatically controls
the frequency of the wipes from the
off setting to the high speed setting
according to the weather conditions.
The wipers can be left in a
rainsense mode even when it is not
raining.
When Rainsense is active, the
headlamps turn on automatically if
the exterior lamp control is in the
AUTO position and the wipers are
active.
ProCarManuals.com
Page 223 of 398

Driving and Operating 9-19
.Keep your eyes moving—scan
the road ahead and to the sides.
.Check the rearview mirror and
vehicle instruments often.
Hill and Mountain Roads
Driving on steep hills or through
mountains is different than driving
on flat or rolling terrain. Tips for
driving in these conditions include:
.Keep the vehicle serviced and in
good shape.
.Check all fluid levels and brakes,
tires, cooling system, and
transmission.
.Going down steep or long hills,
shift to a lower gear.
{WARNING
If you do not shift down, the
brakes could get so hot that they
would not work well. You would
then have poor braking or even
none going down a hill. You could
crash. Shift down to let the engine
assist the brakes on a steep
downhill slope.
{WARNING
Coasting downhill in N (Neutral)
or with the ignition off is
dangerous. The brakes will have
to do all the work of slowing down
and they could get so hot that
they would not work well. You
(Continued)
WARNING (Continued)
would then have poor braking or
even none going down a hill. You
could crash. Always have the
engine running and the vehicle in
gear when going downhill.
.Stay in your own lane. Do not
swing wide or cut across the
center of the road. Drive at
speeds that let you stay in your
own lane.
.Top of hills: Be
alert—something could be in
your lane (stalled car, accident).
.Pay attention to special road
signs (falling rocks area, winding
roads, long grades, passing or
no-passing zones) and take
appropriate action.
ProCarManuals.com
Page 249 of 398

Driving and Operating 9-45
WARNING (Continued)
Do not back the vehicle by only
looking at the RVC screen, or use
the screen during longer, higher
speed backing maneuvers or
where there could be cross-traffic.
Your judged distances using the
screen will differ from actual
distances.
So if you do not use proper care
before backing up, you could hit a
vehicle, child, pedestrian,
bicyclist, or pet, resulting in
vehicle damage, injury, or death.
Even though the vehicle has the
RVC system, always check
carefully before backing up by
checking behind and around the
vehicle.The rear vision camera system is
designed to help the driver when
backing up by displaying a view of
the area behind the vehicle. When
the key is in the ON/RUN position
and the driver shifts the vehicle into
R (Reverse), the video image
automatically appears on the inside
rear view mirror. Once the driver
shifts out of R (Reverse), the video
image automatically disappears
from the inside rear view mirror after
a four second delay.
Turning the Rear Vision Camera
System Off or On
To turn off the rear vision camera
system, the vehicle must be in
R (Reverse), then press and release
the button located on the back of
the mirror on the passenger side.
The video display will default back
to on when the ignition is cycled,
or the vehicle is put back in
R (Reverse).
ProCarManuals.com
Page 251 of 398

Driving and Operating 9-47
.The back of the vehicle is in an
accident, the position and
mounting angle of the camera
can change or the camera can
be affected. Be sure to have the
camera and its position and
mounting angle checked at your
dealer/retailer.
The rear vision camera system
display in the rearview mirror may
turn off or not appear as expected
due to one of the following
conditions. If this occurs the video
display will turn blue.
During any wire harness or camera
fault condition, the display will be
blue while the vehicle is in
R (Reverse) or until the conditions
return to normal.
If the display is turned off by
pressing and releasing the button
located the back of the inside rear
view mirror on the passenger side, it
will default back to on when the
ignition is cycled, or the vehicle is
put back in R (Reverse).Fuel
Use of the recommended fuel is an
important part of the proper
maintenance of this vehicle. To help
keep the engine clean and maintain
optimum vehicle performance, we
recommend the use of gasoline
advertised as TOP TIER Detergent
Gasoline.
Look for the TOP TIER label on the
fuel pump to ensure gasoline meets
enhanced detergency standards
developed by auto companies. A list
of marketers providing TOP TIER
Detergent Gasoline can be found at
www.toptiergas.com.
The 8th digit of the Vehicle
Identification Number (VIN) shows
the code letter or number that
identifies the vehicle's engine. The
ProCarManuals.com