steering SATURN VUE HYBRID 2009 User Guide
[x] Cancel search | Manufacturer: SATURN, Model Year: 2009, Model line: VUE HYBRID, Model: SATURN VUE HYBRID 2009Pages: 346, PDF Size: 2.1 MB
Page 107 of 346

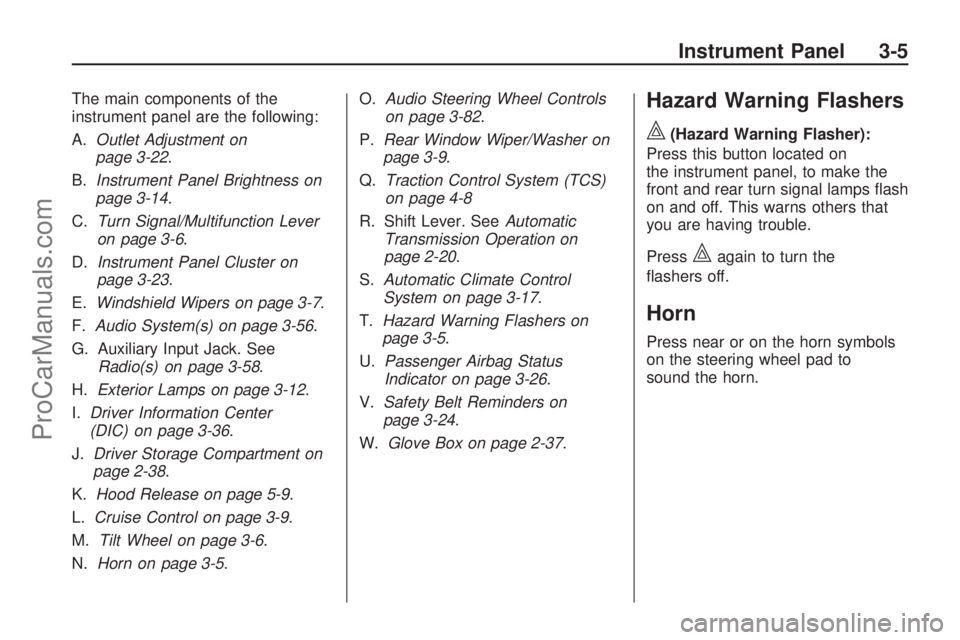
The main components of the
instrument panel are the following:
A.Outlet Adjustment on
page 3-22.
B.Instrument Panel Brightness on
page 3-14.
C.Turn Signal/Multifunction Lever
on page 3-6.
D.Instrument Panel Cluster on
page 3-23.
E.Windshield Wipers on page 3-7.
F.Audio System(s) on page 3-56.
G. Auxiliary Input Jack. See
Radio(s) on page 3-58.
H.Exterior Lamps on page 3-12.
I.Driver Information Center
(DIC) on page 3-36.
J.Driver Storage Compartment on
page 2-38.
K.Hood Release on page 5-9.
L.Cruise Control on page 3-9.
M.Tilt Wheel on page 3-6.
N.Horn on page 3-5.O.Audio Steering Wheel Controls
on page 3-82.
P.Rear Window Wiper/Washer on
page 3-9.
Q.Traction Control System (TCS)
on page 4-8
R. Shift Lever. SeeAutomatic
Transmission Operation on
page 2-20.
S.Automatic Climate Control
System on page 3-17.
T.Hazard Warning Flashers on
page 3-5.
U.Passenger Airbag Status
Indicator on page 3-26.
V.Safety Belt Reminders on
page 3-24.
W.Glove Box on page 2-37.Hazard Warning Flashers
|
(Hazard Warning Flasher):
Press this button located on
the instrument panel, to make the
front and rear turn signal lamps �ash
on and off. This warns others that
you are having trouble.
Press
|again to turn the
�ashers off.
Horn
Press near or on the horn symbols
on the steering wheel pad to
sound the horn.
Instrument Panel 3-5
ProCarManuals.com
Page 108 of 346

Tilt Wheel
The tilt lever lets the steering wheel
be adjusted.
The tilt lever is located on the left
side of the steering column.
To adjust the steering wheel, hold
the wheel and push the lever down.
Then move the wheel to a
comfortable position and pull the
lever up �rmly to lock the steering
column in place.
Turn Signal/Multifunction
Lever
The lever on the left side of the
steering column includes:
G:Turn and Lane-Change
Signals
3:Headlamp High/Low-Beam
Changer
Flash-to-Pass Feature.
Information for these features is on
the pages following.
Turn and Lane-Change
Signals
An arrow on the instrument panel
cluster �ashes in the direction of the
turn or lane change.
Move the lever all the way up or
down to signal a turn.
Raise or lower the lever until the
arrow starts to �ash and then
release, to signal a lane change.
The turn signal �ashes automatically
three times.
The lever returns to its starting
position whenever it is released.
If after signaling a turn or lane
change the arrow �ashes rapidly or
does not come on, a signal bulb
may be burned out.
3-6 Instrument Panel
ProCarManuals.com
Page 109 of 346

Have the bulbs replaced. If a bulb is
not burned out, check the fuse. See
Fuses and Circuit Breakers on
page 5-75and for burned-out bulbs.
Headlamp High/
Low-Beam Changer
23
Headlamp High/Low Beam
Changer:Push the turn
signal/multifunction lever away from
you to turn the high beams on.
Pull the lever towards you to return
to low beams.
This indicator light turns on in the
instrument panel cluster when
the high beam headlamps are on.
Flash-to-Pass
This feature lets you use your
high-beam headlamps to signal a
driver in front of you that you want
to pass.
To �ash the high beams
from low beam, pull the turn
signal/multifunction lever all the
way towards you. Then release it.
Windshield Wipers
The windshield wiper lever is
located on the right side of the
steering column.
Push up or pull down on the lever to
place it in one of the following
positions.
8(Mist):For a single wiping
cycle. The lever returns to its
starting position when released. For
more cycles, hold the lever down
before releasing it.
9(Off):Turns the wipers off.
&(Intermittent):Sets a delay
between wipes. To set for a shorter
or longer delay between wipes,
move the switch on top of the lever
left or right to decrease or
increase wiper movement.
a(Low):For slow, steady wiping
cycles.
1(High):For rapid wiping cycles.
Clear ice and snow from the wiper
blades before using them. If the
wiper blades are frozen to the
windshield, gently loosen or thaw
them. If they become damaged,
install new blades or blade inserts.
SeeWindshield Wiper Blade
Replacement on page 5-38.
Instrument Panel 3-7
ProCarManuals.com
Page 112 of 346

Setting Cruise Control
{CAUTION
If you leave your cruise control on
when you are not using cruise,
you might hit a button and go into
cruise when you do not want to.
You could be startled and even
lose control. Keep the cruise
control switch off until you want to
use cruise control.
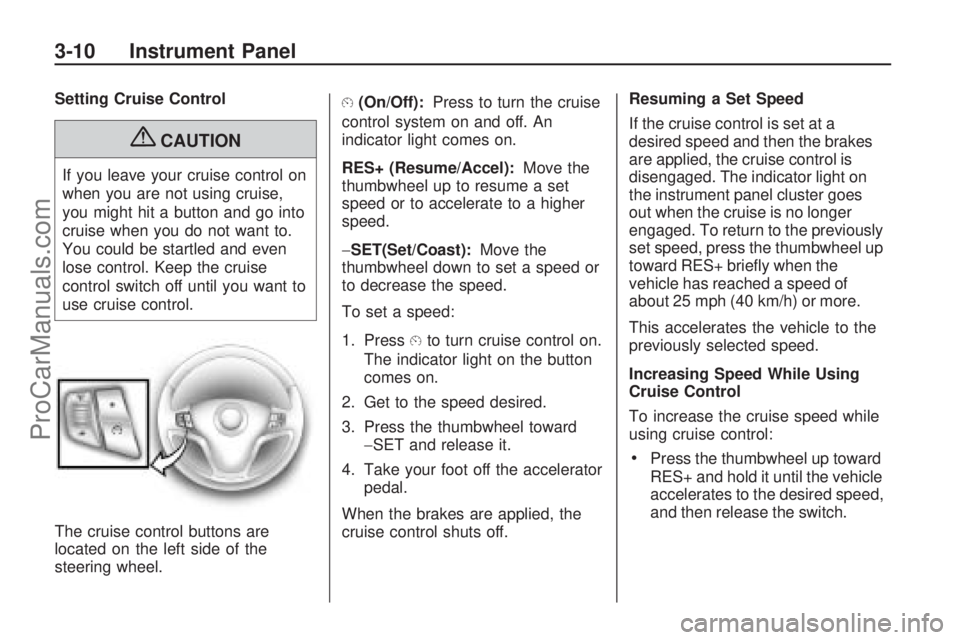
The cruise control buttons are
located on the left side of the
steering wheel.
E(On/Off):Press to turn the cruise
control system on and off. An
indicator light comes on.
RES+ (Resume/Accel):Move the
thumbwheel up to resume a set
speed or to accelerate to a higher
speed.
−SET(Set/Coast):Move the
thumbwheel down to set a speed or
to decrease the speed.
To set a speed:
1. Press
Eto turn cruise control on.
The indicator light on the button
comes on.
2. Get to the speed desired.
3. Press the thumbwheel toward
−SET and release it.
4. Take your foot off the accelerator
pedal.
When the brakes are applied, the
cruise control shuts off.Resuming a Set Speed
If the cruise control is set at a
desired speed and then the brakes
are applied, the cruise control is
disengaged. The indicator light on
the instrument panel cluster goes
out when the cruise is no longer
engaged. To return to the previously
set speed, press the thumbwheel up
toward RES+ brie�y when the
vehicle has reached a speed of
about 25 mph (40 km/h) or more.
This accelerates the vehicle to the
previously selected speed.
Increasing Speed While Using
Cruise Control
To increase the cruise speed while
using cruise control:
Press the thumbwheel up toward
RES+ and hold it until the vehicle
accelerates to the desired speed,
and then release the switch.
3-10 Instrument Panel
ProCarManuals.com
Page 114 of 346

Exterior Lamps
The exterior lamp control is located
on the instrument panel to the
left of the steering wheel.
The exterior lamp control can be
turned to the following positions:
9(Off):Turns off the exterior
lamps. The knob returns to
the AUTO position after it is
released.AUTO (Automatic):Automatically
turns the exterior lamps on and
off, depending on outside lighting.
;(Parking Lamps):Turns on the
parking lamps together with the
following:
Sidemarker Lamps
Taillamps
License Plate Lamps
Instrument Panel Lights
2(Headlamps):Turns on the
headlamps, together with the
previously listed lamps and lights.
Lamps On Reminder
A warning chime sounds, if the driver
door is opened while the ignition is
off and the lamps are on.
Wiper Activated
Headlamps
This feature automatically turns
on the headlamps and parking
lamps if the exterior lamp control is
set in the AUTO position and the
windshield wipers are turned on and
have completed eight wipe cycles.
SeeExterior Lamps on page 3-12
for additional information.
When the ignition is turned off,
the wiper-activated headlamps
immediately turn off. They also turn
off if the windshield wiper control
is turned off.
3-12 Instrument Panel
ProCarManuals.com
Page 116 of 346

Instrument Panel
Brightness
This feature controls the brightness
of the instrument panel lights.
The thumbwheel for this feature is
located on the left side of the
steering wheel next to the exterior
lamps control.
Turn the thumbwheel to the right or
left to brighten or dim the lights.
Dome Lamp
*
(Dome Lamp Override):Press
this button to keep the dome
lamps and other interior lamps
turned off while any door is open.
Press this button again to return it to
the out position and the lamps
automatically come on when any
door is opened.
+(On/Off):Press this button to
turn the dome lamps on and off
while the doors are closed.
Entry Lighting
If the dome lamp override button is
in the out position, the lamps
inside the vehicle automatically
come on when any door is opened
or when the Remote Keyless
Entry (RKE) unlock button is
pressed. After the door is opened
the lights remain on and stay on for
20 seconds after the doors are
closed, or until the key is put into
the ignition and turned to theACC/ACCESSORY position. The
lights will then gradually dim until it
is no longer lit.
Reading Lamps
The reading lamps are located on
the overhead console.
To turn the reading lamps on or off,
press the button located next to
each lamp.
Electric Power
Management
The vehicle has Electric Power
Management (EPM) that estimates
the battery’s temperature and
state of charge. It then adjusts the
voltage for best performance
and extended life of the battery.
When the battery’s state of charge is
low, the voltage is raised slightly to
quickly bring the charge back up.
When the state of charge is high, the
voltage is lowered slightly to prevent
overcharging. If the vehicle has a
voltmeter gage or a voltage display
3-14 Instrument Panel
ProCarManuals.com
Page 148 of 346

REMOTE KEY LEARNING
COMPLETE
This message displays while
matching a Remote Keyless Entry
(RKE) transmitter to your vehicle.
See “MATCHING TRANSMITTERS
TO YOUR VEHICLE” under
Remote Keyless Entry (RKE)
System Operation on page 2-4and
DIC Operation and Displays on
page 3-36for more information.
REPLACE REMOTE KEY FOB
BATTERY
This message displays if a Remote
Keyless Entry (RKE) transmitter
battery is low. The battery needs to
be replaced in the transmitter.
See “Battery Replacement” under
Remote Keyless Entry (RKE)
System Operation on page 2-4.
SERVICE A/C
(Air Conditioning) SYSTEM
This message displays when there
is a problem detected in the air
conditioning system. Have the
vehicle serviced by your
dealer/retailer.
SERVICE AIR BAG
This message displays when there
is a problem with the airbag
system. Have your vehicle serviced
by your dealer/retailer immediately.
SeeAirbag Readiness Light on
page 3-25for more information.
SERVICE BRAKE SYSTEM
This message displays along with
the brake system warning light
if there is a problem with the brake
system or when the brake �uid
level is low. SeeBrake System
Warning Light on page 3-27. Have
the brake system serviced by
your dealer/retailer as soon as
possible.
SERVICE HILL START ASSIST
This message displays if there is
a problem with the hill start
assist function. Have your vehicle
serviced by your dealer/retailer.
SERVICE HYBRID SYSTEM
This message displays if the hybrid
components need to be serviced.
Have your vehicle serviced by your
dealer/retailer.
SERVICE POWER STEERING
This message displays if there
has been a problem detected with
the power steering. SeeSteering on
page 4-9for more information.
3-46 Instrument Panel
ProCarManuals.com
Page 149 of 346

SERVICE STABILITRAK
This message displays if there has
been a problem detected with
StabiliTrak
®. A warning light also
appears on the instrument
panel cluster. SeeStabiliTrak
®/
Traction Control System (TCS)
Warning Light on page 3-28. See
StabiliTrak
®System on page 4-7for
more information.
If this message turns on while you
are driving, pull off the road as soon
as possible and stop carefully.
Try resetting the system by turning
the ignition off and then back
on. If this message still stays on or
turns back on again while you
are driving, your vehicle needs
service. Have the system inspected
by your dealer/retailer as soon
as possible.
SERVICE TIRE MONITORING
SYSTEM
On vehicles with the Tire Pressure
Monitor System (TPMS), this
message displays if a part on the
TPMS is not working properly.
The tire pressure light also �ashes
and then remains on during the
same ignition cycle. SeeTire
Pressure Light on page 3-29.
Several conditions may cause this
message to appear. SeeTire
Pressure Monitor Operation on
page 5-46for more information. If
the warning comes on and stays on,
there may be a problem with the
TPMS. See your dealer/retailer.
SERVICE TRACTION
CONTROL
This message displays when the
Traction Control System (TCS)
is not functioning properly. A
warning light also appears on the
instrument panel cluster. See
StabiliTrak
®/Traction Control System
(TCS) Warning Light on page 3-28
andTraction Control System(TCS) on page 4-8for more
information. Have the TCS serviced
by your dealer/retailer as soon
as possible.
SERVICE TRANSMISSION
This message displays when there
is a problem with the transmission.
See your dealer/retailer for
service.
SERVICE VEHICLE SOON
This message displays when
a non-emissions related malfunction
occurs. Have the vehicle serviced
by your dealer/retailer as soon
as possible.
SPEED LIMITED TO
XXX MPH (KM/H)
This message displays when your
vehicle speed is limited to 80 mph
(128 km/h) because the vehicle
detects a problem in the speed
variable assist steering system.
Have your vehicle serviced by your
dealer/retailer.
Instrument Panel 3-47
ProCarManuals.com
Page 161 of 346

the radio features to work
improperly. If this happens, contact
the radio station.
Playing the Radio
O(Power/Volume):Press to turn
the system on and off.
Turn to increase or decrease the
volume.
Finding a Station
BAND:Press to switch between
AM, FM, or XM™ (if equipped).
f(Tune):Turn to select radio
stations.
©SEEK¨:Press to go to the
previous or to the next station.
To scan stations, press and hold
either arrow for a few seconds until
a beep sounds. The radio goes
to a station, plays for a few seconds,
then goes to the next station.
Press either arrow again to stop
scanning.The radio only seeks and scans
stations with a strong signal that are
in the selected band.
4(Information) (XM™ Satellite
Radio Service, MP3, and
RDS Features):Press to display
additional text information related to
the current FM-RDS station, XM
station, or MP3 song. If information
is available, the song title
information displays on the top line
of the display and artist information
displays on the bottom line.
When information is not available,
“NO INFO” displays.
Storing a Radio Station as a
Favorite
Drivers are encouraged to set up
their radio station favorites while the
vehicle is parked. Tune to favorite
stations using the presets, favorites
button, and steering wheel
controls, if the vehicle has them.
SeeDefensive Driving on page 4-3.FAV (Favorites):A maximum of
36 stations can be programmed as
favorites using the six pushbuttons
positioned below the radio station
frequency labels and by using
the FAV button (radio favorites
page). Press the FAV button to go
through up to six pages of
favorites, each having six favorite
stations available per page.
Each page of favorites can contain
any combination of AM, FM, or
XM stations. To store a station as a
favorite:
1. Tune to the desired radio station.
2. Press the FAV button to
display the page where
the station is to be stored.
3. Press and hold one of the six
pushbuttons until a beep
sounds. When that pushbutton is
pressed and released, the
station that was set, returns.
4. Repeat the steps for each
pushbutton radio station to
be stored as a favorite.
Instrument Panel 3-59
ProCarManuals.com
Page 174 of 346

Check XM Receivr:If this message
does not clear within a short
period of time, the receiver could
have a fault. Consult with your
dealer/retailer.
XM Not Available:If this message
does not clear within a short
period of time, the receiver could
have a fault. Consult with your
dealer/retailer.
Bluetooth®
Vehicles with a Bluetooth system can
use a Bluetooth capable cell phone
with a Hands Free Pro�le to make
and receive phone calls. The system
can be used while the key is in
ON/RUN or ACC/ACCESSORY
position. The range of the Bluetooth
system can be up to 30 ft. (9.1 m).
Not all phones support all functions,
and not all phones are guaranteed to
work with the in-vehicle Bluetooth
system. See gm.com/bluetooth for
more information on compatible
phones.
Voice Recognition
The Bluetooth system uses voice
recognition to interpret voice
commands to dial phone numbers
and name tags.
Noise:Keep interior noise levels to
a minimum. The system may not
recognize voice commands if there
is too much background noise.
When to Speak:A short tone
sounds after the system responds
indicating when it is waiting for
a voice command. Wait until
the tone and then speak.
How to Speak:Speak clearly in a
calm and natural voice.
Audio System
When using the in-vehicle Bluetooth
system, sound comes through
the vehicle’s front audio system
speakers and overrides the audio
system. Use the audio system
volume knob, during a call,
to change the volume level. The
adjusted volume level remainsin memory for later calls. To prevent
missed calls, a minimum volume
level is used if the volume is turned
down too low.
Bluetooth Controls
Use the buttons located on the
steering wheel to operate the
in-vehicle Bluetooth system. See
Audio Steering Wheel Controls
on page 3-82for more information.
J/0(Push To Talk):Press to
answer incoming calls, con�rm
system information, and to start
speech recognition.
−/
K(Phone On Hook):Press
to end a call and to cancel an
operation.
Pairing
A Bluetooth enabled cell phone
must be paired to the in-vehicle
Bluetooth system �rst and then
connected to the vehicle before it
can be used. See the cell phone
manufacturers user guide for
3-72 Instrument Panel
ProCarManuals.com