mirror SATURN VUE HYBRID 2009 Owners Manual
[x] Cancel search | Manufacturer: SATURN, Model Year: 2009, Model line: VUE HYBRID, Model: SATURN VUE HYBRID 2009Pages: 346, PDF Size: 2.1 MB
Page 1 of 346

Seats and Restraint
System............................... 1-1
Head Restraints
.............. 1-2
Front Seats
.................... 1-3
Rear Seats
.................... 1-9
Safety Belts
..................1-10
Child Restraints
.............1-22
Airbag System
..............1-41
Restraint System
Check
......................1-56
Features and Controls...... 2-1
Keys
............................. 2-2
Doors and Locks
............ 2-6
Windows
........................ 2-9
Theft-Deterrent
Systems
...................2-10
Starting and Operating
Your Vehicle
.............2-14
Mirrors
.........................2-27
OnStar
®System
............2-29
Universal Home Remote
System
.....................2-32
Storage Areas
...............2-37
Instrument Panel............... 3-1
Instrument Panel
Overview
.................... 3-4
Climate Controls
............3-17
Warning Lights, Gages,
and Indicators
............3-22
Driver Information
Center (DIC)
.............3-36
Audio System(s)
............3-56
Driving Your Vehicle......... 4-1
Your Driving, the Road,
and the Vehicle
........... 4-1
Towing
........................4-22
Service and
Appearance Care............... 5-1
Service
.......................... 5-3
Fuel
.............................. 5-5
Checking Things Under
the Hood
.................... 5-9
Headlamp Aiming
..........5-33
Bulb Replacement
.........5-35Windshield Wiper Blade
Replacement
.............5-38
Tires
...........................5-38
Appearance Care
..........5-66
Vehicle Identi�cation
......5-74
Electrical System
...........5-74
Capacities and
Speci�cations
............5-81
Maintenance Schedule...... 6-1
Maintenance Schedule
..... 6-1
Customer Assistance
Information........................ 7-1
Customer Assistance and
Information
................. 7-1
Reporting Safety
Defects
.....................7-12
Vehicle Data Recording
and Privacy
...............7-14
Index....................................i-1
2009 Saturn VUE Green Line Hybrid Owner ManualM
ProCarManuals.com
Page 63 of 346

Features and
Controls
Keys
Keys...................................2-2
Remote Keyless Entry
(RKE) System...................2-3
Remote Keyless Entry
(RKE) System Operation. . .2-4
Doors and Locks
Door Locks.........................2-6
Power Door Locks..............2-6
Delayed Locking.................2-6
Automatic Door Lock..........2-7
Automatic Door Unlock.......2-7
Rear Door Security
Locks................................2-7
Lockout Protection..............2-7
Liftgate...............................2-8
Windows
Windows.............................2-9
Power Windows..................2-9
Sun Visors........................2-10
Theft-Deterrent Systems
Theft-Deterrent Systems. . . .2-10
Content Theft-Deterrent.....2-10
PASS-Key®III+ Electronic
Immobilizer......................2-12
PASS-Key®III+ Electronic
Immobilizer Operation......2-12
Starting and Operating
Your Vehicle
New Vehicle Break-In.......2-14
Ignition Positions...............2-14
Retained Accessory
Power (RAP)...................2-15
Starting the Engine
(Automatic Engine
Start/Stop)
.......................2-15
Engine Coolant Heater......2-19
Automatic Transmission
Operation........................2-20
Parking Brake...................2-22
Regenerative Braking........2-23
Shifting Into Park..............2-23
Shifting Out of Park..........2-25
Parking Over Things
That Burn........................2-25
Engine Exhaust.................2-26
Running the Vehicle
While Parked..................2-26
Mirrors
Manual Rearview Mirror. . . .2-27
Automatic Dimming
Rearview Mirror...............2-27
Outside Power Mirrors......2-28
Outside Convex Mirror......2-28
Outside Heated Mirrors.....2-28
OnStar®System
OnStar®System................2-29
Universal Home Remote
System
Universal Home Remote
System............................2-32
Universal Home Remote
System Operation............2-33
Features and Controls 2-1
ProCarManuals.com
Page 72 of 346

To open or close a window, press
or pull up on the switch.
The power windows operate when
the ignition is in ON/RUN or
ACC/ACCESSORY, or while in
Retained Accessory Power (RAP).
SeeRetained Accessory Power
(RAP) on page 2-15.
Express-Down Window
The driver window switch has an
express-down feature that lowers
the window without holding the
switch. Press the switch part way
and the window will open a
small amount. Press the switch
down all the way and release it and
the window lowers all the way.
To stop the window while it
is lowering, press and release the
switch.
Window Lockout
o(Window Lockout):The
vehicle has a lockout feature to
prevent rear seat passengers from
operating the windows. Press
the lockout button, located with the
power window switches, to turn
the feature on and off.
Sun Visors
To block out glare, swing the sun
visor down, or detach the driver sun
visor from the center mount and
slide it along the rod from
side-to-side.
On a visor with a mirror, lift the
cover to use it.
Theft-Deterrent
Systems
Vehicle theft is big business,
especially in some cities. This vehicle
has theft-deterrent features,
however, they do not make it
impossible to steal.
Content Theft-Deterrent
This vehicle may have a content
theft-deterrent alarm system.
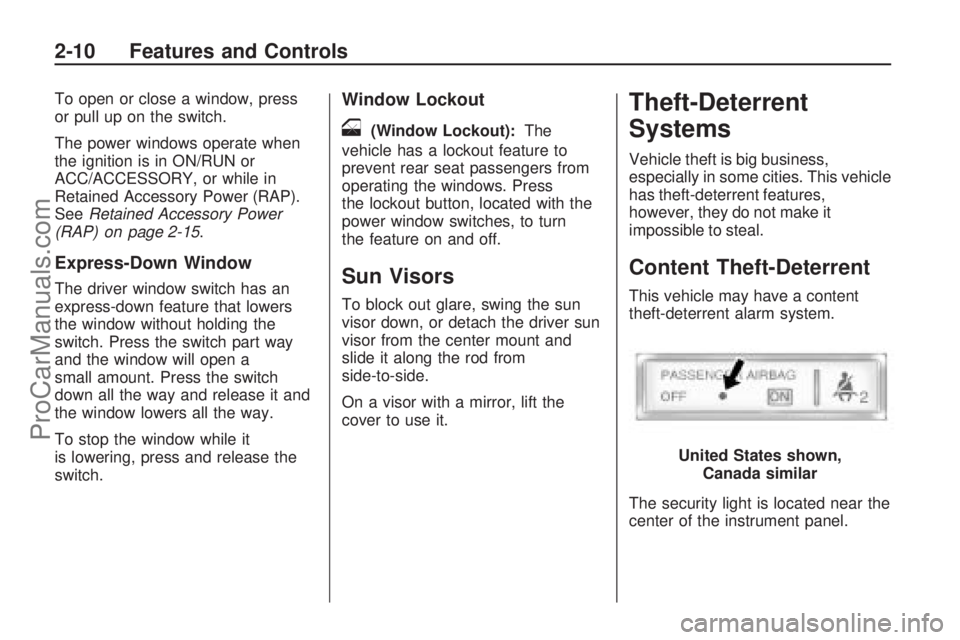
The security light is located near the
center of the instrument panel.United States shown,
Canada similar
2-10 Features and Controls
ProCarManuals.com
Page 77 of 346

ACC (ACC/ACCESSORY):This is
the position in which you can operate
the electrical accessories or items
plugged into the accessory power
outlets.
Use this position if the vehicle must
be pushed or towed.
ON/RUN:This position can be used
to operate the electrical accessories
and to display some instrument
panel cluster warning and indicator
lights. The switch stays in this
position when the engine is running.
The transmission is also unlocked in
this position. If you leave the key in
the ACC/ACCESSORY or ON/RUN
positions with the engine off, the
battery could be drained. You may
not be able to start the vehicle if the
battery is allowed to drain for an
extended period of time.START:This is the position that
starts the engine. When the engine
starts, release the key. The ignition
switch returns to ON/RUN for driving.
A warning tone will sound when the
driver door is opened, the ignition is
in ACC/ACCESSORY or LOCK/OFF
and the key is in the ignition.
Retained Accessory
Power (RAP)
These vehicle accessories may be
used for up to 10 minutes after
the ignition key is turned off:
Outside Mirror
Power Windows
Radio
All these features work when the
ignition key is in the ON/RUN
or ACC/ACCESSORY positions,
until a door is opened.
Starting the Engine
(Automatic Engine
Start/Stop)
Place the transmission in the
proper gear.
Move the shift lever to P (Park) or
N (Neutral). The engine will not start
in any other position. To restart the
engine when the vehicle is already
moving, use N (Neutral) only.
Notice:Do not try to shift to
P (Park) if the vehicle is moving.
If you do, you could damage
the transmission. Shift to P (Park)
only when the vehicle is stopped.
Starting Procedure
1. With your foot off the accelerator
pedal, turn the ignition key to
START. When the engine starts,
let go of the key. The idle speed
will go down as your engine gets
warm. Do not race the engine
immediately after starting it.
Features and Controls 2-15
ProCarManuals.com
Page 89 of 346

{CAUTION
Idling a vehicle in an enclosed
area with poor ventilation is
dangerous. Engine exhaust may
enter the vehicle. Engine exhaust
contains Carbon Monoxide (CO)
which cannot be seen or smelled.
It can cause unconsciousness
and even death. Never run the
engine in an enclosed area that
has no fresh air ventilation. For
more information, seeEngine
Exhaust on page 2-26.
Follow the proper steps to be sure
the vehicle will not move. See
Shifting Into Park on page 2-23.
If parking on a hill and pulling
a trailer, seeTowing a Trailer on
page 4-26.
Mirrors
Manual Rearview Mirror
The vehicle has a manual rearview
mirror. It can be adjusted by
holding the mirror in the center to
move it for a clearer view behind
your vehicle. Reduce the glare
of headlamps from behind by
pushing the lever forward or pulling
it back for daytime/nighttime use.
Automatic Dimming
Rearview Mirror
The vehicle has an automatic
dimming rearview mirror.
Vehicles with OnStar
®have
three additional control buttons
for the OnStar
®system. See your
dealer/retailer for more informationabout OnStar
®and how to subscribe
to it. SeeOnStar®System on
page 2-29for more information
about the services OnStar
®
provides.
O(On/Off):Press to turn the
dimming feature on or off.
Automatic Dimming Mirror
Operation
The automatic dimming mirror
reduces the glare from the
headlamps of the vehicle behind
you. The dimming feature comes on
and the indicator light illuminates
each time the ignition is turned
to start.
Features and Controls 2-27
ProCarManuals.com
Page 90 of 346

Outside Power Mirrors
Controls for the outside power
mirrors are located on the
driver door.To adjust the power mirrors:
1. Turn the knob to choose the
left (L) or the (R) right mirror.
2. Adjust each mirror so that you can
see the side of your vehicle and
the area behind your vehicle.
3. Return the control to the center
position so the mirror cannot be
moved.
The mirrors can be manually folded
inward toward the vehicle. Return
to the original position to use
correctly.
Outside Convex Mirror
{CAUTION
A convex mirror can make things
(like other vehicles) look farther
away than they really are. If you
cut too sharply into the right lane,
you could hit a vehicle on the
right. Check the inside mirror or
glance over your shoulder before
changing lanes.
The passenger side mirror is convex
shaped. A convex mirror’s surface
is curved so more can be seen from
the driver seat.
Outside Heated Mirrors
For vehicles with outside heated
mirrors:
=(Rear Window Defogger):
Press to heat the outside rearview
mirrors. See “Rear Window
Defogger” underAutomatic Climate
Control System on page 3-17for
more information.
2-28 Features and Controls
ProCarManuals.com
Page 99 of 346

Reprogramming a Single
Universal Home Remote
Button
To reprogram any of the three
Universal Home Remote buttons,
repeat the programming instructions
earlier in this section, beginning
with Step 2.
For help or information on the
Universal Home Remote System,
call the customer assistance phone
number underCustomer Assistance
Offices on page 7-5.
Storage Areas
Glove Box
To open the glove box, lift up on the
lever. The glove box divider can
be removed. The slots on the
left side are for storing the divider.
Cupholders
There are cupholders located in
front of and behind the center
console.
To access the cupholders behind
the center console, push the button.
Sunglasses Storage
Compartment
Your vehicle may have a sunglasses
storage compartment located near
the rearview mirror. Push the
cover to open.
Center Console Storage
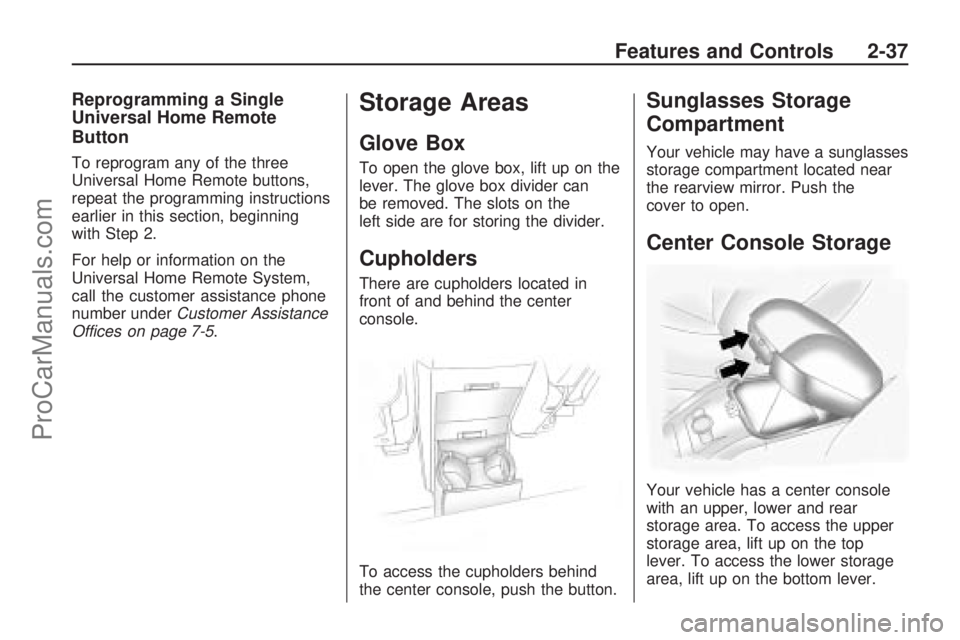
Your vehicle has a center console
with an upper, lower and rear
storage area. To access the upper
storage area, lift up on the top
lever. To access the lower storage
area, lift up on the bottom lever.
Features and Controls 2-37
ProCarManuals.com
Page 110 of 346

Heavy snow or ice can overload the
wiper motor. A circuit breaker will
stop the motor until it cools down.
Rainsense™ II Wipers
For vehicles with Rainsense™ II
windshield wipers, the moisture
sensor is located next to the inside
rearview mirror and is mounted
on the windshield. When active,
these sensors are able to detect
moisture on the windshield and
automatically turn on the wipers.
To turn on the Rainsense feature,
the wipers must be set to one
of the �ve delay settings on the
multifunction lever. Each of the �ve
settings adjusts the sensitivity of
the sensor.Since different drivers have
different setting preferences, it is
recommended that the mid-range
setting (position 3) be used initially.
For more wipes, select the higher
settings; for fewer wipes, select the
lower settings located closer to the
off position on the multifunction lever.
The sensor will automatically control
the frequency of the wipes from
the off setting to the high speed
setting according to the weather
conditions. The wipers can be left in
a rainsense mode even when it is
not raining.
When Rainsense is active, the
headlamps will turn on automatically
if the exterior lamp control is in
the AUTO position and the wipers
are active.
Notice:Going through an
automatic car wash with the
wipers on can damage them. Turn
the wipers off when going
through an automatic car wash.
Windshield Washer
{CAUTION
In freezing weather, do not use
your washer until the windshield is
warmed. Otherwise the washer
�uid can form ice on the
windshield, blocking your vision.
Pull the windshield wiper lever
toward you to spray washer �uid on
the windshield. The wipers will run
for a few cycles to clear the
windshield. For more wash cycles,
pull the lever forward and hold.
Heated Windshield Washer
Nozzles
This feature prevents the windshield
washer �uid from freezing on the
nozzle during cold conditions.
The heated nozzles are turned on
when the rear window defogger
is activated. SeeAutomatic Climate
Control System on page 3-17.
3-8 Instrument Panel
ProCarManuals.com
Page 198 of 346

If the vehicle starts to slide, ease
your foot off the accelerator pedal
and quickly steer the way you want
the vehicle to go. If you start steering
quickly enough, the vehicle may
straighten out. Always be ready for
a second skid if it occurs.
Of course, traction is reduced when
water, snow, ice, gravel, or other
material is on the road. For safety,
slow down and adjust your driving to
these conditions. It is important to
slow down on slippery surfaces
because stopping distance will be
longer and vehicle control more
limited.
While driving on a surface with
reduced traction, try your best to
avoid sudden steering, acceleration,
or braking, including reducing vehicle
speed by shifting to a lower gear.
Any sudden changes could cause
the tires to slide. You may not realize
the surface is slippery until thevehicle is skidding. Learn to
recognize warning clues — such as
enough water, ice, or packed snow
on the road to make a mirrored
surface — and slow down when
you have any doubt.
Remember: Any Antilock Brake
System (ABS) helps avoid only
the braking skid.
Driving at Night
Night driving is more dangerous than
day driving because some drivers
are likely to be impaired — by alcohol
or drugs, with night vision problems,
or by fatigue.
Night driving tips include:
Drive defensively.
Do not drink and drive.
Reduce headlamp glare
by adjusting the inside
rearview mirror.
Slow down and keep more space
between you and other vehicles
because headlamps can only
light up so much road ahead.
Watch for animals.
When tired, pull off the road.
Do not wear sunglasses.
Avoid staring directly into
approaching headlamps.
Keep the windshield and all glass
on your vehicle clean — inside
and out.
Keep your eyes moving,
especially during turns or curves.
No one can see as well at night as
in the daytime. But, as we get
older, these differences increase.
A 50-year-old driver might need
at least twice as much light to see
the same thing at night as a
20-year-old.
4-12 Driving Your Vehicle
ProCarManuals.com
Page 200 of 346

Before Leaving on a
Long Trip
To prepare your vehicle for a long
trip, consider having it serviced
by your dealer/retailer before
departing.
Things to check on your own
include:
Windshield Washer Fluid:
Reservoir full? Windows
clean — inside and outside?
Wiper Blades:In good shape?
Fuel, Engine Oil, Other Fluids:All
levels checked?
Lamps:Do they all work and are
lenses clean?
Tires:Are treads good? Are tires
in�ated to recommended
pressure?
Weather and Maps:Safe to
travel? Have up-to-date maps?
Highway Hypnosis
Always be alert and pay attention to
your surroundings while driving. If
you become tired or sleepy, �nd a
safe place to park your vehicle
and rest.
Other driving tips include:
Keep the vehicle well ventilated.
Keep interior temperature cool.
Keep your eyes moving — scan
the road ahead and to the sides.
Check the rearview mirror and
vehicle instruments often.
Hill and Mountain Roads
Driving on steep hills or through
mountains is different than driving
on �at or rolling terrain. Tips for
driving in these conditions include:
Keep the vehicle serviced
and in good shape.
Check all �uid levels and brakes,
tires, cooling system, and
transmission.
Going down steep or long hills,
shift to a lower gear.
{CAUTION
If you do not shift down, the
brakes could get so hot that they
would not work well. You would
then have poor braking or even
none going down a hill. You could
crash. Shift down to let the engine
assist the brakes on a steep
downhill slope.
4-14 Driving Your Vehicle
ProCarManuals.com