tailgate Seat Alhambra 2007 Owner's Manual
[x] Cancel search | Manufacturer: SEAT, Model Year: 2007, Model line: Alhambra, Model: Seat Alhambra 2007Pages: 291, PDF Size: 9.13 MB
Page 5 of 291
Contents3
ContentsThe structure of this manual
. . . . .
Content
. . . . . . . . . . . . . . . . . . . . . . . . . . . . . . . .
Safety First
. . . . . . . . . . . . . . . . . . . . . . . . . . .
Safe driving
. . . . . . . . . . . . . . . . . . . . . . . . . . . . . .
Brief introduction . . . . . . . . . . . . . . . . . . . . . . . .
Proper sitting position for occupants . . . . . . . . .
Pedal area . . . . . . . . . . . . . . . . . . . . . . . . . . . . . .
Stowing luggage . . . . . . . . . . . . . . . . . . . . . . . . .
Seat belts
. . . . . . . . . . . . . . . . . . . . . . . . . . . . . . . .
Introduction . . . . . . . . . . . . . . . . . . . . . . . . . . . . .
Why wear seat belts? . . . . . . . . . . . . . . . . . . . . . .
Seat belts . . . . . . . . . . . . . . . . . . . . . . . . . . . . . . .
Belt tension devices . . . . . . . . . . . . . . . . . . . . . .
Airbag system
. . . . . . . . . . . . . . . . . . . . . . . . . . . .
Brief introduction . . . . . . . . . . . . . . . . . . . . . . . .
Front airbags . . . . . . . . . . . . . . . . . . . . . . . . . . . .
Side airbags . . . . . . . . . . . . . . . . . . . . . . . . . . . . .
Curtain airbags . . . . . . . . . . . . . . . . . . . . . . . . . .
Deactivating airbags* . . . . . . . . . . . . . . . . . . . . .
Child safety
. . . . . . . . . . . . . . . . . . . . . . . . . . . . . .
Brief introduction . . . . . . . . . . . . . . . . . . . . . . . .
Child seats . . . . . . . . . . . . . . . . . . . . . . . . . . . . . .
Installation of child seats in vehicle seats . . . . .
Integrated child seat . . . . . . . . . . . . . . . . . . . . . .
Operating instructions
. . . . . . . . . . . .
Cockpit
. . . . . . . . . . . . . . . . . . . . . . . . . . . . . . . . . . .
Overview . . . . . . . . . . . . . . . . . . . . . . . . . . . . . . .
Instruments . . . . . . . . . . . . . . . . . . . . . . . . . . . . .
Display in the instrument panel . . . . . . . . . . . . .
Warning lamps . . . . . . . . . . . . . . . . . . . . . . . . . . .
On board computer with multifunction display*
Navigation system * . . . . . . . . . . . . . . . . . . . . . .
Steering wheel controls
. . . . . . . . . . . . . . . . . . .
Steering wheel . . . . . . . . . . . . . . . . . . . . . . . . . . .
Unlocking and locking
. . . . . . . . . . . . . . . . . . . .
Keys . . . . . . . . . . . . . . . . . . . . . . . . . . . . . . . . . . .
Central locking . . . . . . . . . . . . . . . . . . . . . . . . . . .
Key with remote control . . . . . . . . . . . . . . . . . . .
Anti-theft alarm system . . . . . . . . . . . . . . . . . . . .
Tailgate . . . . . . . . . . . . . . . . . . . . . . . . . . . . . . . . .
Windows . . . . . . . . . . . . . . . . . . . . . . . . . . . . . . .
Sliding/tilting sun roof . . . . . . . . . . . . . . . . . . . .
Lights and visibility
. . . . . . . . . . . . . . . . . . . . . . .
Lights . . . . . . . . . . . . . . . . . . . . . . . . . . . . . . . . . .
Visibility . . . . . . . . . . . . . . . . . . . . . . . . . . . . . . . .
Windscreen washers . . . . . . . . . . . . . . . . . . . . . .
Mirrors . . . . . . . . . . . . . . . . . . . . . . . . . . . . . . . . .
Seats and stowage
. . . . . . . . . . . . . . . . . . . . . . .
The importance of correct seat adjustment . . . .
Head restraints . . . . . . . . . . . . . . . . . . . . . . . . . .
Front seats . . . . . . . . . . . . . . . . . . . . . . . . . . . . . .
Rear seats . . . . . . . . . . . . . . . . . . . . . . . . . . . . . .
Stowage compartments . . . . . . . . . . . . . . . . . . .
Ashtrays, cigarette lighter and electrical sockets
Hazard warning triangles and first aid kit . . . . .
Luggage compartment . . . . . . . . . . . . . . . . . . . . Roof carrier . . . . . . . . . . . . . . . . . . . . . . . . . . . . . .
Cooling and heating box* . . . . . . . . . . . . . . . . . .
Heating, Ventilation and Air conditioning
. .
Climatronic . . . . . . . . . . . . . . . . . . . . . . . . . . . . . .
Driving
. . . . . . . . . . . . . . . . . . . . . . . . . . . . . . . . . . .
Steering . . . . . . . . . . . . . . . . . . . . . . . . . . . . . . . .
Safety . . . . . . . . . . . . . . . . . . . . . . . . . . . . . . . . . .
Ignition lock . . . . . . . . . . . . . . . . . . . . . . . . . . . . .
Starting and stopping the engine . . . . . . . . . . .
Manual gearbox . . . . . . . . . . . . . . . . . . . . . . . . . .
Automatic gearbox . . . . . . . . . . . . . . . . . . . . . . .
Handbrake . . . . . . . . . . . . . . . . . . . . . . . . . . . . . .
Parking distance warning system . . . . . . . . . . . .
Cruise control system (CCS) . . . . . . . . . . . . . . . .
Tips and Maintenance
. . . . . . . . . . . . .
Intelligent technology
. . . . . . . . . . . . . . . . . . . . .
Brakes . . . . . . . . . . . . . . . . . . . . . . . . . . . . . . . . .
Driving and the environment
. . . . . . . . . . . . . .
Running-in . . . . . . . . . . . . . . . . . . . . . . . . . . . . . .
Exhaust gas emission control system . . . . . . . .
Driving abroad . . . . . . . . . . . . . . . . . . . . . . . . . . .
Trailer towing . . . . . . . . . . . . . . . . . . . . . . . . . . . .
Driving economically and with respect for the
environment . . . . . . . . . . . . . . . . . . . . . . . . . . . . .
Cleaning and caring for your vehicle
. . . . . . .
General notes . . . . . . . . . . . . . . . . . . . . . . . . . . .
Care of the vehicle exterior . . . . . . . . . . . . . . . . .
Care of the vehicle interior . . . . . . . . . . . . . . . . .
5
6
7
7
7
9
14
14
17
17
19
22
30
32
32
36
39
41
43
45
45
47
49
52 61
61
61
62
67
70
79
83
84
84
86
86
87
93
95
97
100
104
108
108
114
116
118
121
121
122
124
126
133
139
142
142 147
148
151
151
159
159
160
161
163
165
166
172
173
175
179
179
179
185
185
186
187
188
191
193
193
194
199
alhambra ingles.book Seite 3 Donnerstag, 19. April 2007 4:04 16
Page 17 of 291
Safe driving15
Safety First
Operating instructions
Tips and Maintenance
Te c h n i c a l D a t a
– Distribute the load evenly in the luggage compartment.
– Lay and stow heavy luggage as far forward as possible in the luggage compartment.
– Stow heavy luggage as low as possible in the luggage compart- ment.
– Secure heavy objects to the fitted fastening rings ⇒page 15.
WARNING
•
Loose luggage and other objects in the luggage compartment can
cause serious injuries.
•
Always stow objects in the luggage compartment and secure them on
the fastening rings.
•
Use suitable specialist straps to secure heavy objects.
•
During sudden manoeuvres or accidents, loose objects can be thrown
forward, injuring vehicle occupants or passers-by. This increased risk of
injury will be further increased if a loose object is struck by an inflating
airbag. If this happens, objects can be transformed into “missiles”. Risk of
fatal injury.
•
Please note that the centre of gravity may shift when transporting
heavy objects; this may affect the vehicle's handling and lead to an acci-
dent. Therefore, it is essential to adjust your speed and driving style
accordingly, to avoid accidents.
•
Never exceed the allowed axle loads or allowed maximum weight. If the
allowed axle load or the allowed total weight is exceeded, the driving char-
acteristics of the vehicle may change, leading to accidents, injuries and
damage to the vehicle.
•
Never leave your vehicle unattended, especially when the tailgate is
open. Children could climb into the luggage compartment closing the door behind them; they will remain trappe
d without help and there is a mortal
risk.
•
Never allow children to play in or around the vehicle. Close and lock
both the tailgate and all the doors when you leave the vehicle. Before you
lock the vehicle, make sure that ther e are no adults or children in the
vehicle.
•
Never transport passengers in the luggage compartment. Every
passenger must be properly belted in ⇒ page 17.Note
•
Air circulation in the vehicle helps reduce fogging of the windows. Used
air escapes through ventilation slits in the side trim of the luggage compart-
ment. Ensure that the ventil ation slits are never covered.
•
Straps for securing the load to the fastening rings are commercially
available.
Fastening rings
There are four fastening rings in the luggage compartment
which can be used to secure luggage and other objects.– Always use suitable and undamaged straps to secure luggage and other objects to the fastening rings ⇒ in “Loading the
luggage compartment” on page 14.
– Pull up the fastening rings to attach the straps.
WARNING (continued)
alhambra ingles.book Seite 15 Donnerstag, 19. April 2007 4:04 16
Page 74 of 291
Cockpit
72
WARNING
•
Failure to observe warning lamps and warning messages can result in
serious personal injury or damage to your vehicle.
•
The risk of an accident increases if your vehicle breaks down. Use a
warning triangle to draw the attention of other road users to your
stationary vehicle so that it does not represent a danger.
•
The engine compartment of any motor vehicle is a dangerous area!
Before you open the bonnet to work on the engine or in the engine compart-
ment, you must switch off the engine and allow it to cool to reduce the risk
of scalding or other injuries. Read and observe the relevant warnings
⇒ page 209.Note
•
The appropriate warning lamp for a fa ult will light up in vehicles without
warning or information texts in the display.
•
In vehicles with warning or information texts in the display, the appro-
priate warning lamp for a fault will ligh t up and a warning or information text
will also appear in the display.
Trailer turn signals
This warning lamp also flashes when the turn signals are
operated while towing a caravan or trailer.The warning lamp
flashes when the turn signals are operated, provided a
trailer is correctly attached and connected to the vehicle.
The warning lamp will not flash if one of the turn signals on the trailer fails.
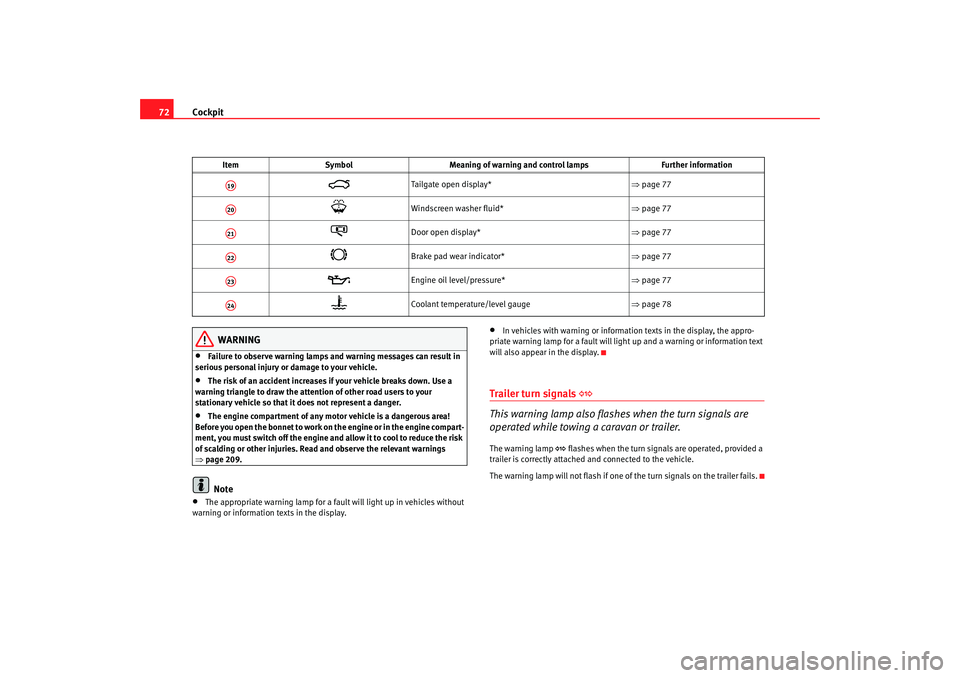
Tailgate open display* ⇒page 77
Windscreen washer fluid* ⇒page 77
Door open display* ⇒page 77
Brake pad wear indicator* ⇒page 77
Engine oil level/pressure* ⇒page 77
Coolant temperature/level gauge ⇒page 78
Item
Symbol Meaning of warning and control lamps Further information
A19A20A21A22A23A24
alhambra ingles.book Seite 72 Donnerstag, 19. April 2007 4:04 16
Page 79 of 291
Cockpit77
Safety First
Operating instructions
Tips and Maintenance
Te c h n i c a l D a t a
Tailgate open display*
When the ignition is switched on, the warning light indicates that the tailgate
is open.
The warning light only goes off when the tailgate is completely closed.Washer fluid
This warning lamp lights up to indicate that the windscreen
washer level is too low.This serves as a reminder to fill up the reservoir at the earliest opportunity
⇒page 218.Door open display*
This light comes on when a door is open or incorrectly closed.Brake pad wear indicator*
As the brake pad wear indicator only monitors the front brake pads, it is advis-
able to have the rear brake pads inspected at the same time.
WARNING
Have the brake pads inspected immediately by a qualified dealership if the
warning display
lights up.
Engine oil pressure
The warning light indicates that the engine oil pressure is too
low or that the oil gauge does not operate correctly.It lights up or flashes in red (oil pressure too low)
If the indicator lights up or starts to flash in red while driving, an audible
signal will also be emitted three times when the engine speed exceeds 1500
rpm. Stop and switch off the engine: check the level of oil and top up if neces-
sary ⇒page 214.
If the warning light flashes even though the oil level is correct, do not
continue driving The engine should not be turning even at idle speed. Obtain
technical assistance.
If, while driving, the engine speed falls to below idling speed, the oil pressure
warning light may come on. Increase the engine speed by accelerating or
dropping to a lower gear.
A yellow light comes on (oil level* too low)
If the warning light comes on in yellow, this indicates that the oil level is too
low. Switch off engine, check oil level, replacing where necessary.
When the bonnet is opened the oil level warni ng will fall to zero. But if it is not
topped with oil, the light will come back on after approximately 100 km.
Yellow flashing (defective oil level* )
If the oil gauge is faulty, a sound signal is emitted and the warning light
flashes several times.
At the same time, a warning appears briefly on the on board computer
display*. The engine should immediately be checked by a Technical Service
Centre.
From the moment the defect appears until the engine is checked, the level of
oil should be constantly monitored, prefeably every time the vehicle is
refuelled.
alhambra ingles.book Seite 77 Donnerstag, 19. April 2007 4:04 16
Page 84 of 291
Cockpit
82•
To protect your face, hands and arms from hot steam or fluid, cover the
fan cap with a large cloth in order to open it.
•
Take care to avoid coolant spilling on the exhaust pipe or any other hot
component as antifreeze is inflammable.
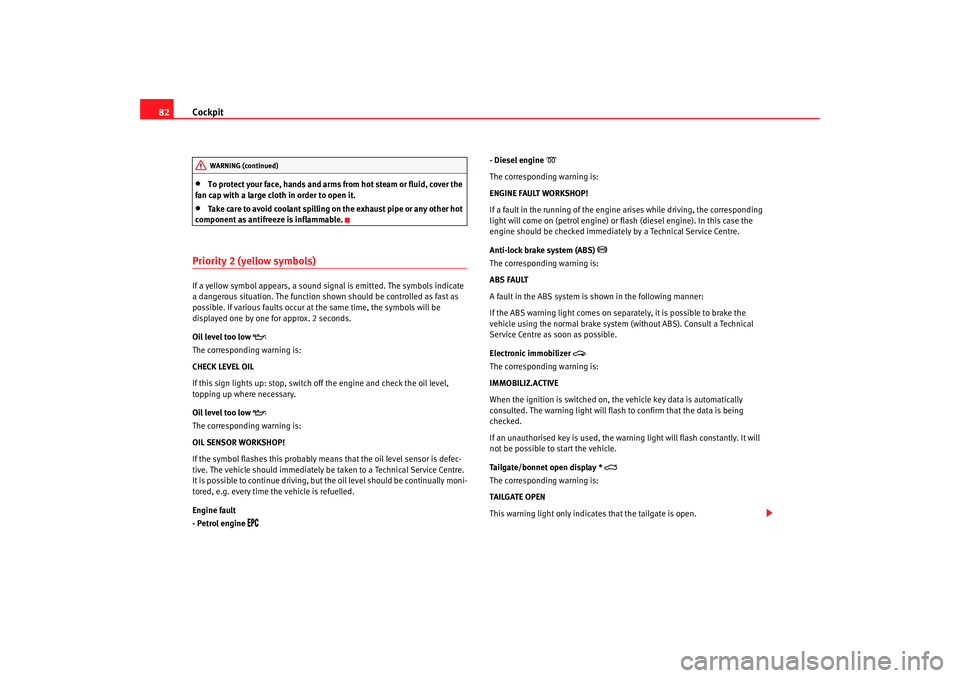
Priority 2 (yellow symbols)If a yellow symbol appears, a sound signal is emitted. The symbols indicate
a dangerous situation. The function sh own should be controlled as fast as
possible. If various faults occur at the same time, the symbols will be
displayed one by one for approx. 2 seconds.
Oil level too low
The corresponding warning is:
CHECK LEVEL OIL
If this sign lights up: stop, switch off the engine and check the oil level,
topping up where necessary.
Oil level too low
The corresponding warning is:
OIL SENSOR WORKSHOP!
If the symbol flashes this probably means that the oil level sensor is defec-
tive. The vehicle should immediately be taken to a Technical Service Centre.
It is possible to continue driving, but the oil level should be continually moni-
tored, e.g. every time th e vehicle is refuelled.
Engine fault
- Petrol engine
- Diesel engine
The corresponding warning is:
ENGINE FAULT WORKSHOP!
If a fault in the running of the engine arises whil e driving, the corresponding
light will come on (petrol engine) or flash (diesel engine). In this case the
engine should be checked immediately by a Technical Service Centre.
Anti-lock brake system (ABS)
The corresponding warning is:
ABS FAULT
A fault in the ABS system is shown in the following manner:
If the ABS warning light comes on separately, it is possible to brake the
vehicle using the normal brake system (without ABS). Consult a Technical
Service Centre as soon as possible.
Electronic immobilizer
The corresponding warning is:
IMMOBILIZ.ACTIVE
When the ignition is switched on, the vehicle key data is automatically
consulted. The warning light will flash to confirm that the data is being
checked.
If an unauthorised key is used, the warning light will flash constantly. It will
not be possible to start the vehicle.
Tailgate/bonnet open display *
The corresponding warning is:
TAILGATE OPEN
This warning light only indicates that the tailgate is open.
WARNING (continued)
alhambra ingles.book Seite 82 Donnerstag, 19. April 2007 4:04 16
Page 85 of 291
Cockpit83
Safety First
Operating instructions
Tips and Maintenance
Te c h n i c a l D a t a
The warning light only goes off when the tailgate is completely closed ( to the
second position)
Windscreen washer*
The corresponding warning is:
TOPUP WASHER FLUID
This symbol lights up to indicate that the windscreen washer level is too low.
Top up windscreen and headlight washer fluid*
Fuel level low
The corresponding warning is:
PLEASE REFUEL!Navigation system *
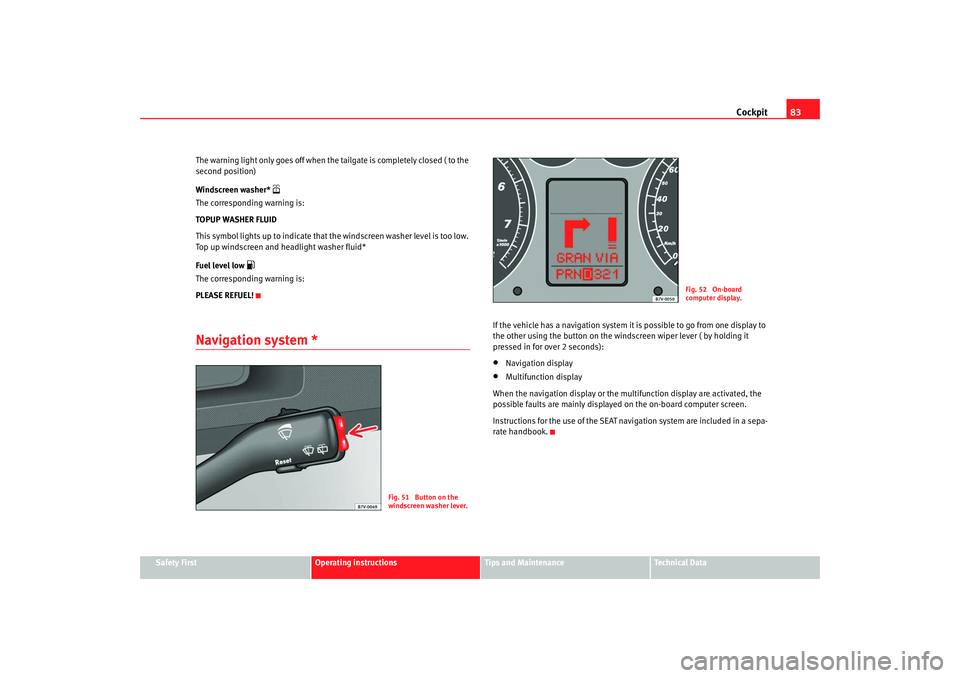
If the vehicle has a navigation system it is possible to go from one display to
the other using the button on the wind
screen wiper lever ( by holding it
pressed in for over 2 seconds):•
Navigation display
•
Multifunction display
When the navigation display or the multifunction display are activated, the
possible faults are mainly displayed on the on-board computer screen.
Instructions for the use of the SEAT navigation system are included in a sepa-
rate handbook.
Fig. 51 Button on the
windscreen washer lever.
Fig. 52 On-board
computer display.
alhambra ingles.book Seite 83 Donnerstag, 19. April 2007 4:04 16
Page 89 of 291

Unlocking and locking87
Safety First
Operating instructions
Tips and Maintenance
Te c h n i c a l D a t a
Remote control keys*Two keys are supplied in vehicles with remote control, a folding key and a
fixed key ⇒fig. 55.
Note
In certain versions of the model, the remote control key may be folding. The
key works, in terms of remote control, in the same way as other remote control
keys ⇒page 93.
Folding key*To u n f o l d key bit, press button ⇒fig. 56 . This unfolds with a spring
action.
To fold the key bit, press button and push key down until it clicks into
place.Central lockingDescription of the central locking system
The central locking system enables you to lock and unlock all
the doors and the tailgate from one point.Central locking can be operated using any of the following options:•
mechanically with the key in the driver door ⇒page 86,
Fig. 55 Remote control
keys
Fig. 56 Folding key
AAAA
alhambra ingles.book Seite 87 Donnerstag, 19. April 2007 4:04 16
Page 90 of 291
Unlocking and locking
88•
the key with remote control
9) ⇒ page 93,
•
with the central locking button ⇒page 90.
Individual opening of doors
9)
An Authorised SEAT Service Centre ca n programme the individual opening of
doors.
When the key is turned once in the driver's door lock, in the direction of
opening, or when button ⇒page 93, fig. 61 on the remote control key is
pressed, only the driver 's door will unlock.
When the key is turned a second time or the button is pressed a second
time, all the doors and the tailgate are unlocked.
WARNING
•
Do not leave anyone in the car if it has been locked from the outside. It
is not possible to open the doors from the inside. Locked doors could delay
assistance in an emergency. People could become trapped inside in an
emergency.
•
Never close the doors without observing and ensuring it is clear, to do
otherwise could cause serious injury to you and others. Make sure that no
one is in the path of the door.Note
The entire vehicle is unlocked if the airbags are triggered during an accident.
The vehicle cannot be locked from the inside unless the ignition is first
switched off and back on. Following an accident, the vehicle cannot be locked
from the outside. Contact an Authorised Service Centre.
Opening and closing the doors with the keyOpening the doors
– Insert the key in the lock on the driver door.
– Turn the key to the open position. The doors and the tailgate are unlocked.
Closing the doors
– Insert the key in the lock on the driver door.
– First turn the key once to the locking position ⇒. The doors
and the tailgate are locked.Notes on unlocking
The following applies if you wish to unlock your vehicle manually using the
key:•
The deadlock mechanism, the interior monitoring system
10) and the anti-
theft alarm
10) will be deactivated immediately. The deactivation is confirmed
by the turn signals flashing briefly twice.
•
The interior lights in the courtesy position will be switched on for approx-
imately 20 seconds when the vehicle is unlocked.
•
If the key is held in the unlocking position, all windows (apart from the
electric vent wing at the rear) will be opened on vehicles equipped with elec-
tric windows.
Notes on locking
The following applies if you wish to lock your vehicle manually using the key:
9)Optional equipment
A1
10)Optional equipment
alhambra ingles.book Seite 88 Donnerstag, 19. April 2007 4:04 16
Page 91 of 291
Unlocking and locking89
Safety First
Operating instructions
Tips and Maintenance
Te c h n i c a l D a t a
•
The deadlock mechanism, th e interior monitoring system
10) and the anti-
theft alarm
10) will be activated immediately if the key is turned once in the
lock. The activation is confirmed by the turn signals flashing briefly.
•
The deadlock mechanism, the interior monitoring system and the anti-
theft alarm will not be activated if the key is turned in the lock twice within
one second. All the doors and the tailgate will, however, be locked. The doors
can be unlocked from the inside if the deadlock mechanism has not been
activated. To do this, operate the door opening lever on the door in question.
The alarm will go off.
•
When locking the vehicle, the interior lights in the courtesy switch posi-
tion will be switched off.
•
A warning lamp in the driver door flashes to indicate the deadlock is
working. The warning lamp will switch of f after 14 days. This is to prevent the
vehicle battery from discharging complete ly when the vehicle is not used for
a longer period. The system is still active.
•
Windows, or the sliding roof, which are still open can be closed automat-
ically on vehicles equipped with electric windows and electric vent windows
or with an electric sliding roof. To do this, the key must be kept held in the
locking position until all windows an d the sliding roof are fully closed.
WARNING
If the vehicle is locked, children and disabled people may be trapped
inside.•
Never leave children or disabled persons in the vehicle; in case of emer-
gency they may not be able to leave the vehicle or look after themselves.
•
Always take you car keys with you when you leave the vehicle. Misuse
of the keys, for example, by children, may result in serious damage and
accident.
−The engine may accidentally be started and be out of control.
− If the ignition is switched on, the electric equipment could be acti-
vated with risk of injury, for example, in the electric windows. −
The doors can be locked using the remote control key. This could
result in people being trapped in the vehicle in an emergency.
− Always take the key with you when you leave the vehicle.
•
Never remove the key from the ignition if the vehicle is in motion. Risk
of accident. The steering lock could engage suddenly, and you would not be
able to steer the vehicle.Caution
Each key contains electronic components. Protect the keys from moisture and
excessive vibration.
Note
•
Any SEAT Service centre can programme the central locking system so that
only the driver's door is unlocked when the key is turned once to open.WARNING (continued)
alhambra ingles.book Seite 89 Donnerstag, 19. April 2007 4:04 16
Page 92 of 291
Unlocking and locking
90Central locking buttons
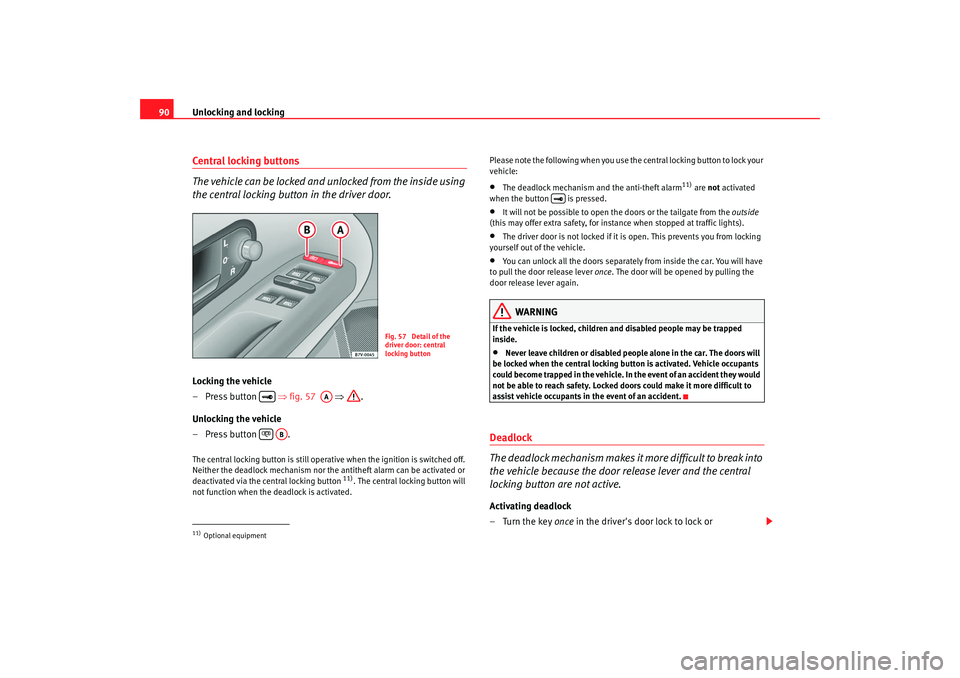
The vehicle can be locked and unlocked from the inside using
the central locking button in the driver door.Locking the vehicle
– Press button ⇒fig. 57 ⇒ .
Unlocking the vehicle
– Press button .The central locking button is still operative when the ignition is switched off.
Neither the deadlock mechanism nor the antitheft alarm can be activated or
deactivated via the central locking button
11). The central locking button will
not function when the deadlock is activated. Please note the following when you use the central locking button to lock your
vehicle:
•
The deadlock mechanism and the anti-theft alarm
11) are
not activated
when the button is pressed.
•
It will not be possible to open the doors or the tailgate from the outside
(this may offer extra safety, for instance when stopped at traffic lights).
•
The driver door is not locked if it is open. This prevents you from locking
yourself out of the vehicle.
•
You can unlock all the doors separately from inside the car. You will have
to pull the door release lever once. The door will be opened by pulling the
door release lever again.
WARNING
If the vehicle is locked, children and disabled people may be trapped
inside.•
Never leave children or disabled people alone in the car. The doors will
be locked when the central locking bu tton is activated. Vehicle occupants
could become trapped in the vehicle. In the event of an accident they would
not be able to reach safety. Locked doors could make it more difficult to
assist vehicle occupants in the event of an accident.
Deadlock
The deadlock mechanism makes it more difficult to break into
the vehicle because the door release lever and the central
locking button are not active.Activating deadlock
–Turn the key once in the driver's door lock to lock or
11)Optional equipment
Fig. 57 Detail of the
driver door: central
locking button
AA
AB
alhambra ingles.book Seite 90 Donnerstag, 19. April 2007 4:04 16