display Seat Altea 2005 Owner's Guide
[x] Cancel search | Manufacturer: SEAT, Model Year: 2005, Model line: Altea, Model: Seat Altea 2005Pages: 286, PDF Size: 9.59 MB
Page 77 of 286
Cockpit75
Safety First
Operating instructions
Tips and Maintenance
Te c h n i c a l D a t a
First look at the coolant temperature gauge. If the needle is in the normal
range, top up with coolant at the earliest opportunity ⇒
.
WARNING
•
If your vehicle is immobilised for any technical reasons, move it to a
safe distance from traffic. Turn off the engine, turn on the hazard lights and
place the warning triangle.
•
Never open the bonnet if you can see or hear steam or coolant escaping
from the engine compartment. Risk of scalding. Wait until you can no
longer see or hear escaping steam or coolant.
•
The engine compartment of any motor vehicle is a dangerous area!
Before carrying out any work in the engine compartment, switch off the
engine and allow it to cool down. Alwa ys note the corresponding warnings.
⇒ page 201
Rear fog light
This warning lamp lights up when the rear fog light is switched on
. Further
information ⇒page 109.
Turn signals
The warning lamp flashes when the turn signals are in oper-
ation.Depending on which turn signal is operated, either the left
or right
indi-
cator lamp flashes. Both warning lamps wi ll flash at the same time when the
hazard warning lights are switched on.
If one turn signal fails, the warning lamp will start flashing twice as fast. Further information on the turn signals
⇒page 113.
Trailer turn signals
This warning lamp also flashe s when the turn signals are
operated while towing a caravan or trailer.The warning lamp
flashes when the turn signals are operated, provided a
trailer is correctly attached and connected to the vehicle.
The warning lamp will not flash if one of the turn signals on the trailer fails.
Main beam headlights
This warning lamp lights up when the main beams are on.The warning lamp
lights up when the main beams are on or when the
headlight flasher is operated.
Further information ⇒page 113
Bulb defect
The warning lamp lights up when a bulb in the vehicle's exte-
rior lighting is defective.The warning lamp
lights up when a bulb in the vehicle's exterior lighting
(e.g. left-hand main beam) is defective.
The following information text displayed in the instrument panel display
9) :
FULL LIGHTS LEFT FAULT
altea_ingles Seite 75 Donnerstag, 19. Mai 2005 3:02 15
Page 78 of 286
Cockpit
76Cruise control system*
The warning lamp comes on when the cruise control system
is switched on.The warning lamp
lights up when the cruise control system is switched on.
Further notes on the cruise control system ⇒page 169.
Washer fluid
This warning lamp lights up to indicate that the windscreen
washer level is too low.This serves as a reminder to fill up the reservoir at the earliest opportunity
⇒page 211
The following information text display ed in the instrument panel display
10) :
REFILL WINDSCREEN LIQUID
Brake system* / handbrake
The warning lamp lights up if the handbrake is applied, if the
brake fluid level falls too low or if there is a fault in the brake
system.This warning lamp
lights up if
•
If the handbrake is on If you drive faster than 6 km/h with the handbrake on, the following message
will appear on the instrument panel display
11):
HANDBRAKE ON Also, an
audible warning is given.
•
If the brake fluid level is too low ⇒page 214
The following information text displayed in the instrument panel display
11) :
STOP BRAKE FLUID SEE INSTRUCTION MANUAL .
•
If there is a fault in the brake system
The following information text displayed in the instrument panel display
11) :
BRAKE FAULT SEE INSTRUCTION MANUAL
This warning lamp can light up together with the anti-lock brake system
warning lamp.
WARNING
•
Before opening the bonnet, read and observe the warnings on
⇒ page 201, “Working in the engine compartment”.
•
If the brake warning lamp does not go out, or if it lights up when
driving, the brake fluid level ⇒page 214, “Brake fluid” in the reservoir is
too low. Risk of accident. Stop the vehicle and do not drive on. Obtain tech-
nical assistance.
•
If the brake warning lamp
lights up together with the ABS warning
lamp
, the control function of the ABS could be out of action. This could
cause the rear wheels to lock quickly when you brake. This could cause the
rear to break away. Risk of skidding. Drive carefully to the nearest qualified
workshop and have the fault corrected.
9)Depending on the model version10)Depending on the model version
11)Depending on the model version
altea_ingles Seite 76 Donnerstag, 19. Mai 2005 3:02 15
Page 79 of 286
Cockpit77
Safety First
Operating instructions
Tips and Maintenance
Te c h n i c a l D a t a
Engine oil pressure
This warning lamp indicates that the engine oil pressure is
too low.If this warning symbol starts to flash, and is accompanied by three audible
warnings , switch off the engine and check the oil level. If the oil level is too
low, add more engine oil ⇒page 204.
The following information text displayed in the instrument panel display
12) :
STOP ENGINE OIL PRESSURE SEE INSTRUCTION MANUAL .
If the symbol flashes although the oil level is correct, do not drive on. The
engine must not even run at idle speed. Obtain technical assistance.
Anti-lock brake system (ABS)
A warning lamp system monitors the ABS.The warning lamp
should light up for a few seconds when the ignition is
switched on. It goes out again after th e system has run through an automatic
test sequence.
There is a fault in the ABS if:
•
The warning lamp
does not light up when the ignition is switched on.
•
The warning lamp does not go out again after a few seconds.
•
The warning lamp lights up when the vehicle is moving.
The vehicle can still be braked in the normal way (except that the ABS control
function will not function). Please take the vehicle to a qualified workshop as
soon as possible. For further information on the ABS see the ⇒page 173.
If a fault occurs in the ABS, the ESP* warning lamp will also light up. Brake system fault
If the ABS warning lamp
lights up together with the brake warning lamp
, this indicates not only a fault in the
ABS function, but also a possible fault
in the brake system. ⇒
WARNING
•
Before opening the bonnet, read and observe the warnings on
⇒ page 201.
•
If the brake warning lamp
should light up together with the ABS
warning lamp
, stop the vehicle immediately and check the brake fluid
level in the reservoir ⇒page 214, “Brake fluid”. If the fluid level has
dropped below the “MIN” mark you must not drive on. Risk of accident.
Obtain technical assistance.
•
If the brake fluid level is correct, the fault in the brake system may have
been caused by a failure of the ABS system. This could cause the rear
wheels to lock quickly when you brake. This could cause the rear to break
away. Risk of skidding. Drive carefully to the nearest qualified workshop
and have the fault corrected.
Differential lock fault (EDL)*
EDL operates along with the ABS in vehicles equipped with an
Electronic Stabilisation Program (ESP)*A malfunction in the EDL is indicated by the ABS warning lamp
. Please
take the vehicle to a qualified workshop as soon as possible. For further infor-
mation on the EDL ⇒page 176
12)Depending on the model version
altea_ingles Seite 77 Donnerstag, 19. Mai 2005 3:02 15
Page 82 of 286
Cockpit
80Glow plug system / Engine fault
The warning lamp lights up to show that the glow plugs are
preheating the engine. It flashes if there is an engine fault.
Warning lamp
is lit
The warning lamp lights up while the glow plugs are preheating. When the
warning lamp goes off, the engine should be started straight away.
Warning lamp
flashes
If a fault develops in the engine management system while you are driving,
the glow plug lamp will flash
. Take the vehicle to an Authorised Service
Centre as soon as possible and have the engine checked.
Emission control system*
This warning lamp monitors the exhaust system.
Warning lamp
flashes:
When there is misfiring that can damage the catalytic converter. Reduce
speed and drive carefully to the near est qualified workshop to have the
engine checked.
The following information text display ed in the instrument panel display
13) :
EXHAUST TUBE SEE WORKSHOP
Warning lamp
is lit:
If a fault has developed during driving which has reduced the quality of the
exhaust gas (e. g. lambda probe fault). Reduce speed and drive carefully to
the nearest qualified workshop to have the engine checked. The following information text display
ed in the instrument panel display:
EXHAUST TUBE SEE WORKSHOP .
Electronic stabilisation programme (ESP)*
This warning lamp monitors the electronic stabilisation
program.
This program includes the ABS, EDL and TCS.
The warning lamp
has the following functions:
•
It will light for about 2 seconds when the ignition is switched on while a
test of the function is carried out.
•
It flashes when the ESP is activated when driving.
•
It will light up continuously if there is a malfunction in the ESP.
•
It will light up continuously if the ESP is switched off.
•
It will also come on if a fault should occur in the ABS because the ESP
operates in conjunction with the ABS.
If the ESP warning lamp
lights up and stays on af ter the engine is started,
this may mean that the control system has temporarily switched off the ESP.
In this case the ESP can be reactivated by switching the ignition off and then
on again. If the warning lamp goes out, this means the system is fully
functional.
Operating the foot brake
The footbrake must be depressed when this warning lamp lights up. This is
necessary when the automatic gearbox* selector lever is moved out of the
positions P or N.
13)Depending on the model version
altea_ingles Seite 80 Donnerstag, 19. Mai 2005 3:02 15
Page 83 of 286
Cockpit81
Safety First
Operating instructions
Tips and Maintenance
Te c h n i c a l D a t a
Power steering system*
For vehicles with power steering, the level of steering assistance depends on
the vehicle's speed and on the steering angle.
The warning lamp should light up for a few seconds when the ignition is
switched on. It should go out when the engine has started running.
If the battery is disconnected, the indicator remains lit, even with the engine
running. The warning light only goes of f after a distance of approx. 50 m.
There is a fault in the electromechanica l steering system if the lamp does not
go out or lights up whilst the vehicle is in motion. The indicator may appear
in two different colours to indicate faults. If it lights yellow, this indicates a
minor fault. If it lights red, seek wo rkshop assistance immediately, if no
assistance is available stop driving. Stop the vehicle and seek technical
assistance. The power steering does not work if the battery is flat or if the
engine is off (for example, for towing). You should take into account that you
will need considerably more power than normal to steer the vehicle if the
steering assistance is reduced or has failed completely.
For those vehicles fitted with ESP* the function “Recommended steering
manoeuvre” is included. See⇒ page 175Brake pad wear indicator*
As the brake pad wear indicator only monitors the front brake pads, it is advis-
able to have the rear brake pads inspected at the same time.
The following information text displayed in the instrument panel display
14) :
CHECK BRAKE PADS .
WARNING
Have the brake pads inspected immediately by a qualified dealership if the
warning display
lights up.
Indicator for open doors or tailgate
This indicator lights if one of th e doors or the tailgate is open.The warning light
should go off when all the doors are closed correctly.
The system also works when the ignition is switched off. It should go off
about 15 seconds after the vehicle is locked.
Electronic immobiliser* “Safe”
This warning lamp flashes if an unauthorised key is used.Inside the key there is a chip that deactivates the electronic immobiliser auto-
matically when the key is inserted into the ignition. The immobiliser will be
activated again automatically as soon as you pull the key out of the ignition
lock.
The following information text displayed in the instrument panel display
15) :
SAFE . The vehicle cannot be used in that case ⇒page 158.
The engine can, however, be started if the appropriate coded SEAT genuine
key is used.
14)Depending on the model version
15)Depending on the model version
altea_ingles Seite 81 Donnerstag, 19. Mai 2005 3:02 15
Page 113 of 286
Lights and visibility111
Safety First
Operating instructions
Tips and Maintenance
Te c h n i c a l D a t a
Coming home / leaving home function*
After dark the area around the car is lit up with the aid of the
coming home / leaving home function.To activate the function
– Put the light switch into the position
or in the “Auto” position
for those vehicles fitted with the automatic lighting function.
– Remove key from ignition switch.
To deactivate the function
– Turn light switch to position 0
Coming home function*
When the system is activated and it is dark, the coming home function will
illuminate the vehicle and its surroundings by switching on the dipped head-
lights, rear lights and nu mber plate lights when the driver's door is opened.
While one of the doors or the tailgate are open, the dipped headlights, the
rear lights and the registration plate lighting remain on for about 90 seconds.
If, before this time is up, all of the doors and the tailgate are closed, another
40 seconds of lighting is given. However, if all of the doors and the tailgate
are closed after the 90 seconds have passed, the system will be deactivated
and the lights will not come on.
When the vehicle is completely closed and both 90 second periods are up,
the system will be turned off and the lights will also turn off. If you wish to
reactivate the system, you must start from the beginning.
The lighting time is defined at the time of manufacture. Leaving home function*
The function is activated when the vehicle is unlocked using the remote
control. In the dark, the leaving home function will light the dipped beam
lights, the rear lights and the registration plate lighting for about 40 seconds.
Note
•
If the vehicle is used often during the night for short trips using the
coming home function, this will place a heavy demand on the battery. To
avoid this, make longer journeys whenever possible.
•
Observe all relevant statutory requirements when using the lighting
systems described here.
•
For those vehicles fitted with the “Dot Matrix” display, the delay in turning
off the headlights (about 40 seconds) can be adjusted using the “Configura-
tion, lights and visibility” menu.
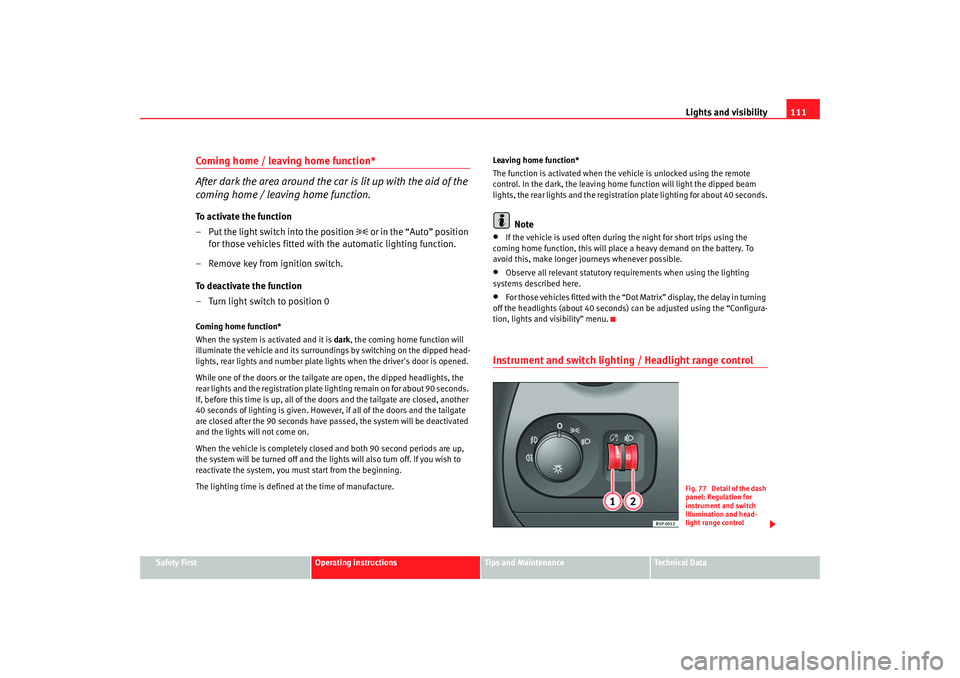
Instrument and switch lighting / Headlight range control
Fig. 77 Detail of the dash
panel: Regulation for
instrument and switch
illumination and head-
light range control
altea_ingles Seite 111 Donnerstag, 19. Mai 2005 3:02 15
Page 147 of 286
Air conditioning145
Safety First
Operating instructions
Tips and Maintenance
Te c h n i c a l D a t a
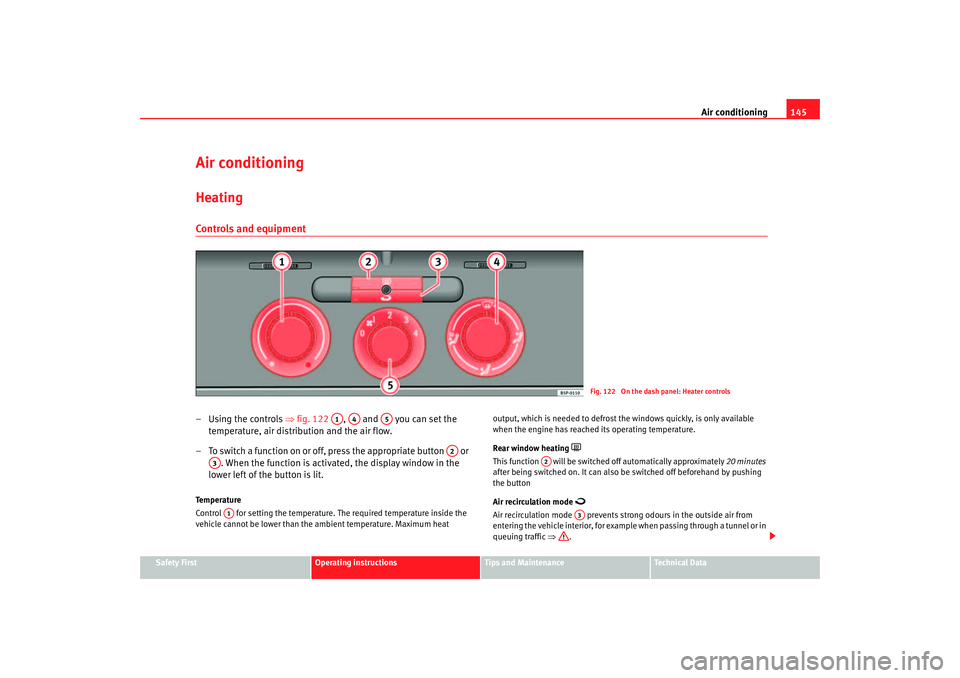
Air conditioningHeatingControls and equipment– Using the controls ⇒ fig. 122 , and you can set the
temperature, air distribution and the air flow.
– To switch a function on or off, press the appropriate button or . When the function is activated, the display window in the
lower left of the button is lit.Temperature
Control for setting the temperature. The required temperature inside the
vehicle cannot be lower than the ambient temperature. Maximum heat output, which is needed to defrost the windows quickly, is only available
when the engine has reached its operating temperature.
Rear window heating
This function will be switched off automatically approximately
20 minutes
after being switched on. It can also be switched off beforehand by pushing
the button
Air recirculation mode
Air recirculation mode prevents st rong odours in the outside air from
entering the vehicle interior, for example when passing through a tunnel or in
queuing traffic ⇒.
Fig. 122 On the dash panel: Heater controls
A1
A4
A5
A2
A3A1
A2
A3
altea_ingles Seite 145 Donnerstag, 19. Mai 2005 3:02 15
Page 149 of 286
Air conditioning147
Safety First
Operating instructions
Tips and Maintenance
Te c h n i c a l D a t a
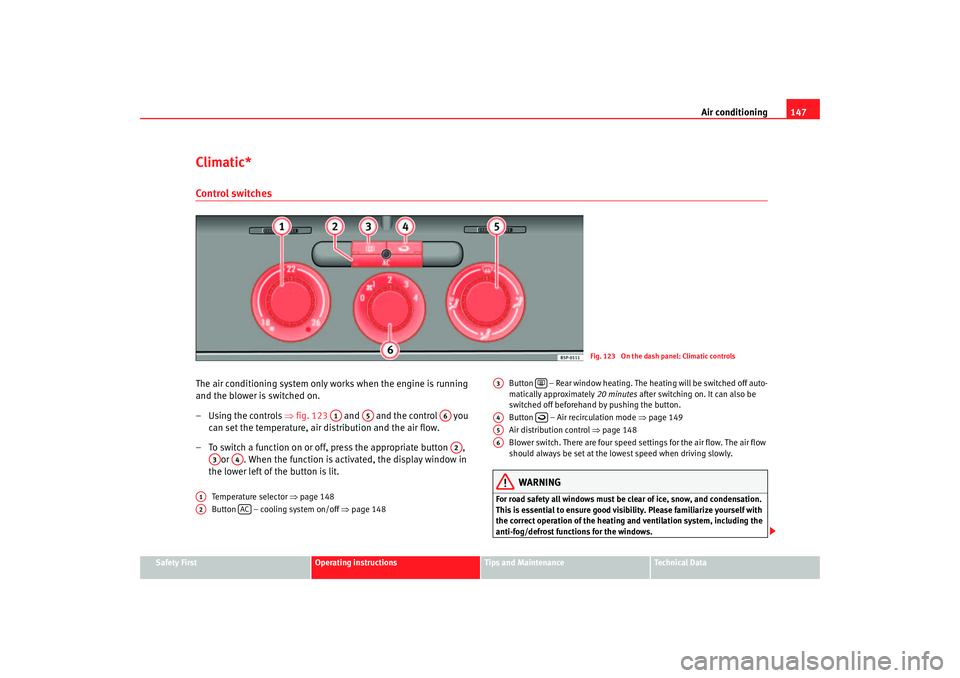
Climatic*Control switchesThe air conditioning system only works when the engine is running
and the blower is switched on.
– Using the controls ⇒fig. 123 and and the control you
can set the temperature, air distribution and the air flow.
– To switch a function on or off, press the appropriate button , or . When the function is activated, the display window in
the lower left of the button is lit.
Temperature selector ⇒page 148
Button – cooling system on/off ⇒page 148 Button – Rear window heating. The heating will be switched off auto-
matically approximately
20 minutes after switching on. It can also be
switched off beforehand by pushing the button.
Button – Air recirculation mode ⇒page 149
Air distribution control ⇒page 148
Blower switch. There are four speed settings for the air flow. The air flow
should always be set at the lowe st speed when driving slowly.
WARNING
For road safety all windows must be clear of ice, snow, and condensation.
This is essential to ensure good visibility. Please familiarize yourself with
the correct operation of the heating and ventilation system, including the
anti-fog/defrost functions for the windows.
Fig. 123 On the dash panel: Climatic controls
A1
A5
A6A2
A3
A4
A1A2
AC
A3
A4
A5A6
altea_ingles Seite 147 Donnerstag, 19. Mai 2005 3:02 15
Page 153 of 286
Air conditioning151
Safety First
Operating instructions
Tips and Maintenance
Te c h n i c a l D a t a
The air conditioning system only works when the engine is running
and the blower is switched on.
– Press the temperature control buttons ⇒page 150, fig. 126
or in order to adjust the temperature on the left hand side or
the right hand side respectively.
– The functions will be switched on when the buttons are pressed. When these functions are activated, they are indicated in the
display. Also, the de-icing and re ar heated window functions will
turn on along with their corres ponding yellow symbol. Press the
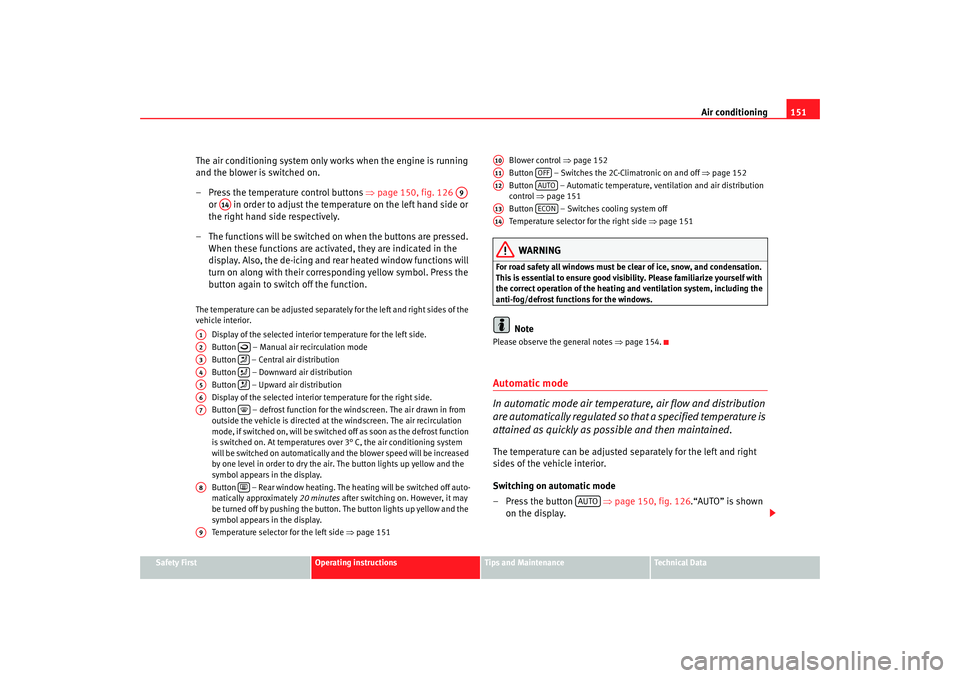
button again to switch off the function.The temperature can be adjusted separately for the left and right sides of the
vehicle interior.
Display of the selected interior temperature for the left side.
Button – Manual air recirculation mode
Button – Central air distribution
Button – Downward air distribution
Button – Upward air distribution
Display of the selected interior temperature for the right side.
Button – defrost function for the windscreen. The air drawn in from
outside the vehicle is directed at the windscreen. The air recirculation
mode, if switched on, will be switched off as soon as the defrost function
is switched on. At temperatures over 3° C, the air conditioning system
will be switched on automatically and the blower speed will be increased
by one level in order to dry the air. The button lights up yellow and the
symbol appears in the display.
Button – Rear window heating. The heating will be switched off auto-
matically approximately 20 minutes after switching on. However, it may
be turned off by pushing the button. The button lights up yellow and the
symbol appears in the display.
Temperature selector for the left side ⇒page 151 Blower control
⇒page 152
Button – Switches the 2C-Climatronic on and off ⇒page 152
Button – Automatic temperature, ventilation and air distribution
control ⇒page 151
Button – Switches cooling system off
Temperature selector for the right side ⇒page 151
WARNING
For road safety all windows must be clear of ice, snow, and condensation.
This is essential to ensure good visibility. Please familiarize yourself with
the correct operation of the heating and ventilation system, including the
anti-fog/defrost functions for the windows.
Note
Please observe the general notes ⇒page 154.Automatic mode
In automatic mode air temperatur e, air flow and distribution
are automatically regulated so that a specified temperature is
attained as quickly as possible and then maintained.The temperature can be adjusted separately for the left and right
sides of the vehicle interior.
Switching on automatic mode
– Press the button ⇒page 150, fig. 126 .“AUTO” is shown
on the display.
A9
A14
A1A2
A3
A4
A5
A6A7
A8
A9
A10A11
OFF
A12
AUTO
A13
ECON
A14
AUTO
altea_ingles Seite 151 Donnerstag, 19. Mai 2005 3:02 15
Page 154 of 286
Air conditioning
152
– Turn the temperature selectors to set the desired temperatures for the left and right sides of the interior. We recommend 22°C
(72°F).A comfortable interior climate is quickly reached when a temperature of
+22° C (72° F) is set in automatic mode. It can be changed as necessary to
suit individual preferences or particular circumstances. It is possible to select
interior temperatures from +16° C ( 61° F) to +29.5° C (86° F). These are
approximate temperatures and the actual temperature may be slightly higher
or lower depending on the ambient conditions. Climatronic maintains a constant temperature level fully automatically. The
temperature of the air supplied to the interior, the blower speed and the air
distribution are regulated automatically. The system also allows for the effect
of strong sunlight, so there is no need for manual adjustment. Therefore,
automatic mode
provides the best comfort for the vehicle occupants in virtu-
ally all conditions throughout the year.
Automatic mode is switched off whenever an adjustment is made using the
buttons for the air distribution, air flow or . The temperature continues
to be regulated.Manual mode
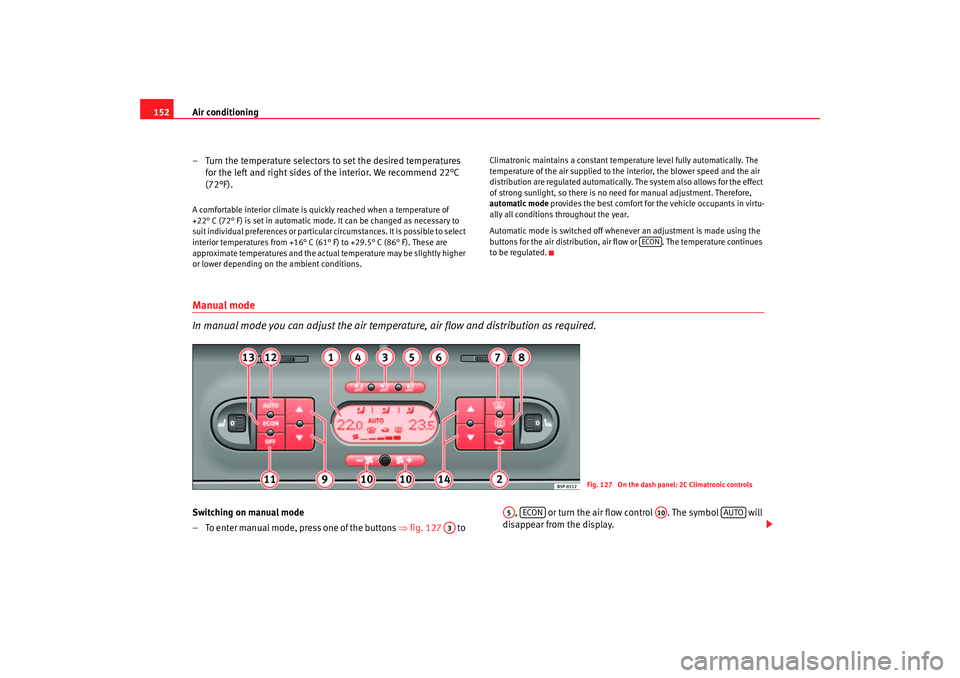
In manual mode you can adjust the air temperat ure, air flow and distribution as required.Switching on manual mode
– To enter manual mode, press one of the buttons ⇒fig. 127 to , or turn the air flow control . The symbol will
disappear from the display.
ECON
Fig. 127 On the dash panel: 2C Climatronic controls
A3
A5
ECON
A10
AUTO
altea_ingles Seite 152 Donnerstag, 19. Mai 2005 3:02 15