snow chains Seat Altea 2007 Owner's Manual
[x] Cancel search | Manufacturer: SEAT, Model Year: 2007, Model line: Altea, Model: Seat Altea 2007Pages: 302, PDF Size: 9.17 MB
Page 82 of 302
Cockpit
80Tyre pressure*
The tyre monitor indicator compares wheel revolutions and uses this informa-
tion to compare the diameter of each wheel using the ABS sensors. If the
diameter of a wheel changes, the tyre monitor indicator lights
. The wheel
diameter changes when:
•
Tyre pressure is insufficient.
•
The tyre structure is damaged.
•
The vehicle is unbalanced because of a load.
•
The wheels of one axle are under more pressure (for example, driving with
a trailer or on extreme slopes).
•
The vehicle is fitted with snow chains.
•
The emergency wheel is fitted.
•
The wheel on one axle is changed. Tyre pressure adjustment
Following the modification to tyre pressure or changing one or more wheels,
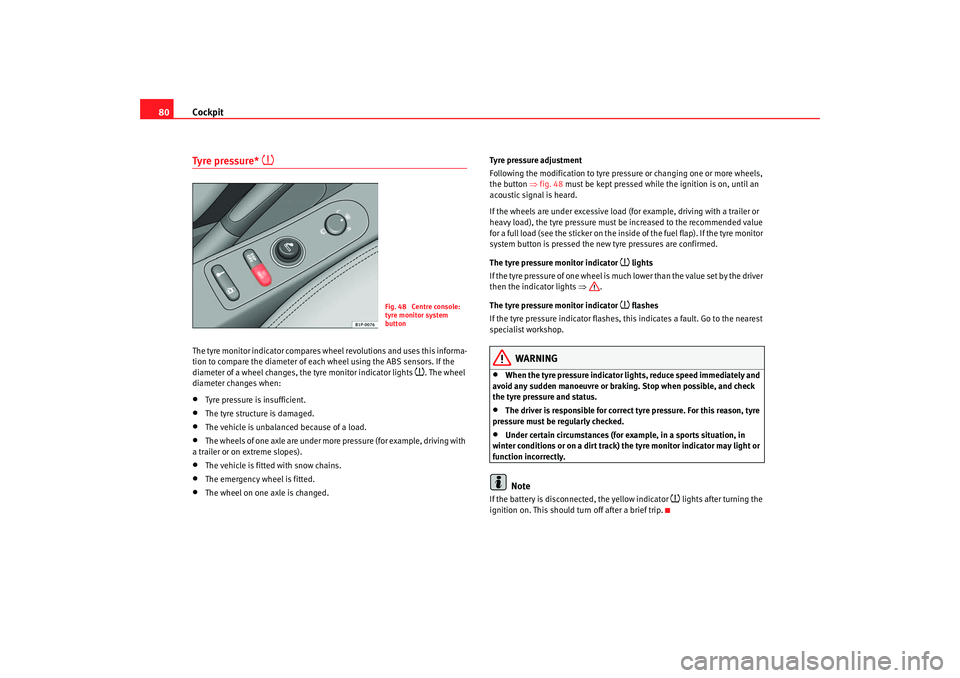
the button
⇒fig. 48 must be kept pressed while the ignition is on, until an
acoustic signal is heard.
If the wheels are under excessive load (for example, driving with a trailer or
heavy load), the tyre pressure must be increased to the recommended value
for a full load (see the sticker on the inside of the fuel flap). If the tyre monitor
system button is pressed the new tyre pressures are confirmed.
The tyre pressure monitor indicator
lights
If the tyre pressure of one wheel is much lower than the value set by the driver
then the indicator lights ⇒.
The tyre pressure monitor indicator flashes
If the tyre pressure indicator flashes, this indicates a fault. Go to the nearest
specialist workshop.
WARNING
•
When the tyre pressure indicator lights, reduce speed immediately and
avoid any sudden manoeuvre or braking. Stop when possible, and check
the tyre pressure and status.
•
The driver is responsible for correct tyre pressure. For this reason, tyre
pressure must be regularly checked.
•
Under certain circumstances (for example, in a sports situation, in
winter conditions or on a dirt track) the tyre monitor indicator may light or
function incorrectly.Note
If the battery is disconnected, the yellow indicator
lights after turning the
ignition on. This should turn off after a brief trip.
Fig. 48 Centre console:
tyre monitor system
button
altea_ingles_0706.book Seite 80 Mittwoch, 30. August 2006 3:48 15
Page 162 of 302
Driving
160•
Adjust the driver seat or steering wheel so that there is a distance of at
least 25 cm between the steering wheel and your chest ⇒ page 159,
fig. 130. If you fail to observe the minimum distance, the airbag will not
protect you. Risk of fatal injury.
•
If your physical constitution prevents you from maintaining the
minimum distance of 25 cm, contact an Authorised Service Centre. The
Authorised Service Centre will help you decide if special specific modifica-
tions are necessary.
•
If you adjust the steering wheel so tha t it points towards your face, the
driver airbag will not protect you properly in the event of an accident. Make
sure that the steering wheel points towards your chest.
•
When driving, always hold the steer ing wheel with both hands on the
outside of the ring at the 9 o'clock and 3 o'clock positions. Never hold the
steering wheel at the 12 o'clock positi on, or in any other manner (e.g. in
the centre of the steering wheel, or on the inside of the rim). In such cases,
you could receive severe injuries to the arms, hands and head.
SafetyElectronic stabilisation programme (ESP)*
ESP helps make driving safer in certain situations.The Electronic Stabilisation Program (ESP ) contains the electronic differential
lock (EDL) and the traction control syst em (TCS). The ESP function works in
conjunction with the ABS. Both warning lamps will light up if the ESP or ABS
systems are faulty.
The ESP is started automatically when the engine is started.
In specific circumstances where you require less traction, you can switch off
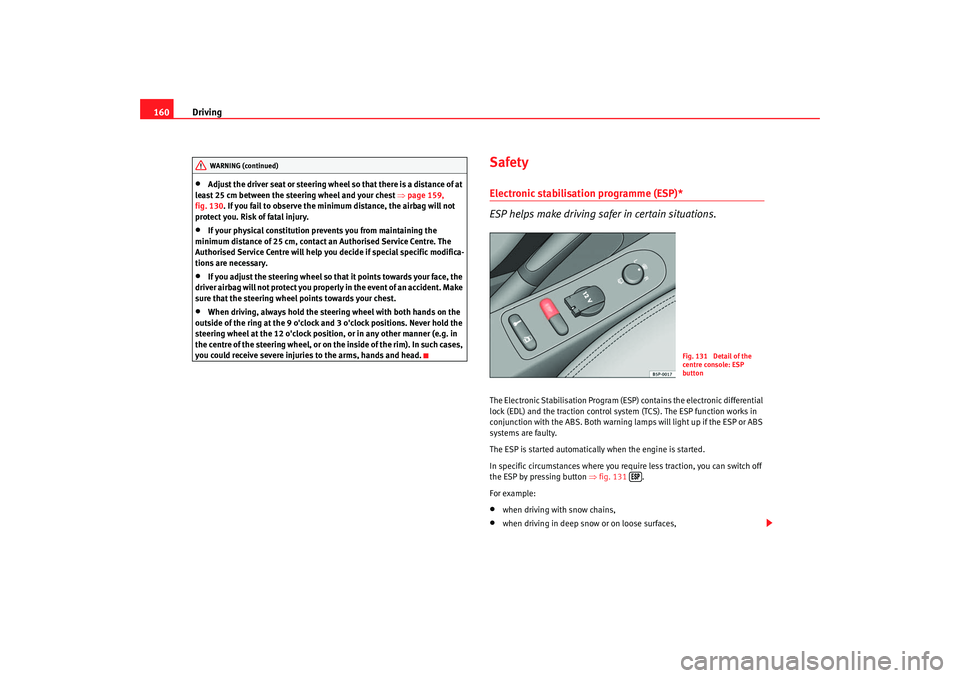
the ESP by pressing button ⇒fig. 131 .
For example:•
when driving with snow chains,
•
when driving in deep snow or on loose surfaces,
WARNING (continued)
Fig. 131 Detail of the
centre console: ESP
button
altea_ingles_0706.book Seite 160 Mittwoch, 30. August 2006 3:48 15
Page 175 of 302
Driving173
Safety First
Operating instructions
Tips and Maintenance
Te c h n i c a l D a t a
Activation
The system is activated by engagement of the reverse gear. A brief acoustic
signal confirms the activation and correct function of the system.
Reversing
The distance warning will begin as soon as an obstacle is detected by the
system. The frequency of the bleeps emitted by the system will increase
rapidly as the vehicle approaches the obstacle.
Within a short distance of about 25 cm, a continuous signal sounds (stop
signal). The driver should not reverse any further.
Trailer towing
For vehicles fitted with a tow bar by the manufacturer, the parking aid system
will not be activated by the engagement of the reverse gear when pulling a
trailer, as the trailer's electric conn
ecter will be plugged into the vehicle.
To avoid system malfunctions, when not driving with a trailer, remove the
trailer hitch.
Possible faults
If a continuous bleep sounds for some seconds when the reverse gear is
engaged, this indicates that there is a fault in the parking aid system.
If the fault continues until the ignition is turned off, the acoustic signal
warning of the fault will not be emitted every time the system is reactivated
(by engaging the reverse gear). Thus, the system ready indication will not
sound either. Have the fault repaired by an Authorised Service Centre as soon
as possible.
If there is no ready signal or no acou stic warning signal then the parking aid
loudspeaker is faulty and may not warn of obstacles.
To ensure that the system works properly, the sensors must be kept clean and
free of ice and snow.
WARNING
•
The sensors have blind spots in which obstacles may not be detected.
•
Always look out for small children and animals because the system will
not always detect them. Always pay attention when reversing to avoid acci-
dents.
•
The parking aid is not a replacement for driver awareness. The driver
must take full responsibility for parking and other manoeuvres.Caution
•
Please note that low obstacles detected by the system may no longer be
registered by the sensors as the car moves closer, so the system will not give
any further warning. Certain kinds of ob stacles (such as wire fences, chains,
thin posts or trailer draw bars, high kerbs or painted railings etc) may not
always be detected by the system, so there is a risk of damaging the vehicle
in such cases.
•
Obstacles with uniform edges and bumps may not be detected immedi-
ately by the system due to their geometry. Take special care around this type
of obstacle such as corners, rectangu lar objects, etc.., these can cause
damage to the vehicle.
•
Be especially carefully when mano euvring into a corner between two
perpendicular walls. Survey the approach of the wall to the side of the vehicle
(using the mirrors)
•
The parking aid system does not replace use of the mirrors for manoeu-
vres.
•
Distant ultra-sonic sources (hammers , tyres, construction machinery,
other vehicles with PDC) may interfere with the operation of the system.
•
Periodic cleaning of the sensors, take care not to damage or scratch them.
When cleaning with high pressure washers or steam cleaners, the sensors
should be sprayed for only a very short period and from a distance of more
than 10 cm.
altea_ingles_0706.book Seite 173 Mittwoch, 30. August 2006 3:48 15
Page 182 of 302
Intelligent technology
180Anti-lock brake system and traction control
M-ABS (ABS and TCS)Anti-lock brake system (ABS)
The anti-lock brake system prevents the wheels locking
during braking.The anti-lock brake system (ABS) is an important part of the vehicle's active
safety system.
How the ABS works
If one of the wheels turns too slowly in relation to the road speed, and is close
to locking, the system will reduce the braking pressure for this wheel. The
driver is made aware of this control process by a pulsating of the brake pedal
and audible noise. This is a deliberate warning to the driver that one or more
of the wheels is tending to lock and the ABS control function has intervened.
In this situation it is important to keep the brake pedal fully depressed so the
ABS can regulate the brake application. Do not “pump”.
If you brake hard on a slippery road surface, the best possible control is
retained as the wheels do not lock.
However, ABS will not necessarily guarantee shorter braking distances in all
conditions. The braking distance could even be longer if you brake on gravel
or on fresh snow covering a slippery surface.
WARNING
•
The anti-lock brake system cannot defy the laws of physics. Slippery
and wet roads are dangerous even with ABS! If you notice that the ABS is
working (to counteract locked wheels under braking), you should reduce
speed immediately to suit the road and traffic conditions. Do not let the
extra safety features tempt you into taking any risks when driving.
•
The effectiveness of ABS is also determined by the tyres fitted
⇒ page 225.
•
If the running gear or brakes are mo dified, the effectiveness of the ABS
could be severely limited.
Traction control system (TCS)
The traction control system prevents the drive wheels from
spinning when the car is accelerating.Description and operation of the traction control system during acceleration
(TCS)
TCS reduces engine power to help prevent the drive wheels of front-wheel
drive vehicles losing traction during acceleration. The system works in the
entire speed range in conjunction with ABS. If a malfunction should occur in
the ABS, the TCS will also be out of action.
TCS helps the vehicle to start moving, accelerate and climb a gradient in slip-
pery conditions where this may otherwise be difficult or even impossible.
The TCS is switched on automatically when the engine is started. If necessary,
it may be turned on or off pushing the button on the centre console.
When the TCS is off, the warning lamp is lit. The TCS should normally be left
switched on at all times. Only in exceptional circumstances, when slipping of
the wheels is required, should it be disconnected for example•
With compact temporary spare wheel.
•
When using the snow chains.
•
When driving in deep snow or on loose surfaces
•
When the vehicle is bogged-down, to free it by “rocking”.WARNING (continued)
altea_ingles_0706.book Seite 180 Mittwoch, 30. August 2006 3:48 15
Page 230 of 302
Checking and refilling levels
228
Driving on puncture-proof tyres (emergency use)
– Ensure that the ESP/TCS is operating (electronic stabilization program) ⇒page 181.
– Drive carefully and at moderate speed (80 km/h maximum).
– Avoid sharp turns and rapid manouevres.
– Avoid driving over obstacles (for example, kerbs) or potholes.
– If the ESP/TCS is frequently activated, check whether there is smoke coming from the tyres or a smell of rubber, or if the vehicle
vibrates or rattles. If this is the case, stop the vehicle.Puncture-proof tyres are marked on the tyre wall as follows: “DSST”,
“Eufonia”, “RFT”, “ROF”, “RSC”, “SSR” or “ZP”.
The tyre walls of this type of tyre are reinforced. When the tyres lose air, the
tyre walls keep the tyre up (emergency use).
Loss of air pressure in the tyre is shown on the instrument panel. The vehicle
may still be driven for at least 80 km and, under ideal conditions (for example,
no load) further.
The faulty tyre should be replaced as soon as possible. The tyre rim should be
checked for damage at a specialised workshop and replaced as necessary.
We recommend you contact your Authorised Service Centre. If more than one
tyre is being used under emergency co nditions, this reduces the distance
which can be travelled.
Starting driving in emergency conditions
When the loss in tyre pressure is displayed on the instrument panel, this
implies that at least one tyre is being driven in emergency conditions ⇒.
End of emergency operation
Do not drive on if:
•
smoke is coming from one of the tyres,
•
there is a smell of rubber,
•
the vehicle vibrates,
•
there is a rattling noise.
WARNING
When driving in emergency conditions, the driving quality of the vehicle is
considerably impaired.•
Drive carefully and at moderate speed (80km/h maximum).
•
Avoid sharp turns and rapid manoeuvres, and brake earlier than usual.
•
Avoid driving over obstacles (for example, kerbs) or potholes.
•
If one or more tyres is being driven in emergency conditions, the driving
quality of the vehicle is impaired and there is a risk of accident.Note
•
Puncture-proof tyres do not “deflate” on losing pressure as they are
supported by the tyre walls. Therefore defects in the tyre can not be deteced
with a visual inspection.
•
Snow chains must not be used on front tyres used in emergency
conditions.
New tyres and wheels
New tyres and wheels have to be run-in.The tyres and wheel rims are an essenti al part of the vehicle's design. The
tyres and rims approved by SEAT are specially matched to the characteristics
of the vehicle and make a major contribution to good road holding and safe
handling ⇒.
altea_ingles_0706.book Seite 228 Mittwoch, 30. August 2006 3:48 15
Page 233 of 302
Checking and refilling levels231
Safety First
Operating instructions
Tips and Maintenance
Te c h n i c a l D a t a
WARNING
The maximum speed for the winter tyre s must not be exceeded. Otherwise,
this could lead to tyre damage and thus, an accident risk.
For the sake of the environment
Fit your summer tyres in good time. They are quieter, do not wear so quickly
and reduce fuel consumption.Snow chainsSnow chains may be fitted only to the front wheels, and only to certain tyre
sizes ⇒page 270.
Snow chains must have fine-pitch links which do not protrude more than 9
mm, including tension device.
Remove wheel hub covers and trim rings before fitting snow chains. For safety
reasons cover caps, available in any Authorised Service Centre, must then be
fitted over the wheel bolts.
WARNING
Observe the fitting instructions provided by the snow chain manufacturer.
Caution
You must remove the snow chains to drive on roads which are free of snow.
Otherwise they will impair handling, damage the tyres and wear out very
quickly.
Note
In some countries, the speed limit for using snow chains is 50 km/h. The legal
requirements of the country should be followed.
altea_ingles_0706.book Seite 231 Mittwoch, 30. August 2006 3:48 15
Page 235 of 302
If and when233
Safety First
Operating instructions
Tips and Maintenance
Te c h n i c a l D a t a
Compact temporary spare wheel*
The compact temporary spare wheel (spare wheel for vehicles
with no puncture repair kit) should only be used when really
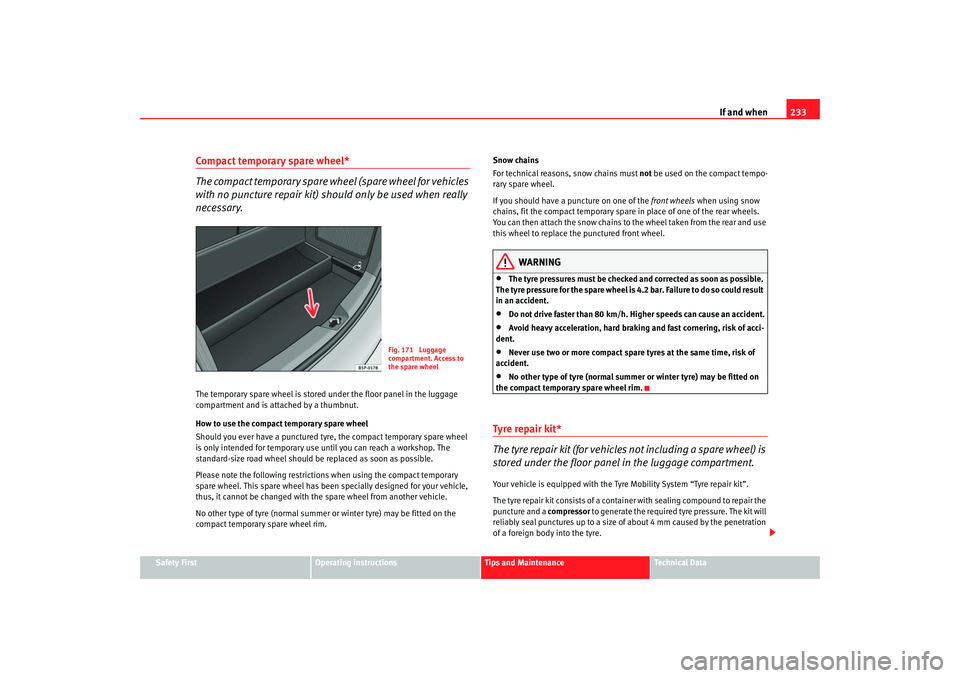
necessary.The temporary spare wheel is stored under the floor panel in the luggage
compartment and is attached by a thumbnut.
How to use the compact temporary spare wheel
Should you ever have a punctured tyre, the compact temporary spare wheel
is only intended for temporary use until you can reach a workshop. The
standard-size road wheel should be replaced as soon as possible.
Please note the following restrictions when using the compact temporary
spare wheel. This spare wheel has been specially designed for your vehicle,
thus, it cannot be changed with th e spare wheel from another vehicle.
No other type of tyre (normal summer or winter tyre) may be fitted on the
compact temporary spare wheel rim. Snow chains
For technical reasons, snow chains must not
be used on the compact tempo-
rary spare wheel.
If you should have a puncture on one of the front wheels when using snow
chains, fit the compact temporary spare in place of one of the rear wheels.
You can then attach the snow chains to the wheel taken from the rear and use
this wheel to replace the punctured front wheel.
WARNING
•
The tyre pressures must be checked and corrected as soon as possible.
The tyre pressure for the spare wheel is 4.2 bar. Failure to do so could result
in an accident.
•
Do not drive faster than 80 km/h. High er speeds can cause an accident.
•
Avoid heavy acceleration, hard braking and fast cornering, risk of acci-
dent.
•
Never use two or more compact spare tyres at the same time, risk of
accident.
•
No other type of tyre (normal summer or winter tyre) may be fitted on
the compact temporary spare wheel rim.
Tyre repair kit*
The tyre repair kit (for vehicles not including a spare wheel) is
stored under the floor panel in the luggage compartment.Your vehicle is equipped with the Tyre Mobility System “Tyre repair kit”.
The tyre repair kit consists of a contai ner with sealing compound to repair the
puncture and a compressor to generate the required tyre pressure. The kit will
reliably seal punctures up to a size of about 4 mm caused by the penetration
of a foreign body into the tyre.
Fig. 171 Luggage
compartment. Access to
the spare wheel
altea_ingles_0706.book Seite 233 Mittwoch, 30. August 2006 3:48 15
Page 272 of 302
General notes on the technical data
270WeightsKerb weight refers to the basic model with a fuel tank filled to 90% capacity
and without optional extras. The figure quoted includes 75 kg to allow for the
weight of the driver.
For special versions and optional equipment fittings or for the addition of
accessories, the weight of the vehicle will increase ⇒.
WARNING
•
Please note that the centre of gravity may shift when transporting
heavy objects; this may affect the vehi cle's handling and lead to an acci-
dent. Always adjust your speed and dr iving style to suit road conditions
and requirements.
•
Never exceed the gross axle weight rating or the gross vehicle weight
rating. If the allowed axle load or the allowed total weight is exceeded, the
driving characteristics of the vehicle may change, leading to accidents,
injuries and damage to the vehicle.
To w i n g a t r a i l e rTrailer weightsTrailer weights
The trailer weights and drawbar loads approved are selected in intensive
trials according to precisely defined criteria. The approved trailer weights are
valid for vehicles in EU for maximum speeds of 80 km/h (in certain circum-
stances up to 100 km/h). The figures may be different in other countries. All
data in the official vehicle documents take precedence over these data ⇒. Drawbar load
The
maximum permitted weight exerted by the trailer drawbar on the ball joint
of the towing bracket must not exceed 75 kg.
In the interest of road safety, we recommend that you always tow
approaching the maximum drawbar load. The response of the trailer on the
road will be poor if th e drawbar load is too small.
If the maximum permissible drawbar load cannot be met (e.g. with small,
empty and light-weight single axle trailers or tandem axle trailers with an axle
base of less than 1 metre), at least 4% of the actual trailer weight is a legal
stipulation for a drawbar load.
WARNING
•
For safety reasons, you should not drive at speeds above 80 km/h when
towing a trailer. This also applies to countries where higher speeds are
permitted.
•
Never exceed the maximum trailer weights or the draw bar loading. If
the permissible axle load or the perm issible total weight is exceeded, the
driving characteristics of the vehicle may change, leading to accidents,
injuries and damage to the vehicle.
WheelsTyre pressure, snow chains, wheel boltsTyre pressures
The sticker with the tyre pressure values can be found on the inside of the
tank flap. The tyre pressure values given there are for cold tyres. The slightly
raised pressures of warm tyres must not be reduced ⇒.
altea_ingles_0706.book Seite 270 Mittwoch, 30. August 2006 3:48 15
Page 273 of 302
General notes on the technical data 271
Safety First
Operating instructions
Tips and Maintenance
Te c h n i c a l D a t a
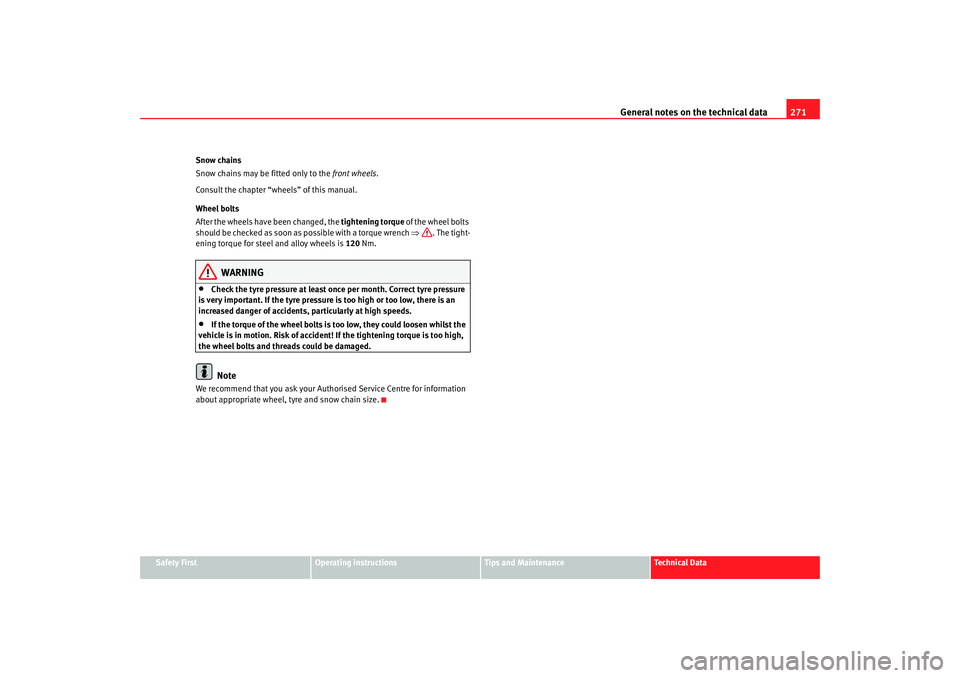
Snow chains
Snow chains may be fitted only to the
front wheels.
Consult the chapter “wheels” of this manual.
Wheel bolts
After the wheels have been changed, the tightening torque of the wheel bolts
should be checked as soon as possible with a torque wrench ⇒. The tight-
ening torque for steel and alloy wheels is 120 Nm.
WARNING
•
Check the tyre pressure at least once per month. Correct tyre pressure
is very important. If the tyre pressure is too high or too low, there is an
increased danger of accidents, particularly at high speeds.
•
If the torque of the wheel bolts is too low, they could loosen whilst the
vehicle is in motion. Risk of accident! If the tightening torque is too high,
the wheel bolts and threads could be damaged.Note
We recommend that you ask your Authorised Service Centre for information
about appropriate wheel, tyre and snow chain size.
altea_ingles_0706.book Seite 271 Mittwoch, 30. August 2006 3:48 15
Page 299 of 302
Index297
Seat belts . . . . . . . . . . . . . . . . . . . . . . . . . . . . . . . 19
adjustment . . . . . . . . . . . . . . . . . . . . . . . . . . . 24
Incorrectly fastened . . . . . . . . . . . . . . . . . . . . 28
Not worn . . . . . . . . . . . . . . . . . . . . . . . . . . . . . 22
Safety notes . . . . . . . . . . . . . . . . . . . . . . . . . . 23
Warning lamp . . . . . . . . . . . . . . . . . . . . . . . . . 19
Seat belts protect . . . . . . . . . . . . . . . . . . . . . . . . 23
Seat heating . . . . . . . . . . . . . . . . . . . . . . . . . . . . 131
Seats . . . . . . . . . . . . . . . . . . . . . . . . . . . . . . . . . . . 19
Selective opening* . . . . . . . . . . . . . . . . . . . . . . . 94
Selector lever locking . . . . . . . . . . . . . . . . . . . . 167
Selector lever positions . . . . . . . . . . . . . . . . . . . 166
Service interval display . . . . . . . . . . . . . . . . . . . . 60
Shoes . . . . . . . . . . . . . . . . . . . . . . . . . . . . . . . . . . 16
Side airbags . . . . . . . . . . . . . . . . . . . . . . . . . . . . . 37 Description . . . . . . . . . . . . . . . . . . . . . . . . . . . 37
Function . . . . . . . . . . . . . . . . . . . . . . . . . . . . . 39
Safety notes . . . . . . . . . . . . . . . . . . . . . . . . . . 40
Side lights . . . . . . . . . . . . . . . . . . . . . . . . . . . . . 111
Sitting position Driver . . . . . . . . . . . . . . . . . . . . . . . . . . . . . . . 10
Front passenger . . . . . . . . . . . . . . . . . . . . . . . 11
Incorrect sitting position . . . . . . . . . . . . . . . . 15
Passengers . . . . . . . . . . . . . . . . . . . . . . . . . . . 12
Sitting position, occupants . . . . . . . . . . . . . . . . . 10
Sliding/tilting roof . . . . . . . . . . . . . . . . . . . . . . . 108
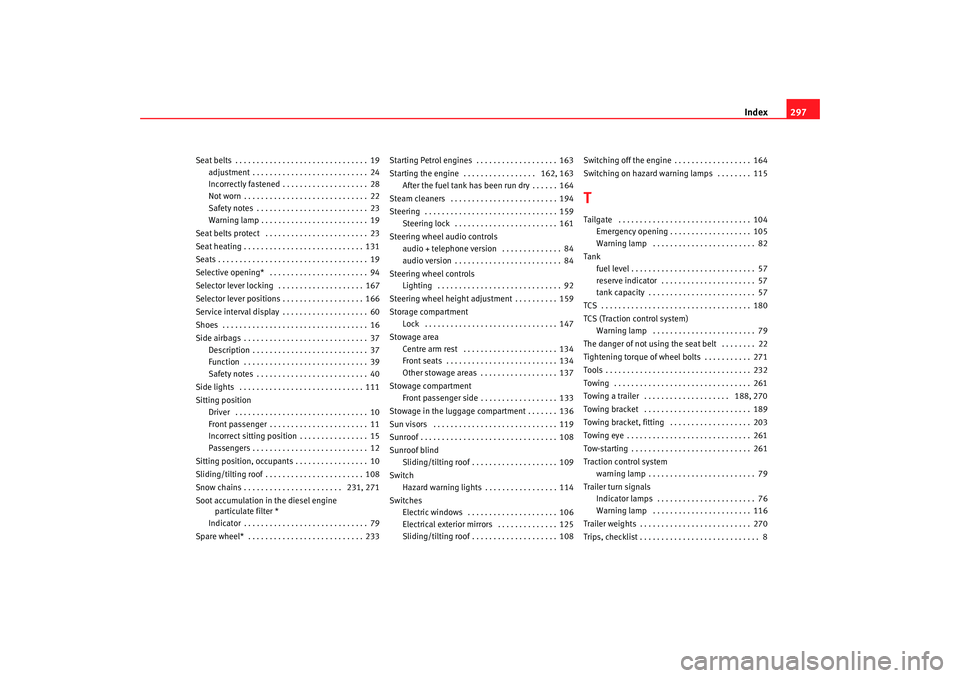
Snow chains . . . . . . . . . . . . . . . . . . . . . . . 231, 271
Soot accumulation in the diesel engine
particulate filter *
Indicator . . . . . . . . . . . . . . . . . . . . . . . . . . . . . 79
Spare wheel* . . . . . . . . . . . . . . . . . . . . . . . . . . . 233 Starting Petrol engines . . . . . . . . . . . . . . . . . . . 163
Starting the engine . . . . . . . . . . . . . . . . . 162, 163
After the fuel tank has been run dry . . . . . . 164
Steam cleaners . . . . . . . . . . . . . . . . . . . . . . . . . 194
Steering . . . . . . . . . . . . . . . . . . . . . . . . . . . . . . . 159 Steering lock . . . . . . . . . . . . . . . . . . . . . . . . 161
Steering wheel audio controls audio + telephone version . . . . . . . . . . . . . . 84
audio version . . . . . . . . . . . . . . . . . . . . . . . . . 84
Steering wheel controls Lighting . . . . . . . . . . . . . . . . . . . . . . . . . . . . . 92
Steering wheel height adjustment . . . . . . . . . . 159
Storage compartment Lock . . . . . . . . . . . . . . . . . . . . . . . . . . . . . . . 147
Stowage area Centre arm rest . . . . . . . . . . . . . . . . . . . . . . 134
Front seats . . . . . . . . . . . . . . . . . . . . . . . . . . 134
Other stowage areas . . . . . . . . . . . . . . . . . . 137
Stowage compartment Front passenger side . . . . . . . . . . . . . . . . . . 133
Stowage in the luggage compartment . . . . . . . 136
Sun visors . . . . . . . . . . . . . . . . . . . . . . . . . . . . . 119
Sunroof . . . . . . . . . . . . . . . . . . . . . . . . . . . . . . . . 108
Sunroof blind Sliding/tilting roof . . . . . . . . . . . . . . . . . . . . 109
Switch Hazard warning lights . . . . . . . . . . . . . . . . . 114
Switches Electric windows . . . . . . . . . . . . . . . . . . . . . 106
Electrical exterior mirrors . . . . . . . . . . . . . . 125
Sliding/tilting roof . . . . . . . . . . . . . . . . . . . . 108 Switching off the engine . . . . . . . . . . . . . . . . . . 164
Switching on hazard warning lamps . . . . . . . . 115
TTailgate . . . . . . . . . . . . . . . . . . . . . . . . . . . . . . . 104
Emergency opening . . . . . . . . . . . . . . . . . . . 105
Warning lamp . . . . . . . . . . . . . . . . . . . . . . . . 82
Tank fuel level . . . . . . . . . . . . . . . . . . . . . . . . . . . . . 57
reserve indicator . . . . . . . . . . . . . . . . . . . . . . 57
tank capacity . . . . . . . . . . . . . . . . . . . . . . . . . 57
TCS . . . . . . . . . . . . . . . . . . . . . . . . . . . . . . . . . . . 180
TCS (Traction control system) Warning lamp . . . . . . . . . . . . . . . . . . . . . . . . 79
The danger of not using the seat belt . . . . . . . . 22
Tightening torque of wheel bo lts . . . . . . . . . . . 271
Tools . . . . . . . . . . . . . . . . . . . . . . . . . . . . . . . . . . 232
Towing . . . . . . . . . . . . . . . . . . . . . . . . . . . . . . . . 261
Towing a trailer . . . . . . . . . . . . . . . . . . . . 188, 270
Towing bracket . . . . . . . . . . . . . . . . . . . . . . . . . 189
Towing bracket, fitting . . . . . . . . . . . . . . . . . . . 203
Towing eye . . . . . . . . . . . . . . . . . . . . . . . . . . . . . 261
Tow-starting . . . . . . . . . . . . . . . . . . . . . . . . . . . . 261
Traction control system warning lamp . . . . . . . . . . . . . . . . . . . . . . . . . 79
Trailer turn signals Indicator lamps . . . . . . . . . . . . . . . . . . . . . . . 76
Warning lamp . . . . . . . . . . . . . . . . . . . . . . . 116
Trailer weights . . . . . . . . . . . . . . . . . . . . . . . . . . 270
Trips, checklist . . . . . . . . . . . . . . . . . . . . . . . . . . . . 8
altea_ingles_0706.book Seite 297 Mittwoch, 30. August 2006 3:48 15