Seat Altea 2008 Owner's Manual
Manufacturer: SEAT, Model Year: 2008, Model line: Altea, Model: Seat Altea 2008Pages: 309, PDF Size: 9.45 MB
Page 141 of 309
Seats and stowage139
Safety First
Operating instructions
Tips and Maintenance
Te c h n i c a l D a t a
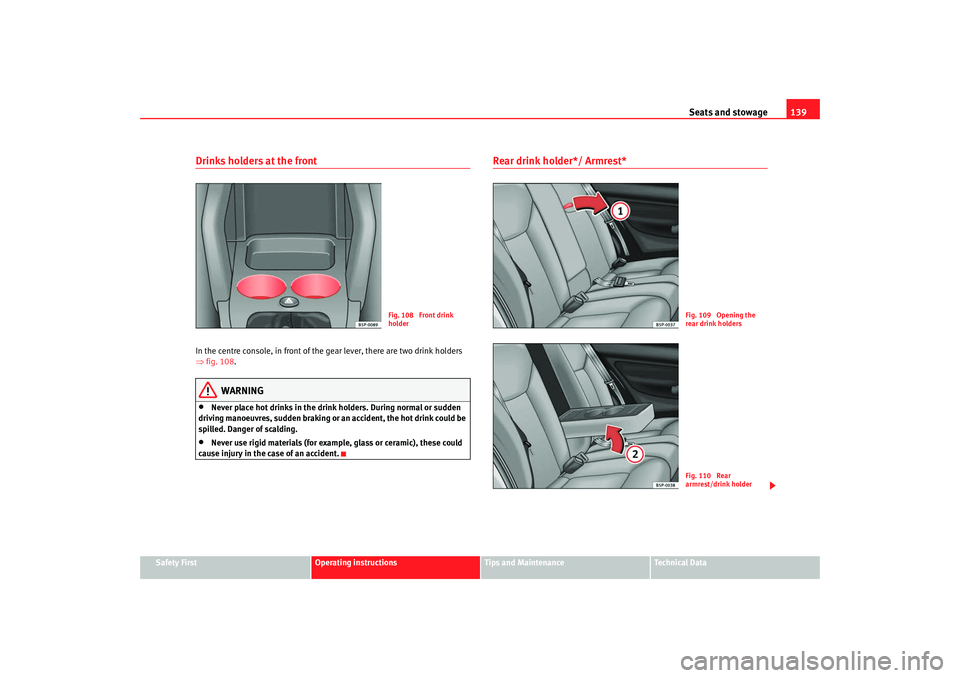
Drinks holders at the frontIn the centre console, in front of the gear lever, there are two drink holders
⇒fig. 108 .
WARNING
•
Never place hot drinks in the drink holders. During normal or sudden
driving manoeuvres, sudden braking or an accident, the hot drink could be
spilled. Danger of scalding.
•
Never use rigid materials (for example, glass or ceramic), these could
cause injury in the case of an accident.
Rear drink holder*/ Armrest*
Fig. 108 Front drink
holder
Fig. 109 Opening the
rear drink holdersFig. 110 Rear
armrest/drink holder
altea ingles.book Seite 139 Dienstag, 11. September 2007 4:39 16
Page 142 of 309
Seats and stowage
140
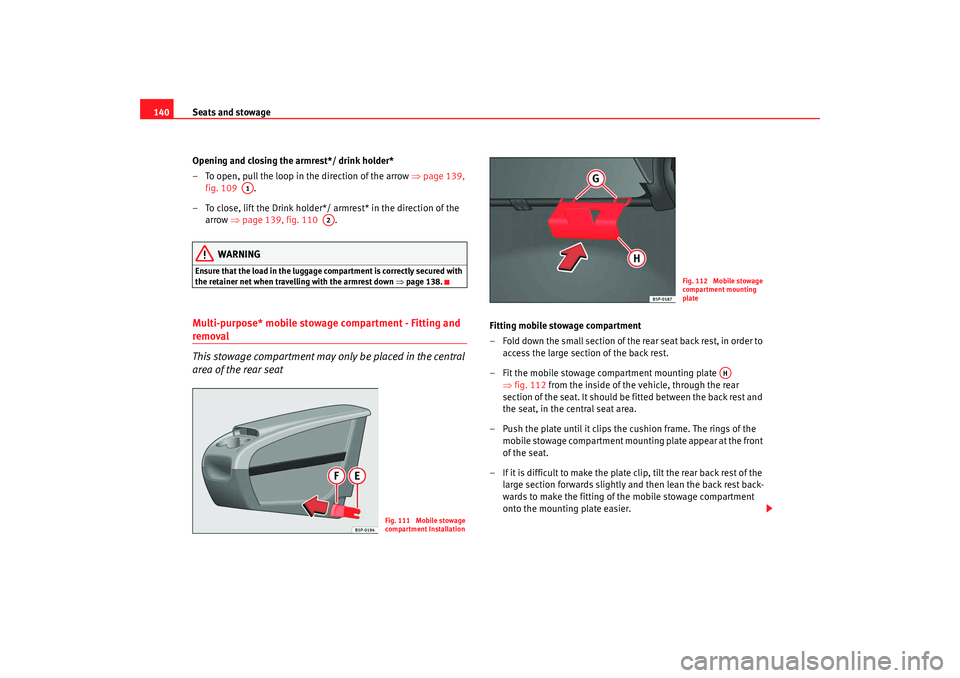
Opening and closing the armrest*/ drink holder*
– To open, pull the loop in the direction of the arrow ⇒page 139,
fig. 109 .
– To close, lift the Drink holder*/ armrest* in the direction of the arrow ⇒page 139, fig. 110 .
WARNING
Ensure that the load in the luggage compartment is correctly secured with
the retainer net when travelling with the armrest down ⇒ page 138.Multi-purpose* mobile stowage compartment - Fitting and removal
This stowage compartment may only be placed in the central
area of the rear seat
Fitting mobile stowage compartment
– Fold down the small section of the rear seat back rest, in order to
access the large section of the back rest.
– Fit the mobile stowage compartment mounting plate ⇒fig. 112 from the inside of the vehicle, through the rear
section of the seat. It should be fitted between the back rest and
the seat, in the central seat area.
– Push the plate until it clips the cushion frame. The rings of the mobile stowage compartment mounting plate appear at the front
of the seat.
– If it is difficult to make the plate clip, tilt the rear back rest of the large section forwards slightly an d then lean the back rest back-
wards to make the fitting of the mobile stowage compartment
onto the mounting plate easier.
A1
A2
Fig. 111 Mobile stowage
compartment Installation
Fig. 112 Mobile stowage
compartment mounting
plate
AH
altea ingles.book Seite 140 Dienstag, 11. September 2007 4:39 16
Page 143 of 309
Seats and stowage141
Safety First
Operating instructions
Tips and Maintenance
Te c h n i c a l D a t a
– Place the mobile stowage compartment onto the foam of the
central seat.
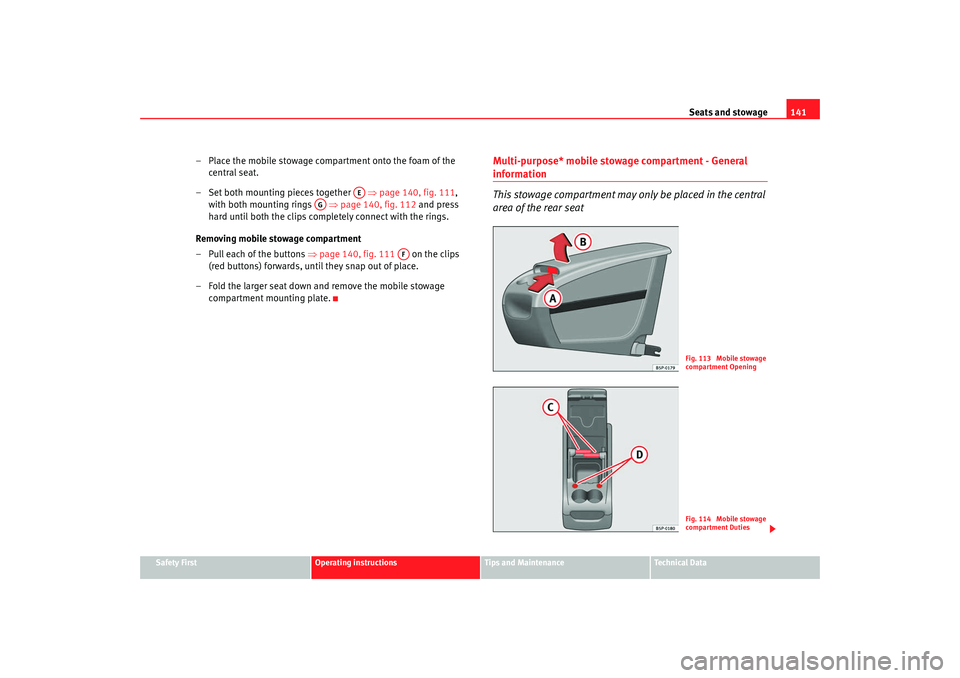
– Set both mounting pieces together ⇒page 140, fig. 111 ,
with both mounting rings ⇒page 140, fig. 112 and press
hard until both the clips completely connect with the rings.
Removing mobile stowage compartment
– Pull each of the buttons ⇒page 140, fig. 111 on the clips
(red buttons) forwards, until they snap out of place.
– Fold the larger seat down and remove the mobile stowage compartment mounting plate.
Multi-purpose* mobile stowage compartment - General information
This stowage compartment may only be placed in the central
area of the rear seat
AE
AG
AF
Fig. 113 Mobile stowage
compartment OpeningFig. 114 Mobile stowage
compartment Duties
altea ingles.book Seite 141 Dienstag, 11. September 2007 4:39 16
Page 144 of 309
Seats and stowage
142
Opening
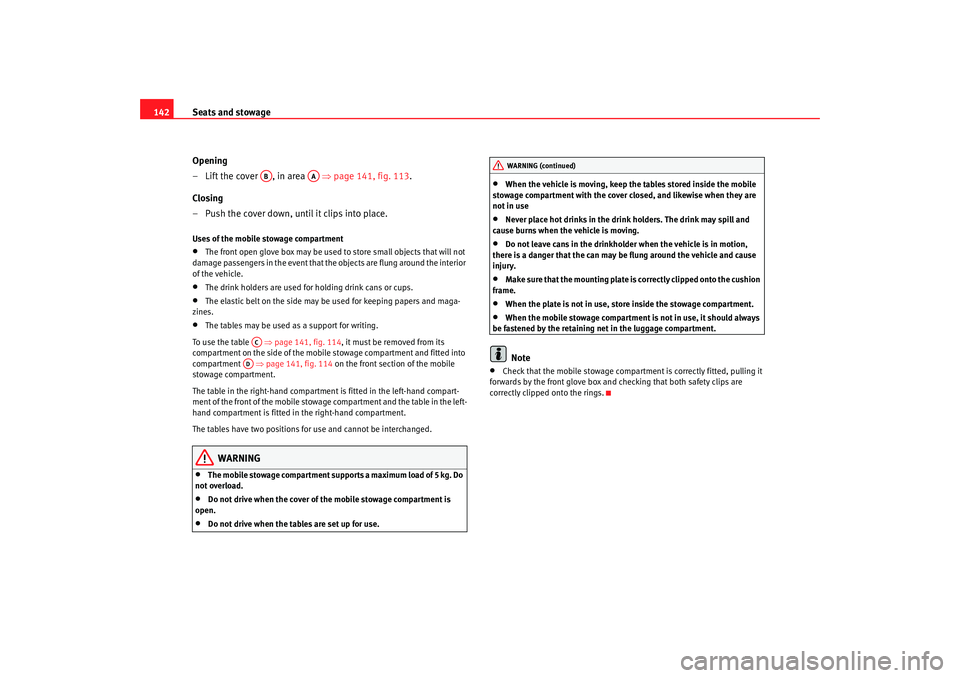
– Lift the cover , in area ⇒page 141, fig. 113 .
Closing
– Push the cover down, until it clips into place.Uses of the mobile stowage compartment•
The front open glove box may be used to store small objects that will not
damage passengers in the event that the objects are flung around the interior
of the vehicle.
•
The drink holders are used for holding drink cans or cups.
•
The elastic belt on the side may be used for keeping papers and maga-
zines.
•
The tables may be used as a support for writing.
To use the table ⇒page 141, fig. 114, it must be removed from its
compartment on the side of the mobile stowage compartment and fitted into
compartment ⇒page 141, fig. 114 on the front section of the mobile
stowage compartment.
The table in the right-hand compartment is fitted in the left-hand compart-
ment of the front of the mobile stowage compartment and the table in the left-
hand compartment is fitted in the right-hand compartment.
The tables have two positions for use and cannot be interchanged.
WARNING
•
The mobile stowage compartment supports a maximum load of 5 kg. Do
not overload.
•
Do not drive when the cover of the mobile stowage compartment is
open.
•
Do not drive when the tables are set up for use.
•
When the vehicle is moving, keep the tables stored inside the mobile
stowage compartment with the cover closed, and likewise when they are
not in use
•
Never place hot drinks in the drink holders. The drink may spill and
cause burns when the vehicle is moving.
•
Do not leave cans in the drinkholder when the vehicle is in motion,
there is a danger that the can may be flung around the vehicle and cause
injury.
•
Make sure that the mounting plate is correctly clipped onto the cushion
frame.
•
When the plate is not in use, store inside the stowage compartment.
•
When the mobile stowage compartment is not in use, it should always
be fastened by the retaining net in the luggage compartment.Note
•
Check that the mobile stowage compartment is correctly fitted, pulling it
forwards by the front glove box and checking that both safety clips are
correctly clipped onto the rings.
AB
AA
AC
AD
WARNING (continued)
altea ingles.book Seite 142 Dienstag, 11. September 2007 4:39 16
Page 145 of 309
Seats and stowage143
Safety First
Operating instructions
Tips and Maintenance
Te c h n i c a l D a t a
Ashtrays*, cigarette lighter* and electrical
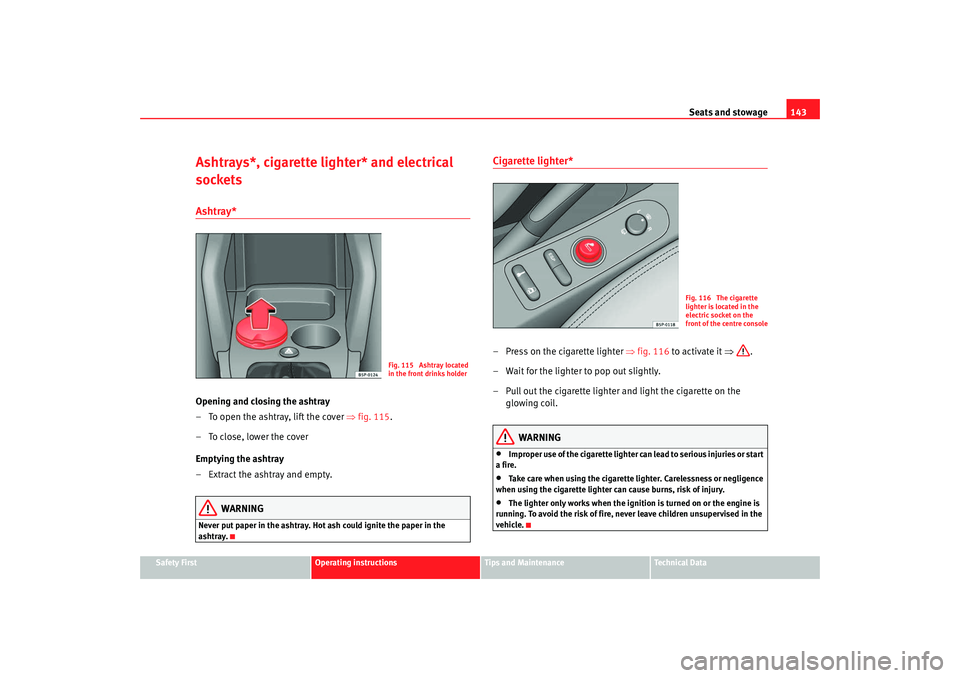
socketsAshtray* Opening and closing the ashtray
– To open the ashtray, lift the cover ⇒fig. 115 .
– To close, lower the cover
Emptying the ashtray
– Extract the ashtray and empty.
WARNING
Never put paper in the ashtray. Hot ash could ignite the paper in the
ashtray.
Cigarette lighter* – Press on the cigarette lighter ⇒fig. 116 to activate it ⇒.
– Wait for the lighter to pop out slightly.
– Pull out the cigarette lighter and light the cigarette on the glowing coil.
WARNING
•
Improper use of the cigarette lighter can lead to serious injuries or start
a fire.
•
Take care when using the cigarette lighter. Carelessness or negligence
when using the cigarette lighter can cause burns, risk of injury.
•
The lighter only works when the ignition is turned on or the engine is
running. To avoid the risk of fire, never leave children unsupervised in the
vehicle.
Fig. 115 Ashtray located
in the front drinks holder
Fig. 116 The cigarette
lighter is located in the
electric socket on the
front of the centre console
altea ingles.book Seite 143 Dienstag, 11. September 2007 4:39 16
Page 146 of 309
Seats and stowage
144Electrical sockets
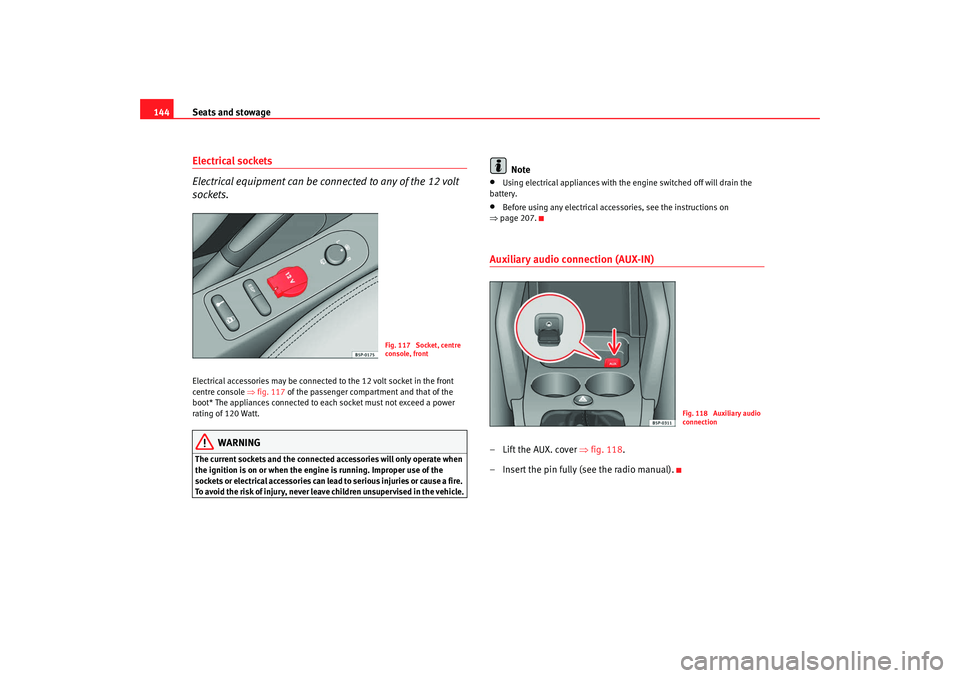
Electrical equipment can be connected to any of the 12 volt
sockets.Electrical accessories may be connected to the 12 volt socket in the front
centre console ⇒ fig. 117 of the passenger compartment and that of the
boot* The appliances connected to each socket must not exceed a power
rating of 120 Watt.
WARNING
The current sockets and the connected accessories will only operate when
the ignition is on or when the engine is running. Improper use of the
sockets or electrical accessories can lead to serious injuries or cause a fire.
To avoid the risk of injury, never leave children unsupervised in the vehicle.
Note
•
Using electrical appliances with the engine switched off will drain the
battery.
•
Before using any electrical accessories, see the instructions on
⇒ page 207.
Auxiliary audio connection (AUX-IN)– Lift the AUX. cover ⇒fig. 118 .
– Insert the pin fully (see the radio manual).
Fig. 117 Socket, centre
console, front
Fig. 118 Auxiliary audio
connection
altea ingles.book Seite 144 Dienstag, 11. September 2007 4:39 16
Page 147 of 309
Seats and stowage145
Safety First
Operating instructions
Tips and Maintenance
Te c h n i c a l D a t a
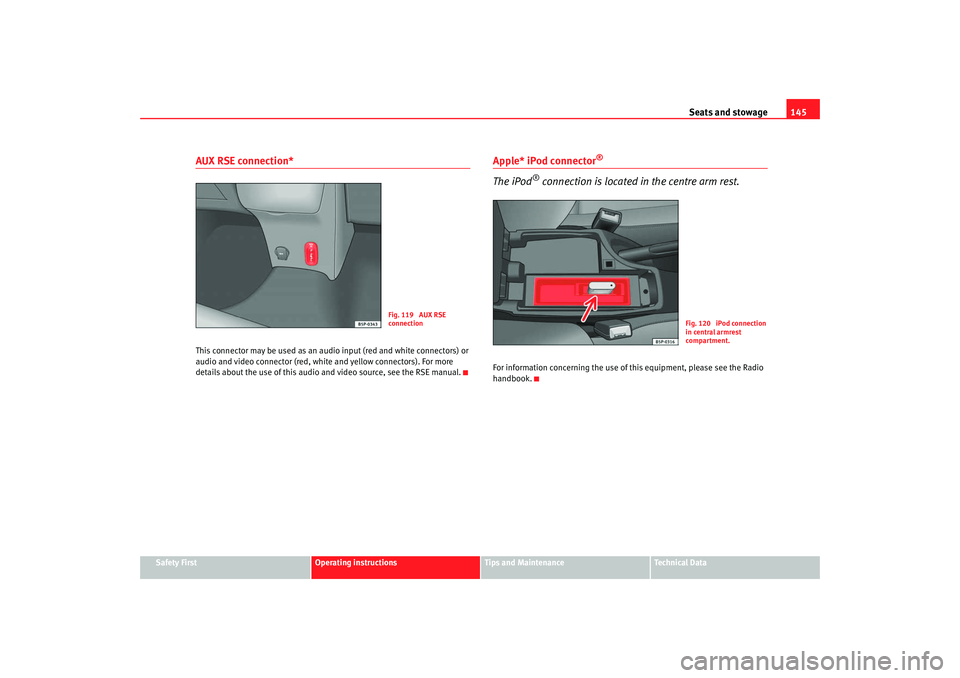
AUX RSE connection*This connector may be used as an audi o input (red and white connectors) or
audio and video connector (red, white and yellow connectors). For more
details about the use of this audio and video source, see the RSE manual.
Apple* iPod connector
®
The iPod
® connection is located in the centre arm rest.
For information concerning the use of this equipment, please see the Radio
handbook.
Fig. 119 AUX RSE
connection
Fig. 120 iPod connection
in central armrest
compartment.
altea ingles.book Seite 145 Dienstag, 11. September 2007 4:39 16
Page 148 of 309
Seats and stowage
146USB* Connection
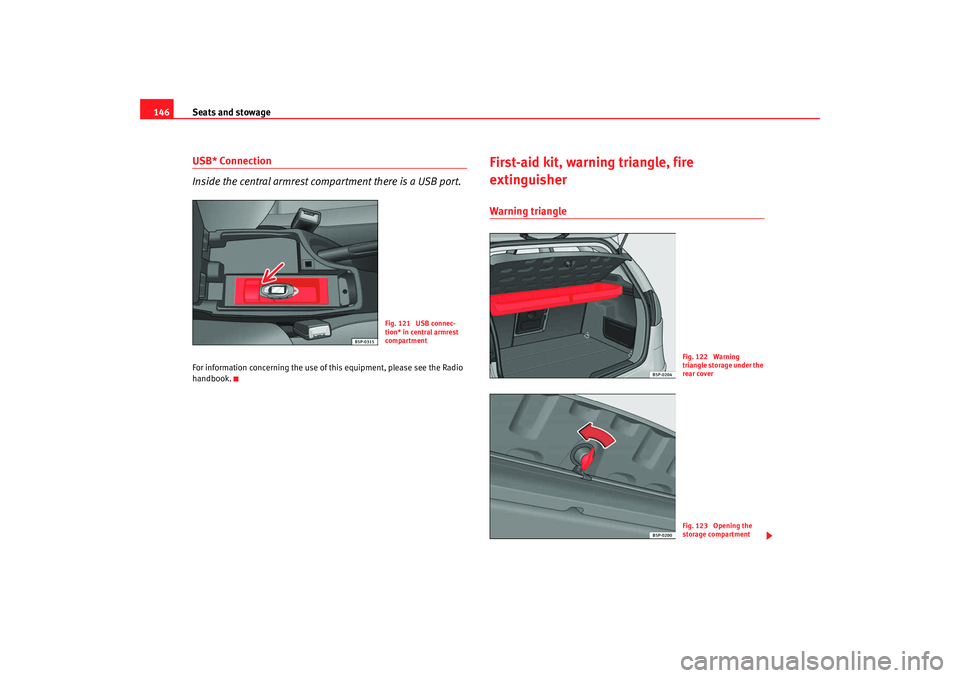
Inside the central armrest compartment there is a USB port.For information concerning the use of this equipment, please see the Radio
handbook.
First-aid kit, warning triangle, fire
extinguisherWarning triangle
Fig. 121 USB connec-
tion* in central armrest
compartment
Fig. 122 Warning
triangle storage under the
rear coverFig. 123 Opening the
storage compartment
altea ingles.book Seite 146 Dienstag, 11. September 2007 4:39 16
Page 149 of 309
Seats and stowage147
Safety First
Operating instructions
Tips and Maintenance
Te c h n i c a l D a t a
The warning triangle* is located in a stowage box under the luggage compart-
ment cover
⇒page 146, fig. 122. To open this storage compartment, turn the
knob 90° fig. ⇒page 146, fig. 123 .
Note
•
The warning triangle is not part of the vehicle's standard equipment.
First-aid kit and fire extinguisherThe first-aid kit* is located in a stowage box on the left side of the luggage
compartment.
The fire extinguisher* is attached to the luggage compartment carpet by
velcro.
Note
•
The first-aid kit and the fire extinguisher are not part of the vehicle's
standard equipment.
•
The first aid kit must comply with legal requirements.
•
Observe the expiry date of the contents of the first aid kit. You should
purchase a new first-aid kit as soon as possible after the shelf-life date of the
first-aid kit has expired.
•
The fire extinguisher must comply with legal requirements.
•
Ensure that the fire extinguisher is fu lly functional. The fire extinguisher
should, therefore, be checked regularly. The sticker on the fire extinguisher
will inform you of the next date for checking.
•
Before acquiring accessories and emergency equipment see the instruc-
tions in “Accessories and spares” ⇒page 207.
Luggage compartmentStowing luggage
All luggage must be securely stowed.Please observe the following points to ensure the vehicle handles
well at all times:
– Distribute the load as evenly as possible.
– Place heavy objects as far forward in the luggage compartment
as possible.
– Secure luggage in the luggage compartment with suitable straps on the fastening rings.
WARNING
•
Loose luggage and other loose items in the vehicle can cause serious
injuries.
•
Loose objects in the luggage compartment can suddenly move and
change the way the vehicle handles.
•
During sudden manoeuvres or ac cidents, loose objects in the
passenger compartment can be flung forward, injuring vehicle occupants.
•
Always store objects in the luggage compartment and secure with suit-
able straps. This is especially important for heavy objects.
•
When you transport heavy objects, always keep in mind that a change
in the centre of gravity can also cause changes in vehicle handling.
•
Please observe information on safe driving ⇒page 7, “Safe driving”.
altea ingles.book Seite 147 Dienstag, 11. September 2007 4:39 16
Page 150 of 309
Seats and stowage
148
CautionHard objects on the shelf could chafe against the wires of the heating
element in the rear window and cause damage.
Note
The ventilation slots in front of the rear side windows must not be covered as
this would prevent stale air being extracted from the vehicle.Rear shelf
Removing the cover
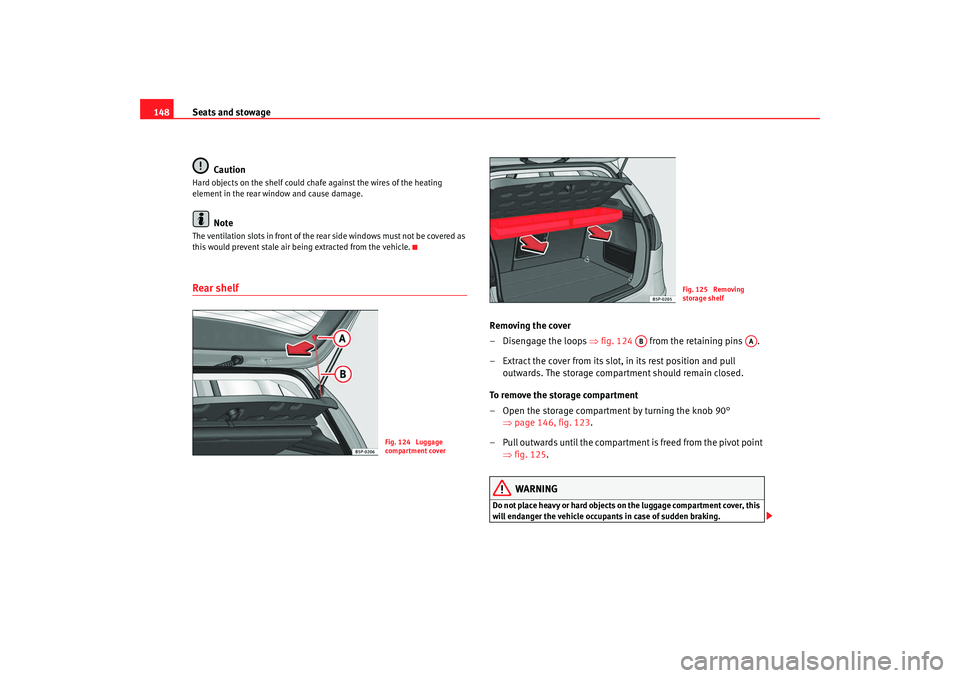
– Disengage the loops ⇒fig. 124 from the retaining pins .
– Extract the cover from its slot, in its rest position and pull outwards. The storage compartment should remain closed.
To remove the storage compartment
– Open the storage compartment by turning the knob 90° ⇒page 146, fig. 123 .
– Pull outwards until the compartmen t is freed from the pivot point
⇒ fig. 125.
WARNING
Do not place heavy or hard objects on the luggage compartment cover, this
will endanger the vehicle occupants in case of sudden braking.
Fig. 124 Luggage
compartment cover
Fig. 125 Removing
storage shelf
AB
AA
altea ingles.book Seite 148 Dienstag, 11. September 2007 4:39 16