boot Seat Altea 2009 Owner's Manual
[x] Cancel search | Manufacturer: SEAT, Model Year: 2009, Model line: Altea, Model: Seat Altea 2009Pages: 299, PDF Size: 9.39 MB
Page 18 of 299
Safe driving17
Safety First
Operating instructions
Practical tips
Te c h n i c a l D a t a
•
Never lay or fit floor mats or other floor coverings over the original floor
mats. This would reduce the pedal area and could obstruct the pedals. Risk
of accident.
Stowing luggageLoading the boot
All luggage and other loose object s must be safely secured in
the luggage compartment.Unsecured objects which shift back and forth could impair the
driving safety or driving characteristics of the vehicle by shifting the
centre of gravity.
– Distribute the load evenly in the luggage compartment.
– Lay and stow heavy luggage as far forward as possible in the luggage compartment.
– Stow heavy luggage as low as possible in the luggage compart- ment.
– Secure heavy objects to the fitted fastening rings ⇒page 18.
WARNING
•
Loose luggage and other objects in the boot could cause serious inju-
ries.
•
Always stow objects in the luggage compartment and secure them on
the fastening rings.
•
Use suitable specialist straps to secure heavy objects.
•
During sudden manoeuvres or accidents, loose objects can be thrown
forward, injuring vehicle occupants or passers-by. This increased risk of
injury will be further increased if a loose object is struck by an inflating
airbag. If this happens, objects can be transformed into “missiles”. Risk of
fatal injury.
•
Please note that the centre of gravity may shift when transporting
heavy objects; this may affect the vehicle's handling and lead to an acci-
dent. Therefore, it is essential to adjust your speed and driving style
accordingly, to avoid accidents.
•
Never exceed the allowed axle loads or allowed maximum weight. If the
allowed axle load or the allowed total weight is exceeded, the driving char-
acteristics of the vehicle may change, leading to accidents, injuries and
damage to the vehicle.
•
Never leave your vehicle unattended, especially when the tailgate is
open. Children could climb into the luggage compartment closing the door
behind them; they will remain trapped without help and there is a mortal
risk.
•
Never allow children to play in or around the vehicle. Close and lock
both the tailgate and all the doors when you leave the vehicle. Before you
lock the vehicle, make sure that ther e are no adults or children in the
vehicle.
•
Never transport passengers in the luggage compartment. Every
passenger must be properly belted in ⇒ page 19.
WARNING (continued)
WARNING (continued)
Altea_EN.book Seite 17 Montag, 19. Januar 2009 1:31 13
Page 19 of 299
Safe driving
18
Note•
Air circulation in the vehicle helps re duce fogging of the windows. Used
air escapes through ventilation slits in the side trim of the luggage compart-
ment. Ensure that the ventilation slits are never covered.
•
Straps for securing the load to the fastening rings are commercially
available.
Fastening rings*
There can be four fastening rings in the boot for fastening
luggage and other objects.– Always use suitable and undamaged straps to secure luggage and other objects to the fastening rings ⇒ in “Loading the
boot” on page 17.
– Pull up the fastening rings to attach the straps.During a collision or an accident, even small and light objects can build up so
much energy that they can cause very severe injuries. The amount of “kinetic
energy” depends on the speed of the vehicle and the weight of the object.
The most significant factor, however, is the speed of the vehicle.
Example: An object weighing 4.5 kg is lying unsecured in the vehicle. During
a frontal collision at a s peed of 50 km/h, this object generates a force corre-
sponding to 20 times its weight. That means that the effective weight of the
object increases to about 90 kg. You can imagine the severity of the injuries
which might be sustained if this “projectile” strikes an occupant as it flies
through the passenger compartment. This increased risk of injury will be
further increased if a loose object is struck by an inflating airbag.
WARNING
•
If pieces of baggage or other objects are secured to the fastening rings
with inappropriate or damaged retaining cords, injuries could result in the
event of braking manoeuvres or accidents.
•
To prevent pieces of luggage or other objects from flying forward,
always use appropriate retaining cords which are secured to the fastening
rings.
•
Never secure a child seat on the fastening rings.
Altea_EN.book Seite 18 Montag, 19. Januar 2009 1:31 13
Page 96 of 299
Unlocking and locking95
Safety First
Operating instructions
Practical tips
Te c h n i c a l D a t a
Unlocking all doors and the boot
The unlock button on the remote must be pressed twice so that all doors
and the boot can be opened.
Press twice within 2 seconds to deactivate the “Safe” system for all vehicle,
to unlock all doors and to use the boot. The indicator and the alarm (only vehi-
cles fitted with one) are turned off.
Automatic speed dependent locking and unlocking system*
This is a safety system which prevent the access to the vehicle
from the outside when it is running (for example, when
stopped at a traffic light).Locking
The doors and the boot are automatically locked when vehicle speed exceeds
15 km/h.
If the vehicle is stopped and one of the doors is opened, when the vehicle
moves off again and exceeds a speed of 15 km/h, the unlocked door(s) will
be locked once more.
Unlocking
The driver's door automatically unlocks when the key is removed from the
ignition.
Each door can be unlocked and opened
independently from the inside (for
example, when a passenger gets out of it). To do it, simply operate the lever
inside the door.
WARNING
The door handles must no t be operated when the vehicle is running: the
door would open.
Automatic locking system for involuntary unlocking*
It is an anti-theft system and prevents the unintentional
unlocking of the vehicle.If the vehicle is unlocked and any of the doors (including the tailgate) are
opened within 30 seconds, it gets re-locked automatically. This function
prevents the vehicle from remaining unlocked if the unlock button is pressed
by mistake.Emergency unlocking systemIf the airbags are triggered during an accident, the vehicle gets unlocked,
except for the boot. It is possible to lock the vehicle from inside with the
central locking, after turning the ignition of f and back on again.
If the doors must be locked from th e outside, see “Emergency locking of the
doors”
Altea_EN.book Seite 95 Montag, 19. Januar 2009 1:31 13
Page 105 of 299
Unlocking and locking
104Ta i l g a t eUnlocking and locking
The operation of the tailgate opening system is electric. It is
activated by using the handle on the tailgate
Opening the tailgate
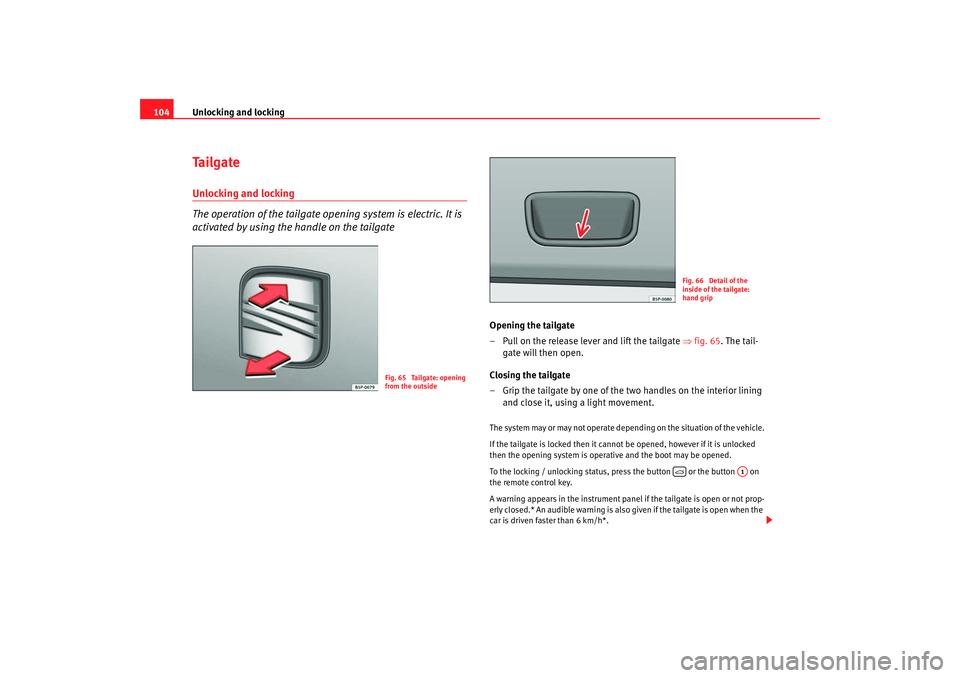
– Pull on the release lever and lift the tailgate ⇒fig. 65 . The tail-
gate will then open.
Closing the tailgate
– Grip the tailgate by one of the two handles on the interior lining and close it, using a light movement.The system may or may not operate depending on the situation of the vehicle.
If the tailgate is locked then it cannot be opened, however if it is unlocked
then the opening system is operat ive and the boot may be opened.
To the locking / unlocking status, press the button or the button on
the remote control key.
A warning appears in the instrument panel if the tailgate is open or not prop-
erly closed.* An audible warning is also given if the tailgate is open when the
car is driven faster than 6 km/h*.
Fig. 65 Tailgate: opening
from the outside
Fig. 66 Detail of the
inside of the tailgate:
hand grip
A1
Altea_EN.book Seite 104 Montag, 19. Januar 2009 1:31 13
Page 106 of 299
Unlocking and locking105
Safety First
Operating instructions
Practical tips
Te c h n i c a l D a t a
WARNING
•
Always close the tailgate properly. Risk of accident or injury.
•
Do not close the tailgate by pushing it down with your hand on the rear
window. The glass could smash. Risk of injury!
•
Ensure the tailgate is locked after closing it. If not, it may open unex-
pectedly while driving.
•
Never allow children to play in or ar ound the vehicle. A locked vehicle
can be subjected to extremely high and low temperatures, depending on
the time of year, thus causing serious injuries/illness. It could even have
fatal consequences. Close and lock both the tailgate and all the other doors
when you are not using the vehicle.
•
Closing the tailgate without observing and ensuring it is clear could
cause serious injury to you and to third parties. Make sure that no one is in
the path of the tailgate.
•
Never drive with the tailgate open or half-closed, exhaust gases may
penetrate into the interior of th e vehicle. Danger of poisoning!
•
If you only open the tailgate, do not leave the key inside. The vehicle
will not be opened if the key is left inside.
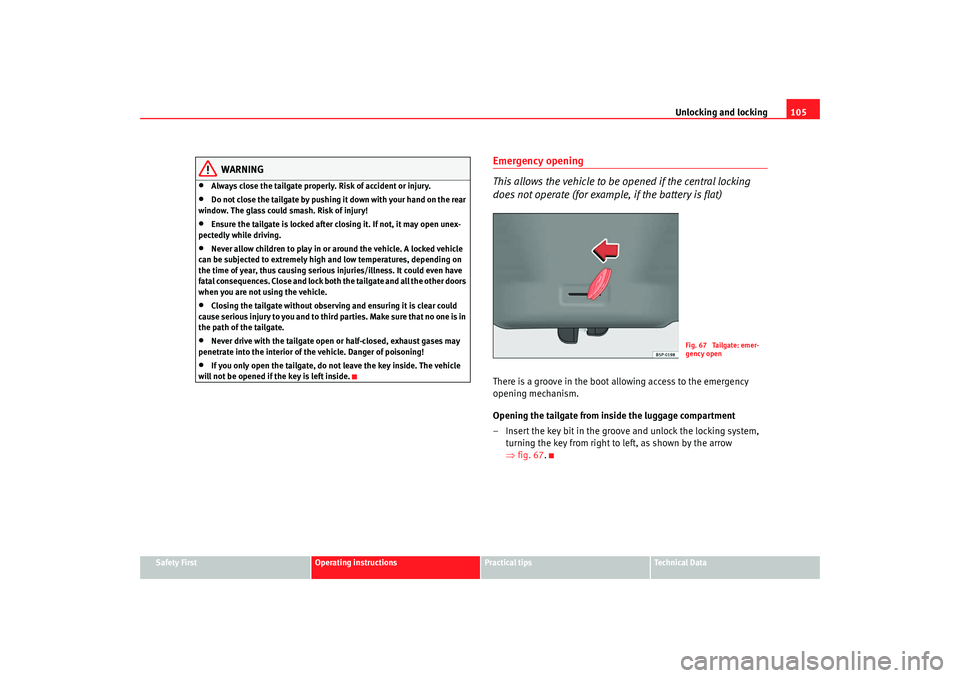
Emergency opening
This allows the vehicle to be opened if the central locking
does not operate (for example, if the battery is flat)There is a groove in the boot allowing access to the emergency
opening mechanism.
Opening the tailgate from inside the luggage compartment
– Insert the key bit in the groove and unlock the locking system, turning the key from right to left, as shown by the arrow
⇒fig. 67 .
Fig. 67 Tailgate: emer-
gency open
Altea_EN.book Seite 105 Montag, 19. Januar 2009 1:31 13
Page 148 of 299
Seats and stowage147
Safety First
Operating instructions
Practical tips
Te c h n i c a l D a t a
Electrical sockets*
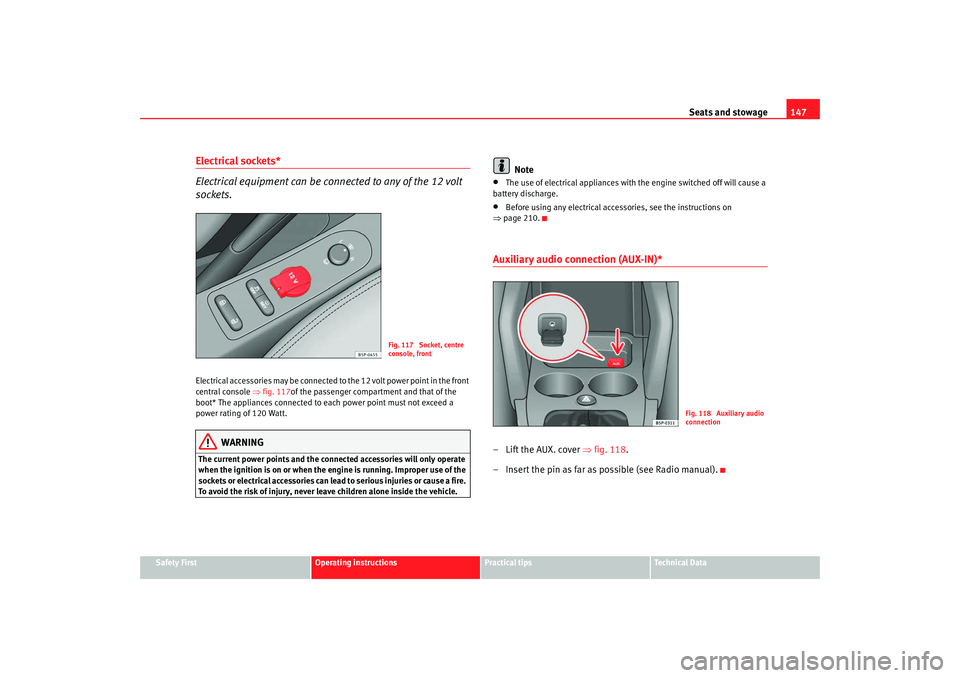
Electrical equipment can be connected to any of the 12 volt
sockets.Electrical accessories may be connected to the 12 volt power point in the front
central console ⇒fig. 117 of the passenger compartment and that of the
boot* The appliances connected to ea ch power point must not exceed a
power rating of 120 Watt.
WARNING
The current power points and the connected accessories will only operate
when the ignition is on or when the engine is running. Improper use of the
sockets or electrical accessories can lead to serious injuries or cause a fire.
To avoid the risk of injury, never leave children alone inside the vehicle.
Note
•
The use of electrical appliances with the engine switched off will cause a
battery discharge.
•
Before using any electrical accessories, see the instructions on
⇒ page 210.
Auxiliary audio connection (AUX-IN)*– Lift the AUX. cover ⇒fig. 118.
– Insert the pin as far as possible (see Radio manual).
Fig. 117 Socket, centre
console, front
Fig. 118 Auxiliary audio
connection
Altea_EN.book Seite 147 Montag, 19. Januar 2009 1:31 13
Page 152 of 299
Seats and stowage151
Safety First
Operating instructions
Practical tips
Te c h n i c a l D a t a
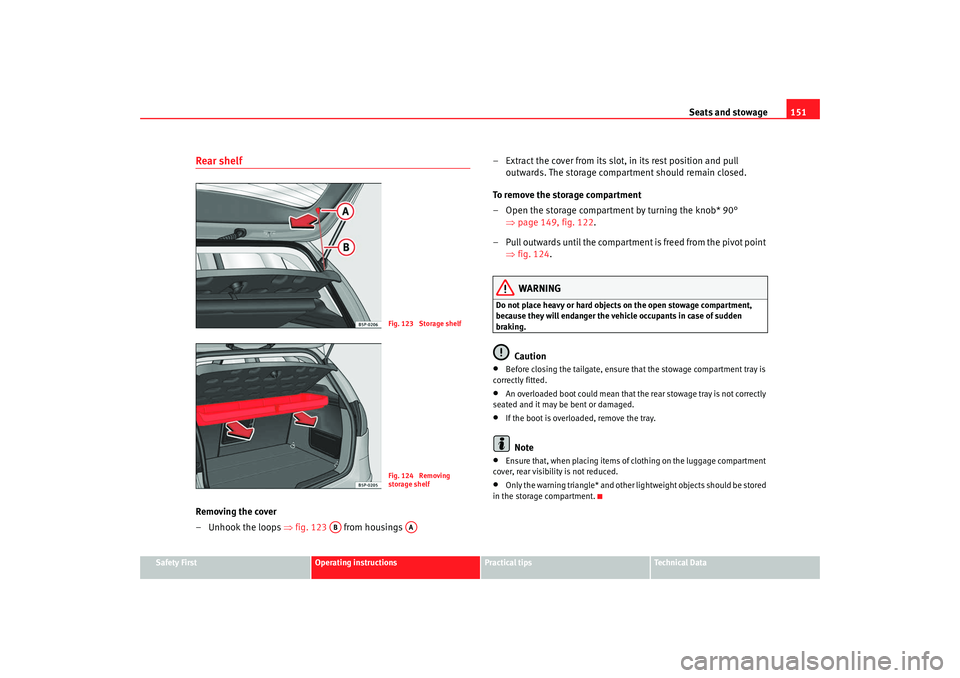
Rear shelfRemoving the cover
– Unhook the loops ⇒fig. 123 from housings – Extract the cover from its slot, in its rest position and pull
outwards. The storage compartment should remain closed.
To remove the storage compartment
– Open the storage compartment by turning the knob* 90° ⇒page 149, fig. 122 .
– Pull outwards until the compartment is freed from the pivot point ⇒fig. 124.
WARNING
Do not place heavy or hard objects on the open stowage compartment,
because they will endanger the ve hicle occupants in case of sudden
braking.
Caution
•
Before closing the tailgate, ensure th at the stowage compartment tray is
correctly fitted.
•
An overloaded boot could mean that the rear stowage tray is not correctly
seated and it may be bent or damaged.
•
If the boot is overloaded, remove the tray.Note
•
Ensure that, when placing items of clothing on the luggage compartment
cover, rear visibility is not reduced.
•
Only the warning triangle* and other lightweight objects should be stored
in the storage compartment.
Fig. 123 Storage shelfFig. 124 Removing
storage shelf
AB
AA
Altea_EN.book Seite 151 Montag, 19. Januar 2009 1:31 13
Page 271 of 299
General notes on the technical data
270Vehicle identification data
The most important data are given on the type plate and the
vehicle data sticker.Vehicles for certain export countries do not have a type plate.
Type plate
The type plate is located on the left rib inside the engine compartment.
Vehicle identification number
The vehicle identification number (chass is number) can be read from outside
the vehicle through a viewer in the windscreen. This is located on the left-
hand side of the vehicle in the lower area of the windscreen. It is also located
on the right hand side of the engine compartment. Vehicle data
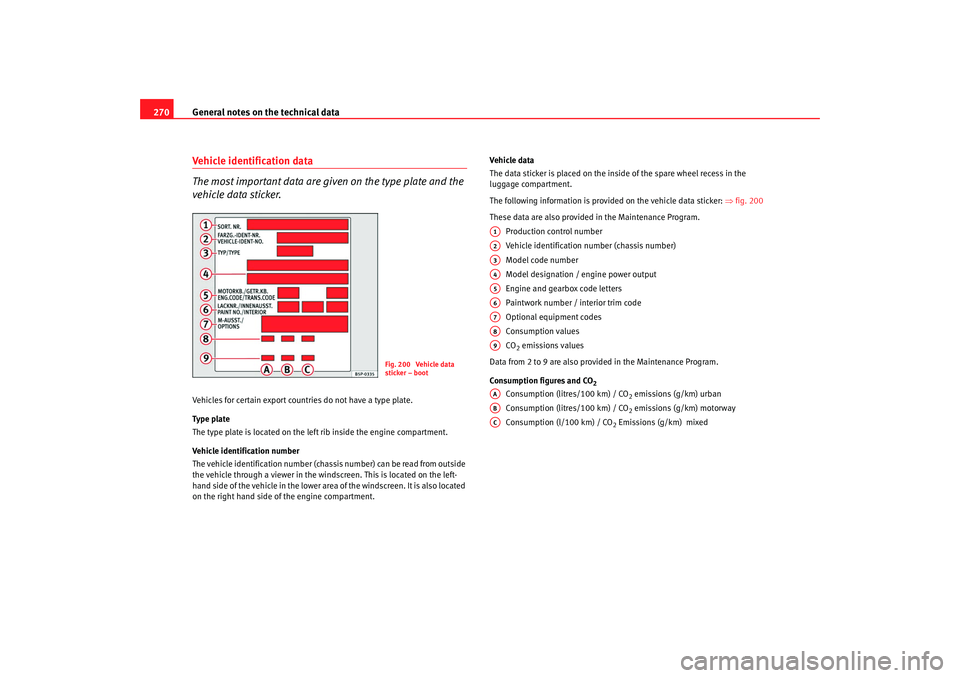
The data sticker is placed on the inside of the spare wheel recess in the
luggage compartment.
The following information is provided on the vehicle data sticker:
⇒fig. 200
These data are also provided in the Maintenance Program. Production control number
Vehicle identification number (chassis number)
Model code number
Model designation / engine power output
Engine and gearbox code letters
Paintwork number / interior trim code
Optional equipment codes
Consumption values
CO
2 emissions values
Data from 2 to 9 are also provided in the Maintenance Program.
Consumption figures and CO
2
Consumption (litres/100 km) / CO
2 emissions (g/km) urban
Consumption (litres/100 km) / CO2 emissions (g/km) motorway
Consumption (l/100 km) / CO
2 Emissions (g/km) mixed
Fig. 200 Vehicle data
sticker – boot
A1A2A3A4A5A6A7A8A9AAABAC
Altea_EN.book Seite 270 Montag, 19. Januar 2009 1:31 13
Page 294 of 299
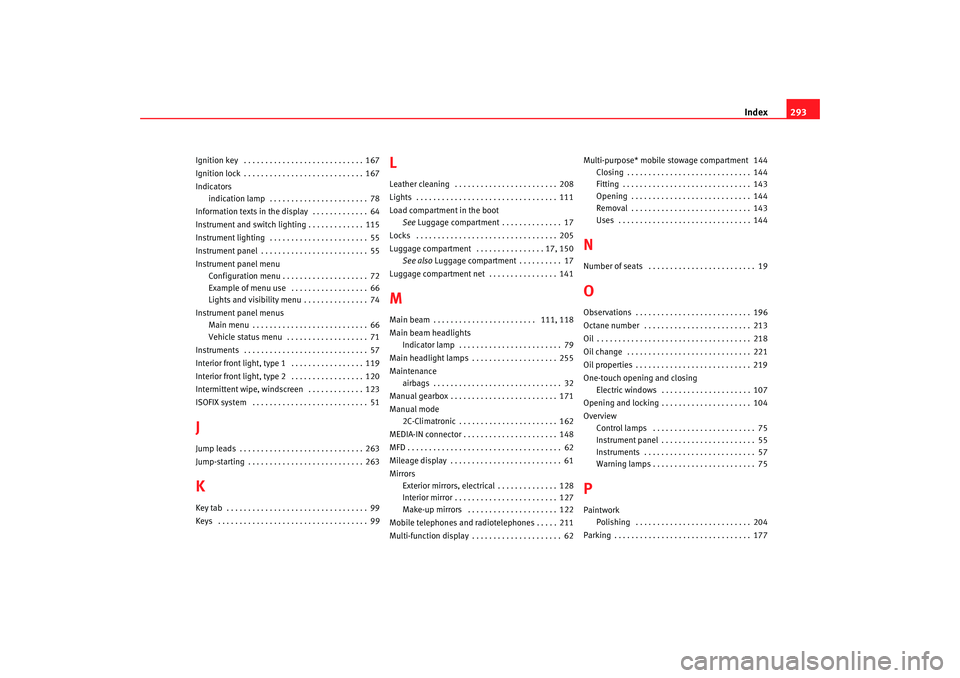
Index293
Ignition key . . . . . . . . . . . . . . . . . . . . . . . . . . . . 167
Ignition lock . . . . . . . . . . . . . . . . . . . . . . . . . . . . 167
Indicators
indication lamp . . . . . . . . . . . . . . . . . . . . . . . 78
Information texts in the display . . . . . . . . . . . . . 64
Instrument and switch lighting . . . . . . . . . . . . . 115
Instrument lighting . . . . . . . . . . . . . . . . . . . . . . . 55
Instrument panel . . . . . . . . . . . . . . . . . . . . . . . . . 55
Instrument panel menu Configuration menu . . . . . . . . . . . . . . . . . . . . 72
Example of menu use . . . . . . . . . . . . . . . . . . 66
Lights and visibility menu . . . . . . . . . . . . . . . 74
Instrument panel menus Main menu . . . . . . . . . . . . . . . . . . . . . . . . . . . 66
Vehicle status menu . . . . . . . . . . . . . . . . . . . 71
Instruments . . . . . . . . . . . . . . . . . . . . . . . . . . . . . 57
Interior front light, type 1 . . . . . . . . . . . . . . . . . 119
Interior front light, type 2 . . . . . . . . . . . . . . . . . 120
Intermittent wipe, windscreen . . . . . . . . . . . . . 123
ISOFIX system . . . . . . . . . . . . . . . . . . . . . . . . . . . 51JJump leads . . . . . . . . . . . . . . . . . . . . . . . . . . . . . 263
Jump-starting . . . . . . . . . . . . . . . . . . . . . . . . . . . 263KKey tab . . . . . . . . . . . . . . . . . . . . . . . . . . . . . . . . . 99
Keys . . . . . . . . . . . . . . . . . . . . . . . . . . . . . . . . . . . 99
LLeather cleaning . . . . . . . . . . . . . . . . . . . . . . . . 208
Lights . . . . . . . . . . . . . . . . . . . . . . . . . . . . . . . . . 111
Load compartment in the boot See Luggage compartment . . . . . . . . . . . . . . 17
Locks . . . . . . . . . . . . . . . . . . . . . . . . . . . . . . . . . 205
Luggage compartment . . . . . . . . . . . . . . . . 17, 150 See also Luggage compartment . . . . . . . . . . 17
Luggage compartment net . . . . . . . . . . . . . . . . 141MMain beam . . . . . . . . . . . . . . . . . . . . . . . . 111, 118
Main beam headlights Indicator lamp . . . . . . . . . . . . . . . . . . . . . . . . 79
Main headlight lamps . . . . . . . . . . . . . . . . . . . . 255
Maintenance airbags . . . . . . . . . . . . . . . . . . . . . . . . . . . . . . 32
Manual gearbox . . . . . . . . . . . . . . . . . . . . . . . . . 171
Manual mode 2C-Climatronic . . . . . . . . . . . . . . . . . . . . . . . 162
MEDIA-IN connector . . . . . . . . . . . . . . . . . . . . . . 148
MFD . . . . . . . . . . . . . . . . . . . . . . . . . . . . . . . . . . . . 62
Mileage display . . . . . . . . . . . . . . . . . . . . . . . . . . 61
Mirrors Exterior mirrors, electrical . . . . . . . . . . . . . . 128
Interior mirror . . . . . . . . . . . . . . . . . . . . . . . . 127
Make-up mirrors . . . . . . . . . . . . . . . . . . . . . 122
Mobile telephones and radiotelephones . . . . . 211
Multi-function display . . . . . . . . . . . . . . . . . . . . . 62 Multi-purpose* mobile
stowage compartment 144
Closing . . . . . . . . . . . . . . . . . . . . . . . . . . . . . 144
Fitting . . . . . . . . . . . . . . . . . . . . . . . . . . . . . . 143
Opening . . . . . . . . . . . . . . . . . . . . . . . . . . . . 144
Removal . . . . . . . . . . . . . . . . . . . . . . . . . . . . 143
Uses . . . . . . . . . . . . . . . . . . . . . . . . . . . . . . . 144
NNumber of seats . . . . . . . . . . . . . . . . . . . . . . . . . 19OObservations . . . . . . . . . . . . . . . . . . . . . . . . . . . 196
Octane number . . . . . . . . . . . . . . . . . . . . . . . . . 213
Oil . . . . . . . . . . . . . . . . . . . . . . . . . . . . . . . . . . . . 218
Oil change . . . . . . . . . . . . . . . . . . . . . . . . . . . . . 221
Oil properties . . . . . . . . . . . . . . . . . . . . . . . . . . . 219
One-touch opening and closing Electric windows . . . . . . . . . . . . . . . . . . . . . 107
Opening and locking . . . . . . . . . . . . . . . . . . . . . 104
Overview Control lamps . . . . . . . . . . . . . . . . . . . . . . . . 75
Instrument panel . . . . . . . . . . . . . . . . . . . . . . 55
Instruments . . . . . . . . . . . . . . . . . . . . . . . . . . 57
Warning lamps . . . . . . . . . . . . . . . . . . . . . . . . 75PPaintworkPolishing . . . . . . . . . . . . . . . . . . . . . . . . . . . 204
Parking . . . . . . . . . . . . . . . . . . . . . . . . . . . . . . . . 177
Altea_EN.book Seite 293 Montag, 19. Januar 2009 1:31 13