turn signal Seat Altea Freetrack 2012 User Guide
[x] Cancel search | Manufacturer: SEAT, Model Year: 2012, Model line: Altea Freetrack, Model: Seat Altea Freetrack 2012Pages: 297, PDF Size: 4.31 MB
Page 112 of 297

110Unlocking and locking
WARNING
● Incorrect use of the electric windows can result in injury.
● Always take the key with you when leaving the vehicle, even if you
only intend to be gone for a short time. Please ensure that children are
never left alone inside the vehicle.
● The electric windows will work until the key has been removed from
the ignition and one of the front doors has been opened.
● Never close the tailgate without observing and ensuring it is clear, to
do otherwise could cause serious injury to you and third parties. Make
sure that no one is in the path of a window.
● Never allow people to remain in the vehicle when you close the vehi-
cle from the outside. The windows cannot be opened even in an emergen-
cy.
Note
The roll-back function is deactivated if the windows are closed from the out-
side of the vehicle using the ignition key for convenience closing
⇒ page 110.
Convenience opening and closing*
Using the door lock
– Hold the key in the door lock of the driver door in either the
locking or the unlocking position until all windows are either
opened or closed.
– Release the key to interrupt this function. Using the remote control
–
Push the lock button on the remote control for about 3 seconds.
All windows which function electrically will be either opened or
closed.
– Press the unlock button to interrupt the function.
– Once the windows are completely closed, the turn signals will
flash.
Sliding/tilting sunroof* Opening and closing the sliding/tilting roof
The sliding/tilting sunroof is opened and closed using the
rotary knob when the ignition is switched on.
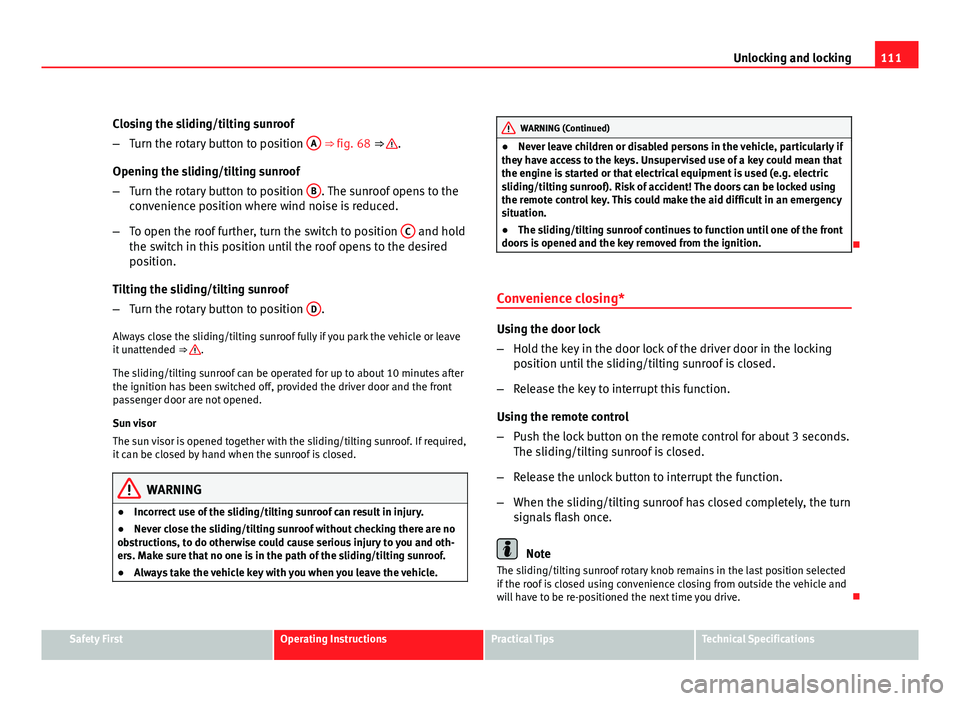
Fig. 68 Roof lining de-
scription: sliding/tilting
sunroof rotary knob
Page 113 of 297
111
Unlocking and locking
Closing the sliding/tilting sunroof
– Turn the rotary button to position A
⇒ fig. 68 ⇒ .
Opening the sliding/tilting sunroof
– Turn the rotary button to position B
. The sunroof opens to the
convenience position where wind noise is reduced.
– To open the roof further, turn the switch to position C
and hold
the switch in this position until the roof opens to the desired
position.
Tilting the sliding/tilting sunroof
– Turn the rotary button to position D
.
Always close the sliding/tilting sunroof fully if you park the vehicle or leave
it unattended ⇒
.
The sliding/tilting sunroof can be operated for up to about 10 minutes after
the ignition has been switched off, provided the driver door and the front
passenger door are not opened.
Sun visor
The sun visor is opened together with the sliding/tilting sunroof. If required,
it can be closed by hand when the sunroof is closed.
WARNING
● Incorrect use of the sliding/tilting sunroof can result in injury.
● Never close the sliding/tilting sunroof without checking there are no
obstructions, to do otherwise could cause serious injury to you and oth-
ers. Make sure that no one is in the path of the sliding/tilting sunroof.
● Always take the vehicle key with you when you leave the vehicle.
WARNING (Continued)
● Never leave children or disabled persons in the vehicle, particularly if
they have access to the keys. Unsupervised use of a key could mean that
the engine is started or that electrical equipment is used (e.g. electric
sliding/tilting sunroof). Risk of accident! The doors can be locked using
the remote control key. This could make the aid difficult in an emergency
situation.
● The sliding/tilting sunroof continues to function until one of the front
doors is opened and the key removed from the ignition.
Convenience closing*
Using the door lock
– Hold the key in the door lock of the driver door in the locking
position until the sliding/tilting sunroof is closed.
– Release the key to interrupt this function.
Using the remote control
– Push the lock button on the remote control for about 3 seconds.
The sliding/tilting sunroof is closed.
– Release the unlock button to interrupt the function.
– When the sliding/tilting sunroof has closed completely, the turn
signals flash once.
Note
The sliding/tilting sunroof rotary knob remains in the last position selected
if the roof is closed using convenience closing from outside the vehicle and
will have to be re-positioned the next time you drive.
Safety FirstOperating InstructionsPractical TipsTechnical Specifications
Page 116 of 297
114Lights and visibility
● If you are towing a trailer equipped with a rear fog light on a vehicle with
a factory-fitted towing bracket, the rear fog light on the vehicle will automat-
ically be switched off.
● The use of the lighting described here is subject to the relevant statutory
requirements.
● Depending on weather conditions (very cold or wet), the front and tail
lights and the turn signals may be temporarily misted. This has no influence
on the useful life of the lighting system. The lights will soon demist when
they are switched on.
Automatic lighting*
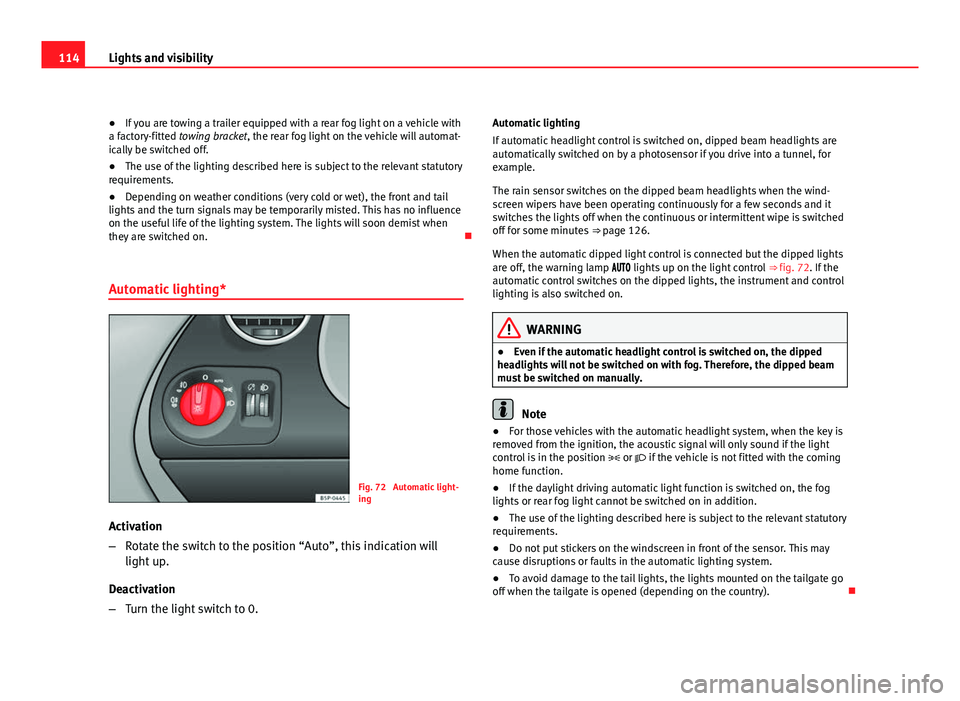
Fig. 72 Automatic light-
ing
Activation
– Rotate the switch to the position “Auto”, this indication will
light up.
Deactivation
– Turn the light switch to 0. Automatic lighting
If automatic headlight control is switched on, dipped beam headlights are
automatically switched on by a photosensor if you drive into a tunnel, for
example.
The rain sensor switches on the dipped beam headlights when the wind-
screen wipers have been operating continuously for a few seconds and it
switches the lights off when the continuous or intermittent wipe is switched
off for some minutes
⇒ page 126.
When the automatic dipped light control is connected but the dipped lights
are off, the warning lamp lights up on the light control ⇒ fig. 72. If the
automatic control switches on the dipped lights, the instrument and control
lighting is also switched on.
WARNING
● Even if the automatic headlight control is switched on, the dipped
headlights will not be switched on with fog. Therefore, the dipped beam
must be switched on manually.
Note
● For those vehicles with the automatic headlight system, when the key is
removed from the ignition, the acoustic signal will only sound if the light
control is in the position or if the vehicle is not fitted with the coming
home function.
● If the daylight driving automatic light function is switched on, the fog
lights or rear fog light cannot be switched on in addition.
● The use of the lighting described here is subject to the relevant statutory
requirements.
● Do not put stickers on the windscreen in front of the sensor. This may
cause disruptions or faults in the automatic lighting system.
● To avoid damage to the tail lights, the lights mounted on the tailgate go
off when the tailgate is opened (depending on the country).
Page 117 of 297

115
Lights and visibility
Daytime lights*
The daytime light reduces the risk of accidents by increasing
the visibility of the vehicle. The daytime running lights are
enabled automatically when the ignition is switched on. It is
automatically switched off when the side lights are turned
on.
Daytime lights (halogen lamps) 1)
The daytime lights increase road safety in vehicles fitted with halogen
lamps. These include the dipped, side and number plate lights.
The daytime lights are switched on each time the ignition is turned on if the
light setting is in position 0 or . Depending upon the model, a control
lamp on the light control switch or the lighting up of the instrument pan-
el will indicate that the daytime lighting is on.
It is not possible to switch the daytime lights on or off. Please contact a spe-
cialised workshop if you wish to deactivate the lights.
Daytime lights (bi-xenon lamps)
The daytime lights increase road safety in vehicles fitted with bi-xenon
lamps. The lights are built-in separately to the headlights and are switched
on each time the ignition is turned on if the light setting is in position 0 or
.
Automatic control of the dipped beam in combination with the daytime
lights (bi-xenon headlights)
If the dipped light control and the daytime lighting are activated at the
same time, the dipped lights and the instrument panel lighting will auto-
matically come on as required (e.g. on entering a tunnel) and the daytime
lights will go off. When the automatic dipped light control switches off the dipped lights (e.g. on coming out of the tunnel), the daytime lights come
back on.
Activating the daytime lights
With the ignition switched off, move the turn signal and main beam lever
upwards and back (right turn signal and headlight flash).
Switch on the ignition for 3 seconds while holding this position. The day-
time lights are activated and can be switched on.
Deactivating the daytime lights
With the ignition switched off, move the turn signal and main beam lever
upwards and back (left turn signal and headlight flash) and hold in this po-
sition.
Switch on the ignition for 3 seconds while holding this position. The day-
time lights are deactivated and cannot be switched on.
Activating daytime lights (bi-xenon lamps)
Remove the key from the ignition, move the turn signal lever upwards (right
turn signal) and press it backwards to flash position and hold it in this posi-
tion.
Insert the key and switch the ignition on, holding it in this position for 3
seconds. Then, switch off the ignition. The daytime lights are activated and
can be switched on.
Deactivating daytime lights (bi-xenon lamps)
Remove the key from the ignition, move the turn signal lever upwards (left
turn signal) and press it backwards to flash position and hold it in this posi-
tion.
Insert the key and switch the ignition on, holding it in this position for 3
seconds. Then, switch off the ignition. The daytime lights are deactivated
and cannot be switched on.
1)
It is only available in some countries or as an optional extra
Safety FirstOperating InstructionsPractical TipsTechnical Specifications
Page 118 of 297

116Lights and visibility
Note
Please observe any relevant legal requirements which may apply in your
country.
Coming home / leaving home function*
The Coming Home function is controlled manually. The Leav-
ing Home function is controlled with a photosensor.
If the Coming Home or Leaving Home function is connected, the front side
and dipped lights, the tail lights and the number plate light will light up to
provide assistance.
Coming home function
The Coming Home function is activated by switching off the ignition and
briefly flashing the lights. When the driver door is opened, the Coming
Home lighting comes on. If the driver door is already open when the lights
are flashed briefly, the Coming Home lighting comes on immediately.
When the last door of the vehicle or the tailgate is closed, the Coming Home
function starts and the switching off the headlights is delayed.
The Coming Home lighting switches off in the following cases:
● On completion of the time period established for the delay in switching
off the lights after all the vehicle doors and the tailgate have been closed.
● If, 30 seconds after being connected, any doors or the tailgate remain
open.
● If the light switch is turned to position .
● If the ignition is switched on.
Leaving home function
The Leaving Home function is activated when the vehicle is unlocked if: ●
the light control is in position and
● the photosensor detects “darkness”.
The Leaving Home lighting switches off in the following cases:
● If the time period for the delay in switching off the headlights has ended
● If the vehicle is locked again.
● If the light switch is turned to position .
● If the ignition is switched on.
Note
The setting for the delay in switching off the headlights in the Coming Home
and Leaving Home function can be changed or the function can be connec-
ted or disconnected in the menu Lights and visibility ⇒ page 75.
● If the ignition key is removed while the lights are on, and the lights are
flashed briefly and the driver door opened, no acoustic signal is heard, as
when the Coming Home function is on, the lights are automatically switched
off after a period of time (except when the light switch is in position or
.
Page 121 of 297

119
Lights and visibility
7. Always take the vehicle key with you when you leave the vehi- cle.
Switch on the hazard warning lights to warn other road users, for example
when:
● reaching the tail end of a traffic jam,
● there is an emergency
● your vehicle breaks down due to a technical fault,
● you are towing another vehicle or your vehicle is being towed.
All turn signals flash simultaneously when the hazard warning lights are
switched on. That is that the two turn signal turn signal lamps and the
turn signal lamp in the switch will flash at the same time. The hazard
warning lights also work when the ignition is switched off.
Emergency braking warning
If the vehicle is braked suddenly and continuously at a speed of more than
80 km/h, the brake light flashes several times per second to warn vehicles
driving behind. If you continue braking, the hazard warning lights will come
on automatically when the vehicle comes to a standstill. They switch off au-
tomatically when the vehicle starts to move again.
WARNING
● The risk of an accident increases if your vehicle breaks down. Always
use the hazard warning lights and a warning triangle to draw the atten-
tion of other road users to your stationary vehicle.
● Never park where the catalytic converter could come into contact with
inflammable materials under the vehicle, for example dry grass or spilt
petrol. This could start a fire!
Note
● The battery will run down if the hazard warning lights are left on for a
long time, even if the ignition is switched off.
● The use of the hazard warning lights described here is subject to the rel-
evant statutory requirements.
Turn signal and main beam headlight lever
The turn signal and main beam lever also operates the park-
ing lights and the headlight flasher.
Fig. 76 Turn signal and
main beam headlight lev-
er
The turn signal and main beam headlight lever has the following
functions:
Switching on the turn signals
– Move the lever all the way up ⇒ fig. 76 1
to indicate right, and
all the way down 2 to indicate left.
Safety FirstOperating InstructionsPractical TipsTechnical Specifications
Page 122 of 297

120Lights and visibility
Signalling a lane change
–Push the lever up 1
or down 2 to the point where you incur
resistance and then release it. The turn signal will flash several
times. The corresponding warning lamp will also flash.
Switching main beam on and off
– If the dipped lights are on, push the lever forward ⇒ fig. 76 3
to switch on the main beam.
– Push the lever towards the steering wheel ⇒ fig. 76 4
to switch
off the main beam.
Headlight flashers
– Pull the lever towards the steering wheel 4
to operate the
flasher.
Switching on parking lights
– Switch the ignition off and remove the key from the lock.
– Move the lever up or down to turn the right or left-hand parking
lights on, respectively.
WARNING
The main beam can dazzle other drivers. Risk of accident! Never use the
main beam headlights or the headlight flasher if they could dazzle other
drivers.
Note
● The turn signals only work when the ignition is switched on. The corre-
sponding warning lamp or flashes in the instrument panel. The warn-
ing lamp flashes when the turn signals are operated, provided a trailer is
correctly attached and connected to the vehicle. If a turn signal bulb is de-
fective, the warning lamp flashes at double speed. If the trailer turn signal
bulbs are damaged, warning lamp does not light up. Change the bulb.
● The main beam headlights can only be switched on if the dipped beam
headlights are already on. The warning lamp then comes on in the instru-
ment panel.
● The headlight flasher comes on for as long as you pull the lever – even if
no other lights are switched on. The warning lamp then comes on in the
instrument panel.
● When the parking lights are switched on, the headlight and the tail light
on the corresponding side of the vehicle light up. The parking lights will on-
ly work if the key is removed from the ignition. If the lights are switched on,
an acoustic signal will be emitted while the driver door is open.
● If the turn signal lever is left on after the key has been taken out of the
ignition lock, an acoustic signal sounds when the driver door is opened.
This is a reminder to switch off the turn signal, unless of course you wish to
leave the parking light on.
Page 182 of 297

180Driving
Handbrake
Using the handbrake
The handbrake should be applied firmly to prevent the vehi-
cle from accidentally rolling away.
Fig. 148 Handbrake be-
tween the front seats
Always apply the handbrake when you leave your vehicle and when
you park.
Applying the handbrake
– Pull the handbrake lever up firmly ⇒ fig. 148.
Releasing the handbrake
– Pull the lever up slightly and press the release knob in the di-
rection of the arrow ⇒ fig. 148 and guide the handbrake lever
down fully ⇒
. Always apply the handbrake
as far as it will go in order to prevent you from
driving with the handbrake applied by mistake ⇒
.
The handbrake warning lamp lights up when the handbrake is applied
and the ignition switched on. The warning turns off when the handbrake is
released.
If you drive faster than 6 km/h with the handbrake on, the following mes-
sage* will appear on the instrument panel display: HANDBRAKE ON. You will
also hear an acoustic warning signal.
WARNING
● Never use the handbrake to stop the vehicle when it is in motion. The
braking distance is considerably longer, because braking is only applied
to the rear wheels. Risk of accident!
● If it is only partially released, this will cause rear brakes overheating,
which can impair the function of the brake system and could lead to an
accident. This also causes premature wear on the rear brake pads.
CAUTION
Always apply the handbrake before you leave the vehicle. The first gear
should also be selected.
Parking
The handbrake should always be firmly applied when the
vehicle is parked.
Always note the following points when parking the vehicle:
– Use the brake pedal to stop the vehicle.
– Apply the handbrake.
Page 184 of 297

182Driving
Parking aid acoustic system*
Rear parking aid
The parking aid system will use an acoustic signal to warn of
the approach of any object towards the rear of the vehicle.
Description
The acoustic parking aid system will measure the distance between the rear
of the vehicle and any possible obstacle using four ultrasonic sensors loca-
ted on the rear bumper. The measuring range of the sensors starts approxi-
mately and depending on the nature of the obstacle at a distance of:
● side of the rear bumper: 0.8 m
● middle of the rear bumper: 1.5 m
Activation
The system is activated by engagement of the reverse gear. A brief acoustic
signal confirms the activation and correct function of the system.
Reverse gear
The distance warning will begin as soon as an obstacle is detected by the
system. The frequency of the bleeps emitted by the system will increase rap-
idly as the vehicle approaches the obstacle.
Within a short distance of about 25 cm, a continuous signal sounds (stop
signal). The driver should not reverse any further.
Trailer towing
For vehicles factory-fitted with a towing bar, the parking aid system will not
be activated by the engagement of the reverse gear when pulling a trailer,
as the trailer's electric connector will be plugged into the vehicle. Possible faults
If a continuous beep sounds for some seconds when the reverse gear is en-
gaged, this indicates that there is a fault in the parking aid system.
If the fault continues until the ignition is turned off, the acoustic signal
warning of the fault will not be emitted every time the system is reactivated
(by engaging the reverse gear). Thus, the system ready indication will not
sound either. Have the fault repaired by an Authorised Service Centre as
soon as possible.
If there is no ready signal or no acoustic warning signal, then the parking
aid loudspeaker is faulty and may not warn of obstacles.
To ensure that the system works properly, the sensors must be kept clean
and free of ice and snow.
WARNING
● The sensors have blind spots in which obstacles may not be detected.
● Always look out for small children and animals because the system
will not always detect them. Always pay attention when reversing to
avoid accidents.
● The parking aid is not a replacement for driver awareness. The driver
must take full responsibility for parking and other manoeuvres.
Page 186 of 297

184Driving
Switching the cruise control system on and off
Fig. 149 Turn signal and
main beam headlight lev-
er: switch and rocker
switch for the cruise con-
trol
Switching on the system
– Push the switch ⇒ fig. 149 B
to the left to
ON.
Switching off the system
– Either push the switch B
to the right to
OFF or turn the ignition
off when the vehicle is stationary.
When the cruise control is on and a speed is programmed, the indicator
on the instrument panel is lit. 1)
If the cruise control system is switched off, the symbol is switched off.
The system will also be deactivated completely when 1st gear is selected.*Setting speed*
Fig. 150 Turn signal and
main beam headlight lev-
er: switch and rocker
switch for the cruise con-
trol
– Press the lower part SET/- of the rocker switch ⇒ fig. 150 A
once briefly when you have reached the speed you wish to set.
When you release the rocker switch, the current speed is set and held con-
stant.
1)
Depending on the version of the model.