window Seat Altea Freetrack 2013 Owner's Guide
[x] Cancel search | Manufacturer: SEAT, Model Year: 2013, Model line: Altea Freetrack, Model: Seat Altea Freetrack 2013Pages: 301, PDF Size: 4.45 MB
Page 130 of 301
128Lights and visibility
main beams are switched on. Clean off stubborn dirt (insects, etc.) from the
headlights at regular intervals, for instance when filling the fuel tank.
Note
● To ensure that the headlight washers work properly in winter, keep the
nozzle holders in the bumper free of snow and remove any ice with a de-icer
spray.
● To remove water, the windscreen wipers will be activated from time to
time, the headlight washers will be activated every three cycles.
Rear vision mirrors Interior rear vision mirror
It is dangerous to drive if you cannot see clearly through the
rear window.
Manual anti-dazzle function for interior rear vision mirror
In the basic mirror position, the lever at the bottom edge of the rear vision
mirror should be at the front. Pull the lever to the back to select the anti-
dazzle function. Automatic anti-dazzle interior mirror*
The automatic anti-dazzle function can be switched on and
off as desired.
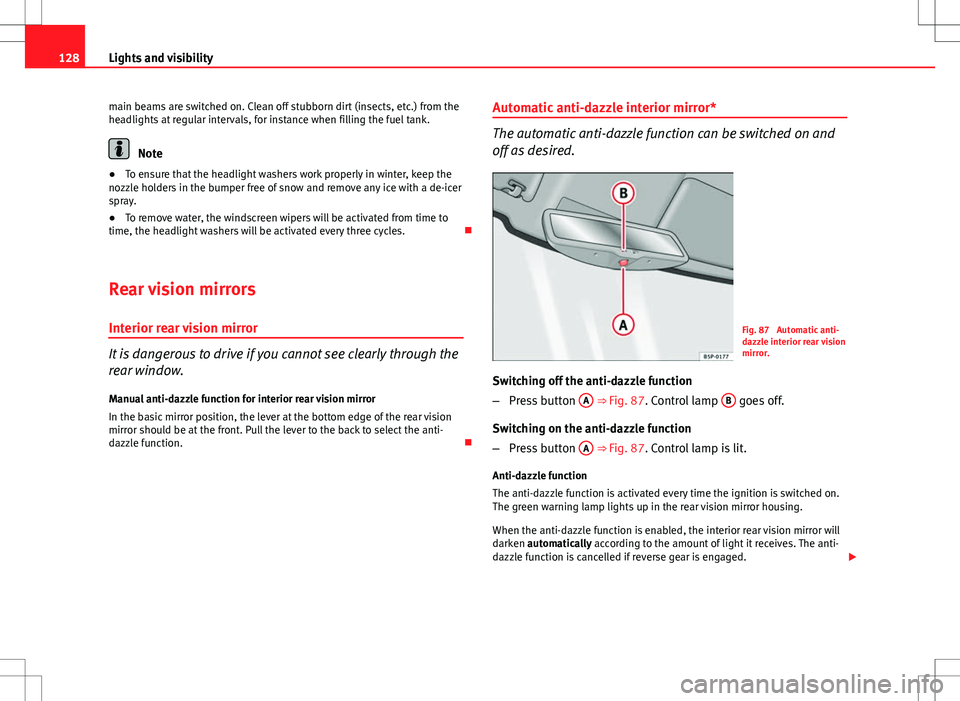
Fig. 87 Automatic anti-
dazzle interior rear vision
mirror.
Switching off the anti-dazzle function
– Press button A
⇒ Fig. 87. Control lamp B goes off.
Switching on the anti-dazzle function
– Press button A
⇒ Fig. 87. Control lamp is lit.
Anti-dazzle function
The anti-dazzle function is activated every time the ignition is switched on.
The green warning lamp lights up in the rear vision mirror housing.
When the anti-dazzle function is enabled, the interior rear vision mirror will
darken automatically according to the amount of light it receives. The anti-
dazzle function is cancelled if reverse gear is engaged.
Page 131 of 301
129
Lights and visibility
Note
● The automatic anti-dazzle function will only work properly if the sun
blind* for the rear window is retracted and there are no other objects pre-
venting light from reaching the rear vision mirror.
● If you have to stick any type of sticker on the windscreen, do not do so in
front of the sensors. Doing so could prevent the anti-dazzle function from
working well or even from working at all.
Exterior mirrors
The exterior mirrors can be adjusted using the rotary knob
in the centre console.
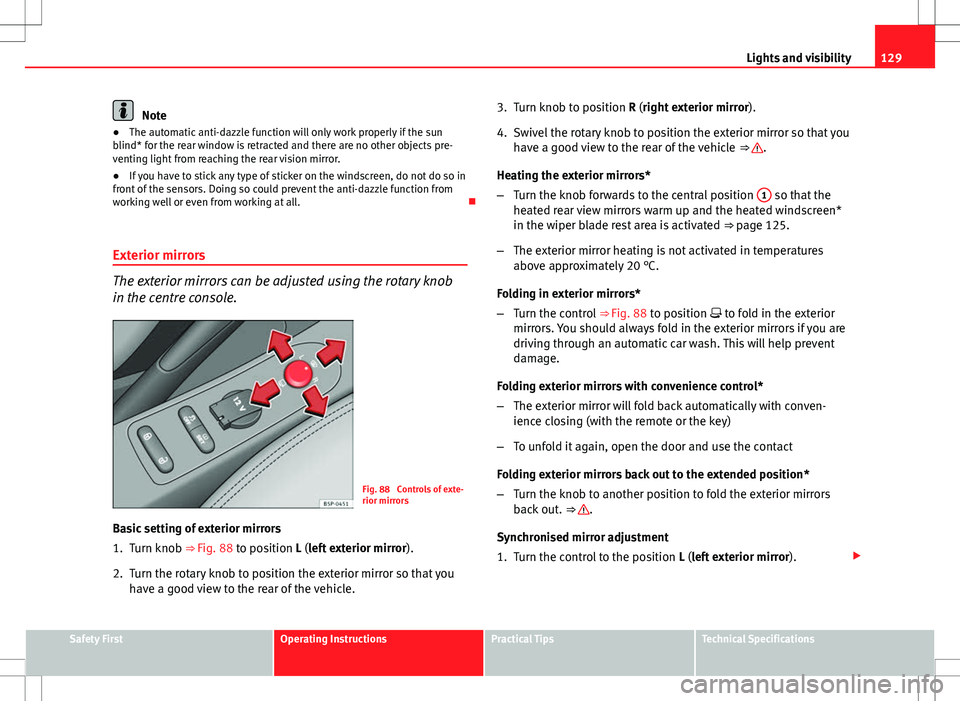
Fig. 88 Controls of exte-
rior mirrors
Basic setting of exterior mirrors
1. Turn knob ⇒
Fig. 88 to position L (left exterior mirror ).
2. Turn the rotary knob to position the exterior mirror so that you have a good view to the rear of the vehicle. 3. Turn knob to position R (right exterior mirror
).
4. Swivel the rotary knob to position the exterior mirror so that you have a good view to the rear of the vehicle ⇒
.
Heating the exterior mirrors*
– Turn the knob forwards to the central position 1
so that the
heated rear view mirrors warm up and the heated windscreen*
in the wiper blade rest area is activated ⇒ page 125.
– The exterior mirror heating is not activated in temperatures
above approximately 20 °C.
Folding in exterior mirrors*
– Turn the control ⇒ Fig. 88 to position to fold in the exterior
mirrors. You should always fold in the exterior mirrors if you are
driving through an automatic car wash. This will help prevent
damage.
Folding exterior mirrors with convenience control*
– The exterior mirror will fold back automatically with conven-
ience closing (with the remote or the key)
– To unfold it again, open the door and use the contact
Folding exterior mirrors back out to the extended position*
– Turn the knob to another position to fold the exterior mirrors
back out. ⇒
.
Synchronised mirror adjustment
1. Turn the control to the position L (left exterior mirror).
Safety FirstOperating InstructionsPractical TipsTechnical Specifications
Page 133 of 301
131
Seats and storage
Seats and storage The importance of correct seat adjustment
Proper seat adjustment optimises the level of protection of-
fered by seat belts and airbags.
Your vehicle has five seats, two in the front and three in the rear. Each seat
is equipped with a three-point seat belt.
The driver seat and the front passenger seat can be adjusted in many ways
to suit the physical requirements of the vehicle occupants. The correct seat
position is very important for:
● a fast and easy operation of all controls on the instrument panel,
● a relaxed posture which does not cause drowsiness,
● a safe driving ⇒ page 7,
● ensuring that the seat belts and airbag system provide maximum pro-
tection ⇒ page 19.
WARNING
● If the driver and passengers assume improper sitting positions, they
may sustain critical injuries.
● Never transport more than the permitted amount of people in your ve-
hicle.
● Every vehicle occupant must properly fasten and wear the seat belt
belonging to his or her seat. Children must be protected with an appro-
priate child restraint system ⇒ page 46, Child safety.
● The front seats and all head restraints must always be adjusted to
body size and the seat belt must always be properly adjusted to provide
you and your passengers with optimum protection.
WARNING (Continued)
● Always keep your feet on the footwell when the vehicle is moving;
never rest them on the dash panel, out of the window or on the seat. This
is also applied to passengers. An incorrect sitting position exposes you
to an increased risk of injury in case of a sudden braking or an accident.
If the airbag is triggered, you could sustain severe injuries due to an in-
correct sitting position.
● It is important for the driver and front passenger to keep a distance of
at least 25 cm from the steering wheel and dash panel. Failure to respect
the minimum distance means that the airbag will not protect you. Risk of
fatal injury. The distance between the driver and the steering wheel or
between the front passenger and the dash panel should always be as
great as possible.
● Adjust the driver or front passenger seat only when the vehicle is sta-
tionary. This also applies to the forwards/backwards adjustment of the
rear seats. Otherwise, your seat could move unexpectedly while the vehi-
cle is moving. This could increase the risk of an accident and therefore,
injury. In addition, while adjusting your seat, you will assume an incor-
rect sitting position. Risk of fatal accidents.
● Special guidelines apply to installing a child seat on the front passen-
ger seat. When installing a child seat, please observe the warnings de-
scribed in ⇒ page 46, Child safety.
Safety FirstOperating InstructionsPractical TipsTechnical Specifications
Page 153 of 301
151
Seats and storage
CAUTION
Hard objects on the shelf could chafe against the wires of the heating ele-
ment in the rear window and cause damage.
Note
The ventilation slots in front of the rear side windows must not be covered
as this would prevent stale air being extracted from the vehicle.
Retractable rear shelf
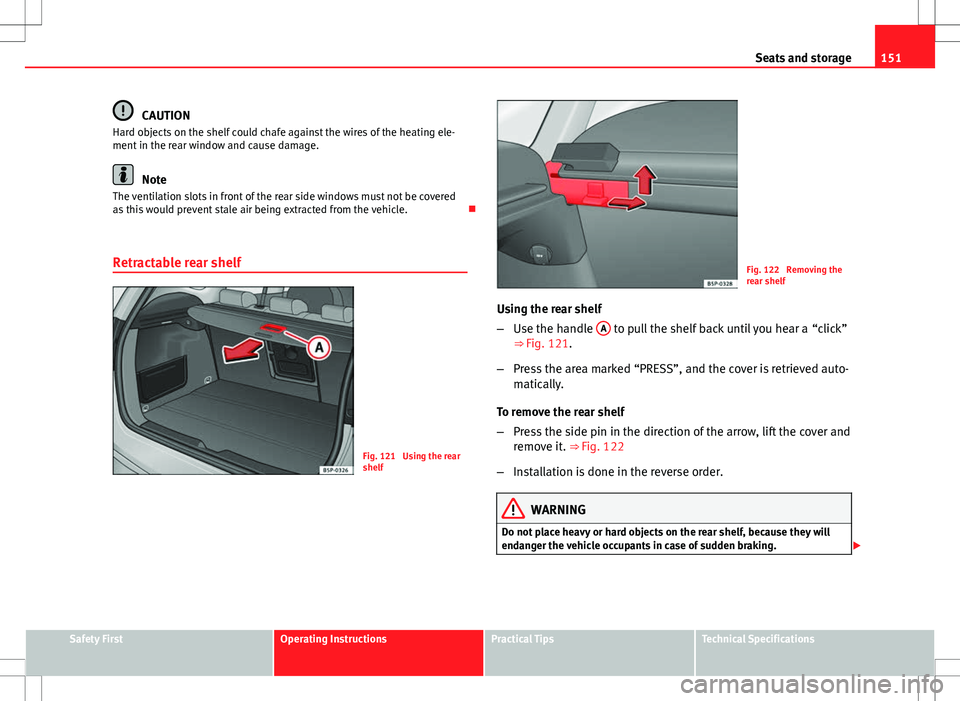
Fig. 121 Using the rear
shelf
Fig. 122 Removing the
rear shelf
Using the rear shelf
– Use the handle A
to pull the shelf back until you hear a “click”
⇒ Fig. 121.
– Press the area marked “PRESS”, and the cover is retrieved auto-
matically.
To remove the rear shelf
– Press the side pin in the direction of the arrow, lift the cover and
remove it. ⇒ Fig. 122
– Installation is done in the reverse order.
WARNING
Do not place heavy or hard objects on the rear shelf, because they will
endanger the vehicle occupants in case of sudden braking.
Safety FirstOperating InstructionsPractical TipsTechnical Specifications
Page 156 of 301
154Air conditioning
Air conditioning
Heating
Operating instructions
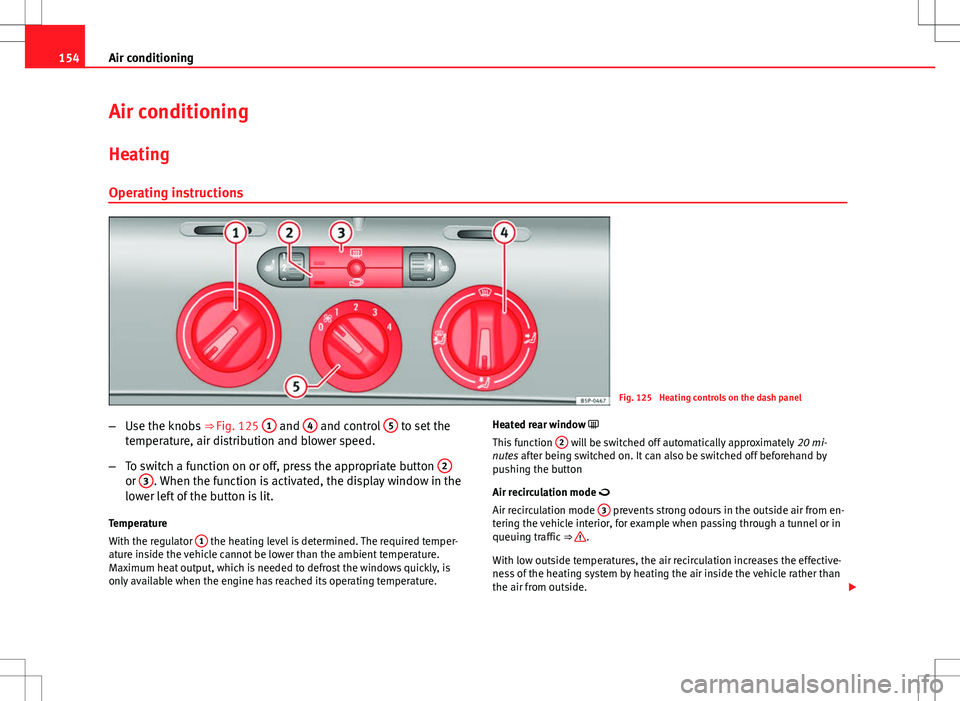
Fig. 125 Heating controls on the dash panel
– Use the knobs ⇒ Fig. 125 1
and 4 and control 5 to set the
temperature, air distribution and blower speed.
– To switch a function on or off, press the appropriate button 2
or 3. When the function is activated, the display window in the
lower left of the button is lit.
Temperature
With the regulator 1
the heating level is determined. The required temper-
ature inside the vehicle cannot be lower than the ambient temperature.
Maximum heat output, which is needed to defrost the windows quickly, is
only available when the engine has reached its operating temperature. Heated rear window
This function
2
will be switched off automatically approximately
20 mi-
nutes after being switched on. It can also be switched off beforehand by
pushing the button
Air recirculation mode
Air recirculation mode 3
prevents strong odours in the outside air from en-
tering the vehicle interior, for example when passing through a tunnel or in
queuing traffic ⇒
.
With low outside temperatures, the air recirculation increases the effective-
ness of the heating system by heating the air inside the vehicle rather than
the air from outside.
Page 157 of 301
155
Air conditioning
Air distribution
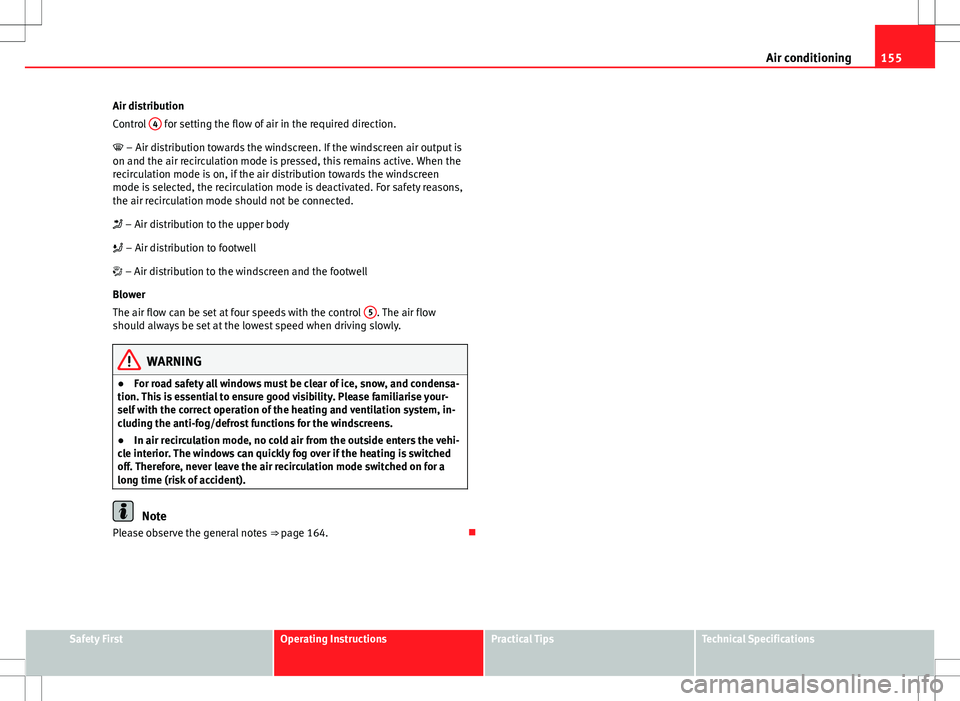
Control 4
for setting the flow of air in the required direction.
– Air distribution towards the windscreen. If the windscreen air output is
on and the air recirculation mode is pressed, this remains active. When the
recirculation mode is on, if the air distribution towards the windscreen
mode is selected, the recirculation mode is deactivated. For safety reasons,
the air recirculation mode should not be connected.
– Air distribution to the upper body
– Air distribution to footwell
– Air distribution to the windscreen and the footwell
Blower
The air flow can be set at four speeds with the control 5
. The air flow
should always be set at the lowest speed when driving slowly.
WARNING
● For road safety all windows must be clear of ice, snow, and condensa-
tion. This is essential to ensure good visibility. Please familiarise your-
self with the correct operation of the heating and ventilation system, in-
cluding the anti-fog/defrost functions for the windscreens.
● In air recirculation mode, no cold air from the outside enters the vehi-
cle interior. The windows can quickly fog over if the heating is switched
off. Therefore, never leave the air recirculation mode switched on for a
long time (risk of accident).
Note
Please observe the general notes ⇒ page 164.
Safety FirstOperating InstructionsPractical TipsTechnical Specifications
Page 158 of 301
156Air conditioning
Climatic*
Controls
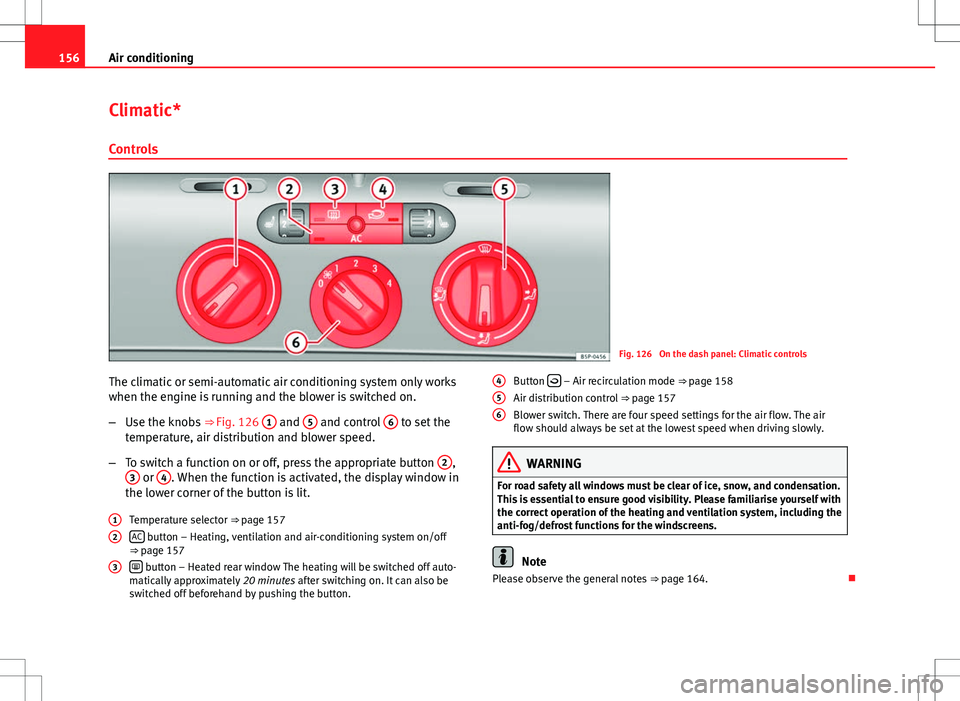
Fig. 126 On the dash panel: Climatic controls
The climatic or semi-automatic air conditioning system only works
when the engine is running and the blower is switched on.
– Use the knobs ⇒ Fig. 126 1
and 5 and control 6 to set the
temperature, air distribution and blower speed.
– To switch a function on or off, press the appropriate button 2
,
3 or 4. When the function is activated, the display window in
the lower corner of the button is lit.
Temperature selector ⇒ page 157
AC
button – Heating, ventilation and air-conditioning system on/off
⇒ page 157
button – Heated rear window The heating will be switched off auto-
matically approximately 20 minutes after switching on. It can also be
switched off beforehand by pushing the button.
1
2
3
Button
– Air recirculation mode ⇒ page 158
Air distribution control ⇒ page 157
Blower switch. There are four speed settings for the air flow. The air
flow should always be set at the lowest speed when driving slowly.
WARNING
For road safety all windows must be clear of ice, snow, and condensation.
This is essential to ensure good visibility. Please familiarise yourself with
the correct operation of the heating and ventilation system, including the
anti-fog/defrost functions for the windscreens.
Note
Please observe the general notes ⇒ page 164.
4
56
Page 159 of 301
157
Air conditioning
Heating and cooling the interior
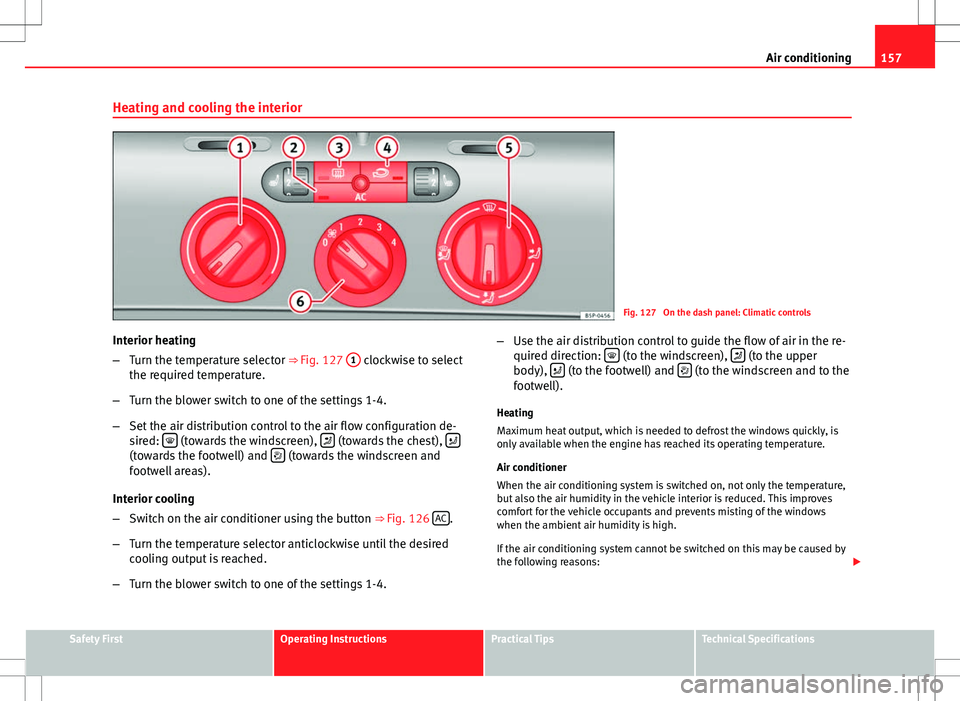
Fig. 127 On the dash panel: Climatic controls
Interior heating
– Turn the temperature selector ⇒ Fig. 127 1
clockwise to select
the required temperature.
– Turn the blower switch to one of the settings 1-4.
– Set the air distribution control to the air flow configuration de-
sired:
(towards the windscreen), (towards the chest), (towards the footwell) and (towards the windscreen and
footwell areas).
Interior cooling
– Switch on the air conditioner using the button ⇒ Fig. 126 AC
.
– Turn the temperature selector anticlockwise until the desired
cooling output is reached.
– Turn the blower switch to one of the settings 1-4. –
Use the air distribution control to guide the flow of air in the re-
quired direction:
(to the windscreen), (to the upper
body), (to the footwell) and (to the windscreen and to the
footwell).
Heating
Maximum heat output, which is needed to defrost the windows quickly, is
only available when the engine has reached its operating temperature.
Air conditioner
When the air conditioning system is switched on, not only the temperature,
but also the air humidity in the vehicle interior is reduced. This improves
comfort for the vehicle occupants and prevents misting of the windows
when the ambient air humidity is high.
If the air conditioning system cannot be switched on this may be caused by
the following reasons:
Safety FirstOperating InstructionsPractical TipsTechnical Specifications
Page 161 of 301
159
Air conditioning
WARNING
In air recirculation mode, no cold air from the outside enters the vehicle
interior. If the air conditioning system is switched off, the windows can
quickly mist over. Therefore, never leave the air recirculation mode
switched on for a long time (risk of accident).
2C-Climatronic* Controls
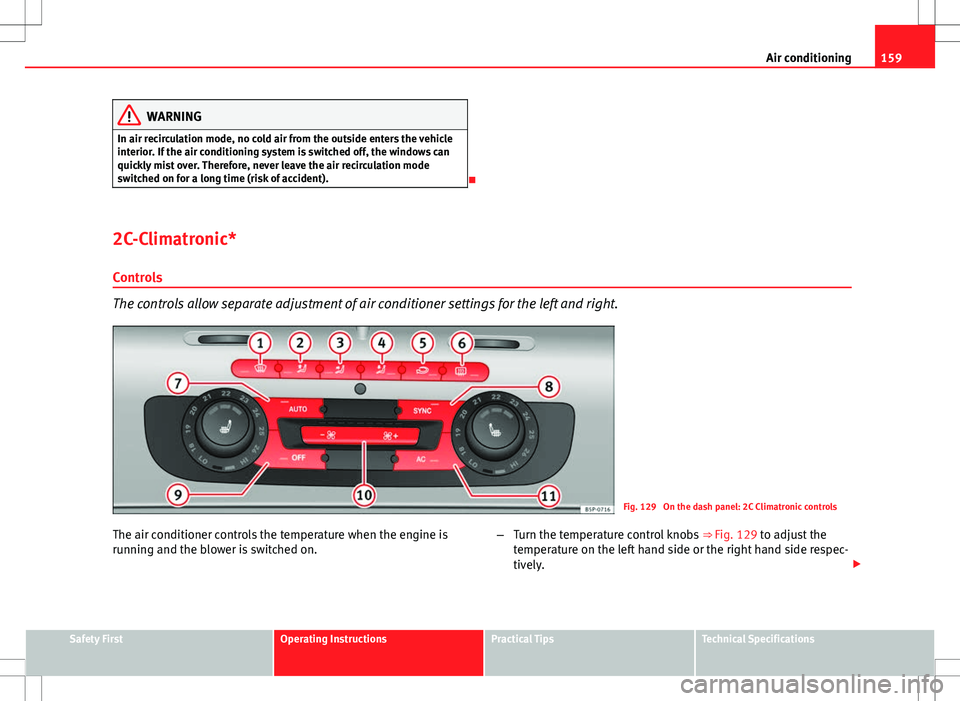
The controls allow separate adjustment of air conditioner settings for the left and right.
Fig. 129 On the dash panel: 2C Climatronic controls
The air conditioner controls the temperature when the engine is
running and the blower is switched on. –
Turn the temperature control knobs ⇒ Fig. 129 to adjust the
temperature on the left hand side or the right hand side respec-
tively.
Safety FirstOperating InstructionsPractical TipsTechnical Specifications
Page 162 of 301
160Air conditioning
–The functions will be switched on when its buttons are pressed.
When these functions are activated, they are indicated on the
radio display. In addition, all these functions are lit with LEDs.
Press the button again to switch off the function.
The temperature can be adjusted separately for the left and right sides of
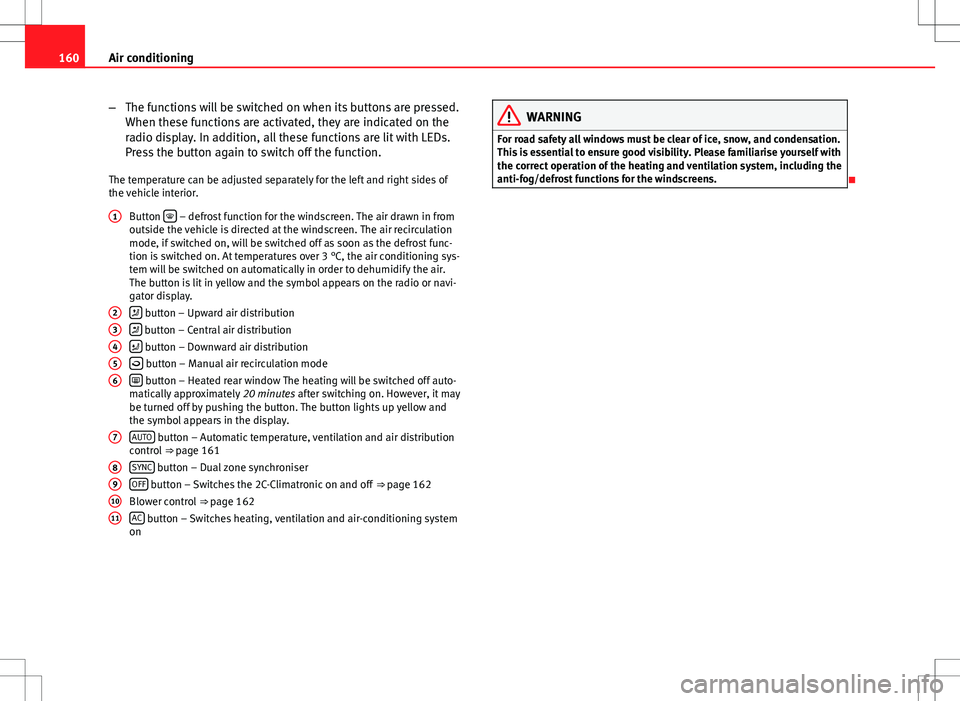
the vehicle interior. Button
– defrost function for the windscreen. The air drawn in from
outside the vehicle is directed at the windscreen. The air recirculation
mode, if switched on, will be switched off as soon as the defrost func-
tion is switched on. At temperatures over 3 °C, the air conditioning sys-
tem will be switched on automatically in order to dehumidify the air.
The button is lit in yellow and the symbol appears on the radio or navi-
gator display.
button – Upward air distribution
button – Central air distribution
button – Downward air distribution
button – Manual air recirculation mode
button – Heated rear window The heating will be switched off auto-
matically approximately 20 minutes after switching on. However, it may
be turned off by pushing the button. The button lights up yellow and
the symbol appears in the display.
AUTO
button – Automatic temperature, ventilation and air distribution
control ⇒ page 161
SYNC
button – Dual zone synchroniser
OFF button – Switches the 2C-Climatronic on and off ⇒ page 162
Blower control ⇒ page 162
AC
button – Switches heating, ventilation and air-conditioning system
on
1
23456
7
891011
WARNING
For road safety all windows must be clear of ice, snow, and condensation.
This is essential to ensure good visibility. Please familiarise yourself with
the correct operation of the heating and ventilation system, including the
anti-fog/defrost functions for the windscreens.