coolant Seat Altea XL 2013 User Guide
[x] Cancel search | Manufacturer: SEAT, Model Year: 2013, Model line: Altea XL, Model: Seat Altea XL 2013Pages: 317, PDF Size: 4.69 MB
Page 169 of 317
167
Air conditioning
With high outside temperatures, the air recirculation increases the effective-
ness of the air conditioning system by cooling the air inside the vehicle
rather than the ambient air.
If the windscreen air output is on and the air recirculation mode is pressed,
this remains active. When the recirculation mode is on, if the air distribution
towards the windscreen mode is selected, the recirculation mode is deacti-
vated. For safety reasons, the air recirculation mode should not be connec-
ted.
WARNING
In air recirculation mode, no cold air from the outside enters the vehicle
interior. If the air conditioning system is switched off, the windows can
quickly mist over. Therefore, never leave the air recirculation mode
switched on for a long time (risk of accident).
General notes
Pollution filter
The pollution filter (a combined particulate filter and active carbon filter)
serves as a barrier against impurities in the outside air, including dust and
pollen.
For the air conditioner to work with maximum efficiency, the pollution filter
must be replaced at the intervals specified in the Service Plan.
If the filter loses efficiency prematurely due to use in areas reaching very
high pollution levels, the pollen filter must be changed more frequently
than stated in the Service Schedule.
Air conditioner
When the air conditioning system is switched on, not only the temperature,
but also the air humidity in the vehicle interior is reduced. This improves comfort for the vehicle occupants and prevents misting of the windows
when the ambient air humidity is high.
If the air conditioning system cannot be switched on this may be caused by
the following reasons:
●
The engine is not running.
● The AC
button is disconnected.
● The outside temperature is below +3 °C.
● The air conditioning system compressor has been temporarily switched
off because the engine coolant temperature is too high.
● The air conditioner fuse is faulty.
● Another fault in the vehicle. Have the air conditioner checked by a speci-
alised workshop.
CAUTION
● If you suspect that the air conditioner is damaged, switch it off with but-
ton AC
to prevent further damage and have it checked by a specialised
workshop.
● Repairs to the air conditioner require specialist knowledge and special
tools. Therefore, we recommend you to take the vehicle to a specialised
workshop.
Note
● If the humidity and temperature outside the vehicle are high, condensa-
tion can drip off the evaporator in the cooling system and so forming a pud-
dle underneath the vehicle. This is completely normal and there is no need
to suspect a leak.
● Keep the air intake slots in front of the windscreen free of snow, ice and
leaves to ensure heating and cooling are not impaired, and to prevent the
windows from misting over.
● The air from the vents flows through the vehicle interior and is extracted
by slots designed for this purpose. Therefore, do not cover these slots with
items of clothing or other objects.
Safety FirstOperating InstructionsPractical TipsTechnical Specifications
Page 176 of 317
174Driving
WARNING
● Never start or run the engine in unventilated or closed rooms. The ex-
haust gases contain carbon monoxide, an odourless and colourless poi-
sonous gas. Risk of fatal accidents. Carbon monoxide can cause loss of
consciousness. It can also result in death.
● Never leave the vehicle unattended if the engine is running.
● Never use “cold start sprays”, they could explode or cause the engine
to run at high revs. Risk of injury.
CAUTION
● When the engine is cold, you should avoid high engine speeds, driving
at full throttle and over-loading the engine. Risk of engine damage.
● The vehicle should not be pushed or towed more than 50 metres to start
the engine. Unburnt fuel could enter the catalytic converter and damage it.
● Before attempting to push-start or tow a vehicle in order to start it, you
should first try to start it using the battery of another vehicle. Note and fol-
low the instructions in ⇒ page 282, Jump-starting.
For the sake of the environment
Do not warm-up the engine by running the engine with the vehicle station-
ary. You should drive off as soon as you start the engine. This helps the en-
gine reach operating temperature faster and reduces emissions.
Switching off the engine
– Stop the vehicle.
– Turn the ignition key to position ⇒ Fig. 138 0
.
After switching the engine off, the radiator fan may run on for up to 10 mi-
nutes. It is also possible that the fan turns itself on once more if the coolant temperature increases due to the heat accumulated in the engine compart-
ment or due to its prolonged exposure to solar radiation.
WARNING
● Never switch the engine off until the vehicle is completely stationary.
● The brake servo works only when the engine is running. With the en-
gine switched off, more strength is needed to brake. As normal brake op-
eration cannot be performed, risk of accidents and serious injury may ex-
ist.
● The steering lock can be immediately blocked once the key is re-
moved from the ignition. The vehicle cannot be steered. Risk of accident.
CAUTION
When the engine has been running under a heavy load for a long period,
heat can accumulate in the engine compartment and cause engine damage.
For this reason, you should idle the engine for approx. 2 minutes before you
switch it off.
Page 177 of 317
175
Driving
Driving with LPG*
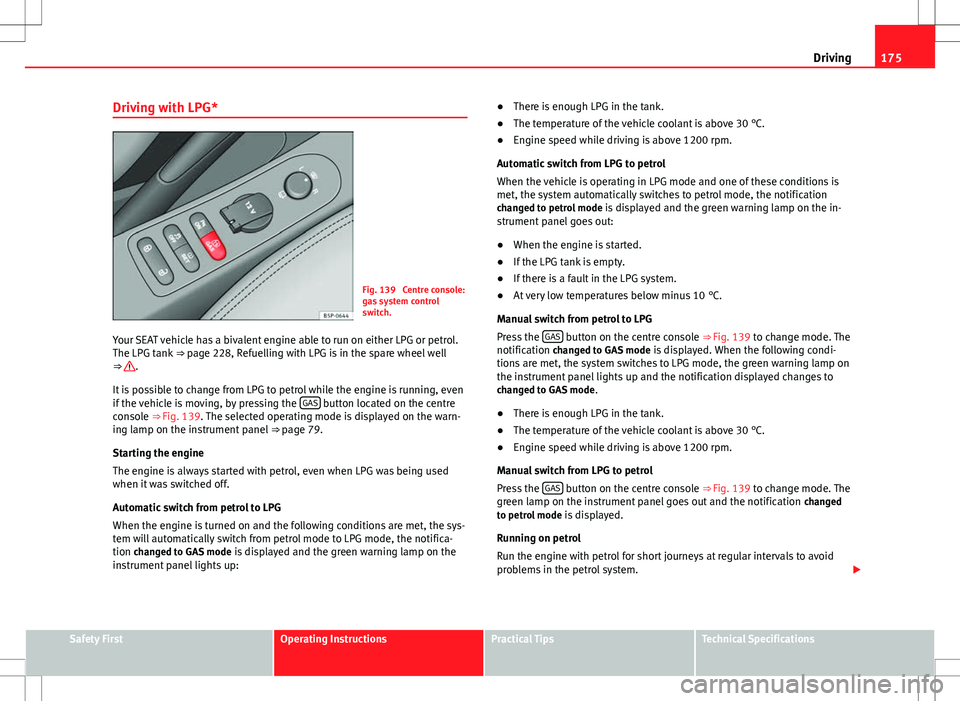
Fig. 139 Centre console:
gas system control
switch.
Your SEAT vehicle has a bivalent engine able to run on either LPG or petrol.
The LPG tank ⇒ page 228, Refuelling with LPG is in the spare wheel well
⇒
.
It is possible to change from LPG to petrol while the engine is running, even
if the vehicle is moving, by pressing the GAS
button located on the centre
console ⇒ Fig. 139. The selected operating mode is displayed on the warn-
ing lamp on the instrument panel ⇒ page 79.
Starting the engine
The engine is always started with petrol, even when LPG was being used
when it was switched off.
Automatic switch from petrol to LPG
When the engine is turned on and the following conditions are met, the sys-
tem will automatically switch from petrol mode to LPG mode, the notifica-
tion changed to GAS mode is displayed and the green warning lamp on the
instrument panel lights up: ●
There is enough LPG in the tank.
● The temperature of the vehicle coolant is above 30 °C.
● Engine speed while driving is above 1200 rpm.
Automatic switch from LPG to petrol
When the vehicle is operating in LPG mode and one of these conditions is
met, the system automatically switches to petrol mode, the notification changed to petrol mode is displayed and the green warning lamp on the in-
strument panel goes out:
● When the engine is started.
● If the LPG tank is empty.
● If there is a fault in the LPG system.
● At very low temperatures below minus 10 °C.
Manual switch from petrol to LPG
Press the GAS
button on the centre console ⇒
Fig. 139 to change mode. The
notification changed to GAS mode is displayed. When the following condi-
tions are met, the system switches to LPG mode, the green warning lamp on
the instrument panel lights up and the notification displayed changes to changed to GAS mode .
● There is enough LPG in the tank.
● The temperature of the vehicle coolant is above 30 °C.
● Engine speed while driving is above 1200 rpm.
Manual switch from LPG to petrol
Press the GAS
button on the centre console ⇒ Fig. 139 to change mode. The
green lamp on the instrument panel goes out and the notification changed
to petrol mode is displayed.
Running on petrol
Run the engine with petrol for short journeys at regular intervals to avoid
problems in the petrol system.
Safety FirstOperating InstructionsPractical TipsTechnical Specifications
Page 179 of 317
177
Driving
● If in an increase in airflow 10
⇒ Fig. 134 is required for more than three
presses.
● Temperature setting HI or LO is selected.
● The engine coolant temperature is insufficient.
● The alternator is faulty, for example the V-belt has ruptured.
● If any of the conditions described in the previous section are not fulfil-
led.
WARNING
Never allow the vehicle to move with the engine off for any reason. You
could lose control of your vehicle. This could cause an accident and seri-
ous injury.
● Power steering does not work when the engine is not running. That is
why it is much more difficult to turn the steering wheel.
● Turn off the Start-Stop system when driving through water (fording
streams, etc.).
Note
● For vehicles with the Start-Stop function and a manual gearbox, when
the engine is started, the clutch must be pressed.
● When the conditions for the Start-Stop function are not fulfilled, the in-
strument panel displays the Start-Stop indicator dimmed.
● If the steering wheel is turned more than 270°, Stop will not function;
however, the angle of steering wheel turn does not affect starting the vehi-
cle. Activating and deactivating the Start-Stop function
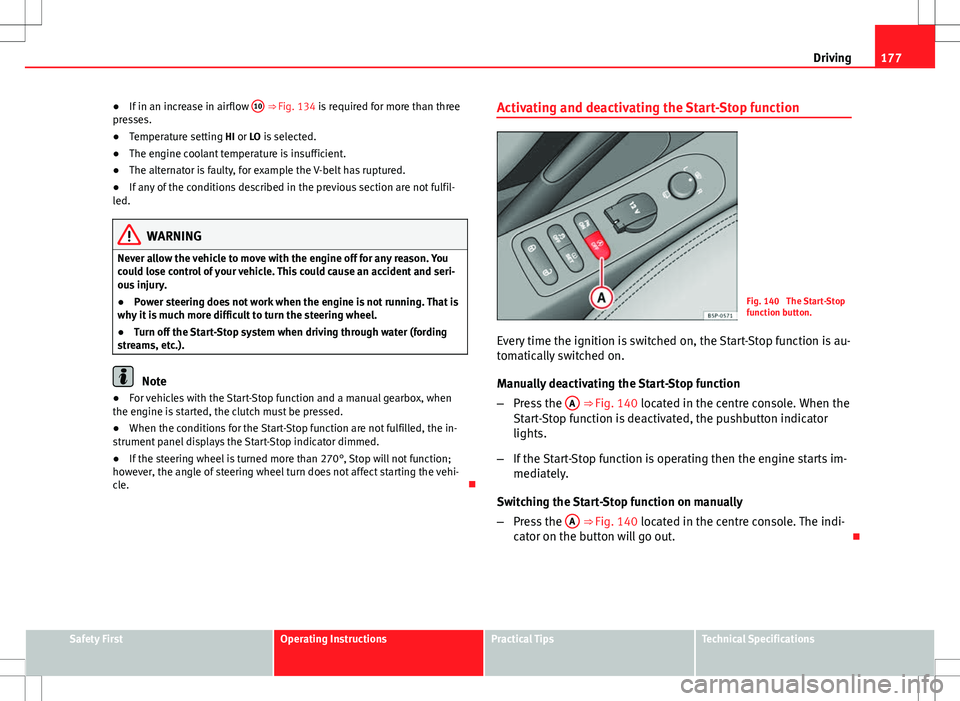
Fig. 140 The Start-Stop
function button.
Every time the ignition is switched on, the Start-Stop function is au-
tomatically switched on.
Manually deactivating the Start-Stop function
– Press the A
⇒ Fig. 140 located in the centre console. When the
Start-Stop function is deactivated, the pushbutton indicator
lights.
– If the Start-Stop function is operating then the engine starts im-
mediately.
Switching the Start-Stop function on manually
– Press the A
⇒ Fig. 140 located in the centre console. The indi-
cator on the button will go out.
Safety FirstOperating InstructionsPractical TipsTechnical Specifications
Page 211 of 317
209
Trailer towing
Note
● Towing a trailer places additional demands on the vehicle. We recom-
mend additional services between the normal inspection intervals if the ve-
hicle is used frequently for towing a trailer.
● Find out whether special regulations apply to towing a trailer in your
country.
Ball coupling of towing bracket*
Depending on the model version, the spherical head on the trailer hook
may be stored in the tool box.
The ball coupling is provided with instructions on fitting and removing the
ball coupling of the towing bracket.
WARNING
The towing bracket ball coupling must be stored securely in the luggage
compartment to prevent them being flung through the vehicle and caus-
ing injury.
Note
● By law, the ball coupling must be removed if a trailer is not being towed
if it obscures the number plate. Driving tips
Driving with a trailer always requires extra care.
Weight distribution
The weight distribution of a loaded trailer with an unladen vehicle is very
unfavourable. However, if this cannot be avoided, drive extra slowly to allow
for the unbalanced weight distribution.
Speed
The stability of the vehicle and trailer is reduced with increasing speed. For
this reason, it is advisable not to drive at the maximum permissible speed
in an unfavourable road, weather or wind conditions. This applies especially
when driving downhill.
You should always reduce speed immediately if the trailer shows the slight-
est sign of snaking. Never try to stop the “snaking” by increasing speed.
Always brake in due course. If the trailer has an overrun brake, apply the
brakes gently at first and then, firmly. This will prevent the jerking that can
be caused by locking of trailer wheels. Select a low gear in due course be-
fore going down a steep downhill. This enables you to use the engine brak-
ing to slow down the vehicle.
Reheating
At very high temperatures and during prolonged slopes, driving in a low
gear and high engine speed, always monitor the coolant temperature gauge
⇒ page 55.
Electronic Stability Control*
The ESC* system helps to stabilise the trailer in case of skidding or rocking.
Safety FirstOperating InstructionsPractical TipsTechnical Specifications
Page 236 of 317
234Checking and refilling levels
You should not do any work in the engine compartment unless you know ex-
actly how to carry out the jobs and have the correct tools! Have the work car-
ried out by a specialised workshop if you are uncertain.
All service fluids and consumables, e.g. coolant, engine oil, spark plugs
and batteries, are under constant development. SEAT provides a constant
flow of information to the Technical Services concerning modifications. For
this reason, we recommend you to have service fluids and consumables re-
placed by a Technical Service. Please observe the relevant instructions
⇒ page 224. The engine compartment of the vehicle is a hazardous area
⇒
.
WARNING
All work on the engine or in the engine compartment, e.g. checking and
refilling fluids, involves the danger of injury and scalding as well as the
risk of accident or fire.
● Never open the bonnet if you see steam, smoke or coolant escaping
from the engine compartment. Otherwise, there is a risk of sustaining
burns. Wait until no more steam or coolant is emitted, then allow the en-
gine to cool before carefully opening the bonnet.
● Switch off the engine and remove the key from the ignition.
● Apply the handbrake and move the gear lever to neutral or selector
lever to position P.
● Keep children away from the vehicle.
● Never touch hot engine parts. There is a risk of burns.
● Never spill liquids on a hot engine or on a hot exhaust gas system.
This is a fire hazard.
● Avoid causing short-circuits in the electrical system, particularly at
the points where the jump leads are attached ⇒ page 283. The battery
could explode.
WARNING (Continued)
● Never touch the radiator fan. It is temperature controlled and could
start automatically, even when the engine has been switched off and the
key removed from the ignition!
● Do not unscrew the cap on the coolant expansion tank when the en-
gine is hot. If the coolant is hot, the cooling system will be pressurised!
● Protect face, hands and arms by covering the cap with a large, thick
cloth to protect against escaping coolant and steam.
● Always make sure you have not left any objects, such as cleaning
cloths and tools, in the engine compartment.
● If you have to work underneath the vehicle, you must use suitable
stands additionally to support the vehicle, there is a risk of accident!. A
hydraulic jack is insufficient for securing the vehicle and there is a risk of
injury.
● If any work has to be performed when the engine is started or with
the engine running, there is an additional, potentially fatal, safety risk
from the rotating parts, such as the drive belts, alternator, radiator fan,
etc., and from the high-voltage ignition system. You should also observe
the following points:
–Never touch the electrical wiring of the ignition system.
– Ensure that jewellery, loose clothing and long hair do not get trap-
ped in rotating engine parts. Danger of death. Before starting any
work remove jewellery, tie back and cover hair, and wear tight-fitting
clothes.
– Never accelerate with a gear engaged without taking the necessary
precautions. The vehicle could move, even if the handbrake is ap-
plied. Danger of death.
● If work has to be carried out on the fuel system or on electrical com-
ponents, you must observe the following safety notes in addition to the
above warnings:
–Always disconnect the battery from the on-board network. The ve-
hicle must be unlocked when this is done, otherwise the alarm will be
triggered.
– Do not smoke.
Page 237 of 317
235
Checking and refilling levels
WARNING (Continued)
– Never work near naked flames.
– Always have a fire extinguisher on hand.
CAUTION
When topping up service fluids, make sure not to mistake them. Using the
wrong fluids could cause serious malfunctions and engine damage!
For the sake of the environment
Service fluids leaks are harmful to the environment. For this reason you
should make regular checks on the ground underneath your vehicle. If you
find spots of oil or other fluids, have your vehicle inspected in a specialised
workshop.
Opening the bonnet
The bonnet is released from inside the vehicle.
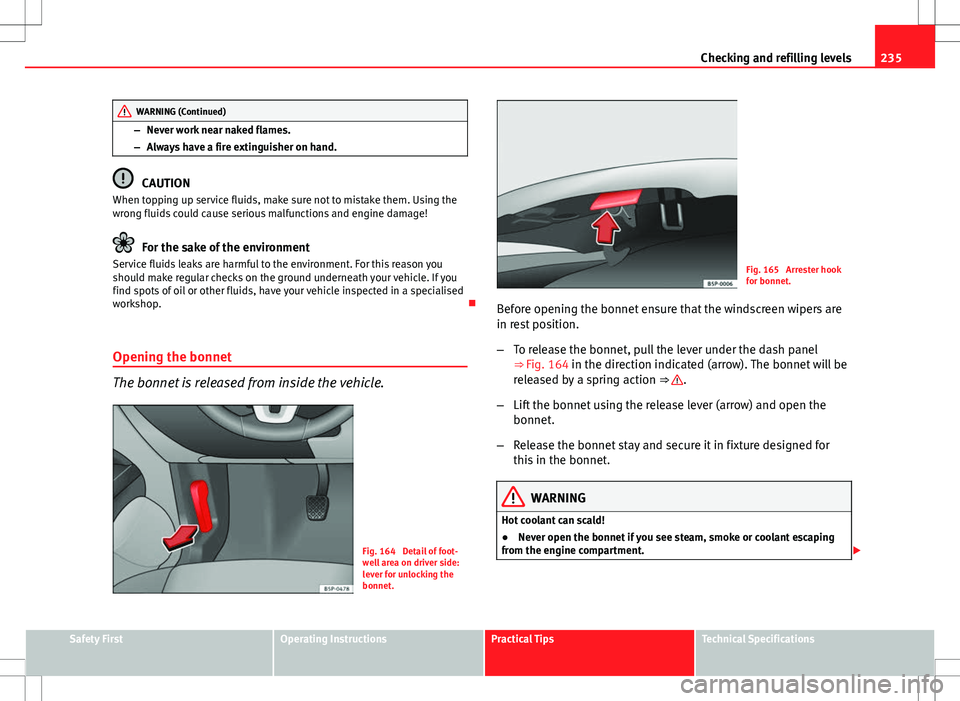
Fig. 164 Detail of foot-
well area on driver side:
lever for unlocking the
bonnet.
Fig. 165 Arrester hook
for bonnet.
Before opening the bonnet ensure that the windscreen wipers are
in rest position.
– To release the bonnet, pull the lever under the dash panel
⇒ Fig. 164 in the direction indicated (arrow). The bonnet will be
released by a spring action ⇒
.
– Lift the bonnet using the release lever (arrow) and open the
bonnet.
– Release the bonnet stay and secure it in fixture designed for
this in the bonnet.
WARNING
Hot coolant can scald!
● Never open the bonnet if you see steam, smoke or coolant escaping
from the engine compartment.
Safety FirstOperating InstructionsPractical TipsTechnical Specifications
Page 238 of 317
236Checking and refilling levels
WARNING (Continued)
● Wait until no more steam, smoke or coolant is emitted from the bon-
net, then carefully open the bonnet.
● When working in the engine compartment, always observe the safety
warnings ⇒ page 233.
Closing the bonnet
– Raise the bonnet slightly.
– Release the bonnet stay and replace it in its support.
– At a height of about 30 cm let it fall so it is locked.
If the bonnet does not close, do not press downwards. Open it once more
and let it fall as before.
WARNING
If the bonnet is not closed properly, it could open while you are driving
and completely obscure your view of the road. Risk of accident.
● After closing the bonnet, always check that it is properly secured. The
bonnet must be flush with the surrounding body panels.
● If you notice that the bonnet latch is not secured when the vehicle is
moving, stop the vehicle immediately and close the bonnet properly.
Risk of accident.
Engine oil
General notes
The engine comes with a special, multi-grade oil that can be used all year
round.
Because the use of high-quality oil is essential for the correct operation of
the engine and its long useful life, when topping up or changing oil, use on-
ly those oils that comply with VW standards.
The specifications (VW standards) set out in the following page should ap-
pear on the container of the service oil; when the container displays the
specific standards for petrol and diesel engines together, it means that the
oil can be used for both types of engines.
We recommend that the oil change, indicated in the Maintenance Pro-
gramme, be performed by a Technical Service or a specialised workshop.
The correct oil specifications for your engine are listed in the ⇒ page 237,
Oil properties.
Service intervals
Service intervals can be flexible (LongLife service) or fixed (dependent on
time/distance travelled).
If the PR code that appears on the back of the “Maintenance Programme”
booklet is PR QI6, this means that your vehicle has the LongLife service pro-
grammed. If it lists the codes QI1, QI2, QI3, QI4 or QI7, the interval service
is dependent on time/distance travelled.
Flexible service intervals (LongLife service intervals*)
Special oils and processes have been developed which, depending on the
characteristics and individual driving profiles, enable the extension of the
oil change service (LongLife service intervals).
Page 242 of 317
240Checking and refilling levels
WARNING
Only change the engine oil yourself if you have the specialist knowledge
required!
● Before opening the bonnet, read and observe the warnings
⇒ page 233, Safety instructions on working in the engine compartment.
● Wait for the engine to cool down. Hot oil may cause burn injuries.
● Wear eye protection to avoid injuries, such as acid burns, caused by
splashes of oil.
● When removing the oil drain plug with your fingers, keep your arm
horizontal to help prevent oil from running down your arm.
● Wash your skin thoroughly if it comes into contact with engine oil.
● Engine oil is poisonous! Used oil must be stored in a safe place out of
the reach of children.
CAUTION
No additives should be used with engine oil. This could result in engine
damage. Any damage caused by the use of such additives would not be
covered by the factory warranty.
For the sake of the environment
● Because of the disposal problems, the necessary special tools and spe-
cialist knowledge required, we recommend that you have the engine oil and
filter changed by a Technical Service.
● Never pour oil down drains or into the ground.
● Use a suitable container when draining the used oil. It must be large
enough to hold all the engine oil. Coolant
Engine coolant specifications
The engine cooling system is supplied from the factory with a specially trea-
ted mixture of water and, at least, 40 % of the additive G 13 (TLVW 774 J).
The engine coolant additive is recognisable by its purple colour. This mix-
ture of water and additive gives the necessary frost protection down to
-25 °C (-13 °F) and protects the light alloy parts of the cooling system
against corrosion. It also prevents scaling and considerably raises the boil-
ing point of the coolant.
To protect the engine cooling system, the percentage of additive must al-
ways be at least 40 %, even in warm climates where anti-freeze protection is
not required.
If greater frost protection is required in very cold climates, the proportion of
additive can be increased. However, the percentage of additive should not
exceed 60 %, as this would reduce the frost protection and, in turn, de-
crease the cooling capacity.
When the coolant is topped up, use a mixture of distilled water and, at
least, 40 % of the G 13 or G 12 plus-plus (TL-VW 774 G) additive (both are
purple) to obtain an optimum anticorrosion protection ⇒
. The mixture of
G 13 with G 12 plus (TL-VW 774 F), G 12 (red) or G 11 (green-blue) engine
coolants will significantly reduce the anticorrosion protection and should,
therefore be avoided ⇒
.
Page 243 of 317
241
Checking and refilling levels
WARNING
If there is not enough anti-freeze in the coolant system, the engine may
fail leading to serious damage.
● Please make sure that the percentage of additive is correct with re-
spect to the lowest expected ambient temperature in the zone in which
the vehicle is to be used.
● When the outside temperature is very low, the coolant could freeze
and the vehicle would be immobilised. In this case, the heating would
not work either and inadequately dressed passengers could die of cold.
CAUTION
The original additives should never be mixed with coolants which are not
approved by SEAT. Otherwise, you run the risk of causing severe damage to
the engine and the engine cooling system.
● If the fluid in the expansion tank is not purple but is, for example,
brown, this indicates that the G 13 additive has been mixed with an inade-
quate coolant. The coolant must be changed as soon as possible if this is
the case! This could result in serious faults and engine damage.
For the sake of the environment
Coolants and additives can contaminate the environment. If any fluids are
spilled, they should be collected and correctly disposed of, with respect to
the environment. Checking the coolant level and topping up
The correct coolant level is important for fault-free function-
ing of the engine cooling system.
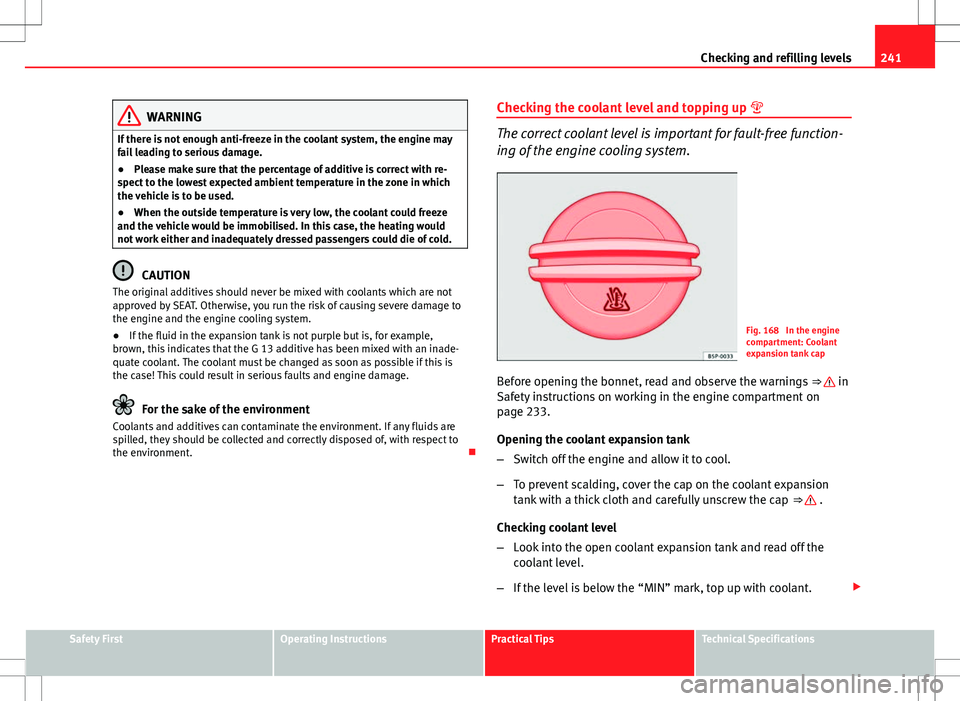
Fig. 168 In the engine
compartment: Coolant
expansion tank cap
Before opening the bonnet, read and observe the warnings ⇒
in
Safety instructions on working in the engine compartment on
page 233.
Opening the coolant expansion tank
– Switch off the engine and allow it to cool.
– To prevent scalding, cover the cap on the coolant expansion
tank with a thick cloth and carefully unscrew the cap ⇒
.
Checking coolant level
– Look into the open coolant expansion tank and read off the
coolant level.
– If the level is below the “MIN” mark, top up with coolant.
Safety FirstOperating InstructionsPractical TipsTechnical Specifications