remote control Seat Altea XL 2013 User Guide
[x] Cancel search | Manufacturer: SEAT, Model Year: 2013, Model line: Altea XL, Model: Seat Altea XL 2013Pages: 317, PDF Size: 4.69 MB
Page 112 of 317
110Opening and closing
Windows
Opening or closing the electric windows
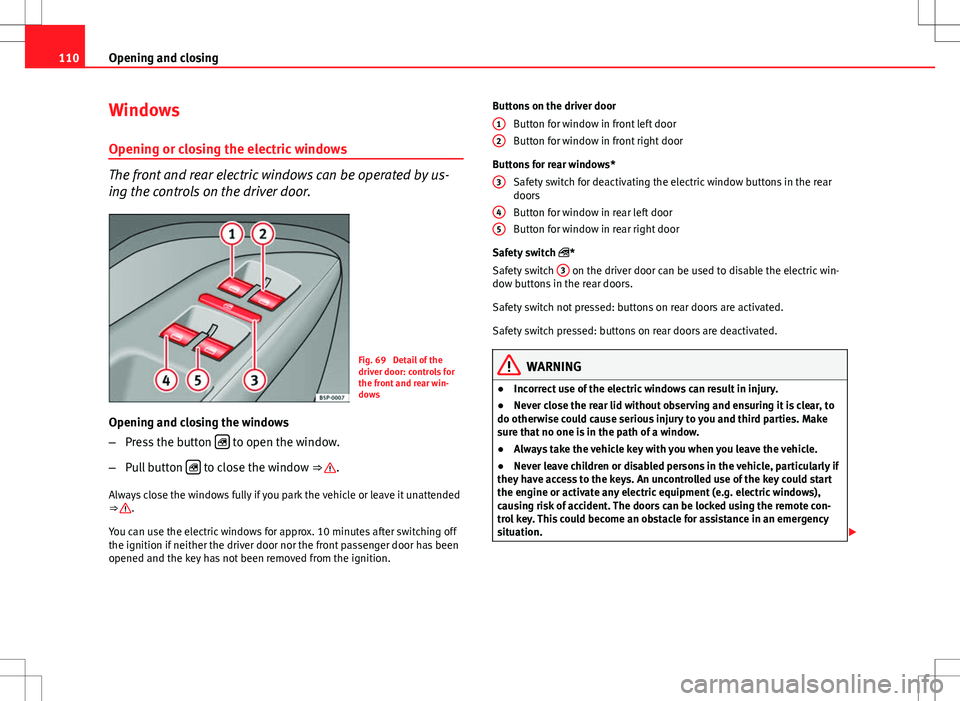
The front and rear electric windows can be operated by us-
ing the controls on the driver door.
Fig. 69 Detail of the
driver door: controls for
the front and rear win-
dows
Opening and closing the windows
– Press the button
to open the window.
– Pull button
to close the window ⇒ .
Always close the windows fully if you park the vehicle or leave it unattended
⇒
.
You can use the electric windows for approx. 10 minutes after switching off
the ignition if neither the driver door nor the front passenger door has been
opened and the key has not been removed from the ignition. Buttons on the driver door
Button for window in front left door
Button for window in front right door
Buttons for rear windows* Safety switch for deactivating the electric window buttons in the rear
doors
Button for window in rear left door
Button for window in rear right door
Safety switch *
Safety switch 3
on the driver door can be used to disable the electric win-
dow buttons in the rear doors.
Safety switch not pressed: buttons on rear doors are activated.
Safety switch pressed: buttons on rear doors are deactivated.
WARNING
● Incorrect use of the electric windows can result in injury.
● Never close the rear lid without observing and ensuring it is clear, to
do otherwise could cause serious injury to you and third parties. Make
sure that no one is in the path of a window.
● Always take the vehicle key with you when you leave the vehicle.
● Never leave children or disabled persons in the vehicle, particularly if
they have access to the keys. An uncontrolled use of the key could start
the engine or activate any electric equipment (e.g. electric windows),
causing risk of accident. The doors can be locked using the remote con-
trol key. This could become an obstacle for assistance in an emergency
situation.
12
3
45
Page 114 of 317
112Opening and closing
WARNING
● Incorrect use of the electric windows can result in injury.
● Always take the ignition key with you when leaving the vehicle, even
if you only intend to be gone for a short time. Please ensure that children
are never left alone inside the vehicle.
● The electric windows will work until the key has been removed from
the ignition and one of the front doors has been opened.
● Never close the rear lid without observing and ensuring it is clear, to
do otherwise could cause serious injury to you and third parties. Make
sure that no one is in the path of a window.
● Never allow people to remain in the vehicle when you close the vehi-
cle from the outside. The windows cannot be opened even in an emergen-
cy.
Note
The roll-back function is deactivated if the windows are closed from the out-
side of the vehicle using the ignition key for convenience closing
⇒ page 112.
Convenience opening and closing*
Using the door lock
– Hold the key in the door lock of the driver door in either the
locking or the unlocking position until all windows are either
opened or closed.
– Release the key to interrupt this function. Using the remote control
–
Push the lock button on the remote control for about 3 seconds.
All windows which function electrically will be either opened or
closed.
– Press the unlock button to interrupt the function.
– Once the windows are completely closed, the turn signals will
flash.
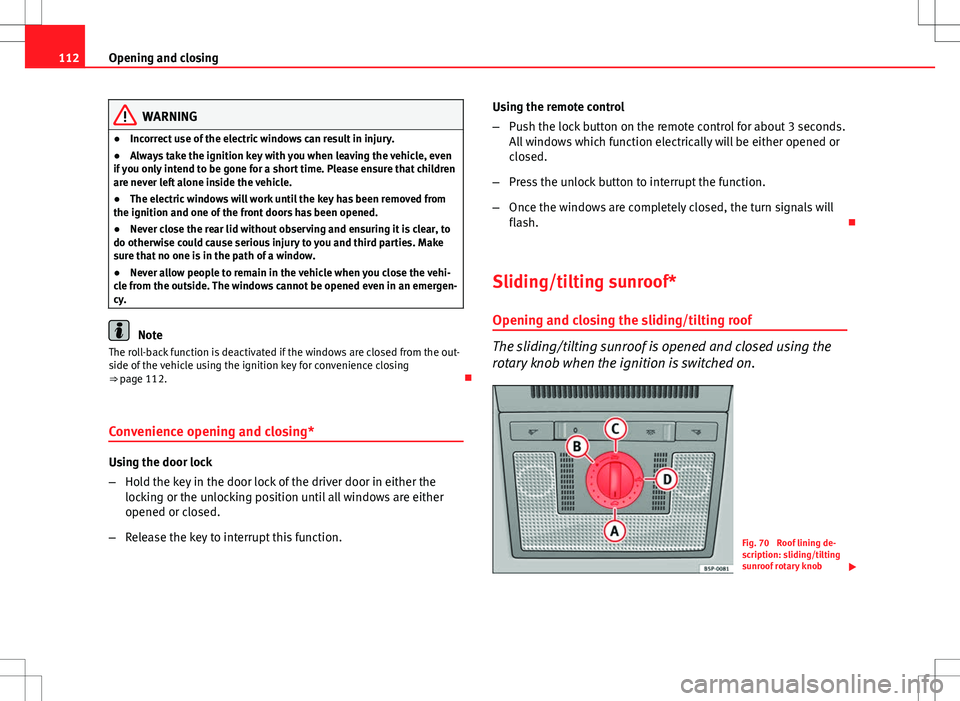
Sliding/tilting sunroof* Opening and closing the sliding/tilting roof
The sliding/tilting sunroof is opened and closed using the
rotary knob when the ignition is switched on.
Fig. 70 Roof lining de-
scription: sliding/tilting
sunroof rotary knob
Page 115 of 317
113
Opening and closing
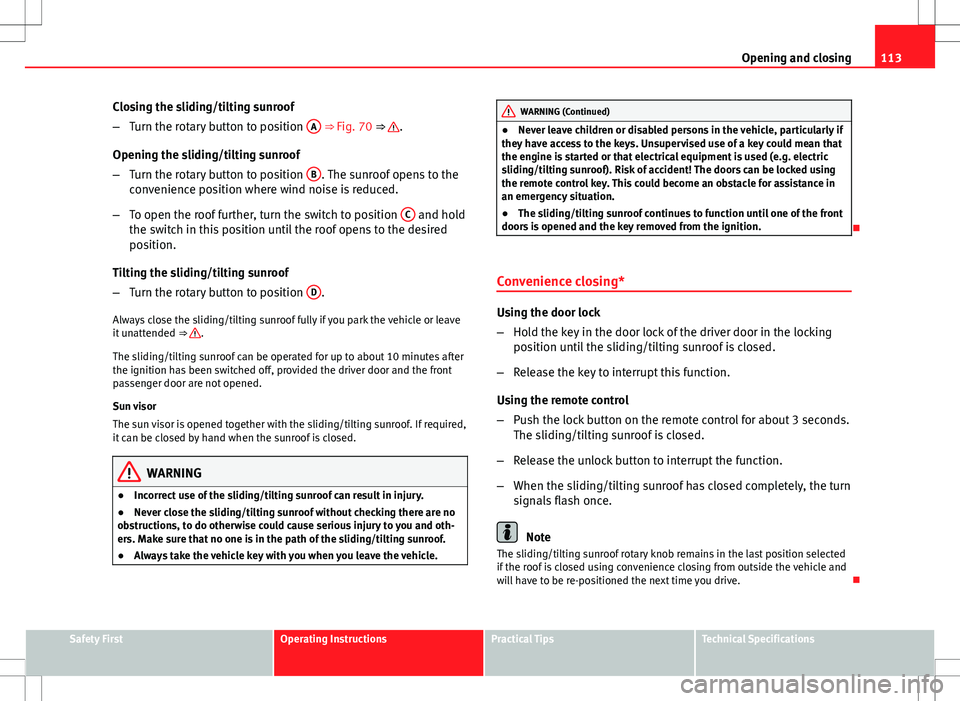
Closing the sliding/tilting sunroof
– Turn the rotary button to position A
⇒ Fig. 70 ⇒ .
Opening the sliding/tilting sunroof
– Turn the rotary button to position B
. The sunroof opens to the
convenience position where wind noise is reduced.
– To open the roof further, turn the switch to position C
and hold
the switch in this position until the roof opens to the desired
position.
Tilting the sliding/tilting sunroof
– Turn the rotary button to position D
.
Always close the sliding/tilting sunroof fully if you park the vehicle or leave
it unattended ⇒
.
The sliding/tilting sunroof can be operated for up to about 10 minutes after
the ignition has been switched off, provided the driver door and the front
passenger door are not opened.
Sun visor
The sun visor is opened together with the sliding/tilting sunroof. If required,
it can be closed by hand when the sunroof is closed.
WARNING
● Incorrect use of the sliding/tilting sunroof can result in injury.
● Never close the sliding/tilting sunroof without checking there are no
obstructions, to do otherwise could cause serious injury to you and oth-
ers. Make sure that no one is in the path of the sliding/tilting sunroof.
● Always take the vehicle key with you when you leave the vehicle.
WARNING (Continued)
● Never leave children or disabled persons in the vehicle, particularly if
they have access to the keys. Unsupervised use of a key could mean that
the engine is started or that electrical equipment is used (e.g. electric
sliding/tilting sunroof). Risk of accident! The doors can be locked using
the remote control key. This could become an obstacle for assistance in
an emergency situation.
● The sliding/tilting sunroof continues to function until one of the front
doors is opened and the key removed from the ignition.
Convenience closing*
Using the door lock
– Hold the key in the door lock of the driver door in the locking
position until the sliding/tilting sunroof is closed.
– Release the key to interrupt this function.
Using the remote control
– Push the lock button on the remote control for about 3 seconds.
The sliding/tilting sunroof is closed.
– Release the unlock button to interrupt the function.
– When the sliding/tilting sunroof has closed completely, the turn
signals flash once.
Note
The sliding/tilting sunroof rotary knob remains in the last position selected
if the roof is closed using convenience closing from outside the vehicle and
will have to be re-positioned the next time you drive.
Safety FirstOperating InstructionsPractical TipsTechnical Specifications
Page 134 of 317
132Lights and visibility
Note
● The automatic anti-dazzle function will only work properly if the sun
blind* for the rear window is retracted and there are no other objects pre-
venting light from reaching the rear vision mirror.
● If you have to stick any type of sticker on the windscreen, do not do so in
front of the sensors. Doing so could prevent the anti-dazzle function from
working well or even from working at all.
Exterior mirrors
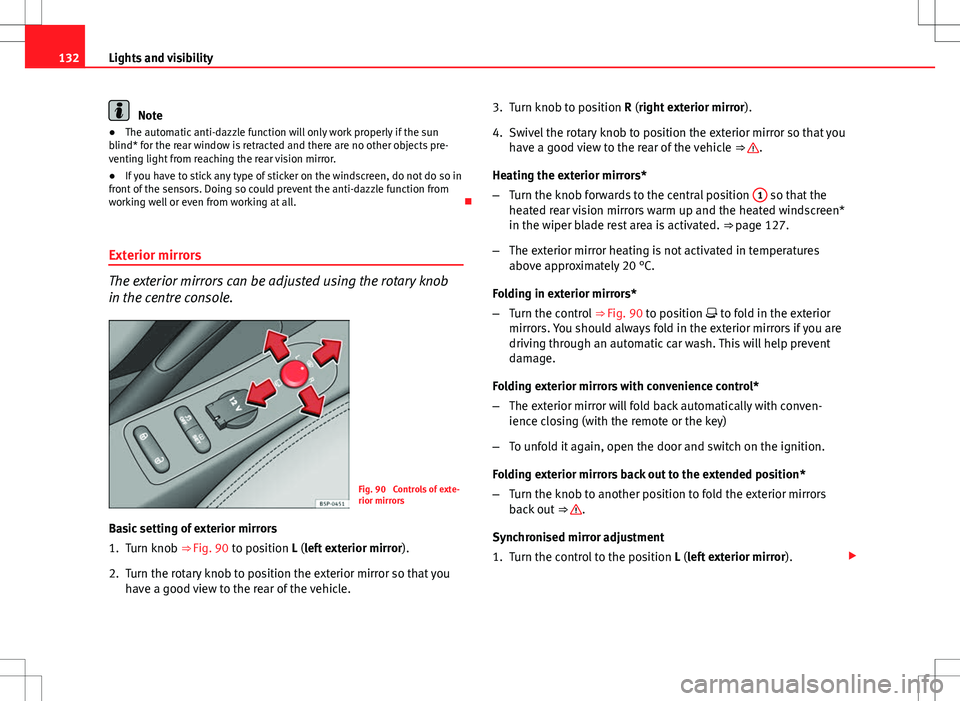
The exterior mirrors can be adjusted using the rotary knob
in the centre console.
Fig. 90 Controls of exte-
rior mirrors
Basic setting of exterior mirrors
1. Turn knob ⇒
Fig. 90 to position L (left exterior mirror ).
2. Turn the rotary knob to position the exterior mirror so that you have a good view to the rear of the vehicle. 3. Turn knob to position R (right exterior mirror
).
4. Swivel the rotary knob to position the exterior mirror so that you have a good view to the rear of the vehicle ⇒
.
Heating the exterior mirrors*
– Turn the knob forwards to the central position 1
so that the
heated rear vision mirrors warm up and the heated windscreen*
in the wiper blade rest area is activated. ⇒ page 127.
– The exterior mirror heating is not activated in temperatures
above approximately 20 °C.
Folding in exterior mirrors*
– Turn the control ⇒ Fig. 90 to position to fold in the exterior
mirrors. You should always fold in the exterior mirrors if you are
driving through an automatic car wash. This will help prevent
damage.
Folding exterior mirrors with convenience control*
– The exterior mirror will fold back automatically with conven-
ience closing (with the remote or the key)
– To unfold it again, open the door and switch on the ignition.
Folding exterior mirrors back out to the extended position*
– Turn the knob to another position to fold the exterior mirrors
back out ⇒
.
Synchronised mirror adjustment
1. Turn the control to the position L (left exterior mirror).
Page 312 of 317
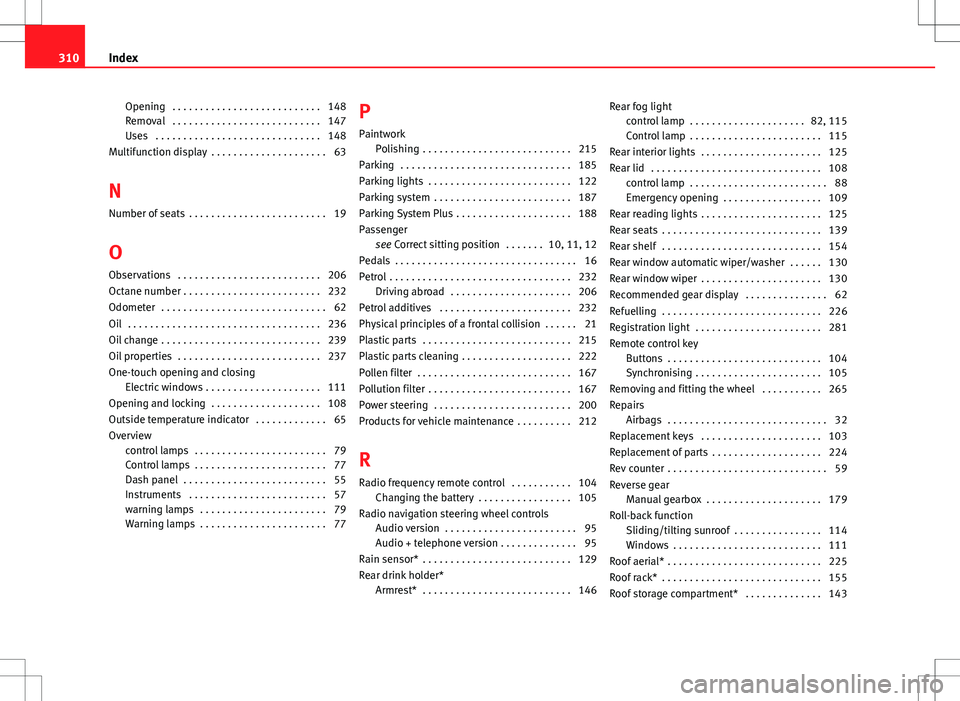
Opening . . . . . . . . . . . . . . . . . . . . . . . . . . . 148
Removal . . . . . . . . . . . . . . . . . . . . . . . . . . . 147
Uses . . . . . . . . . . . . . . . . . . . . . . . . . . . . . . 148
Multifunction display . . . . . . . . . . . . . . . . . . . . . 63
N
Number of seats . . . . . . . . . . . . . . . . . . . . . . . . . 19
O
Observations . . . . . . . . . . . . . . . . . . . . . . . . . . 206
Octane number . . . . . . . . . . . . . . . . . . . . . . . . . 232
Odometer . . . . . . . . . . . . . . . . . . . . . . . . . . . . . . 62
Oil . . . . . . . . . . . . . . . . . . . . . . . . . . . . . . . . . . . 236
Oil change . . . . . . . . . . . . . . . . . . . . . . . . . . . . . 239
Oil properties . . . . . . . . . . . . . . . . . . . . . . . . . . 237
One-touch opening and closing Electric windows . . . . . . . . . . . . . . . . . . . . . 111
Opening and locking . . . . . . . . . . . . . . . . . . . . 108
Outside temperature indicator . . . . . . . . . . . . . 65
Overview control lamps . . . . . . . . . . . . . . . . . . . . . . . . 79
Control lamps . . . . . . . . . . . . . . . . . . . . . . . . 77
Dash panel . . . . . . . . . . . . . . . . . . . . . . . . . . 55
Instruments . . . . . . . . . . . . . . . . . . . . . . . . . 57
warning lamps . . . . . . . . . . . . . . . . . . . . . . . 79
Warning lamps . . . . . . . . . . . . . . . . . . . . . . . 77 P
Paintwork Polishing . . . . . . . . . . . . . . . . . . . . . . . . . . . 215
Parking . . . . . . . . . . . . . . . . . . . . . . . . . . . . . . . 185
Parking lights . . . . . . . . . . . . . . . . . . . . . . . . . . 122
Parking system . . . . . . . . . . . . . . . . . . . . . . . . . 187
Parking System Plus . . . . . . . . . . . . . . . . . . . . . 188
Passenger see Correct sitting position . . . . . . . 10, 11, 12
Pedals . . . . . . . . . . . . . . . . . . . . . . . . . . . . . . . . . 16
Petrol . . . . . . . . . . . . . . . . . . . . . . . . . . . . . . . . . 232 Driving abroad . . . . . . . . . . . . . . . . . . . . . . 206
Petrol additives . . . . . . . . . . . . . . . . . . . . . . . . 232
Physical principles of a frontal collision . . . . . . 21
Plastic parts . . . . . . . . . . . . . . . . . . . . . . . . . . . 215
Plastic parts cleaning . . . . . . . . . . . . . . . . . . . . 222
Pollen filter . . . . . . . . . . . . . . . . . . . . . . . . . . . . 167
Pollution filter . . . . . . . . . . . . . . . . . . . . . . . . . . 167
Power steering . . . . . . . . . . . . . . . . . . . . . . . . . 200
Products for vehicle maintenance . . . . . . . . . . 212
RRadio frequency remote control . . . . . . . . . . . 104 Changing the battery . . . . . . . . . . . . . . . . . 105
Radio navigation steering wheel controls Audio version . . . . . . . . . . . . . . . . . . . . . . . . 95
Audio + telephone version . . . . . . . . . . . . . . 95
Rain sensor* . . . . . . . . . . . . . . . . . . . . . . . . . . . 129
Rear drink holder* Armrest* . . . . . . . . . . . . . . . . . . . . . . . . . . . 146 Rear fog light
control lamp . . . . . . . . . . . . . . . . . . . . . 82, 115
Control lamp . . . . . . . . . . . . . . . . . . . . . . . . 115
Rear interior lights . . . . . . . . . . . . . . . . . . . . . . 125
Rear lid . . . . . . . . . . . . . . . . . . . . . . . . . . . . . . . 108 control lamp . . . . . . . . . . . . . . . . . . . . . . . . . 88
Emergency opening . . . . . . . . . . . . . . . . . . 109
Rear reading lights . . . . . . . . . . . . . . . . . . . . . . 125
Rear seats . . . . . . . . . . . . . . . . . . . . . . . . . . . . . 139
Rear shelf . . . . . . . . . . . . . . . . . . . . . . . . . . . . . 154
Rear window automatic wiper/washer . . . . . . 130
Rear window wiper . . . . . . . . . . . . . . . . . . . . . . 130
Recommended gear display . . . . . . . . . . . . . . . 62
Refuelling . . . . . . . . . . . . . . . . . . . . . . . . . . . . . 226
Registration light . . . . . . . . . . . . . . . . . . . . . . . 281
Remote control key Buttons . . . . . . . . . . . . . . . . . . . . . . . . . . . . 104
Synchronising . . . . . . . . . . . . . . . . . . . . . . . 105
Removing and fitting the wheel . . . . . . . . . . . 265
Repairs Airbags . . . . . . . . . . . . . . . . . . . . . . . . . . . . . 32
Replacement keys . . . . . . . . . . . . . . . . . . . . . . 103
Replacement of parts . . . . . . . . . . . . . . . . . . . . 224
Rev counter . . . . . . . . . . . . . . . . . . . . . . . . . . . . . 59
Reverse gear Manual gearbox . . . . . . . . . . . . . . . . . . . . . 179
Roll-back function Sliding/tilting sunroof . . . . . . . . . . . . . . . . 114
Windows . . . . . . . . . . . . . . . . . . . . . . . . . . . 111
Roof aerial* . . . . . . . . . . . . . . . . . . . . . . . . . . . . 225
Roof rack* . . . . . . . . . . . . . . . . . . . . . . . . . . . . . 155
Roof storage compartment* . . . . . . . . . . . . . . 143
310 Index