display Seat Altea XL 2014 Service Manual
[x] Cancel search | Manufacturer: SEAT, Model Year: 2014, Model line: Altea XL, Model: Seat Altea XL 2014Pages: 321, PDF Size: 4.52 MB
Page 179 of 321
177
Driving
Applies to the model: ALTEA / ALTEA XL Driving with LPG*
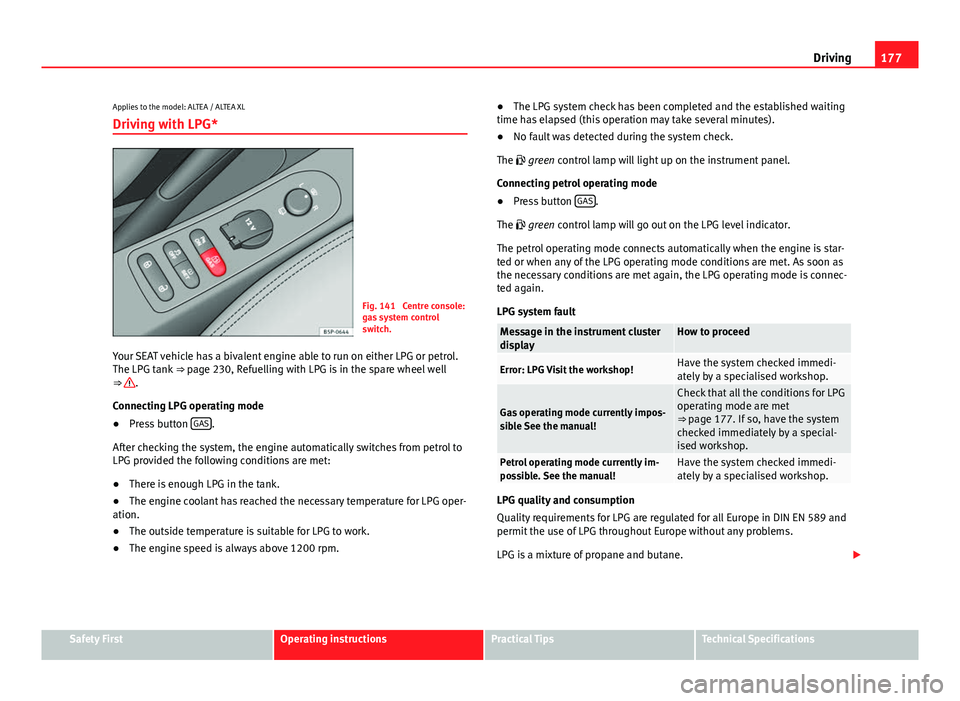
Fig. 141 Centre console:
gas system control
switch.
Your SEAT vehicle has a bivalent engine able to run on either LPG or petrol.
The LPG tank ⇒ page 230, Refuelling with LPG is in the spare wheel well
⇒
.
Connecting LPG operating mode
● Press button GAS
.
After checking the system, the engine automatically switches from petrol to
LPG provided the following conditions are met:
● There is enough LPG in the tank.
● The engine coolant has reached the necessary temperature for LPG oper-
ation.
● The outside temperature is suitable for LPG to work.
● The engine speed is always above 1200 rpm. ●
The LPG system check has been completed and the established waiting
time has elapsed (this operation may take several minutes).
● No fault was detected during the system check.
The green control lamp will light up on the instrument panel.
Connecting petrol operating mode
● Press button GAS
.
The green control lamp will go out on the LPG level indicator.
The petrol operating mode connects automatically when the engine is star-
ted or when any of the LPG operating mode conditions are met. As soon as
the necessary conditions are met again, the LPG operating mode is connec-
ted again.
LPG system fault
Message in the instrument cluster
displayHow to proceed
Error: LPG Visit the workshop!Have the system checked immedi-
ately by a specialised workshop.
Gas operating mode currently impos-
sible See the manual!
Check that all the conditions for LPG
operating mode are met
⇒ page 177. If so, have the system
checked immediately by a special-
ised workshop.
Petrol operating mode currently im-
possible. See the manual!Have the system checked immedi-
ately by a specialised workshop.
LPG quality and consumption
Quality requirements for LPG are regulated for all Europe in DIN EN 589 and
permit the use of LPG throughout Europe without any problems.
LPG is a mixture of propane and butane.
Safety FirstOperating instructionsPractical TipsTechnical Specifications
Page 180 of 321
178Driving
A difference is drawn between winter gas and summer gas. Winter gas has a
higher proportion of propane gas. As a result, the driving range of winter
gas may be lower (due to increased consumption) than that of summer gas.
The vehicle's engine management adapts automatically to the LPG used.
Therefore, both types of LPG can be mixed in the tank, without the need for
comprehensive draining before applying a different quality LPG.
LPG and safety
If you can smell gas or suspect that there is a leak in the LPG system. ⇒
●Stop the vehicle immediately.
● Switch the ignition off.
● Open the doors to appropriately ventilate the vehicle.
● Extinguish cigarettes immediately.
● Move away from the vehicle or switch off objects that may cause sparks
or a fire.
● If you continue to smell gas, do not continue driving!
● Seek specialist assistance. Have the fault repaired.
WARNING
LPG is a highly explosive and inflammable substance. It may cause se-
vere burns and other injury.
● Due care must be taken to avoid any risk of fire or explosion.
● When parking the vehicle in a closed area (for example in a garage),
make sure that there is adequate ventilation, either natural or mechani-
cal, to neutralise the LPG in the event of a leak.
WARNING
Failure to act when you can smell gas in the vehicle or when refuelling
can cause serious injuries.
● Carry out the necessary operations.
● Leave the danger zone.
● If necessary, warn the emergency services.
Note
● The LPG system must be subject to regular inspections at a specialised
workshop in accordance with the Maintenance Plan.
● The engine is always started with petrol, even when LPG was being used
when it was switched off. For this reason the tank should never be drained
of petrol completely.
● If frequent short journeys are made, especially when the outside tem-
perature is low, the vehicle will tend to run on petrol more often than on
LPG. Therefore, the petrol tank may empty before the LPG tank.
● If while you were driving the system switched automatically to petrol op-
erating mode because the LPG tank was almost empty, the next few times
the engine starts up, and according to the outside temperature and and
driving style, it may switch briefly to LPG operating mode to use up what is
left in the tank.
● When the system switches automatically to petrol operating mode be-
cause the LPG tank is almost empty, you can revert to gas operating mode
by pressing the button ⇒ Fig. 141 GAS
while driving slowly and with low ac-
celeration. This procedure can be repeated several times while driving with
precaution until all the LPG left in the tank has been used up.
● Vehicles that can display information or warning messages on the dash-
board may show information related to LPG.
● The notification LPG mode not possible may be displayed.
Page 181 of 321
179
Driving
Start-Stop function*
Description and operation
The Start-Stop function stops the engine when the vehicle is stop-
ped and starts it automatically when required.
– When the vehicle is stopped, put it in neutral and release the
clutch pedal. The engine will stop.
– When the clutch pedal is pressed, the engine starts again.
– The instrument panel display shows information about the sta-
tus of the Start-Stop function ⇒ Fig. 143.
Start-Stop function conditions
● The driver seat belt must be buckled.
● The bonnet must be closed.
● The engine must be at operating temperature.
● The steering wheel must not be turned more than 270°.
● The vehicle must not be on a steep gradient.
● The vehicle must not be in reverse.
● A trailer must not be connected.
● The temperature of the passenger compartment must be within the com-
fort limits (button AC
11 ⇒ Fig. 136 should be selected).
● The windscreen de-mist function must be off.
● If not, it requires an increase in airflow 10
⇒ Fig. 136 for more than three
presses.
● The temperature must not be set to HI or LO.
● The driver door must be closed.
● The diesel particulate filter must not be in regeneration mode, for diesel
engines. ●
The battery charge must not be low for the next start.
● The battery temperature must be between -1 °C (+30 °F) and +55 °C
(+131 °F).
● The Parking aid system (Park Assist*) must not be activated.
Start-Stop function interruption
In the following situations, the Start-Stop function will be interrupted and
the engine will automatically start:
● The vehicle starts moving.
● The brake pedal is pressed several times in a row.
● The battery has been discharged excessively.
● The Start-Stop System is manually deactivated.
● The windscreen de-mist function is turned on.
● The temperature of the passenger compartment exceeds the comfort
limits (button AC
11 ⇒ Fig. 136 should be selected).
● If in an increase in airflow 10 ⇒ Fig. 136 is required for more than three
presses.
● Temperature setting HI or LO is selected.
● The engine coolant temperature is insufficient.
● The alternator is faulty, for example the V-belt has ruptured.
● If any of the conditions described in the previous section are not fulfil-
led.
WARNING
Never allow the vehicle to move with the engine off for any reason. You
could lose control of your vehicle. This could cause an accident and seri-
ous injury.
● Power steering does not work when the engine is not running. That is
why it is much more difficult to turn the steering wheel.
● Turn off the Start-Stop system when driving through water (fording
streams, etc.).
Safety FirstOperating instructionsPractical TipsTechnical Specifications
Page 182 of 321
180Driving
Note
● For vehicles with the Start-Stop function and a manual gearbox, when
the engine is started, the clutch must be pressed.
● When the conditions for the Start-Stop function are not fulfilled, the in-
strument panel displays the Start-Stop indicator dimmed.
● If the steering wheel is turned more than 270°, Stop will not function;
however, the angle of steering wheel turn does not affect starting the vehi-
cle.
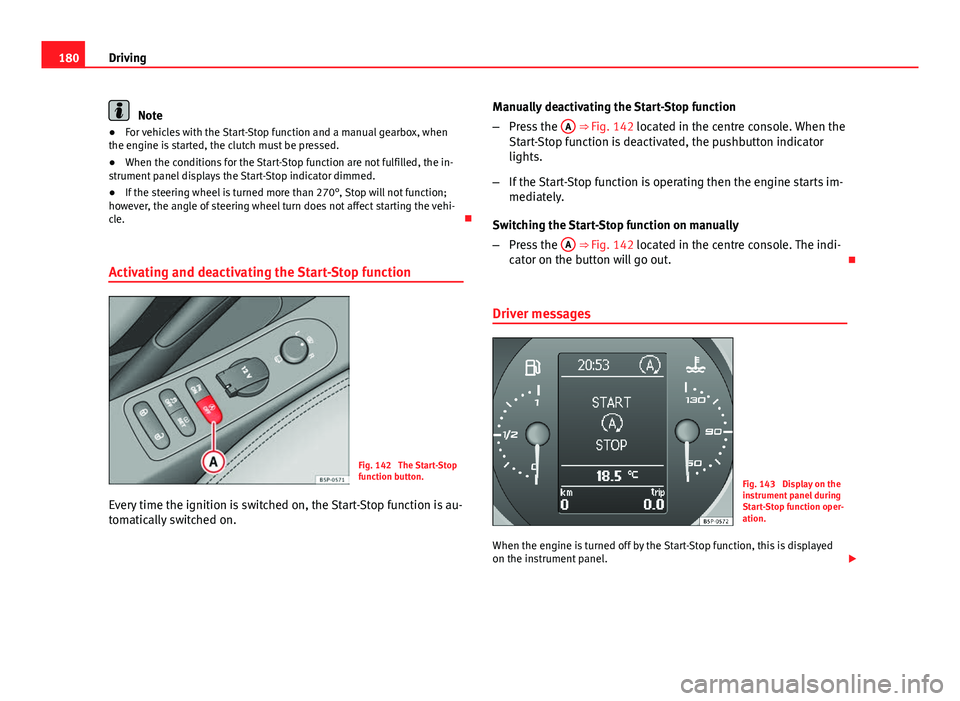
Activating and deactivating the Start-Stop function
Fig. 142 The Start-Stop
function button.
Every time the ignition is switched on, the Start-Stop function is au-
tomatically switched on. Manually deactivating the Start-Stop function
–
Press the A
⇒ Fig. 142 located in the centre console. When the
Start-Stop function is deactivated, the pushbutton indicator
lights.
– If the Start-Stop function is operating then the engine starts im-
mediately.
Switching the Start-Stop function on manually
– Press the A
⇒ Fig. 142 located in the centre console. The indi-
cator on the button will go out.
Driver messages
Fig. 143 Display on the
instrument panel during
Start-Stop function oper-
ation.
When the engine is turned off by the Start-Stop function, this is displayed
on the instrument panel.
Page 183 of 321
181
Driving
Note
There are different versions of the dash panel; the display of indications on
the screen may differ.
Safety FirstOperating instructionsPractical TipsTechnical Specifications
Page 190 of 321
188Driving
Handbrake
Using the handbrake
The handbrake should be applied firmly to prevent the vehi-
cle from accidentally rolling away.
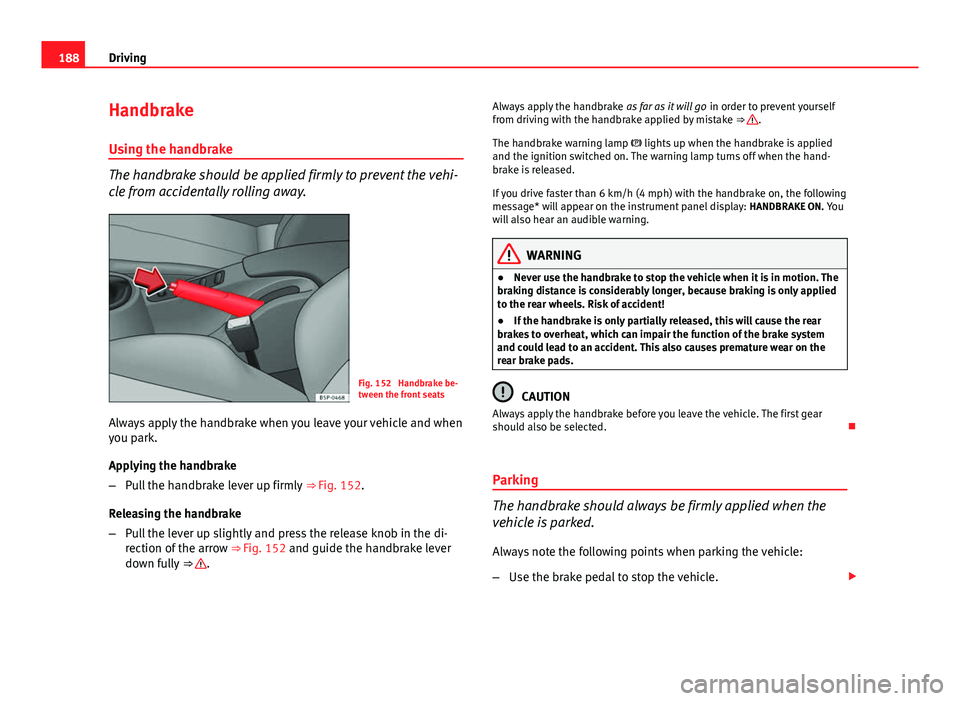
Fig. 152 Handbrake be-
tween the front seats
Always apply the handbrake when you leave your vehicle and when
you park.
Applying the handbrake
– Pull the handbrake lever up firmly ⇒ Fig. 152.
Releasing the handbrake
– Pull the lever up slightly and press the release knob in the di-
rection of the arrow ⇒ Fig. 152 and guide the handbrake lever
down fully ⇒
. Always apply the handbrake
as far as it will go in order to prevent yourself
from driving with the handbrake applied by mistake ⇒
.
The handbrake warning lamp lights up when the handbrake is applied
and the ignition switched on. The warning lamp turns off when the hand-
brake is released.
If you drive faster than 6 km/h (4 mph) with the handbrake on, the following
message* will appear on the instrument panel display: HANDBRAKE ON. You
will also hear an audible warning.
WARNING
● Never use the handbrake to stop the vehicle when it is in motion. The
braking distance is considerably longer, because braking is only applied
to the rear wheels. Risk of accident!
● If the handbrake is only partially released, this will cause the rear
brakes to overheat, which can impair the function of the brake system
and could lead to an accident. This also causes premature wear on the
rear brake pads.
CAUTION
Always apply the handbrake before you leave the vehicle. The first gear
should also be selected.
Parking
The handbrake should always be firmly applied when the
vehicle is parked.
Always note the following points when parking the vehicle:
– Use the brake pedal to stop the vehicle.
Page 193 of 321
191
Driving
CAUTION
Please note that low obstacles detected by the system may no longer be
registered by the sensors as the vehicle moves closer, so the system will not
give any further warning. Certain kinds of obstacles (such as wire fences,
chains, thin painted posts or trailer draw bars, etc) may not always be de-
tected by the system, so take care not to damage the vehicle in such cases.
Note
Please refer to the notes on towing ⇒ page 192.
SEAT Parking System Plus*: Description
The Parking System Plus is an acoustic and optical parking
aid.
Sensors are located in the front and rear bumpers. When the sensors detect
an obstacle, you are alerted by audible and optical warnings. The measur-
ing range of the sensors starts at approximately:
FrontSide0.90Centre1.20
RearSide0.60Centre1.60
The audible warnings sound with increasing frequency as you approach the
obstacle. When the vehicle is less than 0.30 m away from the obstacle, the
warning tone will sound continuously. Stop moving immediately!
The volume of the warning beeps will be gradually reduced after about four
seconds if the vehicle remains at a constant distance from a detected obsta-
cle (it does not affect the permanent audible warning). Activating/Deactivating
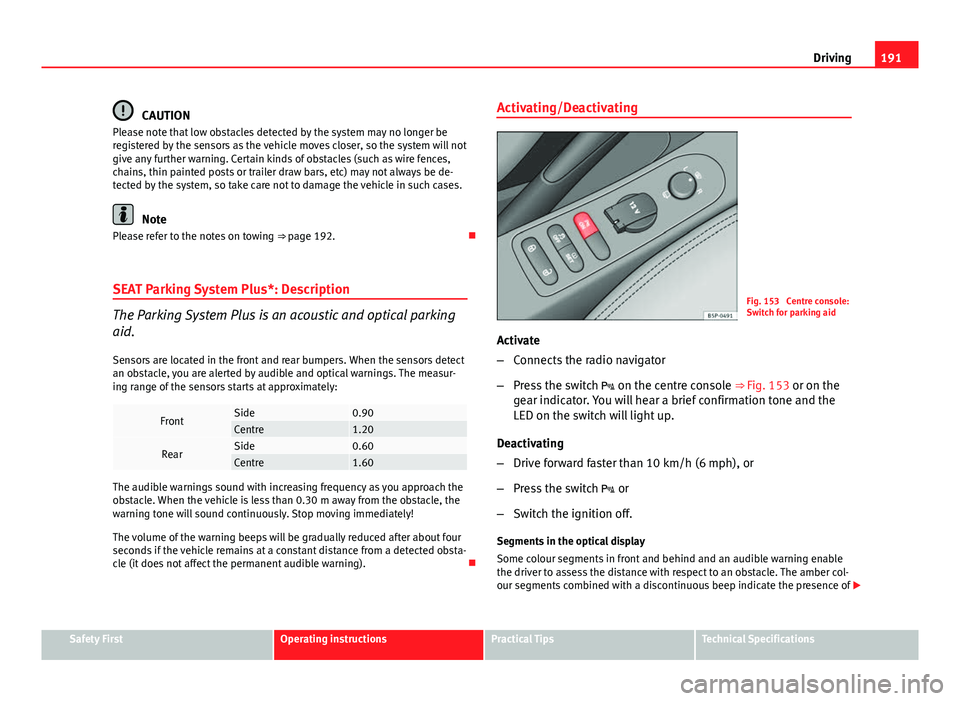
Fig. 153 Centre console:
Switch for parking aid
Activate
– Connects the radio navigator
– Press the switch on the centre console ⇒ Fig. 153 or on the
gear indicator. You will hear a brief confirmation tone and the
LED on the switch will light up.
Deactivating
– Drive forward faster than 10 km/h (6 mph), or
– Press the switch or
– Switch the ignition off.
Segments in the optical display
Some colour segments in front and behind and an audible warning enable
the driver to assess the distance with respect to an obstacle. The amber col-
our segments combined with a discontinuous beep indicate the presence of
Safety FirstOperating instructionsPractical TipsTechnical Specifications
Page 194 of 321
192Driving
an obstacle. As the vehicle gets closer to the obstacle, the colour of the seg-
ment changes to red and the acoustic signal beeps continuously. When the
penultimate segment is displayed, this means that the vehicle has reached
the collision zone. Stop moving immediately! ⇒
.
WARNING
● The parking aid is not a replacement for driver awareness. The driver
is personally responsible for safe parking and other manoeuvres.
● The sensors have blind spots in which obstacles are not registered.
Always look out for small children and animals because the system will
not always detect them. Always pay attention when reversing to avoid ac-
cidents.
● Always keep a close eye on the area around the vehicle and make full
use of the rear vision mirrors.
CAUTION
Please note that low obstacles detected by the system may no longer be
registered by the sensors as the vehicle moves closer, so the system will not
give any further warning. Certain kinds of obstacles (such as wire fences,
chains, thin painted posts or trailer draw bars, etc) may not always be de-
tected by the system, so take care not to damage the vehicle in such cases.
Note
● Please refer to the notes on towing ⇒ page 192.
● There is a slight delay in the picture display.
Towing bracket
In towing mode, the rear parking aid sensors are not enabled when you se-
lect reverse gear or press the switch . This function may not be guaran- teed on towing brackets that are not factory fitted. This results in the follow-
ing restrictions:
SEAT Parking System*
No warning is given
SEAT Parking System Plus*
There is no rear distance warning. The system will still give a warning when
obstacles are detected while driving forward. The optical display changes to
towing mode.
Fault messages
If you hear a long beep for a few seconds and the LED on the switch *
starts flashing when you switch on the parking aid, a system fault has oc-
curred. Please refer the problem to a SEAT Official Service or specialised
workshop.
Note
If the fault is not corrected before you switch off the ignition, it will only be
indicated by the flashing LED on the switch the next time you switch on
the parking aid.
Page 240 of 321
238Checking and refilling levels
WARNING (Continued)
● Wait until no more steam, smoke or coolant is emitted from the bon-
net, then carefully open the bonnet.
● When working in the engine compartment, always observe the safety
warnings ⇒ page 235.
Closing the bonnet
– Raise the bonnet slightly
– Release the bonnet stay and replace it in its support.
– At a height of about 30 cm let it fall so it is locked.
If the bonnet does not close, do not press downwards. Open it once more
and let it fall as before.
WARNING
If the bonnet is not closed properly, it could open while you are driving
and completely obscure your view of the road. Risk of accident.
● After closing the bonnet, always check that it is properly secured. The
bonnet must be flush with the surrounding body panels.
● If you notice that the bonnet latch is not secured when the vehicle is
moving, stop the vehicle immediately and close the bonnet properly.
Risk of accident.
Engine oil
General notes
The engine comes with a special, multi-grade oil that can be used all year
round.
Because the use of high-quality oil is essential for the correct operation of
the engine and its long useful life, when topping up or changing oil, use on-
ly those oils that comply with VW standards.
The specifications (VW standards) set out in the following page should ap-
pear on the container of the service oil; when the container displays the
specific standards for petrol and diesel engines together, it means that the
oil can be used for both types of engines.
We recommend that the oil change, indicated in the Maintenance Pro-
gramme, be performed by a Technical Service or a specialised workshop.
The correct oil specifications for your engine are listed in the ⇒ page 239,
Oil properties.
Service intervals
Service intervals can be flexible (LongLife service) or fixed (dependent on
time/distance travelled).
If the PR code that appears on the back of the “Maintenance Programme”
booklet is PR QI6, this means that your vehicle has the LongLife service pro-
grammed. If it lists the codes QI1, QI2, QI3, QI4 or QI7, the interval service
is dependent on time/distance travelled.
Flexible service intervals (LongLife service intervals*)
Special oils and processes have been developed which, depending on the
characteristics and individual driving profiles, enable the extension of the
oil change service (LongLife service intervals).
Page 251 of 321
249
Checking and refilling levels
Brake fluid Checking the brake fluid level
The brake fluid is checked at the intervals given in the serv-
ice schedule.
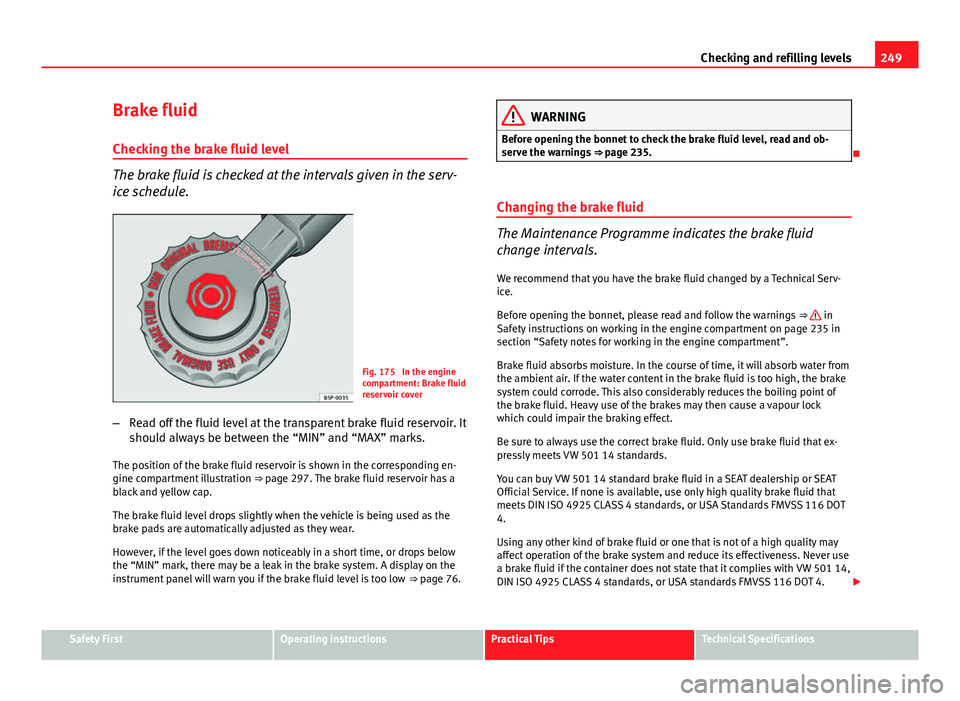
Fig. 175 In the engine
compartment: Brake fluid
reservoir cover
– Read off the fluid level at the transparent brake fluid reservoir. It
should always be between the “MIN” and “MAX” marks.
The position of the brake fluid reservoir is shown in the corresponding en-
gine compartment illustration ⇒ page 297. The brake fluid reservoir has a
black and yellow cap.
The brake fluid level drops slightly when the vehicle is being used as the
brake pads are automatically adjusted as they wear.
However, if the level goes down noticeably in a short time, or drops below
the “MIN” mark, there may be a leak in the brake system. A display on the
instrument panel will warn you if the brake fluid level is too low ⇒ page 76.
WARNING
Before opening the bonnet to check the brake fluid level, read and ob-
serve the warnings ⇒ page 235.
Changing the brake fluid
The Maintenance Programme indicates the brake fluid
change intervals. We recommend that you have the brake fluid changed by a Technical Serv-
ice.
Before opening the bonnet, please read and follow the warnings ⇒
in
Safety instructions on working in the engine compartment on page 235 in
section “Safety notes for working in the engine compartment”.
Brake fluid absorbs moisture. In the course of time, it will absorb water from
the ambient air. If the water content in the brake fluid is too high, the brake
system could corrode. This also considerably reduces the boiling point of
the brake fluid. Heavy use of the brakes may then cause a vapour lock
which could impair the braking effect.
Be sure to always use the correct brake fluid. Only use brake fluid that ex-
pressly meets VW 501 14 standards.
You can buy VW 501 14 standard brake fluid in a SEAT dealership or SEAT
Official Service. If none is available, use only high quality brake fluid that
meets DIN ISO 4925 CLASS 4 standards, or USA Standards FMVSS 116 DOT
4.
Using any other kind of brake fluid or one that is not of a high quality may
affect operation of the brake system and reduce its effectiveness. Never use
a brake fluid if the container does not state that it complies with VW 501 14,
DIN ISO 4925 CLASS 4 standards, or USA standards FMVSS 116 DOT 4.
Safety FirstOperating instructionsPractical TipsTechnical Specifications