fuel consumption Seat Altea XL 2014 Owner's Manual
[x] Cancel search | Manufacturer: SEAT, Model Year: 2014, Model line: Altea XL, Model: Seat Altea XL 2014Pages: 321, PDF Size: 4.52 MB
Page 6 of 321
Trailer towing . . . . . . . . . . . . . . . . . . . . . . . . . . . . . . 210
Instructions to follow . . . . . . . . . . . . . . . . . . . . . . 210
Ball coupling of towing bracket* . . . . . . . . . . . . . 211
Driving tips . . . . . . . . . . . . . . . . . . . . . . . . . . . . . . 211
Fitting a towing bracket* . . . . . . . . . . . . . . . . . . . 212
Vehicle maintenance and cleaning . . . . . . . . . 214
General notes . . . . . . . . . . . . . . . . . . . . . . . . . . . . 214
Care of the vehicle exterior . . . . . . . . . . . . . . . . . . 215
Vehicle interior maintenance . . . . . . . . . . . . . . . . 220
Accessories, replacement of parts and
modifications . . . . . . . . . . . . . . . . . . . . . . . . . . . . . 226
Accessories and spare parts . . . . . . . . . . . . . . . . 226
Technical modifications . . . . . . . . . . . . . . . . . . . . 226
Roof aerial* . . . . . . . . . . . . . . . . . . . . . . . . . . . . . . 227
Mobile phones and two-way radios . . . . . . . . . . . 227
Checking and refilling levels . . . . . . . . . . . . . . . 228
Refuelling . . . . . . . . . . . . . . . . . . . . . . . . . . . . . . . 228
LPG system (Liquefied petroleum gas)* . . . . . . . 230
Petrol . . . . . . . . . . . . . . . . . . . . . . . . . . . . . . . . . . . 233
Diesel . . . . . . . . . . . . . . . . . . . . . . . . . . . . . . . . . . . 234
Working in the engine compartment . . . . . . . . . . 235
Engine oil . . . . . . . . . . . . . . . . . . . . . . . . . . . . . . . . 238
Coolant . . . . . . . . . . . . . . . . . . . . . . . . . . . . . . . . . 242
Washer fluid and windscreen wiper blades . . . . 244
Brake fluid . . . . . . . . . . . . . . . . . . . . . . . . . . . . . . . 249
Vehicle battery . . . . . . . . . . . . . . . . . . . . . . . . . . . 250
Wheels and tyres . . . . . . . . . . . . . . . . . . . . . . . . . . 253
Wheels . . . . . . . . . . . . . . . . . . . . . . . . . . . . . . . . . . 253
If and when . . . . . . . . . . . . . . . . . . . . . . . . . . . . . . . 262
Vehicle tools, tyre repair kit and spare wheel . . . 262
Wheel change . . . . . . . . . . . . . . . . . . . . . . . . . . . . 264
Tyre repair kit (Tyre-Mobility-System)* . . . . . . . . . 269
Fuses . . . . . . . . . . . . . . . . . . . . . . . . . . . . . . . . . . . 272
Bulb change . . . . . . . . . . . . . . . . . . . . . . . . . . . . . 274
Jump-starting . . . . . . . . . . . . . . . . . . . . . . . . . . . . . 287
Towing and tow-starting . . . . . . . . . . . . . . . . . . . . 290 Technical Specifications
. . . . . . . . . . . 293
Description of specifications . . . . . . . . . . . . . . . 293
Important information . . . . . . . . . . . . . . . . . . . . . 293
Information on fuel consumption . . . . . . . . . . . . 294
Towing a trailer . . . . . . . . . . . . . . . . . . . . . . . . . . . 295
Wheels . . . . . . . . . . . . . . . . . . . . . . . . . . . . . . . . . . 296
Technical specifications . . . . . . . . . . . . . . . . . . . . 297
Checking fluid levels . . . . . . . . . . . . . . . . . . . . . . . 297
Petrol engine 1.6 75 kW (102 PS) . . . . . . . . . . . . 298
1.2 TSI 77 kW (105 HP) Start-Stop petrol engine 299
Petrol engine 1.4 92 kW (125 PS) . . . . . . . . . . . . 300
Petrol engine 2.0 155 kW (211 PS) . . . . . . . . . . . 301
Diesel engine 1.6 TDI CR 66 kW (90 PS) with/
without DPF . . . . . . . . . . . . . . . . . . . . . . . . . . . . . . 302
Diesel engine 1.6 TDI CR 77 kW (105 PS) with/
without DPF . . . . . . . . . . . . . . . . . . . . . . . . . . . . . . 303
Diesel engine 1.6 TDI CR 77 kW (105 PS) DPF
Start-Stop . . . . . . . . . . . . . . . . . . . . . . . . . . . . . . . . 304
Diesel engine 2.0 TDI CR 103 kW (140 PS) . . . . . 305
Diesel engine 2.0 TDI CR 125 kW (170 PS) . . . . . 306
Dimensions and capacities . . . . . . . . . . . . . . . . . 307
Index . . . . . . . . . . . . . . . . . . . . . . . . . . . . . . . . . . . 309
4Table of Contents
Page 61 of 321
59
Cockpit
Even if the coolant level is correct do not continue driving. You should ob-
tain technical assistance.
WARNING
When working in the engine compartment, always observe the safety
warnings ⇒ page 235.
CAUTION
Accessories in front of the air inlet reduce the cooling effect of the coolant.
At high outside temperatures and high engine loads, there is a risk of the
engine overheating.
Rev counter
The rev counter displays the engine speed in revolutions per
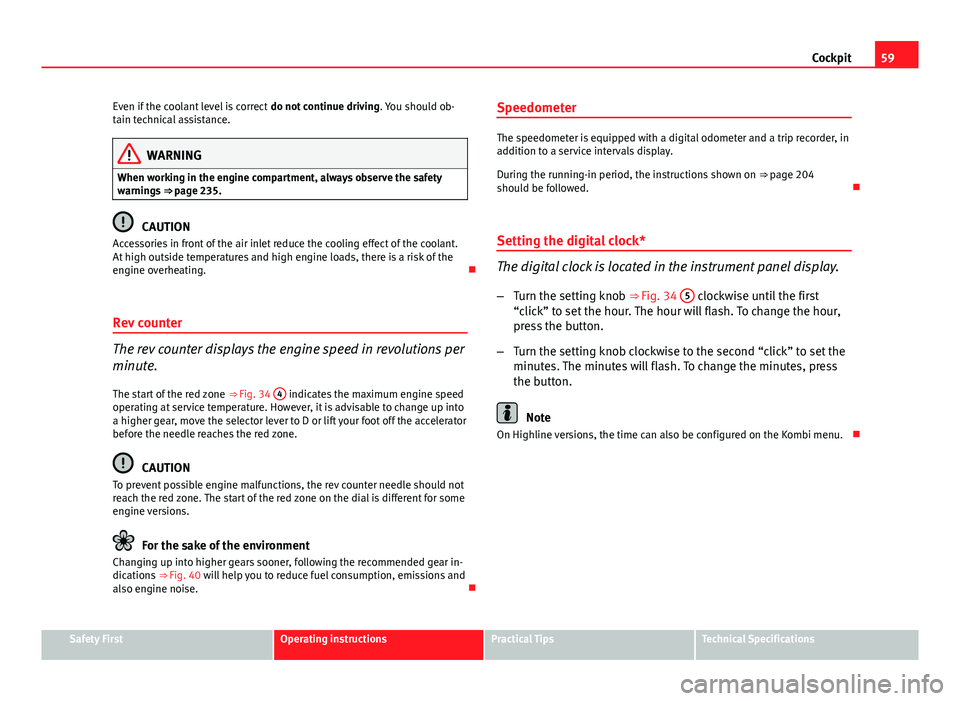
minute. The start of the red zone ⇒ Fig. 34 4
indicates the maximum engine speed
operating at service temperature. However, it is advisable to change up into
a higher gear, move the selector lever to D or lift your foot off the accelerator
before the needle reaches the red zone.
CAUTION
To prevent possible engine malfunctions, the rev counter needle should not
reach the red zone. The start of the red zone on the dial is different for some
engine versions.
For the sake of the environment
Changing up into higher gears sooner, following the recommended gear in-
dications ⇒ Fig. 40 will help you to reduce fuel consumption, emissions and
also engine noise. Speedometer
The speedometer is equipped with a digital odometer and a trip recorder, in
addition to a service intervals display.
During the running-in period, the instructions shown on
⇒ page 204
should be followed.
Setting the digital clock*
The digital clock is located in the instrument panel display.
– Turn the setting knob ⇒ Fig. 34 5
clockwise until the first
“click” to set the hour. The hour will flash. To change the hour,
press the button.
– Turn the setting knob clockwise to the second “click” to set the
minutes. The minutes will flash. To change the minutes, press
the button.
Note
On Highline versions, the time can also be configured on the Kombi menu.
Safety FirstOperating instructionsPractical TipsTechnical Specifications
Page 62 of 321
60Cockpit
LPG system*
Applies to the model: ALTEA / ALTEA XL LPG gauge
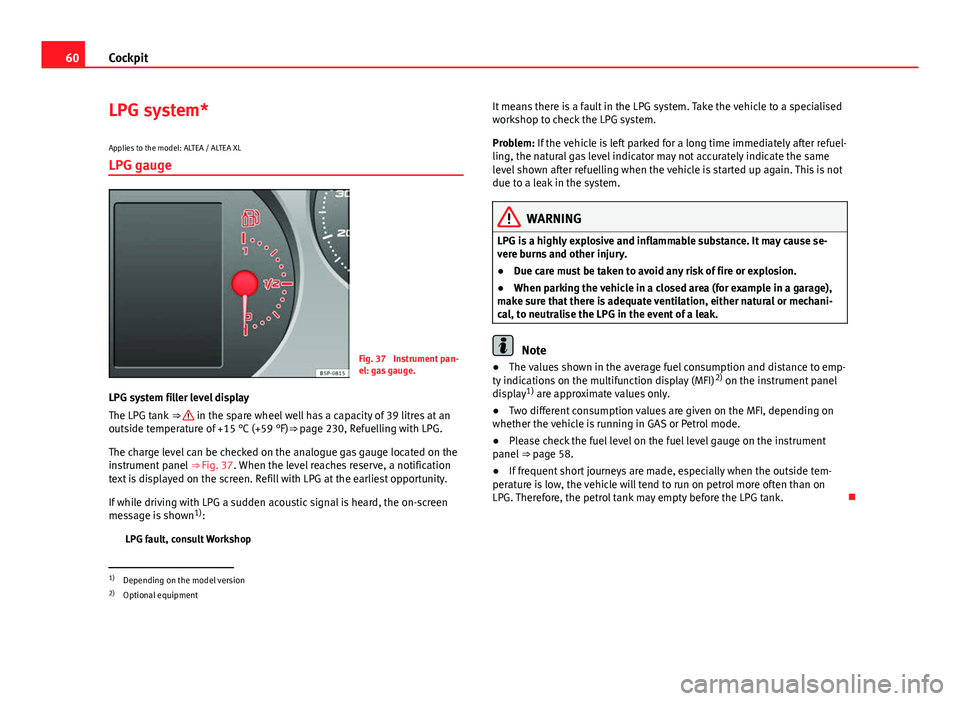
Fig. 37 Instrument pan-
el: gas gauge.
LPG system filler level display
The LPG tank ⇒
in the spare wheel well has a capacity of 39 litres at an
outside temperature of +15 °C (+59 °F)⇒ page 230, Refuelling with LPG.
The charge level can be checked on the analogue gas gauge located on the
instrument panel ⇒ Fig. 37. When the level reaches reserve, a notification
text is displayed on the screen. Refill with LPG at the earliest opportunity.
If while driving with LPG a sudden acoustic signal is heard, the on-screen
message is shown 1)
:
LPG fault, consult Workshop It means there is a fault in the LPG system. Take the vehicle to a specialised
workshop to check the LPG system.
Problem: If the vehicle is left parked for a long time immediately after refuel-
ling, the natural gas level indicator may not accurately indicate the same
level shown after refuelling when the vehicle is started up again. This is not
due to a leak in the system.
WARNING
LPG is a highly explosive and inflammable substance. It may cause se-
vere burns and other injury.
● Due care must be taken to avoid any risk of fire or explosion.
● When parking the vehicle in a closed area (for example in a garage),
make sure that there is adequate ventilation, either natural or mechani-
cal, to neutralise the LPG in the event of a leak.
Note
● The values shown in the average fuel consumption and distance to emp-
ty indications on the multifunction display (MFI) 2)
on the instrument panel
display 1)
are approximate values only.
● Two different consumption values are given on the MFI, depending on
whether the vehicle is running in GAS or Petrol mode.
● Please check the fuel level on the fuel level gauge on the instrument
panel ⇒ page 58.
● If frequent short journeys are made, especially when the outside tem-
perature is low, the vehicle will tend to run on petrol more often than on
LPG. Therefore, the petrol tank may empty before the LPG tank.
1)
Depending on the model version
2) Optional equipment
Page 65 of 321
63
Cockpit
Indications for vehicles with LongLife service
Technical progress has made it possible to considerably reduce servicing re-
quirements. With the LongLife System, SEAT ensures that your vehicle only
has an interval service when it is necessary. The length of the Interval Serv-
ices (max. two years) is determined by factors such as conditions under
which the vehicle is used and personal driving style.
The service pre-warning will first appear 20 days before the date on which
the service is due. The distance travelled is rounded off to the nearest
100 km (miles) and the time to full days. The current service message can
only be consulted 500 km (300 miles) after the last service. Until that time,
only dashes are displayed.
Note
● If you reset the display manually, the next service interval will be indica-
ted after 15 000 km (10 000 miles) or one year and will not be calculated
individually.
● Do not reset the display between service intervals as the display will
otherwise be incorrect.
● In LongLife Service vehicles, if the battery is disconnected for a long pe-
riod, the days remaining until the next service cannot be calculated. There-
fore, the service message displays on the instrument panel may be incor-
rect. Take into account the maximum authorised service intervals. Multifunction display (MFI)*
The multifunction display (MFI) shows you information on
the journey and fuel consumption.
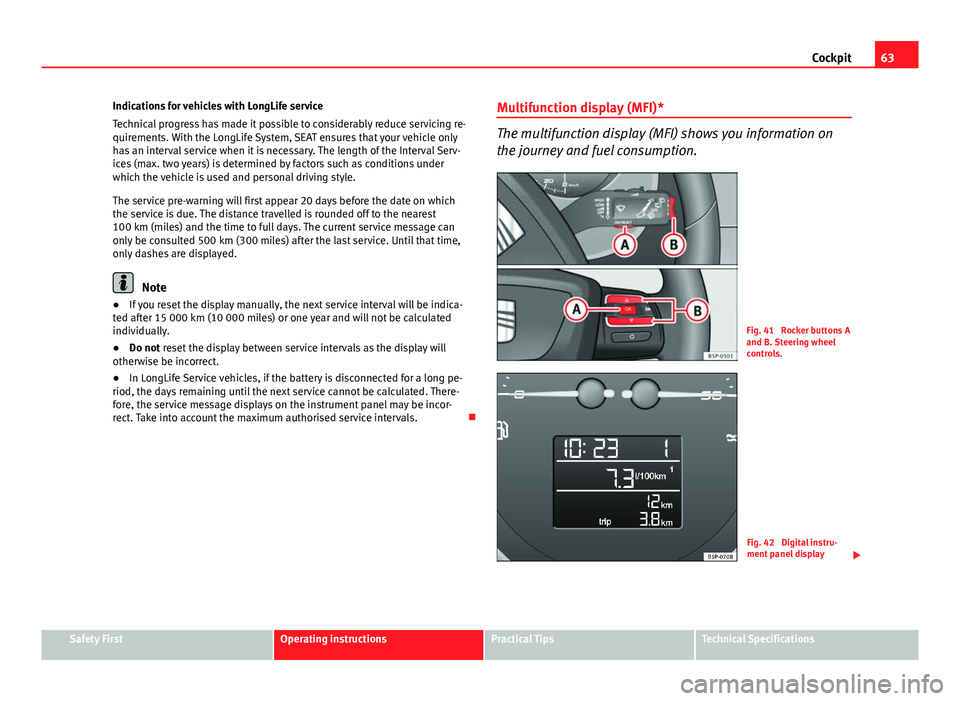
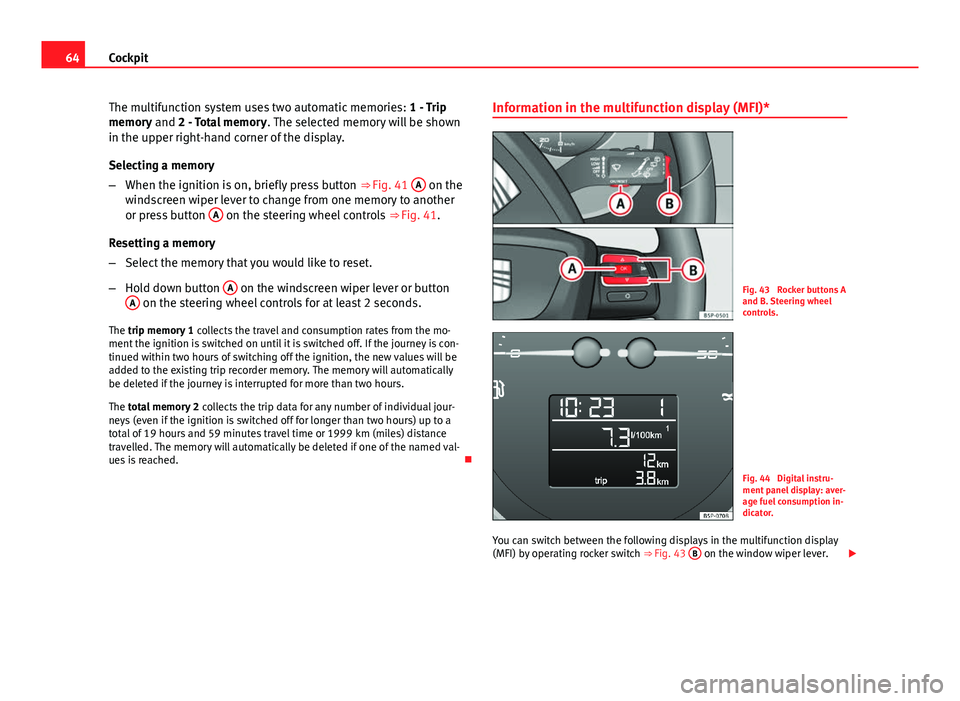
Fig. 41 Rocker buttons A
and B. Steering wheel
controls.
Fig. 42 Digital instru-
ment panel display
Safety FirstOperating instructionsPractical TipsTechnical Specifications
Page 66 of 321
64Cockpit
The multifunction system uses two automatic memories: 1 - Trip
memory and 2 - Total memory . The selected memory will be shown
in the upper right-hand corner of the display.
Selecting a memory
– When the ignition is on, briefly press button ⇒ Fig. 41 A
on the
windscreen wiper lever to change from one memory to another
or press button A
on the steering wheel controls
⇒ Fig. 41.
Resetting a memory
– Select the memory that you would like to reset.
– Hold down button A
on the windscreen wiper lever or button
A on the steering wheel controls for at least 2 seconds.
The trip memory 1 collects the travel and consumption rates from the mo-
ment the ignition is switched on until it is switched off. If the journey is con-
tinued within two hours of switching off the ignition, the new values will be
added to the existing trip recorder memory. The memory will automatically
be deleted if the journey is interrupted for more than two hours.
The total memory 2 collects the trip data for any number of individual jour-
neys (even if the ignition is switched off for longer than two hours) up to a
total of 19 hours and 59 minutes travel time or 1999 km (miles) distance
travelled. The memory will automatically be deleted if one of the named val-
ues is reached. Information in the multifunction display (MFI)*Fig. 43 Rocker buttons A
and B. Steering wheel
controls.
Fig. 44 Digital instru-
ment panel display: aver-
age fuel consumption in-
dicator.
You can switch between the following displays in the multifunction display
(MFI) by operating rocker switch ⇒ Fig. 43 B
on the window wiper lever.
Page 67 of 321
65
Cockpit
Memory displays
● Distance
● Average speed
● Driving speed
● Speed warning at --- km/h (mph)
● Journey duration
● Current fuel consumption
● Average fuel consumption
● Operating range
km (miles) - Distance travelled The display shows the distance travelled since the ignition was switched on.
The maximum display value in both memories is 1999 km (miles). The
memory will automatically be deleted once this value has been reached.
km/h (mph) - Average speed
The average speed will be shown after running a distance of approximately
100 metres. Until then dashes will appear in the display. The display will be
updated every 5 seconds while the vehicle is in motion.
km/h (mph) - Driving speed
Driving speed is digitally shown in the display.
Set speed indicator
When driving at the required speed, enter the speed indicator mode and
press the button A
(Reset), the display remembers the indicated speed. If
the indicated speed is exceeded, a warning message is displayed on the
screen 1)
and an acoustic signal is given.
This may be deactivated by pressing the button A
(Reset).The speed may be altered using the rocker switch
B
in steps of 5 km/h
(mph) within 5 seconds of the initial memory value.
min - Journey duration
The display shows the amount of time which has elapsed since the ignition
was switched on.
The maximum display value in both memories is 19 hours and 59 minutes.
The memory will automatically be deleted once this value has been
reached.
l/100 km or l/h - Current fuel consumption The display will show the current fuel consumption in litre/km whilst the ve-
hicle is in motion or in litre/hour when the vehicle is in a stationary position
with the engine running.
Using this display you can see how your driving style affects fuel consump-
tion ⇒ page 206.
litre/100 km - Average fuel consumption
The average fuel consumption will be shown ⇒ Fig. 44 after a distance of
approximately 100 metres has been travelled. Until then dashes will appear
in the display. The display will be updated every 5 seconds while the vehicle
is in motion. The amount of fuel used will not be shown.
Km (miles) - Fuel range
The fuel range is calculated using the figures for tank content and current
fuel consumption. It shows how far the vehicle can travel using the same
conditions as a reference.
Outside temperature indicator
The measurement margin ranges from -45 °C (-49 °F) to +58 °C (+136.4 °F).
At temperatures lower than +4 °C (+39.2 °F), an “ice crystal symbol” is also
displayed and a “warning” is given if the vehicle is moving at more than
1)
Depending on the model version, the message on the screen may vary and may be repre-
sented by flashing of the speed indication or by a speed message.
Safety FirstOperating instructionsPractical TipsTechnical Specifications
Page 72 of 321
70Cockpit
Open main menu
–Switch the ignition on.
– Press and hold the eject button B
for at least two seconds. It
may be necessary to repeat this operation until the main menu
is displayed.
Select a menu from the main menu
– To choose an option from the menu, press the upper or lower
end of rocker switch B
. The selected option is displayed be-
tween two horizontal lines.
– Press button A
to select the entry.
Example of menu use ⇒ page 68
Main menueffectMultifunction dis-
playChange to the multifunction display (MFI): “Multifunc-
tion display (MFI)”
AudioThis menu displays the available information for the
active audio source (radio station, CD audio track /
MP3 / USB / iPod / Bluetooth audio a)
/ call informa-
tion a)
.
NavigationThis menu is only available if the vehicle is fitted with a
navigation system. The navigation system must be
switched on. When the route guidance is activated, the
turning arrows and proximity bars are displayed. The
appearance is similar to the Navigation system.
If the route guidance is not activated, the direction of
travel (compass) and the name of the street along
which you are driving are shown.
TelephoneThis menu is only available in vehicles with radio unit if
the vehicle is fitted with the telephone function. In ve-
hicles fitted with a radio navigation system, this menu
is available in the central unit (navigator) ⇒ Book-
let Navigation system..
Vehicle conditionThis menu displays current warning or information
texts: “Vehicle status menu”
This option flashes when one of these texts is dis-
played.
ConfigurationThis option allows the time, the speed warning when
using winter tyres, units, language, independent heat-
ing, the Light and visibility menu and the Convenience
menu to be reset.
a) Only in vehicles fitted with a radio navigation system.
Note
For electronic and vehicle equipment one or more of these menus will be
displayed.
Multifunction display menu (MFI)
The multifunction display (MFI) shows you information on
the journey and fuel consumption.
The multifunction display (MFI) has two automatic memories: 1 - Trip memo-
ry and 2 - Total memory . The selected memory is shown on the upper right
hand section of the display at all times.
Open the multifunction display menu
Select the Multifunction display menu from the main menu ⇒ page 69
and press the OK
button on the windscreen wiper lever or the multi-
function steering wheel*.
–
Page 73 of 321
71
Cockpit
Selecting a memory To change from one memory to another, briefly press button A
⇒ Fig. 45 ⇒ page 68 on the windscreen wiper lever or the OK button on
the multifunction steering wheel ⇒ Fig. 46 ⇒ page 68 while the ignition
is switched on.
Resetting a memory Select the memory where you wish to erase the values.
Hold down button A
on the windscreen wiper lever or the OK button
on the multifunction steering wheel* for at least two seconds.
The trip memory 1 collects the travel and consumption data from the mo-
ment the ignition is switched on until it is switched off. If the journey is con-
tinued within two hours of switching off the ignition, the new values will be
added to the existing trip recorder memory. The memory will automatically
be deleted if the journey is interrupted for more than two hours.
The total memory 2 collects the journey data for any number of individual
journeys (even if the ignition is switched off for longer than two hours) up to
a total of 19 hours and 59 minutes travel time or 1999 km (miles) distance
travelled. The memory will automatically be deleted if one of the named val-
ues is reached.
Memory indications
The following data can be viewed on the multifunction display using the
rocker switch B
⇒ Fig. 45 ⇒
page 68 on the windscreen wiper lever or by
pressing button or ⇒
Fig. 46 on the multifunction steering wheel*.
Personal selection of display
The driver can establish which displays are shown on the instrument panel
display as required:
● Select the submenu Multifunction Display Data from the Configuration
menu ⇒ page 73.
● The displays can be activated or deactivated individually by marking the
required option and pressing the OK
button on the windscreen wiper lever
or the multifunction steering wheel*. –
–
– Duration in h and min
The display shows the amount of time which has elapsed since the ignition
was switched on.
The maximum display value in both memories is 19 hours and 59 minutes.
The memory will automatically be deleted once this value has been
reached.
Current fuel consumption in l/100 km or l/hour
The display will show the current fuel consumption in litres/100 km whilst
the vehicle is in motion or in litres/hour when the vehicle is in a stationary
position with the engine running.
Using this display you can see how your driving style affects fuel consump-
tion ⇒ page 171.
Average fuel consumption in l/100 km
The average fuel consumption will be shown after a distance of approxi-
mately 100 metres has been travelled. Until then dashes will appear in the
display. The display will be updated every five seconds while the vehicle is
in motion. The amount of fuel used will not be shown.
Distance travelled in km (miles)
The display shows the distance travelled since the ignition was switched on.
The maximum display value in both memories is 1999 km (miles). The
memory will automatically be deleted once this value has been reached.
Average speed in km/h (mph) After starting the ignition, the average speed will be shown after a distance
of approximately 100 metres has been travelled. Until then dashes will ap-
pear in the display. The display will be updated every five seconds while the
vehicle is in motion.
Speed warning at --- km/h (mph)
This function may help you to keep within the speed limits. Press the OKbutton on the windscreen wiper lever
A or the multifunction steering
Safety FirstOperating instructionsPractical TipsTechnical Specifications
Page 75 of 321
73
Cockpit
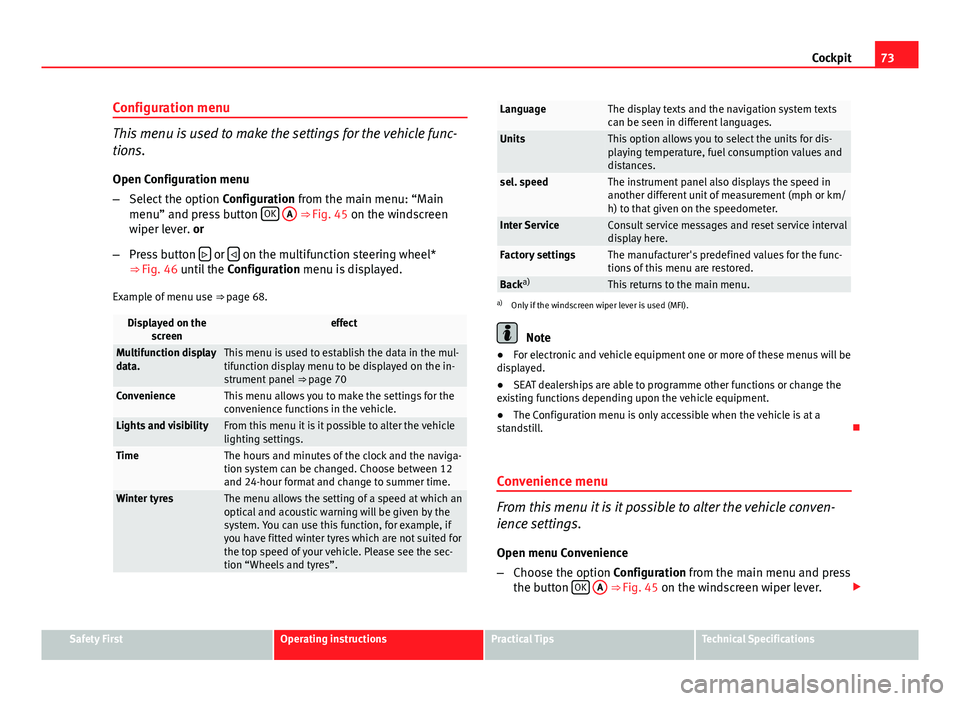
Configuration menu
This menu is used to make the settings for the vehicle func-
tions. Open Configuration menu
– Select the option Configuration from the main menu: “Main
menu” and press button OK
A ⇒ Fig. 45 on the windscreen
wiper lever. or
– Press button
or on the multifunction steering wheel*
⇒ Fig. 46 until the Configuration menu is displayed.
Example of menu use ⇒ page 68.
Displayed on the
screeneffect
Multifunction display
data.This menu is used to establish the data in the mul-
tifunction display menu to be displayed on the in-
strument panel ⇒ page 70
ConvenienceThis menu allows you to make the settings for the
convenience functions in the vehicle.
Lights and visibilityFrom this menu it is it possible to alter the vehicle
lighting settings.
TimeThe hours and minutes of the clock and the naviga-
tion system can be changed. Choose between 12
and 24-hour format and change to summer time.
Winter tyresThe menu allows the setting of a speed at which an
optical and acoustic warning will be given by the
system. You can use this function, for example, if
you have fitted winter tyres which are not suited for
the top speed of your vehicle. Please see the sec-
tion “Wheels and tyres”.
LanguageThe display texts and the navigation system texts
can be seen in different languages.
UnitsThis option allows you to select the units for dis-
playing temperature, fuel consumption values and
distances.
sel. speedThe instrument panel also displays the speed in
another different unit of measurement (mph or km/
h) to that given on the speedometer.
Inter ServiceConsult service messages and reset service interval
display here.
Factory settingsThe manufacturer's predefined values for the func-
tions of this menu are restored.
Backa)This returns to the main menu.a)
Only if the windscreen wiper lever is used (MFI).
Note
● For electronic and vehicle equipment one or more of these menus will be
displayed.
● SEAT dealerships are able to programme other functions or change the
existing functions depending upon the vehicle equipment.
● The Configuration menu is only accessible when the vehicle is at a
standstill.
Convenience menu
From this menu it is it possible to alter the vehicle conven-
ience settings.
Open menu Convenience
– Choose the option Configuration from the main menu and press
the button OK
A ⇒ Fig. 45 on the windscreen wiper lever.
Safety FirstOperating instructionsPractical TipsTechnical Specifications
Page 179 of 321
177
Driving
Applies to the model: ALTEA / ALTEA XL Driving with LPG*
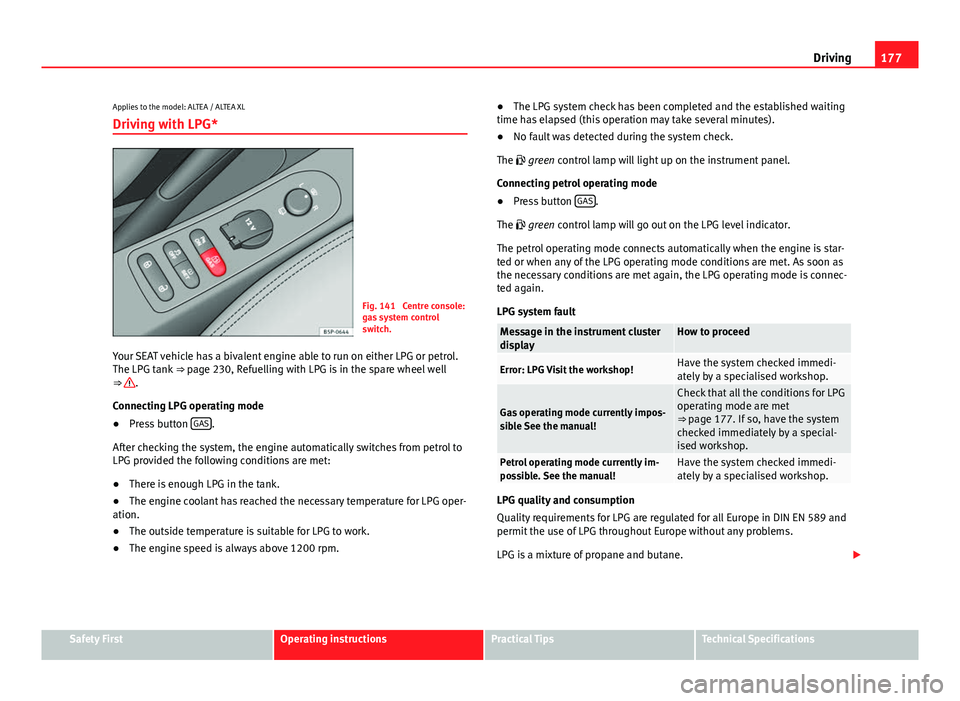
Fig. 141 Centre console:
gas system control
switch.
Your SEAT vehicle has a bivalent engine able to run on either LPG or petrol.
The LPG tank ⇒ page 230, Refuelling with LPG is in the spare wheel well
⇒
.
Connecting LPG operating mode
● Press button GAS
.
After checking the system, the engine automatically switches from petrol to
LPG provided the following conditions are met:
● There is enough LPG in the tank.
● The engine coolant has reached the necessary temperature for LPG oper-
ation.
● The outside temperature is suitable for LPG to work.
● The engine speed is always above 1200 rpm. ●
The LPG system check has been completed and the established waiting
time has elapsed (this operation may take several minutes).
● No fault was detected during the system check.
The green control lamp will light up on the instrument panel.
Connecting petrol operating mode
● Press button GAS
.
The green control lamp will go out on the LPG level indicator.
The petrol operating mode connects automatically when the engine is star-
ted or when any of the LPG operating mode conditions are met. As soon as
the necessary conditions are met again, the LPG operating mode is connec-
ted again.
LPG system fault
Message in the instrument cluster
displayHow to proceed
Error: LPG Visit the workshop!Have the system checked immedi-
ately by a specialised workshop.
Gas operating mode currently impos-
sible See the manual!
Check that all the conditions for LPG
operating mode are met
⇒ page 177. If so, have the system
checked immediately by a special-
ised workshop.
Petrol operating mode currently im-
possible. See the manual!Have the system checked immedi-
ately by a specialised workshop.
LPG quality and consumption
Quality requirements for LPG are regulated for all Europe in DIN EN 589 and
permit the use of LPG throughout Europe without any problems.
LPG is a mixture of propane and butane.
Safety FirstOperating instructionsPractical TipsTechnical Specifications